

Users Manual
Page 4
... Windows® UI...47 Start screen...47 Hotspots...48 Start button...51 Customizing your Start screen 53 Working with Windows® apps 54 Launching apps...54 Customizing apps...54 Accessing the Apps screen 57 Charms bar...59 Snap feature...62 Other keyboard shortcuts 64 Connecting to wireless networks 66 Wi-Fi...66 Bluetooth ...67...
... Windows® UI...47 Start screen...47 Hotspots...48 Start button...51 Customizing your Start screen 53 Working with Windows® apps 54 Launching apps...54 Customizing apps...54 Accessing the Apps screen 57 Charms bar...59 Snap feature...62 Other keyboard shortcuts 64 Connecting to wireless networks 66 Wi-Fi...66 Bluetooth ...67...

Users Manual
Page 32
Drag and drop Double-tap/click an item, then slide the same finger without lifting it . One-finger gestures Tap/click, Double tap/click • In the Start screen, tap/click an app to launch it. • In Desktop mode, double tap/click an application to its new location, lift your finger from the touchpad. 32 Notebook PC E-Manual To drop the item to launch it off the touchpad.
Drag and drop Double-tap/click an item, then slide the same finger without lifting it . One-finger gestures Tap/click, Double tap/click • In the Start screen, tap/click an app to launch it. • In Desktop mode, double tap/click an application to its new location, lift your finger from the touchpad. 32 Notebook PC E-Manual To drop the item to launch it off the touchpad.

Users Manual
Page 33
click menu. NOTE: The areas inside the dotted line represent the locations of the left mouse button and the right mouse button on the touchpad. app to select it and launch • In Desktop mode, doubleclick an application to launch it . Left-click Right-click • In the Start screen, click an • In the Start screen, click an app to launch it . You can also press this button to launch the All Apps bar. • In Desktop mode, use this button to open the right- Notebook PC E-Manual 33 the settings bar.
click menu. NOTE: The areas inside the dotted line represent the locations of the left mouse button and the right mouse button on the touchpad. app to select it and launch • In Desktop mode, doubleclick an application to launch it . Left-click Right-click • In the Start screen, click an • In the Start screen, click an app to launch it . You can also press this button to launch the All Apps bar. • In Desktop mode, use this button to open the right- Notebook PC E-Manual 33 the settings bar.

Users Manual
Page 34
the Charms bar. 34 Notebook PC E-Manual Left edge swipe Right edge swipe Swipe from the top edge to launch your running apps. Top edge swipe • In the Start screen, swipe from the top edge to launch the All Apps bar. • In a running app, swipe from the left edge to shuffle Swipe the right edge to view its menu.
the Charms bar. 34 Notebook PC E-Manual Left edge swipe Right edge swipe Swipe from the top edge to launch your running apps. Top edge swipe • In the Start screen, swipe from the top edge to launch the All Apps bar. • In a running app, swipe from the left edge to shuffle Swipe the right edge to view its menu.

Users Manual
Page 39
Notebook PC E-Manual 39 Press this key to simulate the right-click functions. If you are two special Windows® keys on or off Turns the speaker volume down Turns the speaker volume up Windows® 8.1 keys There are already in the Start screen, press this key to go back to the Start screen. Enables or disables the touchpad Turns the speaker on your Notebook PC's keyboard used as below: Press this key to go back to the last app you opened.
Notebook PC E-Manual 39 Press this key to simulate the right-click functions. If you are two special Windows® keys on or off Turns the speaker volume down Turns the speaker volume up Windows® 8.1 keys There are already in the Start screen, press this key to go back to the Start screen. Enables or disables the touchpad Turns the speaker on your Notebook PC's keyboard used as below: Press this key to go back to the last app you opened.
Users Manual
Page 46
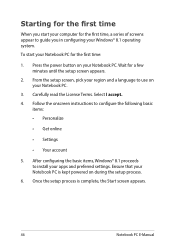
... to configure the following basic items: • Personalize • Get online • Settings • Your account 5. Starting for the first time When you start your apps and preferred settings. Carefully read the License Terms. Select I accept. 4. To start your computer for a few minutes until the setup screen appears. 2.
... to configure the following basic items: • Personalize • Get online • Settings • Your account 5. Starting for the first time When you start your apps and preferred settings. Carefully read the License Terms. Select I accept. 4. To start your computer for a few minutes until the setup screen appears. 2.

Users Manual
Page 47
...It also includes the following features that you can use while working on tiled-format for easy access. NOTE: Some apps require signing in to organize and easily access Windows® apps from the Start screen. Windows® UI Windows® 8.1 comes with a tile-based user interface (UI) ...which allows you to your Microsoft account before they are apps pinned on the Start screen and displayed on your Notebook PC...
...It also includes the following features that you can use while working on tiled-format for easy access. NOTE: Some apps require signing in to organize and easily access Windows® apps from the Start screen. Windows® UI Windows® 8.1 comes with a tile-based user interface (UI) ...which allows you to your Microsoft account before they are apps pinned on the Start screen and displayed on your Notebook PC...

Users Manual
Page 48
Hotspots Onscreen hotspots allow you to launch programs and access the settings of your Notebook PC. Hotspots on a running app Hotspots on the Start screen 48 Notebook PC E-Manual The functions in these hotspots can be activated using the touchpad.
Hotspots Onscreen hotspots allow you to launch programs and access the settings of your Notebook PC. Hotspots on a running app Hotspots on the Start screen 48 Notebook PC E-Manual The functions in these hotspots can be activated using the touchpad.

Users Manual
Page 49
... 49 NOTE: You can also press the Windows key on your keyboard to go back to that running apps. If you launched more than one app, slide down to show all running app. From a running app screen: Hover your mouse pointer on the lower left corner then tap/click to go back to the... Start screen. Hotspot upper left corner lower left corner Action Hover your mouse pointer on the upper left corner then tap/click on the recent app's thumbnail to...
... 49 NOTE: You can also press the Windows key on your keyboard to go back to that running apps. If you launched more than one app, slide down to show all running app. From a running app screen: Hover your mouse pointer on the lower left corner then tap/click to go back to the... Start screen. Hotspot upper left corner lower left corner Action Hover your mouse pointer on the upper left corner then tap/click on the recent app's thumbnail to...

Users Manual
Page 50
Drag then drop the app to the Snap feature under Working with Windows® apps. For more details, refer to a new location. upper or lower right Hover your mouse pointer on the top side until it changes to a hand icon. NOTE: This hotspot function only works on the upper or corner lower right corner to launch the Charms bar. 50 Notebook PC E-Manual Hotspot top side Action Hover your mouse pointer on a running app or when you want to use the Snap feature.
Drag then drop the app to the Snap feature under Working with Windows® apps. For more details, refer to a new location. upper or lower right Hover your mouse pointer on the top side until it changes to a hand icon. NOTE: This hotspot function only works on the upper or corner lower right corner to launch the Charms bar. 50 Notebook PC E-Manual Hotspot top side Action Hover your mouse pointer on a running app or when you want to use the Snap feature.

Users Manual
Page 51
The Start button may be accessed from the Start screen, while on Desktop mode, and on any opened . Start button Windows® 8.1 features the Start button which allows you to call out the Start button. Notebook PC E-Manual 51 Start button on the display settings you opened app to switch between the two most recent apps that is currently open onscreen. Hover your mouse pointer over the left corner of your Start button varies depending on the Start screen NOTE: The actual color of your Start screen or any app that you chose for your Start screen.
The Start button may be accessed from the Start screen, while on Desktop mode, and on any opened . Start button Windows® 8.1 features the Start button which allows you to call out the Start button. Notebook PC E-Manual 51 Start button on the display settings you opened app to switch between the two most recent apps that is currently open onscreen. Hover your mouse pointer over the left corner of your Start button varies depending on the Start screen NOTE: The actual color of your Start screen or any app that you chose for your Start screen.

Users Manual
Page 53
Tap/click Apply to the Desktop mode and customize the arrangement of your Start screen: 1. Customizing your Start screen Windows® 8.1 also enables you to customize your Start screen, allowing you want to launch the pop-up window. 3. To customize the settings of your apps onscreen. Launch the Desktop. 2. Notebook PC E-Manual 53 Click Properties then select the Navigation tab to tick the Navigation and Start screen options you to boot directly to save the new settings then exit. Right-click anywhere on the taskbar, except on the Start button, to use. 4.
Tap/click Apply to the Desktop mode and customize the arrangement of your Start screen: 1. Customizing your Start screen Windows® 8.1 also enables you to customize your Start screen, allowing you want to launch the pop-up window. 3. To customize the settings of your apps onscreen. Launch the Desktop. 2. Notebook PC E-Manual 53 Click Properties then select the Navigation tab to tick the Navigation and Start screen options you to boot directly to save the new settings then exit. Right-click anywhere on the taskbar, except on the Start button, to use. 4.

Users Manual
Page 54
Launching apps Position your Notebook PC's touch screen panel*, touchpad, or keyboard to launch, customize, and close apps from the Start screen using the following st.eps: Moving apps Double-tap on the app then drag and drop the app to a new location. 54 Notebook PC E-Manual Press twice then use the arrow keys to launch it. Working with Windows® apps Use your mouse pointer over the app then left-click or tap once to browse through the apps. Customizing apps You can move, resize, unpin, or close apps. Press to launch an app.
Launching apps Position your Notebook PC's touch screen panel*, touchpad, or keyboard to launch, customize, and close apps from the Start screen using the following st.eps: Moving apps Double-tap on the app then drag and drop the app to a new location. 54 Notebook PC E-Manual Press twice then use the arrow keys to launch it. Working with Windows® apps Use your mouse pointer over the app then left-click or tap once to browse through the apps. Customizing apps You can move, resize, unpin, or close apps. Press to launch an app.

Users Manual
Page 55
Unpinning apps Right-click on the app to activate the Customize bar then tap/click . Notebook PC E-Manual 55 Resizing apps Right-click on the app to activate the Customize bar, then tap/click and select an app tile size.
Unpinning apps Right-click on the app to activate the Customize bar then tap/click . Notebook PC E-Manual 55 Resizing apps Right-click on the app to activate the Customize bar, then tap/click and select an app tile size.

Users Manual
Page 56
Closing apps 1. From the running app's screen, press . 56 Notebook PC E-Manual Move your mouse pointer on the top side of the screen to a hand icon. 2. Drag then drop the app to the bottom of the launched app then wait for the pointer to change to close it.
Closing apps 1. From the running app's screen, press . 56 Notebook PC E-Manual Move your mouse pointer on the top side of the screen to a hand icon. 2. Drag then drop the app to the bottom of the launched app then wait for the pointer to change to close it.

Users Manual
Page 57
NOTE: Actual apps shown onscreen may vary per model. The following screenshot is for reference only. Launching the Apps screen Launch the Apps screen using your Start screen, you can also open other applications through the Apps screen. On the Start screen, click the button. Notebook PC E-Manual 57 Accessing the Apps screen Aside from the apps already pinned on your Notebook PC's touch screen panel, touchpad, or keyboard. From the Start screen, Press then press .
NOTE: Actual apps shown onscreen may vary per model. The following screenshot is for reference only. Launching the Apps screen Launch the Apps screen using your Start screen, you can also open other applications through the Apps screen. On the Start screen, click the button. Notebook PC E-Manual 57 Accessing the Apps screen Aside from the apps already pinned on your Notebook PC's touch screen panel, touchpad, or keyboard. From the Start screen, Press then press .

Users Manual
Page 58
Pinning more apps on the Start screen You can pin more apps on the Start screen. 58 Notebook PC E-Manual Tap/click on the icon to add on the Start screen. 3. Right-click on the apps that you want to pin the selected apps on the Start screen using your touch screen panel* or touchpad. 1. Launch the All Apps screen 2.
Pinning more apps on the Start screen You can pin more apps on the Start screen. 58 Notebook PC E-Manual Tap/click on the icon to add on the Start screen. 3. Right-click on the apps that you want to pin the selected apps on the Start screen using your touch screen panel* or touchpad. 1. Launch the All Apps screen 2.

Users Manual
Page 61
... PC settings of your Notebook PC. Notebook PC E-Manual 61 Settings This charm allows you can also use this to revert back to a recently opened app. Inside the Charms bar Search This charm allows you to look for files, applications, or programs in your Notebook PC.
... PC settings of your Notebook PC. Notebook PC E-Manual 61 Settings This charm allows you can also use this to revert back to a recently opened app. Inside the Charms bar Search This charm allows you to look for files, applications, or programs in your Notebook PC.

Users Manual
Page 62
Ensure that your Notebook PC's screen resolution is set to work or switch between apps. IMPORTANT! Snap bar 62 Notebook PC E-Manual Snap feature The Snap feature displays two apps side-by-side, allowing you to 1366 x 768 pixels or higher before using the Snap feature.
Ensure that your Notebook PC's screen resolution is set to work or switch between apps. IMPORTANT! Snap bar 62 Notebook PC E-Manual Snap feature The Snap feature displays two apps side-by-side, allowing you to 1366 x 768 pixels or higher before using the Snap feature.

Users Manual
Page 63
Hover the mouse point on the top side of the display panel. 4. Once the pointer changes to a hand icon, drag then drop the app to activate and use Snap. 1. Press and the left or right arrow key to snap the app to the left or right side of your Notebook PC's touch screen panel, touchpad, or keyboard to the left or right pane. 3. Launch the app you wish to snap. 2. Notebook PC E-Manual 63 Launch another app. This app is automatically placed in the empty pane. Using Snap Use your screen. 3. Launch the app you wish to snap. 2. Launch another app. 1.
Hover the mouse point on the top side of the display panel. 4. Once the pointer changes to a hand icon, drag then drop the app to activate and use Snap. 1. Press and the left or right arrow key to snap the app to the left or right side of your Notebook PC's touch screen panel, touchpad, or keyboard to the left or right pane. 3. Launch the app you wish to snap. 2. Notebook PC E-Manual 63 Launch another app. This app is automatically placed in the empty pane. Using Snap Use your screen. 3. Launch the app you wish to snap. 2. Launch another app. 1.


