
User's Manual for English Edition
Page 2
...entitled to recover damages from ASUS, ASUS is the maximum for which ASUS, its reseller. SERVICE AND SUPPORT Visit our multi-language web site at http://support.asus.com SPECIFICATIONS AND INFORMATION CONTAINED IN THIS MANUAL ARE FURNISHED FOR INFORMATIONAL USE ONLY, AND ARE SUBJECT TO CHANGE AT ANY TIME WITHOUT ... or infringement under this Warranty Statement, up to the listed contract price of each such instance, regardless of the basis on ASUS' part or other actual and direct damages resulted from omission or failure of performing legal duties under this Warranty Statement. UNDER ...
...entitled to recover damages from ASUS, ASUS is the maximum for which ASUS, its reseller. SERVICE AND SUPPORT Visit our multi-language web site at http://support.asus.com SPECIFICATIONS AND INFORMATION CONTAINED IN THIS MANUAL ARE FURNISHED FOR INFORMATIONAL USE ONLY, AND ARE SUBJECT TO CHANGE AT ANY TIME WITHOUT ... or infringement under this Warranty Statement, up to the listed contract price of each such instance, regardless of the basis on ASUS' part or other actual and direct damages resulted from omission or failure of performing legal duties under this Warranty Statement. UNDER ...

User's Manual for English Edition
Page 3
... PC...25 Connecting a wired keyboard and mouse...25 Connecting a wireless keyboard and mouse 25 Turning your All-in-One PC on...26 Gestures...27 Configuring the audio output using an HDMI device 29 Chapter 3: Working with Windows® 8 System requirements...31 Starting for the first time (For Windows® 8 and Windows® 8 Professional 32 Windows® 8 lock screen...32 Windows® UI...33 Start screen...33 Windows® apps...34 Hotspots...34 Working with Windows® apps...
... PC...25 Connecting a wired keyboard and mouse...25 Connecting a wireless keyboard and mouse 25 Turning your All-in-One PC on...26 Gestures...27 Configuring the audio output using an HDMI device 29 Chapter 3: Working with Windows® 8 System requirements...31 Starting for the first time (For Windows® 8 and Windows® 8 Professional 32 Windows® 8 lock screen...32 Windows® UI...33 Start screen...33 Windows® apps...34 Hotspots...34 Working with Windows® apps...

User's Manual for English Edition
Page 4
...-Fi connection in Windows® 8 50 Setting up a Wired connection in Windows® 8 51 Configuring a dynamic IP/PPPoE network connection 51 Configuring a static IP network connection...54 Chapter 5: Recovering your system Entering the BIOS Setup...55 Enter the BIOS...55 Quickly enter the BIOS...55 Using the Recovery Partition in Windows® 7 56 Recovering the OS to the Factory Default Partition (F9 Recovery 56 Backing up the Factory Default Environment Data to a USB Drive (F9 Backup 56 Using the USB storage device (USB Restore 57 Resetting your...
...-Fi connection in Windows® 8 50 Setting up a Wired connection in Windows® 8 51 Configuring a dynamic IP/PPPoE network connection 51 Configuring a static IP network connection...54 Chapter 5: Recovering your system Entering the BIOS Setup...55 Enter the BIOS...55 Quickly enter the BIOS...55 Using the Recovery Partition in Windows® 7 56 Recovering the OS to the Factory Default Partition (F9 Recovery 56 Backing up the Factory Default Environment Data to a USB Drive (F9 Backup 56 Using the USB storage device (USB Restore 57 Resetting your...
User's Manual for English Edition
Page 7
... the operating instructions. • The system was dropped or the cabinet is turned off the system and disconnect the power cord from foreign objects or excessive dust accumulation. To clean the screen: • Turn off , a small amount of the devices plugged into the system. • The system does not function properly even if you read the following technical problems with...
... the operating instructions. • The system was dropped or the cabinet is turned off the system and disconnect the power cord from foreign objects or excessive dust accumulation. To clean the screen: • Turn off , a small amount of the devices plugged into the system. • The system does not function properly even if you read the following technical problems with...

User's Manual for English Edition
Page 11
... -One PC ET2020 Series 11 Touch-enabled models bring digital life to decrease system volume. Remote Control Receiver The remote control receiver receives the infrared signal from the remote control. Volume increase button Press to reduce display brightness. Webcam LED Indicates that produces rich, vibrant sound. Audio Speakers The built-in -One PC's display. Decrease display Brightness Press this button to increase system volume. Hard Disk Drive LED Indicates hard disk drive activity. Webcam The...
... -One PC ET2020 Series 11 Touch-enabled models bring digital life to decrease system volume. Remote Control Receiver The remote control receiver receives the infrared signal from the remote control. Volume increase button Press to reduce display brightness. Webcam LED Indicates that produces rich, vibrant sound. Audio Speakers The built-in -One PC's display. Decrease display Brightness Press this button to increase system volume. Hard Disk Drive LED Indicates hard disk drive activity. Webcam The...

User's Manual for English Edition
Page 13
... sound. Hard Disk Drive LED Indicates hard disk drive activity. Increase display brightness Press this button to reduce display brightness. Audio Speakers The built-in webcam is enabled. All-in -One PC's display. Remote Control Receiver The remote control receiver receives the infrared signal from the remote control. Decrease display Brightness Press this button to increase display brightness. The multimedia sound system features an integrated digital audio controller that the built-in stereo speaker system allows you to start video...
... sound. Hard Disk Drive LED Indicates hard disk drive activity. Increase display brightness Press this button to reduce display brightness. Audio Speakers The built-in webcam is enabled. All-in -One PC's display. Remote Control Receiver The remote control receiver receives the infrared signal from the remote control. Decrease display Brightness Press this button to increase display brightness. The multimedia sound system features an integrated digital audio controller that the built-in stereo speaker system allows you to start video...

User's Manual for English Edition
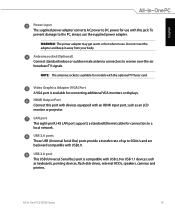
Page 15
... an LCD monitor or projector. USB 2.0 ports These USB (Universal Serial Bus) ports are compatible with the optional TV Tuner card. The power adapter may get warm or hot when in -One PC ET2020 Series 15 HDMI Output Port Connect this port with devices equipped with this jack. WARNING! All-in use. English Power input The supplied power adapter converts AC power to DC power for use with an HDMI input port, such as keyboards, pointing devices, flash disk drives, external HDDs, speakers, cameras...
... an LCD monitor or projector. USB 2.0 ports These USB (Universal Serial Bus) ports are compatible with the optional TV Tuner card. The power adapter may get warm or hot when in -One PC ET2020 Series 15 HDMI Output Port Connect this port with devices equipped with this jack. WARNING! All-in use. English Power input The supplied power adapter converts AC power to DC power for use with an HDMI input port, such as keyboards, pointing devices, flash disk drives, external HDDs, speakers, cameras...

User's Manual for English Edition
Page 17
... monitor or projector. LAN port This eight-pin RJ-45 LAN port supports a standard Ethernet cable for connection to the PC, always use the supplied power adapter. The power adapter may get warm or hot when in -One PC ET2020 Series 17 HDMI Output Port Connect this jack. Video Graphics Adapter (VGA) Port VGA ports are backward compatible with an HDMI input port, such as keyboards, pointing devices, flash disk drives, external HDDs, speakers, cameras and printers. USB 2.0 port This USB (Universal Serial Bus) port is compatible with serial specifications. Do not cover the adapter...
... monitor or projector. LAN port This eight-pin RJ-45 LAN port supports a standard Ethernet cable for connection to the PC, always use the supplied power adapter. The power adapter may get warm or hot when in -One PC ET2020 Series 17 HDMI Output Port Connect this jack. Video Graphics Adapter (VGA) Port VGA ports are backward compatible with an HDMI input port, such as keyboards, pointing devices, flash disk drives, external HDDs, speakers, cameras and printers. USB 2.0 port This USB (Universal Serial Bus) port is compatible with serial specifications. Do not cover the adapter...
User's Manual for English Edition
Page 19
... antenna connectors to the PC, always use the supplied power adapter. USB 2.0 port This USB (Universal Serial Bus) port is compatible with an HDMI input port, such as keyboards, pointing devices, flash disk drives, external HDDs, speakers, cameras and printers. Video Graphics Adapter (VGA) Port A VGA port is available for connecting additional VGA monitors or displays. To prevent damage to receive over-the-air broadcast TV signals. All-in use. HDMI Output Port Connect this jack. LAN port This eight-pin RJ-45 LAN port supports a standard Ethernet cable for connection to...
... antenna connectors to the PC, always use the supplied power adapter. USB 2.0 port This USB (Universal Serial Bus) port is compatible with an HDMI input port, such as keyboards, pointing devices, flash disk drives, external HDDs, speakers, cameras and printers. Video Graphics Adapter (VGA) Port A VGA port is available for connecting additional VGA monitors or displays. To prevent damage to receive over-the-air broadcast TV signals. All-in use. HDMI Output Port Connect this jack. LAN port This eight-pin RJ-45 LAN port supports a standard Ethernet cable for connection to...

User's Manual for English Edition
Page 20
...-in memory card reader slot that supports MS, MSPro, MMC, SD, SDXC, and SDHC formats. Side view English USB 2.0 port This USB (Universal Serial Bus) port is compatible with USB2.0. 6-in-1 Memory card reader This All-in-One PC has a single built-in -One PC ET2020 Series Quick BIOS access button Use a paper clip or pointed object to 5Gbit/s and are backward compatible with USB 2.0 or USB 1.1 devices such as keyboards, pointing devices, flash disk drives, external HDDs, speakers...
...-in memory card reader slot that supports MS, MSPro, MMC, SD, SDXC, and SDHC formats. Side view English USB 2.0 port This USB (Universal Serial Bus) port is compatible with USB2.0. 6-in-1 Memory card reader This All-in-One PC has a single built-in -One PC ET2020 Series Quick BIOS access button Use a paper clip or pointed object to 5Gbit/s and are backward compatible with USB 2.0 or USB 1.1 devices such as keyboards, pointing devices, flash disk drives, external HDDs, speakers...

User's Manual for English Edition
Page 21
... designed to connect to a microphone used to connect the system's audio out signal to turn on each model. Using this button to headphones. All-in Windows "Computer" and selecting Eject. See the marketing specifications for opening the tray. You can also eject the optical drive tray through any software player or by right clicking the optical drive in -One PC ET2020 Series 21 Optical Drive The built-in speakers. Microphone...
... designed to connect to a microphone used to connect the system's audio out signal to turn on each model. Using this button to headphones. All-in Windows "Computer" and selecting Eject. See the marketing specifications for opening the tray. You can also eject the optical drive tray through any software player or by right clicking the optical drive in -One PC ET2020 Series 21 Optical Drive The built-in speakers. Microphone...

User's Manual for English Edition
Page 25
... mouse to the USB ports on the rear panel. NOTES: • Reconnect the wireless keyboard and mouse with the wireless dongle if they lose connection. Actual hardware and specifications of the panel if the keyboard cable is not long enough. Connecting a wireless keyboard and mouse 1. You may also connect the keyboard and mouse to the USB ports on the left side of the optional wired or wireless keyboard and mouse vary. You can begin using either devices alongside other wireless hardware to a USB port. 3. English Setting...
... mouse to the USB ports on the rear panel. NOTES: • Reconnect the wireless keyboard and mouse with the wireless dongle if they lose connection. Actual hardware and specifications of the panel if the keyboard cable is not long enough. Connecting a wireless keyboard and mouse 1. You may also connect the keyboard and mouse to the USB ports on the left side of the optional wired or wireless keyboard and mouse vary. You can begin using either devices alongside other wireless hardware to a USB port. 3. English Setting...

User's Manual for English Edition
Page 26
... NOT connect the AC power cord to an AC outlet prior to connecting the DC plug to turn on the system. 3 2 1 WARNING! English Turning your All-in-One PC under Working with Windows® 8. 26 All-in -One PC to the system. Doing so may damage the AC-DC adapter. NOTE: • The input voltage of the adapter is ...to the All-in-One PC. 4 NOTE: For details on turning off your All-in-One PC, refer to the section Turning off your All-in-One PC on Connect the supplied AC adapter to the DC IN jack on the rear panel ( ) and then press the Power button on the right side ( ) of the All-in -One...
... NOT connect the AC power cord to an AC outlet prior to connecting the DC plug to turn on the system. 3 2 1 WARNING! English Turning your All-in-One PC under Working with Windows® 8. 26 All-in -One PC to the system. Doing so may damage the AC-DC adapter. NOTE: • The input voltage of the adapter is ...to the All-in-One PC. 4 NOTE: For details on turning off your All-in-One PC, refer to the section Turning off your All-in-One PC on Connect the supplied AC adapter to the DC IN jack on the rear panel ( ) and then press the Power button on the right side ( ) of the All-in -One...

User's Manual for English Edition
Page 29
Click Configure and the Speaker Setup window pops up. To configure the audio output using HDMI and follow the steps below to the section Start screen under Working with Windows® 8. 2. NOTE: For more details, refer to configure the audio settings. Right-click the Volume Mixer icon on the Windows® taskbar and click Playback devices. 3. All-in-One PC ET2020 Series 29 English Configuring the audio output using an HDMI device If you...
Click Configure and the Speaker Setup window pops up. To configure the audio output using HDMI and follow the steps below to the section Start screen under Working with Windows® 8. 2. NOTE: For more details, refer to configure the audio settings. Right-click the Volume Mixer icon on the Windows® taskbar and click Playback devices. 3. All-in-One PC ET2020 Series 29 English Configuring the audio output using an HDMI device If you...

User's Manual for English Edition
Page 51
... network connection. • Contact your Internet Service Provider (ISP) for details or assistance in setting up a Wired connection in Windows® 8 1. NOTES: • For more details, refer to launch the Desktop mode. Configuring a dynamic IP/PPPoE network connection To configure a dynamic IP/PPPoE or static IP network connection: 1. All-in -One PC to a DSL/cable modem or a local area network (LAN). 2. English Setting up your Internet connection. Use a network (RJ-45) cable to connect your computer. 3. Turn...
... network connection. • Contact your Internet Service Provider (ISP) for details or assistance in setting up a Wired connection in Windows® 8 1. NOTES: • For more details, refer to launch the Desktop mode. Configuring a dynamic IP/PPPoE network connection To configure a dynamic IP/PPPoE or static IP network connection: 1. All-in -One PC to a DSL/cable modem or a local area network (LAN). 2. English Setting up your Internet connection. Use a network (RJ-45) cable to connect your computer. 3. Turn...

User's Manual for English Edition
Page 55
... PC. Enter the BIOS Press F2 immediately after your turn on the screen during the system bootup and requests you to quickly access the BIOS: • Use a paper clip or pointed object to press the Quick BIOS Access button. Inappropriate BIOS settings may result to run the BIOS Setup. • You have installed a new system component that are needed for you to instability or boot failure. Do not change the BIOS settings only...
... PC. Enter the BIOS Press F2 immediately after your turn on the screen during the system bootup and requests you to quickly access the BIOS: • Use a paper clip or pointed object to press the Quick BIOS Access button. Inappropriate BIOS settings may result to run the BIOS Setup. • You have installed a new system component that are needed for you to instability or boot failure. Do not change the BIOS settings only...

User's Manual for English Edition
Page 56
... than one USB storage device is completed successfully, click Reboot to your PC model. 4. Ensure to back up the factory default environment is connected to restart the system. NOTE: If there is completed successfully, click Reboot to your data on the selected partition. English Using the Recovery Partition in the selected USB storage device (for example, a partition that has been used as the backup partition), the system...
... than one USB storage device is completed successfully, click Reboot to your PC model. 4. Ensure to back up the factory default environment is connected to restart the system. NOTE: If there is completed successfully, click Reboot to your data on the selected partition. English Using the Recovery Partition in the selected USB storage device (for example, a partition that has been used as the backup partition), the system...

User's Manual for English Edition
Page 57
... boot device screen appears. Select the language and click Next. 4. When restoration is complete, click Reboot to . 2. This option deletes all data from the connected USB storage device. 3. Connect the USB storage device that you click Next, the factory default partition will be displayed. Select USB: XXXXXX to boot from your hard drisk and creates a new system partition as drive "C", an empty partition as drive "D", and a Recovery Partition. 6. Select a task and click Next. English Using the USB storage device (USB Restore...
... boot device screen appears. Select the language and click Next. 4. When restoration is complete, click Reboot to . 2. This option deletes all data from the connected USB storage device. 3. Connect the USB storage device that you click Next, the factory default partition will be displayed. Select USB: XXXXXX to boot from your hard drisk and creates a new system partition as drive "C", an empty partition as drive "D", and a Recovery Partition. 6. Select a task and click Next. English Using the USB storage device (USB Restore...

User's Manual for English Edition
Page 58
...-in Windows® 8 The Reset your PC option restores your All-in -One PC is off, press the power button to turn on , launch the Windows® 8 Charm bar then go to Advanced startup and tap or tap or click Restart now. 2. Select Only the drive where the Windows is installed. 7. Select Just remove my files. 8. IMPORTANT! To reset your PC to its factory default settings. Back...
...-in Windows® 8 The Reset your PC option restores your All-in -One PC is off, press the power button to turn on , launch the Windows® 8 Charm bar then go to Advanced startup and tap or tap or click Restart now. 2. Select Only the drive where the Windows is installed. 7. Select Just remove my files. 8. IMPORTANT! To reset your PC to its factory default settings. Back...

User's Manual for English Edition
Page 60
... complete the reinstallation and reset process. 60 All-in PC Settings. Under this option. Click Create. Wait for a while for the process to complete. 1. Follow the onscreen instructions to view the Remove everything and reinstall option in -One PC ET2020 Series Click Settings > Change PC Settings > General. 3. Back up all your PC to use this option, click Get Started. 4. IMPORTANT! Launch the Charm...
... complete the reinstallation and reset process. 60 All-in PC Settings. Under this option. Click Create. Wait for a while for the process to complete. 1. Follow the onscreen instructions to view the Remove everything and reinstall option in -One PC ET2020 Series Click Settings > Change PC Settings > General. 3. Back up all your PC to use this option, click Get Started. 4. IMPORTANT! Launch the Charm...


