Asus AW1500-I5 Support and Manuals
Get Help and Manuals for this Asus item
View All Support Options Below
Free Asus AW1500-I5 manuals!
Problems with Asus AW1500-I5?
Ask a Question
Free Asus AW1500-I5 manuals!
Problems with Asus AW1500-I5?
Ask a Question
Popular Asus AW1500-I5 Manual Pages
AW1500-I5 English Manual - Page 10

... specifications of the problems and offers solutions. It lists the possible causes of the AW1500-I5 redundant power modules. 6. It includes the target audience, chapter description, and conventions used. Introduction: About this guide
This part introduces the contents of the AW1500-I5 system workstation. You may encounter while using the AW1500-I5 workstation. I-2
ASUS AW1500...
AW1500-I5 English Manual - Page 12

... to Ultra 160 SCSI HDD bridge
board (1 piece) 10) AC power cord (1 piece) 11) Support CD that include drivers, utilities and the PC-cillin anti-virus
software 12) ASUS PCI-SCU3 Ultra160 SCSI controller support CD 13) Motherboard user guide 14) System user guide 15) LSI SCSI controller user guide 16) Chassis roller wheels (4 sets) 17) ASUS PCI-SCU3 Ultra160 Dual...
AW1500-I5 English Manual - Page 14

...
1-2
ASUS AW1500-I5 Motherboard ASUS PP-DLW
Chipset
North Bridge:
Intel® E7505 North Bridge (Placer)
South Bridge:
Intel® 82801DA South Bridge (ICH4)
64-bit PCI-X Bridge: Intel® 82870P2 (P64H2)
System Memory Memory Capacity:
4 x 184-pin PC2100 DDR RAM sockets. The following are highlights of 2GB up to 8GB maximum capacity
Processor
Dual Intel® XeonTM processor up...
AW1500-I5 English Manual - Page 18

... Lock Line-Out
6 Full-Length Slots
You may secure the chassis lock with an additional padlock or other security device for added server system security.
1-6
ASUS AW1500-I5 1.3 Rear Panel Features
The server rear panel includes the connectors, the system devices, a chassis lock and six full-length expansion cards slot.
The following shows...
AW1500-I5 English Manual - Page 20

...
Red
Bridge board connected to SCSI backplane
Bridge board failure
Drive Activity
LED
Blinking
ON Power LED
Blinking
HDD Access OFF
LED
Blinking
Message LED
OFF Blinking
HDD Read/Write data
System power ON Suspend Mode No activity Read/Write data in HDD Normal/No incoming event ASMS indicate HW monitor event
1
2 3 4
1-8
ASUS AW1500-I5
AW1500-I5 English Manual - Page 22

Release the cover from the chassis.
2-2
ASUS AW1500-I5 2.1 Removing and installing chassis cover
The chassis is held by two large thumb screws. Loosen the screws.
2. Slide the chassis cover for easy assembly and disassembly, making the installation of internal components very convenient.
2.1.1 Removing the chassis cover
1. The side chassis cover is designed for about half...
AW1500-I5 English Manual - Page 24

.... Place this side towards the rear of your chassis to do so may damage the motherboard.
2-4
ASUS AW1500-I5 The edge with external ports goes to unplug the power cord before installing or removing the motherboard.
Placement direction
When installing the motherboard, make sure that measures 12 inches x 10.5 inches (30.5 x 26.67 cm). Doing so may cause...
AW1500-I5 English Manual - Page 26

... NOT force the CPU into the socket until it firmly on the socket while you are installing only one correct orientation. When the CPU is locked.
2-6
ASUS AW1500-I5 The lever clicks on the motherboard.
Follow these steps to install a CPU.
1. Locate the 604-pin ZIF sockets on the side tab to indicate that the socket...
AW1500-I5 English Manual - Page 28

... to install two CPUs, repeat the same steps for the second CPU heatsink and fan assembly cable.
2-8
ASUS AW1500-I5 If you fail to the fan connector on the motherboard labeled CPUFAN1. Use CPUFAN2 connector for CPU socket 2. If it doesn't fit completely, try reversing it fits only in one orientation.
Hardware monitoring errors may occur...
AW1500-I5 English Manual - Page 30
... install the same type of up to 8GB in pairs. The same rule applies to use only the specified DIMM types for stable system operation.
2-10
ASUS AW1500-I5 ... only supports PC2100 unbuffered and registered non-ECC DIMMs. Make sure to pairs DDRB1/DDRB2 and DDRC1/DDRC2. Installing a single DIMM into any other socket would not work. 2.4.2 Memory Configurations
The motherboard supports system ...
AW1500-I5 English Manual - Page 32

An IDE DVD-ROM drive is installed on the uppermost bay and two free bays are cinched by screwless locks for installation of additional storage devices like optical disc drives or tape drives. Front door bezel
Screwless fixed device bay locks
2-12
ASUS AW1500-I5
2.5 Fixed Device Bays
2.5.1 Overview
The fixed device bay are available for device placement convenience.
AW1500-I5 English Manual - Page 34

Take caution in removing the front panel cover.
3. Remove the appropriate metallic bay panel cover of the bay slot you want to detach the hooked tabs from the left side of the front panel. Use thumbs or a flat-head screw driver to install your device.
2-14
ASUS AW1500-I5 Do not use too much force when installing or removing items.
4.
AW1500-I5 English Manual - Page 44
... make the necessary hardware settings.
2. Set up the BIOS if...Install the necessary software drivers for more details.
4.
Refer to do so may cause you physical injury, damage the expansion card or other motherboard components.
2-24
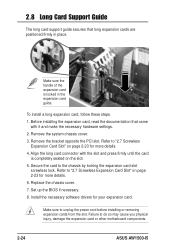
ASUS AW1500-I5 Refer to unplug the power cord before installing or removing expansion cards from the slot. 2.8 Long Card Support Guide
The long card support guide...
AW1500-I5 English Manual - Page 46

...-cm chassis fan, follow these steps.
1. Pull out the 12-cm chassis fan.
2-26
ASUS AW1500-I5 2.10 Chassis Fan
The chassis is cooled by squeezing the pin tail and pushing the pin to the rear panel.
3. chassis fan pin-locks
2. Remove the 12-cm chassis fan 3-pin power cable (SYSFAN3) from the motherboard.
AW1500-I5 English Manual - Page 56

Floppy disk drive 4. reserved 6. DVD-ROM 7. reserved
ASUS AW1500-I5 Power case top view
1
23 4 5 6 7 8 9
1. 24-pin to motherboard ATX connector
2. 12V 8-pin to motherboard connector
3. reserved
A-6
5. SCSI Backplane 9. SCSI Backplane 8.
Asus AW1500-I5 Reviews
We have not received any reviews for Asus yet.