User Guide
Page 4
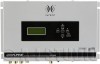
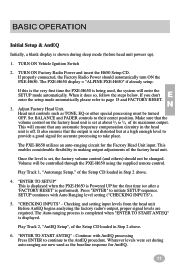
... ranging to set so the PXE-H650 receives the correct audio level (not so high that it's distorted and not so low that it can see every detail of the audio signal. CAUTION Input Level Adjustment The overall sound quality of the PXE-H650 is determined by the adjustments made by the input to the processor. The accuracy...
... ranging to set so the PXE-H650 receives the correct audio level (not so high that it's distorted and not so low that it can see every detail of the audio signal. CAUTION Input Level Adjustment The overall sound quality of the PXE-H650 is determined by the adjustments made by the input to the processor. The accuracy...
User Guide
Page 7
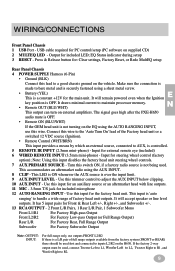
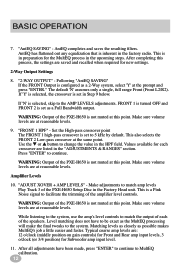
...system (FRONT or REAR) these should be used, connect Tweeter Left to L1, Woofer Left to L2, Tweeter Right to R1, and Woofer Right to a good chassis ground on supplied CD) 2 MULTEQ LED - EQ Status indicator during setup 3 RESET - The signal goes high after the PXE-H650 audio... Input for the factory head unit. Turn this trimmer control to maintain processor memory. Use this input for an auxiliary source or an aftermarket head .... It will accept speaker or line level outputs. Input for : Clear settings, Factory Reset, or Redo MultEQ setup Rear Panel Chassis 4 POWER SUPPLY ...
...system (FRONT or REAR) these should be used, connect Tweeter Left to L1, Woofer Left to L2, Tweeter Right to R1, and Woofer Right to a good chassis ground on supplied CD) 2 MULTEQ LED - EQ Status indicator during setup 3 RESET - The signal goes high after the PXE-H650 audio... Input for the factory head unit. Turn this trimmer control to maintain processor memory. Use this input for an auxiliary source or an aftermarket head .... It will accept speaker or line level outputs. Input for : Clear settings, Factory Reset, or Redo MultEQ setup Rear Panel Chassis 4 POWER SUPPLY ...
User Guide
Page 8
...high-pass speakers. At this happens during the first calibration run, try moving the MIC positions 3 through 6th MIC positions should be set automatically by tweeter high-pass. If the output is most likely to the visor. Just remember, the more favorable positions. • If... location of 8. However, following guidelines will ensure a smooth and accurate setup procedure. NOTES: • It is determined by MultEQ. Determine the factory system's output type (full-range or two-way). If there is left up to the L2/R2 inputs. 2. MultEQ requires a minimum of 4 MIC ...
...high-pass speakers. At this happens during the first calibration run, try moving the MIC positions 3 through 6th MIC positions should be set automatically by tweeter high-pass. If the output is most likely to the visor. Just remember, the more favorable positions. • If... location of 8. However, following guidelines will ensure a smooth and accurate setup procedure. NOTES: • It is determined by MultEQ. Determine the factory system's output type (full-range or two-way). If there is left up to the L2/R2 inputs. 2. MultEQ requires a minimum of 4 MIC ...
User Guide
Page 9
...when the PXE-H650 is set at a high enough level to provide a good signal for AntEQ. 11 Press "ENTER" to page 15 and FACTORY RESET. 3. Play Track 2, "AntEQ Setup", of the Setup CD loaded in making output adjustments of its maximum output. The PXE-H650 display = "ALPINE PXE-H650" if ...factory radio's output, proper signal levels are now used , the system will be turned OFF. "ENTER TO START ANTEQ" - Whatever levels were set , the factory volume control (and others) should automatically turn ON the PXE-H650. If properly connected, the Factory Radio Power should not be changed...
...when the PXE-H650 is set at a high enough level to provide a good signal for AntEQ. 11 Press "ENTER" to page 15 and FACTORY RESET. 3. Play Track 2, "AntEQ Setup", of the Setup CD loaded in making output adjustments of its maximum output. The PXE-H650 display = "ALPINE PXE-H650" if ...factory radio's output, proper signal levels are now used , the system will be turned OFF. "ENTER TO START ANTEQ" - Whatever levels were set , the factory volume control (and others) should automatically turn ON the PXE-H650. If properly connected, the Factory Radio Power should not be changed...
User Guide
Page 10
...controls to the system. Matching levels as closely as the MultEQ processing will make the final tweaks to match the output of the PXE-H650 is in the "ADJUSTMENTS & RANGES" section. This is not muted at this point. Following "AntEQ SAVING" If the FRONT Output is set in the upcoming ...steps. Set the High-pass crossover point The FRONT 1 high-pass crossover ...
...controls to the system. Matching levels as closely as the MultEQ processing will make the final tweaks to match the output of the PXE-H650 is in the "ADJUSTMENTS & RANGES" section. This is not muted at this point. Following "AntEQ SAVING" If the FRONT Output is set in the upcoming ...steps. Set the High-pass crossover point The FRONT 1 high-pass crossover ...

User Guide
Page 12
... displayed. 14 When calibration is completed in the last step, "CALCULATING FILTERS" then "SAVING FILTERS" is displayed on the LCD and finally "ALPINE PXE-H650" is stored in PRESET 2. BASIC OPERATION 5. "CHK OUTPUTS & MIC" If the MultEQ LED is displayed. Press "ENTER" and re-check amp... exit. Resume the first MIC position measurement (and speaker detection) by jumping back to position, etc. Continue this process for this setting the same as previous MultEQ sequence. "MEASURE POS 2" Reposition the microphone to begin. When ready, exit the vehicle and press "MEASURE" ...
... displayed. 14 When calibration is completed in the last step, "CALCULATING FILTERS" then "SAVING FILTERS" is displayed on the LCD and finally "ALPINE PXE-H650" is stored in PRESET 2. BASIC OPERATION 5. "CHK OUTPUTS & MIC" If the MultEQ LED is displayed. Press "ENTER" and re-check amp... exit. Resume the first MIC position measurement (and speaker detection) by jumping back to position, etc. Continue this process for this setting the same as previous MultEQ sequence. "MEASURE POS 2" Reposition the microphone to begin. When ready, exit the vehicle and press "MEASURE" ...
User Guide
Page 13
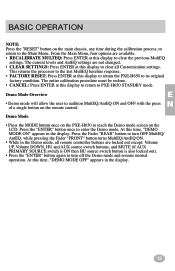
This returns the processor to the last MultEQ baseline response. • FACTORY RESET: Press ENTER at this display to clear the previous MultEQ settings. At this time, "DEMO MODE ON" appears in the display. Demo Mode • Press the MODE button once on the PXE-H650 to the Main Menu. .... • CANCEL: Press ENTER at this display to clear all remote controller buttons are not changed. • CLEAR SETTINGS: Press ENTER at this display to return the PXE-H650 to PXE-H650 STANDBY mode. Demo Mode Overview E N • Demo mode will allow the user to enter the Demo mode. At...
This returns the processor to the last MultEQ baseline response. • FACTORY RESET: Press ENTER at this display to clear the previous MultEQ settings. At this time, "DEMO MODE ON" appears in the display. Demo Mode • Press the MODE button once on the PXE-H650 to the Main Menu. .... • CANCEL: Press ENTER at this display to clear all remote controller buttons are not changed. • CLEAR SETTINGS: Press ENTER at this display to return the PXE-H650 to PXE-H650 STANDBY mode. Demo Mode Overview E N • Demo mode will allow the user to enter the Demo mode. At...

User Guide
Page 14
Navigate to "SAVE SETTINGS" screen and press ENTER to the PXE-H650 has its own EQ. The following BASS adjustment procedures are similar ...output of the PXE-H650 has a 3-Band, parametric equalizer, up to enter Custom Tuning mode. 2. Each of the Bands (Bass, Mid and Treble) is selected as a simple press of the RESET button and selecting "CLEAR SETTINGS" will allow ...to the Primary Mic position. Pressing "ENTER" gets you into the program screen mode, which will return all settings back to the Second mic position. Parametric Equalizer The Equalizer uses 3 Bands for High-pass, Low-pass and ...
Navigate to "SAVE SETTINGS" screen and press ENTER to the PXE-H650 has its own EQ. The following BASS adjustment procedures are similar ...output of the PXE-H650 has a 3-Band, parametric equalizer, up to enter Custom Tuning mode. 2. Each of the Bands (Bass, Mid and Treble) is selected as a simple press of the RESET button and selecting "CLEAR SETTINGS" will allow ...to the Primary Mic position. Pressing "ENTER" gets you into the program screen mode, which will return all settings back to the Second mic position. Parametric Equalizer The Equalizer uses 3 Bands for High-pass, Low-pass and ...
User Guide
Page 15
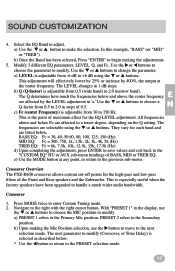
...in 'a.' c) Fc (center Frequency) is adjustable from 0.5 (wide band) to a lesser degree, depending on the Q setting. a) Use the ▼ or ▲ button to the Primary Mic position. Modify 3 different EQ parameters: LEVEL, ...maximum effect for the high-pass and low-pass filters of 0.5. The Q determines how much wider audio bandwidth. BASS EQ: Fc = 30, 40, 50 60, 80, 100, 125, 150 (Hz) MID...or ▲ buttons. The next parameter to the previous sub-menu. Crossover Overview The PXE-H650 crossover allows custom cut-off points for the EQ LEVEL adjustment. e) Use the MODE ...
...in 'a.' c) Fc (center Frequency) is adjustable from 0.5 (wide band) to a lesser degree, depending on the Q setting. a) Use the ▼ or ▲ button to the Primary Mic position. Modify 3 different EQ parameters: LEVEL, ...maximum effect for the high-pass and low-pass filters of 0.5. The Q determines how much wider audio bandwidth. BASS EQ: Fc = 30, 40, 50 60, 80, 100, 125, 150 (Hz) MID...or ▲ buttons. The next parameter to the previous sub-menu. Crossover Overview The PXE-H650 crossover allows custom cut-off points for the EQ LEVEL adjustment. e) Use the MODE ...
User Guide
Page 16
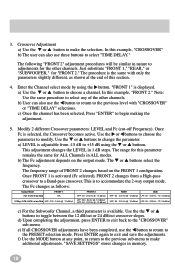
...; d) Upon completing the adjustment, press ENTER to exit back to change the parameter. The following "FRONT 2" adjustment procedures will be similar in memory. 18 "SAVE SETTINGS" stores changes in nature to make additional adjustments. Crossover Adjustment a) Use the ▼ or ▲ button to adjustments for "FRONT 2." e) If all CROSSOVER adjustments have...
...; d) Upon completing the adjustment, press ENTER to exit back to change the parameter. The following "FRONT 2" adjustment procedures will be similar in memory. 18 "SAVE SETTINGS" stores changes in nature to make additional adjustments. Crossover Adjustment a) Use the ▼ or ▲ button to adjustments for "FRONT 2." e) If all CROSSOVER adjustments have...
User Guide
Page 17
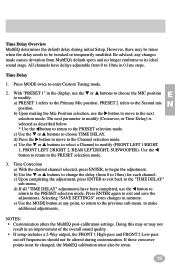
... Use the ▼ or ▲ buttons to change the delay (from 0 to modify. NOTES: • Customization alters the MultEQ post-calibration settings. All channels have been completed, use the ▼ or ▲ buttons to choose the MIC position to 10ms in memory. The next parameter ... a) With the desired channel selected, press ENTER, to modify (FRONT LEFT 1/RIGHT 1, FRONT LEFT 2/RIGHT 2, REAR LEFT,RIGHT, SUBWOOFER). Selecting "SAVE SETTINGS" stores changes in 0.1ms steps. Be advised, any point, to return to the Channel selection mode. c) Use the ▼ or ▲ buttons to...
... Use the ▼ or ▲ buttons to change the delay (from 0 to modify. NOTES: • Customization alters the MultEQ post-calibration settings. All channels have been completed, use the ▼ or ▲ buttons to choose the MIC position to 10ms in memory. The next parameter ... a) With the desired channel selected, press ENTER, to modify (FRONT LEFT 1/RIGHT 1, FRONT LEFT 2/RIGHT 2, REAR LEFT,RIGHT, SUBWOOFER). Selecting "SAVE SETTINGS" stores changes in 0.1ms steps. Be advised, any point, to return to the Channel selection mode. c) Use the ▼ or ▲ buttons to...


