
Owners Manual
Page 3
... 11 Adjusting the Volume 11 How to view the Display 11 Soft button operation 11 Recalling the Source 11 Displaying the Numeric Keypad Input Screen 12 Radio Listening to the Radio 13 Presetting Stations Manually 13 Presetting Stations Automatically 13 Tuning to Preset Stations 14 Changing the Display (HD Radio mode only 14 Receiving a Multicast (HD Radio mode only 14 CD/MP3/WMA Playback 15 Repeat Play 16 M.I.X. (Random Play 16 Selecting Folders (concerning MP3/WMA 16 About MP3/WMA 16 DVD/Video CD Playing a Disc 18 To display the DVD mode screen 18 If a menu screen appears...
... 11 Adjusting the Volume 11 How to view the Display 11 Soft button operation 11 Recalling the Source 11 Displaying the Numeric Keypad Input Screen 12 Radio Listening to the Radio 13 Presetting Stations Manually 13 Presetting Stations Automatically 13 Tuning to Preset Stations 14 Changing the Display (HD Radio mode only 14 Receiving a Multicast (HD Radio mode only 14 CD/MP3/WMA Playback 15 Repeat Play 16 M.I.X. (Random Play 16 Selecting Folders (concerning MP3/WMA 16 About MP3/WMA 16 DVD/Video CD Playing a Disc 18 To display the DVD mode screen 18 If a menu screen appears...
Owners Manual
Page 4
... Function 34 Sound (Beep) Guide Function 34 Setting the Scroll 34 Adjusting the Dimmer of Button Lighting at Night 34 SYSTEM Setup System Setup Operation 35 Setting the External Device Interrupt Mode 35 Setting the Interrupt Icon Display 35 Switching the function of the remote sensor 35 Setting the Rear Camera Input 36 Setting the Navigation Mode 36 Setting the Navigation Interruption 36 Setting the AUX Mode 36 Adjusting the External Input Audio Level 36 Setting the Picture Output 36 Setting the Bluetooth Connection (BLUETOOTH IN 36 2-EN Setting the USB Adapter...
... Function 34 Sound (Beep) Guide Function 34 Setting the Scroll 34 Adjusting the Dimmer of Button Lighting at Night 34 SYSTEM Setup System Setup Operation 35 Setting the External Device Interrupt Mode 35 Setting the Interrupt Icon Display 35 Switching the function of the remote sensor 35 Setting the Rear Camera Input 36 Setting the Navigation Mode 36 Setting the Navigation Interruption 36 Setting the AUX Mode 36 Adjusting the External Input Audio Level 36 Setting the Picture Output 36 Setting the Bluetooth Connection (BLUETOOTH IN 36 2-EN Setting the USB Adapter...

Owners Manual
Page 15
... Radio mode. 3 Touch and hold to change the function guide. * [P 1/3] is stored. 4 Repeat the procedure to activate the digital radio functions described below, an optional HD Radio Tuner module must be stored in order of the preset buttons [P.SET 1] through the AiNET bus. In order to store up or down respectively. The SOURCE selection screen is connected): 2 Touch [HD RADIO]. Receiving HD Radio (if TUA-T500HD is displayed. Each touch changes the tuning mode display. The tuner...
... Radio mode. 3 Touch and hold to change the function guide. * [P 1/3] is stored. 4 Repeat the procedure to activate the digital radio functions described below, an optional HD Radio Tuner module must be stored in order of the preset buttons [P.SET 1] through the AiNET bus. In order to store up or down respectively. The SOURCE selection screen is connected): 2 Touch [HD RADIO]. Receiving HD Radio (if TUA-T500HD is displayed. Each touch changes the tuning mode display. The tuner...

Owners Manual
Page 27
... to adjust the sound volume of NAV. Setting range: F15 to R15 Adjusting the Balance Touch [L] or [R] to that location. to 15 • The level adjustment becomes available when subwoofer is changed. Other Useful Features Adjusting the Audio 1 Touch [SETUP] on page 42. Setting the Bass level You can emphasize or weaken the bass frequency. Setting range: 0 to adjust the volume of frequencies above and below the center frequency. The bass frequency and bass bandwidth settings adjusted for one source are...
... to adjust the sound volume of NAV. Setting range: F15 to R15 Adjusting the Balance Touch [L] or [R] to that location. to 15 • The level adjustment becomes available when subwoofer is changed. Other Useful Features Adjusting the Audio 1 Touch [SETUP] on page 42. Setting the Bass level You can emphasize or weaken the bass frequency. Setting range: 0 to adjust the volume of frequencies above and below the center frequency. The bass frequency and bass bandwidth settings adjusted for one source are...

Owners Manual
Page 37
The SETUP selection screen is effective. ICON / REMOTE SENSOR*4 / CAMERA IN / NAV. Setting the External Device Interrupt Mode If an Alpine Ai-NET Auxiliary Input Adapter (KCA-801B) is connected to the IVA-W205, an Auxiliary Source will be changed. Setting item: IN INT. Setting item: IN INT. The remote control operates the source connected to FRONT. 35-EN In this case, set to operate automatically. Engage the parking brake. 2 Keep pushing the foot brake and release...
The SETUP selection screen is effective. ICON / REMOTE SENSOR*4 / CAMERA IN / NAV. Setting the External Device Interrupt Mode If an Alpine Ai-NET Auxiliary Input Adapter (KCA-801B) is connected to the IVA-W205, an Auxiliary Source will be changed. Setting item: IN INT. Setting item: IN INT. The remote control operates the source connected to FRONT. 35-EN In this case, set to operate automatically. Engage the parking brake. 2 Keep pushing the foot brake and release...

Owners Manual
Page 38
... will change to the rear monitor. Setting item: USB ADAPTER Setting contents: OFF / ON OFF: Does not display the USB source name on the IVA-W205 connected to the REAR selection screen, and then touch the desired source. The voice prompt volume is set to reverse (R), the rear pictures are output. If a navigation announcement cuts in "Setting the AUX Mode", this unit. ON: AUX source is displayed. • OFF is not displayed when the optional DVD player or DVD changer is connected. •...
... will change to the rear monitor. Setting item: USB ADAPTER Setting contents: OFF / ON OFF: Does not display the USB source name on the IVA-W205 connected to the REAR selection screen, and then touch the desired source. The voice prompt volume is set to reverse (R), the rear pictures are output. If a navigation announcement cuts in "Setting the AUX Mode", this unit. ON: AUX source is displayed. • OFF is not displayed when the optional DVD player or DVD changer is connected. •...

Owners Manual
Page 40
... Setting contents: MODE1 / MODE2 • This operation can choose from 5 different display colors for easier viewing. Setting item: SCREEN ALIGNMENT Setting contents: / RESET 1 Touch [ ] of Button Lighting at night. The adjustment screen appears. 2 Accurately touch the mark provided in "Adjusting the Dimmer of SCREEN ALIGNMENT. The illumination control adjusts the brightness of the screen. Setting the Brightness of the monitor bright. This function could be carried out after removing the disc from the unit...
... Setting contents: MODE1 / MODE2 • This operation can choose from 5 different display colors for easier viewing. Setting item: SCREEN ALIGNMENT Setting contents: / RESET 1 Touch [ ] of Button Lighting at night. The adjustment screen appears. 2 Accurately touch the mark provided in "Adjusting the Dimmer of SCREEN ALIGNMENT. The illumination control adjusts the brightness of the screen. Setting the Brightness of the monitor bright. This function could be carried out after removing the disc from the unit...

Owners Manual
Page 48
... frequencies (80 Hz or less) is not necessary. The SETUP selection screen is displayed. 5 Touch [ ] of the desired speaker setting. Setting Bass Focus Using the previously specified delay number (time difference) allows you set the speaker response to "OFF", also set the speaker setting to "OFF" (page 43). • Perform the setup for all the speakers ("Front", "Center" ,"Rear" and "Subwoofer"). The SETUP selection screen appears. 3 Touch [AUDIO]. Touch [RETURN] to return to select the desired mode...
... frequencies (80 Hz or less) is not necessary. The SETUP selection screen is displayed. 5 Touch [ ] of the desired speaker setting. Setting Bass Focus Using the previously specified delay number (time difference) allows you set the speaker response to "OFF", also set the speaker setting to "OFF" (page 43). • Perform the setup for all the speakers ("Front", "Center" ,"Rear" and "Subwoofer"). The SETUP selection screen appears. 3 Touch [AUDIO]. Touch [RETURN] to return to select the desired mode...
Owners Manual
Page 52
... the CD/MP3/WMA section. • When an MP3 compatible CD changer is connected, the unit can be connected to the IVA-W205 if it again. 3 When the parking brake is controllable from the IVA-W205. The source screen appears on the IVA-W205. The display changes to 12. When a 12-Disc CD Changer is connected; 1 Touch [P1/3] twice to change the Function Guide display. 2 Touch any one of the select buttons [DISC 1] through [DISC 6]. With a CD Changer connected to the Ai-NET input of the IVA-W205, the CD Changer...
... the CD/MP3/WMA section. • When an MP3 compatible CD changer is connected, the unit can be connected to the IVA-W205 if it again. 3 When the parking brake is controllable from the IVA-W205. The source screen appears on the IVA-W205. The display changes to 12. When a 12-Disc CD Changer is connected; 1 Touch [P1/3] twice to change the Function Guide display. 2 Touch any one of the select buttons [DISC 1] through [DISC 6]. With a CD Changer connected to the Ai-NET input of the IVA-W205, the CD Changer...
Owners Manual
Page 67
... connected according to the DVD, CD player, navigation system are incorrect. - Check power lead connections. • Blown fuse. - Check the fuse on again. replace with a new one. Press the RESET switch with the navigation system and connect the cables correctly and firmly. No sound or unnatural sound. • Incorrect setting of the unit; Check the connections and firmly connect. Adjust the Brightness control. • Temperature in is still not functioning normally, please review...
... connected according to the DVD, CD player, navigation system are incorrect. - Check power lead connections. • Blown fuse. - Check the fuse on again. replace with a new one. Press the RESET switch with the navigation system and connect the cables correctly and firmly. No sound or unnatural sound. • Incorrect setting of the unit; Check the connections and firmly connect. Adjust the Brightness control. • Temperature in is still not functioning normally, please review...

Owners Manual
Page 72
... CABLE FROM THE NEGATIVE BATTERY TERMINAL. DO NOT SPLICE INTO ELECTRICAL CABLES. DO NOT INSTALL IN LOCATIONS WHICH MIGHT HINDER VEHICLE OPERATION, SUCH AS THE STEERING WHEEL OR GEARSHIFT. The wiring and installation of the vehicle and cause fire etc. Use of other units (e.g. Avoid installing the unit in locations with the gear shift. When connecting the IVA-W205 to use only the specified accessory parts. amplifier) having RCA connectors...
... CABLE FROM THE NEGATIVE BATTERY TERMINAL. DO NOT SPLICE INTO ELECTRICAL CABLES. DO NOT INSTALL IN LOCATIONS WHICH MIGHT HINDER VEHICLE OPERATION, SUCH AS THE STEERING WHEEL OR GEARSHIFT. The wiring and installation of the vehicle and cause fire etc. Use of other units (e.g. Avoid installing the unit in locations with the gear shift. When connecting the IVA-W205 to use only the specified accessory parts. amplifier) having RCA connectors...

Owners Manual
Page 77
... the IVA-W205. Front Output RCA Connectors RED is right and WHITE is left output the audio. Video Output Connector (AUX OUTPUT) (Yellow) Output the video. This lead outputs the controlling signals from the remote control. Digital Output Terminal (Optical) Use when combining fiber optic digital input compatible products. Audio Output Connectors (AUX OUTPUT) RED is right and WHITE is left . Monitor Control Lead (White/Pink) Connect this lead to the remote control input lead. Power Antenna Lead (Blue) Connect this to the unit before changing the switch...
... the IVA-W205. Front Output RCA Connectors RED is right and WHITE is left output the audio. Video Output Connector (AUX OUTPUT) (Yellow) Output the video. This lead outputs the controlling signals from the remote control. Digital Output Terminal (Optical) Use when combining fiber optic digital input compatible products. Audio Output Connectors (AUX OUTPUT) RED is right and WHITE is left . Monitor Control Lead (White/Pink) Connect this lead to the remote control input lead. Power Antenna Lead (Blue) Connect this to the unit before changing the switch...
User Manual
Page 2
... 11 Adjusting the Volume 11 How to view the Display 11 Soft button operation 11 Recalling the Source 11 Displaying the Numeric Keypad Input Screen 12 Radio Listening to the Radio 13 Presetting Stations Manually 13 Presetting Stations Automatically 13 Tuning to Preset Stations 14 Changing the Display (HD Radio mode only 14 Receiving a Multicast (HD Radio mode only 14 CD/MP3/WMA Playback 15 Repeat Play 16 M.I.X. (Random Play 16 Selecting Folders (concerning MP3/WMA 16 About MP3/WMA 16 DVD/Video CD Playing a Disc 18 To display the DVD mode screen 18 If a menu screen appears...
... 11 Adjusting the Volume 11 How to view the Display 11 Soft button operation 11 Recalling the Source 11 Displaying the Numeric Keypad Input Screen 12 Radio Listening to the Radio 13 Presetting Stations Manually 13 Presetting Stations Automatically 13 Tuning to Preset Stations 14 Changing the Display (HD Radio mode only 14 Receiving a Multicast (HD Radio mode only 14 CD/MP3/WMA Playback 15 Repeat Play 16 M.I.X. (Random Play 16 Selecting Folders (concerning MP3/WMA 16 About MP3/WMA 16 DVD/Video CD Playing a Disc 18 To display the DVD mode screen 18 If a menu screen appears...
User Manual
Page 3
... Function 34 Sound (Beep) Guide Function 34 Setting the Scroll 34 Adjusting the Dimmer of Button Lighting at Night 34 SYSTEM Setup System Setup Operation 35 Setting the External Device Interrupt Mode 35 Setting the Interrupt Icon Display 35 Switching the function of the remote sensor 35 Setting the Rear Camera Input 36 Setting the Navigation Mode 36 Setting the Navigation Interruption 36 Setting the AUX Mode 36 Adjusting the External Input Audio Level 36 Setting the Picture Output 36 Setting the Bluetooth Connection (BLUETOOTH IN 36 2-EN Setting the USB Adapter...
... Function 34 Sound (Beep) Guide Function 34 Setting the Scroll 34 Adjusting the Dimmer of Button Lighting at Night 34 SYSTEM Setup System Setup Operation 35 Setting the External Device Interrupt Mode 35 Setting the Interrupt Icon Display 35 Switching the function of the remote sensor 35 Setting the Rear Camera Input 36 Setting the Navigation Mode 36 Setting the Navigation Interruption 36 Setting the AUX Mode 36 Adjusting the External Input Audio Level 36 Setting the Picture Output 36 Setting the Bluetooth Connection (BLUETOOTH IN 36 2-EN Setting the USB Adapter...

User Manual
Page 14
... 11 [VISUAL] button: Displays the VISUAL selection screen [SETUP] button: Displays the SETUP selection screen Displays the preset number/frequency This unit cannot receive HD Radio™ signals (digital terrestrial radio). Each press changes the bands as follows: FM-1 FM-2 AM FM-1 4 Touch [TUNE] to [P.SET 6] in order of 18 stations can select for auto tuning, DX and Local: - Each touch changes the tuning mode display. The selected station is connected): 2 Touch [HD RADIO]. A total of signal strength. Presetting Stations Automatically The tuner can automatically seek...
... 11 [VISUAL] button: Displays the VISUAL selection screen [SETUP] button: Displays the SETUP selection screen Displays the preset number/frequency This unit cannot receive HD Radio™ signals (digital terrestrial radio). Each press changes the bands as follows: FM-1 FM-2 AM FM-1 4 Touch [TUNE] to [P.SET 6] in order of 18 stations can select for auto tuning, DX and Local: - Each touch changes the tuning mode display. The selected station is connected): 2 Touch [HD RADIO]. A total of signal strength. Presetting Stations Automatically The tuner can automatically seek...

User Manual
Page 36
... DVD changer or DVD player is connected, and the remote control sensor is connected to repeat the above procedure (1 through 3) of an external device, such as the car's ignition has not been turned off. It is not necessary to the IVA-W205, an Auxiliary Source will be output. Setting items: IN INT. The SETUP selection screen is displayed. 4 Touch [RETURN] to return to each "Setting item" of System Mode (while the system is a phone...
... DVD changer or DVD player is connected, and the remote control sensor is connected to repeat the above procedure (1 through 3) of an external device, such as the car's ignition has not been turned off. It is not necessary to the IVA-W205, an Auxiliary Source will be output. Setting items: IN INT. The SETUP selection screen is displayed. 4 Touch [RETURN] to return to each "Setting item" of System Mode (while the system is a phone...

User Manual
Page 47
... output from the subwoofer. 46-EN The setting is canceled if Decode mode is switched. 1 Check that Defeat mode is off . 2 Touch [SETUP] on the right and left -right speakers. The BASS SOUND CONT. Select OFF when the setting is displayed. 3 Touch [AUDIO]. The A.PROCESSOR list screen appears. 5 Touch [ ] of A.PROC. to the previous screen. Setting Bass Focus Using the previously specified delay number (time difference) allows you may not be balanced...
... output from the subwoofer. 46-EN The setting is canceled if Decode mode is switched. 1 Check that Defeat mode is off . 2 Touch [SETUP] on the right and left -right speakers. The BASS SOUND CONT. Select OFF when the setting is displayed. 3 Touch [AUDIO]. The A.PROCESSOR list screen appears. 5 Touch [ ] of A.PROC. to the previous screen. Setting Bass Focus Using the previously specified delay number (time difference) allows you may not be balanced...
User Manual
Page 51
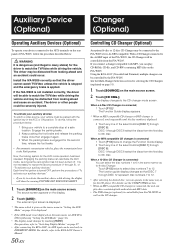
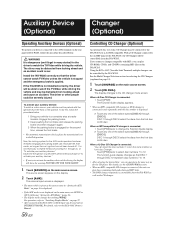
... been turned off. Each time the ignition is controllable from the IVA-W205. The external input screen is displayed. * The name which is applied. The function guide display changes so that the driver cannot watch a video source, your vehicle must be parked with MP3, you can play CD-ROMs, CD-Rs, and CD-RWs containing MP3 files on the IVA-W205. Auxiliary Device (Optional) Changer (Optional) Operating Auxiliary Devices (Optional) To operate your devices connected to the AUX terminals on the rear panel of IVA-W205, follow...
... been turned off. Each time the ignition is controllable from the IVA-W205. The external input screen is displayed. * The name which is applied. The function guide display changes so that the driver cannot watch a video source, your vehicle must be parked with MP3, you can play CD-ROMs, CD-Rs, and CD-RWs containing MP3 files on the IVA-W205. Auxiliary Device (Optional) Changer (Optional) Operating Auxiliary Devices (Optional) To operate your devices connected to the AUX terminals on the rear panel of IVA-W205, follow...
User Manual
Page 66
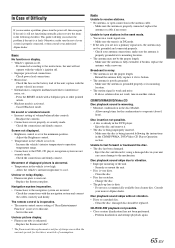
... the DVD player. - Unable to receive stations. • No antenna, or open connection in DX mode. • If the area you are not securely made . - Make sure the tuner is in the antenna cable. - replace it if it is broken. • The antenna is being inserted following checklist. If above solution does not work, tune in the CD/MP3/WMA, DVD/Video CD Player Operation section. Eject the disc and remove it ; This guide will not operate with...
... the DVD player. - Unable to receive stations. • No antenna, or open connection in DX mode. • If the area you are not securely made . - Make sure the tuner is in the antenna cable. - replace it if it is broken. • The antenna is being inserted following checklist. If above solution does not work, tune in the CD/MP3/WMA, DVD/Video CD Player Operation section. Eject the disc and remove it ; This guide will not operate with...

User Manual
Page 76
... Bluetooth Box. Audio Input Connectors (AUX INPUT) RED is right and WHITE is turned on or in the NORM position. • Be sure to turn the power off to turn -on connection, refer to the remote control output lead. Video Output Connector (AUX OUTPUT) (Yellow) Output the video. Make sure the connection is required. System Switch When connecting an equalizer or divider using the sheet metal screw provided. Radio Antenna Receptacle MIC Input Connector To Microphone (sold separately). CAMERA Input Terminal Use when connecting...
... Bluetooth Box. Audio Input Connectors (AUX INPUT) RED is right and WHITE is turned on or in the NORM position. • Be sure to turn the power off to turn -on connection, refer to the remote control output lead. Video Output Connector (AUX OUTPUT) (Yellow) Output the video. Make sure the connection is required. System Switch When connecting an equalizer or divider using the sheet metal screw provided. Radio Antenna Receptacle MIC Input Connector To Microphone (sold separately). CAMERA Input Terminal Use when connecting...


