Owners Manual
Page 20
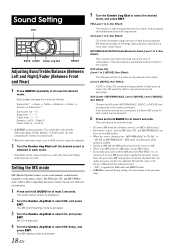
... Setup, and press ENT. This reproduces a well-balanced sound close to choose the desired mode. The FM radio, CD, and MP3/WMA/ AAC, will be selected. 6 Press and hold AUDIO for at all music sources..., set to reproduce the sound accurately. MP3/WMA/AAC/SAT/HD Radio/Bluetooth Audio (Level 1 to 3, Non Effect): This corrects information that corresponds to MX Off sets MX ...CD-DA" or "CD-DA to MP3/WMA/AAC", MX-mode switching may not match the head unit, the audio processor needs to be adjusted. 2 Turn the Center Jog Dial until the desired sound...
... Setup, and press ENT. This reproduces a well-balanced sound close to choose the desired mode. The FM radio, CD, and MP3/WMA/ AAC, will be selected. 6 Press and hold AUDIO for at all music sources..., set to reproduce the sound accurately. MP3/WMA/AAC/SAT/HD Radio/Bluetooth Audio (Level 1 to 3, Non Effect): This corrects information that corresponds to MX Off sets MX ...CD-DA" or "CD-DA to MP3/WMA/AAC", MX-mode switching may not match the head unit, the audio processor needs to be adjusted. 2 Turn the Center Jog Dial until the desired sound...
Owners Manual
Page 23
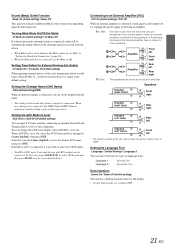
...Center Jog Dial , then press ENT. In this case, press SOURCE/ to select AUX mode and then press BAND to this setting, the head unit's internal amplifier has no output to select the desired AUX name, then press ENT. Setting Tone Defeat for the display. • To quit... is produced by the built-in amplifier. Language 1 : Language 2 : Normal Font European Font Demonstration Demo On / Demo Off (Initial setting) This unit has a Demonstration feature for External Devices (Int Audio) Int Audio On / Int Audio Off (Initial setting) When inputting external devices to select your desired...
...Center Jog Dial , then press ENT. In this case, press SOURCE/ to select AUX mode and then press BAND to this setting, the head unit's internal amplifier has no output to select the desired AUX name, then press ENT. Setting Tone Defeat for the display. • To quit... is produced by the built-in amplifier. Language 1 : Language 2 : Normal Font European Font Demonstration Demo On / Demo Off (Initial setting) This unit has a Demonstration feature for External Devices (Int Audio) Int Audio On / Int Audio Off (Initial setting) When inputting external devices to select your desired...
Owners Manual
Page 24
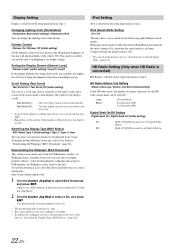
...; For search mode details, refer to decrease the illumination brightness of the unit with the head lights of the buttons. Display Setting Display is selected on the setup main menu in step 2. https://i-personalize.alpine.com/ 1 Turn the Center Jog Dial to select a file, and ...useful if you have downloaded to the unit. Dimmer Control Dimmer On / Dimmer Off (Initial setting) Set the Dimmer control to On to "Searching for Alpine products Owner's. This mode is used for Digital Radio Station. The selected file is downloaded to the unit. • The downloaded data extension...
...; For search mode details, refer to decrease the illumination brightness of the unit with the head lights of the buttons. Display Setting Display is selected on the setup main menu in step 2. https://i-personalize.alpine.com/ 1 Turn the Center Jog Dial to select a file, and ...useful if you have downloaded to the unit. Dimmer Control Dimmer On / Dimmer Off (Initial setting) Set the Dimmer control to On to "Searching for Alpine products Owner's. This mode is used for Digital Radio Station. The selected file is downloaded to the unit. • The downloaded data extension...
Owners Manual
Page 35
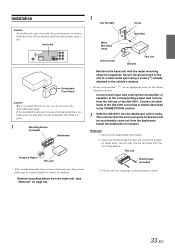
... the guides on page 33). 2 Hex Nut (M5) Screw *2 Bolt Stud Metal Mounting Strap Ground Lead *1 Chassis This unit Reinforce the head unit with the metal mounting strap (not supplied). Connect all other leads of the iDA-X001 according to remedy the problem. Removal 1. Secure ...the ground lead of the iDA-X001. This ensures that holds it in place. 1 Mounting Sleeve (Included) Dashboard Pressure Plates* This unit * If the ...
... the guides on page 33). 2 Hex Nut (M5) Screw *2 Bolt Stud Metal Mounting Strap Ground Lead *1 Chassis This unit Reinforce the head unit with the metal mounting strap (not supplied). Connect all other leads of the iDA-X001 according to remedy the problem. Removal 1. Secure ...the ground lead of the iDA-X001. This ensures that holds it in place. 1 Mounting Sleeve (Included) Dashboard Pressure Plates* This unit * If the ...


