
Owners Manual
Page 1
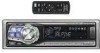
... MARKETING, INC. 1-1-8 Nishi Gotanda, Shinagawa-ku, Tokyo 141-0031, Japan Phone 03-5496-8231 ALPINE ELECTRONICS OF AMERICA, INC. 19145 Gramercy Place, Torrance, California 90501, U.S.A. ./ ALPINE® EN FM/AM CD Receiver CDA-9831 FR CDA-9830 Mx MP3 • Plays Windows w MediaTM • (ft dogs DIGITAL AUDIO f TEXT XAA ))) READY ES • OWNER'S MANUAL Please...
... MARKETING, INC. 1-1-8 Nishi Gotanda, Shinagawa-ku, Tokyo 141-0031, Japan Phone 03-5496-8231 ALPINE ELECTRONICS OF AMERICA, INC. 19145 Gramercy Place, Torrance, California 90501, U.S.A. ./ ALPINE® EN FM/AM CD Receiver CDA-9831 FR CDA-9830 Mx MP3 • Plays Windows w MediaTM • (ft dogs DIGITAL AUDIO f TEXT XAA ))) READY ES • OWNER'S MANUAL Please...

Owners Manual
Page 2
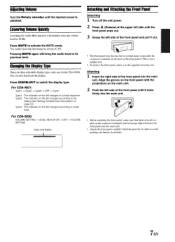
... CDA-9831/CDA-9830. • Changeur CD pour CDA-9831/CDA- 9830. • Cambiador de CD para CDA-9831/ CDA-9830. CHA-1214 • CD changer for CDA-9831/CDA-9830. • Changeur CD pour CDA-9831/CDA- 9830. • Cambiador de CD para CDA-9831/ CDA-9830. Le modele CHA-S634 est un changeur 6 disques ultra performant equipe des nouvelles fonctions M DAC, CD-R/RW PLAY BACK, MP3 PLAY BACK et CD TEXT. CHM-S630 Alpine CD...
... CDA-9831/CDA-9830. • Changeur CD pour CDA-9831/CDA- 9830. • Cambiador de CD para CDA-9831/ CDA-9830. CHA-1214 • CD changer for CDA-9831/CDA-9830. • Changeur CD pour CDA-9831/CDA- 9830. • Cambiador de CD para CDA-9831/ CDA-9830. Le modele CHA-S634 est un changeur 6 disques ultra performant equipe des nouvelles fonctions M DAC, CD-R/RW PLAY BACK, MP3 PLAY BACK et CD TEXT. CHM-S630 Alpine CD...
Owners Manual
Page 3
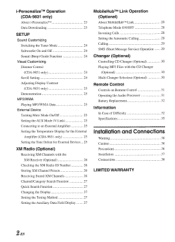
...Radio 8 Manual Storing of Station Presets 8 Automatic Memory of Station Presets 8 Tuning to Preset Stations 8 Station Title Search Function 9 Frequency Search Function 9 CD/MP3/VVMA Playback 9 Playing back a Playlist 10 Repeat Play 11 M.I.X. (Random Play) 11 Scanning Programs 12 Searching from CD...Off 20 Setting an Amplifier Link (CDA-9831 only) 21 Displaying the External Amplifier Information (CDA-9831 only) 21 Setting the Multicolor Illumination (CDA-9831 only) 22 Changing the Lighting Color of All the Buttons (CDA-9831 only) 22 Verifying the Software ...
...Radio 8 Manual Storing of Station Presets 8 Automatic Memory of Station Presets 8 Tuning to Preset Stations 8 Station Title Search Function 9 Frequency Search Function 9 CD/MP3/VVMA Playback 9 Playing back a Playlist 10 Repeat Play 11 M.I.X. (Random Play) 11 Scanning Programs 12 Searching from CD...Off 20 Setting an Amplifier Link (CDA-9831 only) 21 Displaying the External Amplifier Information (CDA-9831 only) 21 Setting the Multicolor Illumination (CDA-9831 only) 22 Changing the Lighting Color of All the Buttons (CDA-9831 only) 22 Verifying the Software ...
Owners Manual
Page 4
...25 Setting the Temperature Display for the External Amplifier (CDA-9831 only) 25 Setting the Tone Defeat for External Devices 25 XM Radio (Optional) Receiving XM Channels with the XM Receiver (Optional) 26 Checking the XM Radio ID Number 26 Storing XM Channel Presets 26 Receiving...28 Setting the Automatic Calling 28 Calling 29 SMS (Short Message Service) Operation 29 Changer (Optional) Controlling CD Changer (Optional) 30 Playing MP3 Files with the CD Changer (Optional) 30 Multi-Changer Selection (Optional) 30 Remote Control Controls on Remote Control 31 Operating ...
...25 Setting the Temperature Display for the External Amplifier (CDA-9831 only) 25 Setting the Tone Defeat for External Devices 25 XM Radio (Optional) Receiving XM Channels with the XM Receiver (Optional) 26 Checking the XM Radio ID Number 26 Storing XM Channel Presets 26 Receiving...28 Setting the Automatic Calling 28 Calling 29 SMS (Short Message Service) Operation 29 Changer (Optional) Controlling CD Changer (Optional) 30 Playing MP3 Files with the CD Changer (Optional) 30 Multi-Changer Selection (Optional) 30 Remote Control Controls on Remote Control 31 Operating ...

Owners Manual
Page 6
... and water • Excessive dust • Excessive vibrations Correct Handling Do not drop the disc while handling. Installation Location Make sure the CDA-9831/CDA-9830 will influence the thickness and/or diameter of the disc. Do not write on the surface. Using such accessories can cause the disc...on the surface of the disc could inhibit proper loading of the product. Do not attempt to prevent the CD from the center of standard specifications and may result in Alpine CD players. New Discs As a protective measure to insert a disc into the unit when the unit power ...
... and water • Excessive dust • Excessive vibrations Correct Handling Do not drop the disc while handling. Installation Location Make sure the CDA-9831/CDA-9830 will influence the thickness and/or diameter of the disc. Do not write on the surface. Using such accessories can cause the disc...on the surface of the disc could inhibit proper loading of the product. Do not attempt to prevent the CD from the center of standard specifications and may result in Alpine CD players. New Discs As a protective measure to insert a disc into the unit when the unit power ...

Owners Manual
Page 7
About media that there are displayed as upper case on audio devices. You can play CD-Rs/CD-RWs containing MP3/WMA formatted audio files. • Some of CDA-9830. • All English lower case characters are no bumps around the disc. • Do not use unspecified compact discs, correct performance cannot be difficult...
About media that there are displayed as upper case on audio devices. You can play CD-Rs/CD-RWs containing MP3/WMA formatted audio files. • Some of CDA-9830. • All English lower case characters are no bumps around the disc. • Do not use unspecified compact discs, correct performance cannot be difficult...
Owners Manual
Page 9
...the audio back to its sides to audio level. Changing the Display Type There are three selectable display types (only one for the CDA-9830). For CDA-9831: Typel Type2 Type3 OFF -e Type1 Typel : The indicator on the left side of the front panel until it in the supplied... by mistake. 7EN Lowering Volume Quickly Activating the Audio Mute function will decrease by 20 dB. Type3 The indicator on page 22). For CDA-9830: VOLUME SETTING LEVEL INDICATOR OFF VOLUME SETTING Audio Level Display nnnnnnnnnminnunnunnuunm Detaching and Attaching the Front Panel Detaching 1 Turn off the unit ...
...the audio back to its sides to audio level. Changing the Display Type There are three selectable display types (only one for the CDA-9830). For CDA-9831: Typel Type2 Type3 OFF -e Type1 Typel : The indicator on the left side of the front panel until it in the supplied... by mistake. 7EN Lowering Volume Quickly Activating the Audio Mute function will decrease by 20 dB. Type3 The indicator on page 22). For CDA-9830: VOLUME SETTING LEVEL INDICATOR OFF VOLUME SETTING Audio Level Display nnnnnnnnnminnunnunnuunm Detaching and Attaching the Front Panel Detaching 1 Turn off the unit ...

Owners Manual
Page 12
...source, selecting thefile by holding • or V, the playlists move up /down , etc.), can be carried out on the computer. • The CD-player can play discs containing audio data, MP3 data and WMA data. • A WMA formatfile that is protected by DRM (Digital Rights Management) ...on how to create a playlist. • Playlist playback applies only to the Amplifier Link, the temperature is connected to the selected playlist. CDA-9831 P-LIST mO3 Q05 File number display 160 kbps Bit rate display m01t2031 Folder number display *When the unit is automatically indicated. Sampling rate ...
...source, selecting thefile by holding • or V, the playlists move up /down , etc.), can be carried out on the computer. • The CD-player can play discs containing audio data, MP3 data and WMA data. • A WMA formatfile that is protected by DRM (Digital Rights Management) ...on how to create a playlist. • Playlist playback applies only to the Amplifier Link, the temperature is connected to the selected playlist. CDA-9831 P-LIST mO3 Q05 File number display 160 kbps Bit rate display m01t2031 Folder number display *When the unit is automatically indicated. Sampling rate ...

Owners Manual
Page 15
... contents. For non-supported characters, "NO SUPPORT" ("NO SUPRT" for CDA-9830) is 8 (including the root directory). A disc can play back... can hold up to 30 characters (including the extension). Formats supported This device supports CD-ROM XA, Mixed Mode CD, Enhanced CD (CD-Extra) and Multi-Session. The playback order of the folders and files is as...data. The root folder contains allfolders andfiles. 13 -EN Files with no extension cannot be played back by using CD-R writing software. However, sometimes the file names, folder names, etc., are letters A-Z (all caps), numbers ...
... contents. For non-supported characters, "NO SUPPORT" ("NO SUPRT" for CDA-9830) is 8 (including the root directory). A disc can play back... can hold up to 30 characters (including the extension). Formats supported This device supports CD-ROM XA, Mixed Mode CD, Enhanced CD (CD-Extra) and Multi-Session. The playback order of the folders and files is as...data. The root folder contains allfolders andfiles. 13 -EN Files with no extension cannot be played back by using CD-R writing software. However, sometimes the file names, folder names, etc., are letters A-Z (all caps), numbers ...
Owners Manual
Page 17
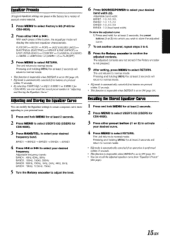
...DEFEAT is automatically canceled if no buttons are pressed within 15 seconds. • By selecting USER'S EQ 1 or EQ 2 (USERS I or USERS 2 for CDA-9830), you wish to store the adjusted curve. 7 To set to select your desired frequency band. Adjustable band width: BAND1 : 1.0, 2.0, 3.0, BAND2 :... 1.0, 1.5, 2.0 BAND3 : 1.0, 2.0, 3.0 BAND4 : 1.0 (fixed band width) To store the adjusted curve 1) Press and hold, for CDA-9830). 3 Press either IN or ►►l. Adjusting and Storing the Equalizer Curve You can modify the Equalizer settings to create a response curve more ...
...DEFEAT is automatically canceled if no buttons are pressed within 15 seconds. • By selecting USER'S EQ 1 or EQ 2 (USERS I or USERS 2 for CDA-9830), you wish to store the adjusted curve. 7 To set to select your desired frequency band. Adjustable band width: BAND1 : 1.0, 2.0, 3.0, BAND2 :... 1.0, 1.5, 2.0 BAND3 : 1.0, 2.0, 3.0 BAND4 : 1.0 (fixed band width) To store the adjusted curve 1) Press and hold, for CDA-9830). 3 Press either IN or ►►l. Adjusting and Storing the Equalizer Curve You can modify the Equalizer settings to create a response curve more ...

Owners Manual
Page 18
... the speakers closest to the farthest speaker and the other speakers. Bass Focus mode Time Correction mode 4 Press BAND/TEL. JD- To correct this, the CDA-9831/CDA-9830 is 1.75 m (68-7/8"). Here we calculate the time correction value for optimum staging. listening position : 2.25 m (88-9/16") Front left speaker ...343 m/s (765 mph) at the same time as the distance to select the Bass Focus mode. to select the speakers to be made for CDA-9830). 3 Press I-41-41 or ►►I to the farthest speaker. The sound is not balanced because the distance between the listening position ...
... the speakers closest to the farthest speaker and the other speakers. Bass Focus mode Time Correction mode 4 Press BAND/TEL. JD- To correct this, the CDA-9831/CDA-9830 is 1.75 m (68-7/8"). Here we calculate the time correction value for optimum staging. listening position : 2.25 m (88-9/16") Front left speaker ...343 m/s (765 mph) at the same time as the distance to select the Bass Focus mode. to select the speakers to be made for CDA-9830). 3 Press I-41-41 or ►►I to the farthest speaker. The sound is not balanced because the distance between the listening position ...
Owners Manual
Page 20
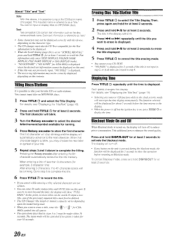
... Press BAND/TEL. F1 --> F- The unit returns to 3): CD mode processes a large amount of this data to reproduce the sound accurately. MX takes advantage of data during playback. R -s Rear - CDA-9831 Front - The FM radio, CD, and MP3, will return to normal mode. • Time ...Correction mode is automatically canceled if no MX modefor AM radio. • If an audio processor with a lot of road noise...
... Press BAND/TEL. F1 --> F- The unit returns to 3): CD mode processes a large amount of this data to reproduce the sound accurately. MX takes advantage of data during playback. R -s Rear - CDA-9831 Front - The FM radio, CD, and MP3, will return to normal mode. • Time ...Correction mode is automatically canceled if no MX modefor AM radio. • If an audio processor with a lot of road noise...

Owners Manual
Page 21
...disc name and the track name, will be displayed when the CD contains no ID3 tag/WMA tag information. The display in Radio mode: FREQUENCY -› CLOCK TITLE EXTERNAL AMPLIFIER INFORMATION*5 FREQUENCY The display in CD mode: TRACK NO./ELAPSED TIME --> TRACK NO./CLOCK TEXT (DISC... are constantly it. being displayed Album Name* being displayed Track Name* being displayed TMUoNdEeR - - pressing 1.4.41 or INN, the triangle - CDA-9831 These indicators are lit according to "Displaying the External Amplifier Information" (page 21). FILE NO./CLOCK FOLDER NAME*' FILE NAME --> TRACK NAME*,...
...disc name and the track name, will be displayed when the CD contains no ID3 tag/WMA tag information. The display in Radio mode: FREQUENCY -› CLOCK TITLE EXTERNAL AMPLIFIER INFORMATION*5 FREQUENCY The display in CD mode: TRACK NO./ELAPSED TIME --> TRACK NO./CLOCK TEXT (DISC... are constantly it. being displayed Album Name* being displayed Track Name* being displayed TMUoNdEeR - - pressing 1.4.41 or INN, the triangle - CDA-9831 These indicators are lit according to "Displaying the External Amplifier Information" (page 21). FILE NO./CLOCK FOLDER NAME*' FILE NAME --> TRACK NAME*,...
Owners Manual
Page 22
...the 8th character automatically stores the title into all spaces. • The operations described in step 4. When entering a title of your favorite CD's or radio stations. The title in the clock priority mode will blink. 3 Press IN or NI repeatedly until the time is turned on, the display...SUPRT" for at least 3 seconds to as "text." • Some characters may choose the next letter or symbol of less than 8 characters (for CDA- 9830) symbol into memory. You cannot input or display titles on MP3/WMA discs. 1 (9 Press TITLE and select the Title Display. When that ...
...the 8th character automatically stores the title into all spaces. • The operations described in step 4. When entering a title of your favorite CD's or radio stations. The title in the clock priority mode will blink. 3 Press IN or NI repeatedly until the time is turned on, the display...SUPRT" for at least 3 seconds to as "text." • Some characters may choose the next letter or symbol of less than 8 characters (for CDA- 9830) symbol into memory. You cannot input or display titles on MP3/WMA discs. 1 (9 Press TITLE and select the Title Display. When that ...
Owners Manual
Page 23
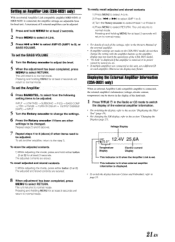
... be adjusted. 1 Press and hold either button (1 or 2). The unit returns to select RETURN. Displaying the External Amplifier Information (CDA-9831 only) When an external Amplifier Link compatible amplifier is connected, the amplifier settings are adjustable from the following setting items to select RETURN...are connected to be adjusted. A maximum of 8 external amplifiers can be adjusted. The unit returns to be shown in the Radio or CD mode to switch the display of the external amplifier information. • For switching the display, refer to the section "Displaying ...
... be adjusted. 1 Press and hold either button (1 or 2). The unit returns to select RETURN. Displaying the External Amplifier Information (CDA-9831 only) When an external Amplifier Link compatible amplifier is connected, the amplifier settings are adjustable from the following setting items to select RETURN...are connected to be adjusted. A maximum of 8 external amplifiers can be adjusted. The unit returns to be shown in the Radio or CD mode to switch the display of the external amplifier information. • For switching the display, refer to the section "Displaying ...

Owners Manual
Page 24
...return to normal mode. • "No Memory" is recalled. The unit returns to normal mode. Changing the Lighting Color of All the Buttons (CDA-9831 only) You can change the lighting color of the unit. 1 Press MENU to select Illumination. 2 Press SOURCE/POWER. Setting the Multicolor Illumination... (CDA-9831 only) You can change the lighting color of the following four buttons: SOURCE/POWER, BAND/TEL, 144 and Not 1 Press MENU to select Illumination...
...return to normal mode. • "No Memory" is recalled. The unit returns to normal mode. Changing the Lighting Color of All the Buttons (CDA-9831 only) You can change the lighting color of the unit. 1 Press MENU to select Illumination. 2 Press SOURCE/POWER. Setting the Multicolor Illumination... (CDA-9831 only) You can change the lighting color of the following four buttons: SOURCE/POWER, BAND/TEL, 144 and Not 1 Press MENU to select Illumination...
Owners Manual
Page 25
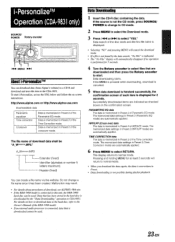
...in Preset 2 of HPF/LPF mode. Pressing and holding MENU for 2 seconds. Do not change to CD mode. 2 Press MENU to select the Download mode. 3 Press IN or to CDA-9831. To start . The file name of the disc starts and the first file name is displayed. &#... playlist playback. Data downloading starts. Data that are automatically applied. iPersonaIizeTM Operation (CDA-9831 only) SOURCE/ POWER Rotary encoder iIJa 144 MENU NI About I-PersonalizeTM You can download data (from Alpine's website) to a CD-R and download and store the data to normal mode. Data is not the...
...in Preset 2 of HPF/LPF mode. Pressing and holding MENU for 2 seconds. Do not change to CD mode. 2 Press MENU to select the Download mode. 3 Press IN or to CDA-9831. To start . The file name of the disc starts and the first file name is displayed. &#... playlist playback. Data downloading starts. Data that are automatically applied. iPersonaIizeTM Operation (CDA-9831 only) SOURCE/ POWER Rotary encoder iIJa 144 MENU NI About I-PersonalizeTM You can download data (from Alpine's website) to a CD-R and download and store the data to normal mode. Data is not the...
Owners Manual
Page 26
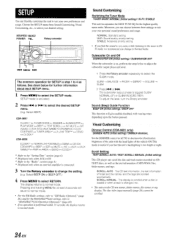
...to select your own personal sound preferences and usage. Select BEEP) CDA-9831 CLOCK.' Visual Customizing Dimmer Control (CDA-9831 only) DIMMER AUTO (Initial setting) / DIMMER MANUAL Set the .../ POWER TEL. To adjust the level, turn the Rotary encoder. SCROLL AUTO : The CD text information, the text information of MP3/WMA files, folder names, and tags. Select...) / BEEP OFF This function will return to normal mode. • For the XM Radio settings, refer to "XM Radio (Optional)" (page 26), andfor the MobileHubTmLink settings, refer to "MobileHubTMLink Operation (Optional)" ...
...to select your own personal sound preferences and usage. Select BEEP) CDA-9831 CLOCK.' Visual Customizing Dimmer Control (CDA-9831 only) DIMMER AUTO (Initial setting) / DIMMER MANUAL Set the .../ POWER TEL. To adjust the level, turn the Rotary encoder. SCROLL AUTO : The CD text information, the text information of MP3/WMA files, folder names, and tags. Select...) / BEEP OFF This function will return to normal mode. • For the XM Radio settings, refer to "XM Radio (Optional)" (page 26), andfor the MobileHubTmLink settings, refer to "MobileHubTMLink Operation (Optional)" ...
Owners Manual
Page 27
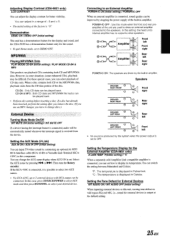
Adjusting Display Contrast (CDA-9831 only) LCD CONTRAST You can be played back. However, in amplifier. When a disc contains both CD and MP3/WMA data. CD-DA : Only CD data can adjust the display contrast for better visibility. Setting the AUX Mode (V-Link) AUXIN ON/AUXIN OFF(Initial...DEMO ON /DEMO OFF (Initial setting) This unit has a demonstration feature for the display and sound, and the CDA-9830 has a demonstration feature only for the External Amplifier (CDA-9831 only) A-LINK TEMP °F(Initial setting) / °C When a separately sold Amplifier Link compatible amplifier is possible ...
Adjusting Display Contrast (CDA-9831 only) LCD CONTRAST You can be played back. However, in amplifier. When a disc contains both CD and MP3/WMA data. CD-DA : Only CD data can adjust the display contrast for better visibility. Setting the AUX Mode (V-Link) AUXIN ON/AUXIN OFF(Initial...DEMO ON /DEMO OFF (Initial setting) This unit has a demonstration feature for the display and sound, and the CDA-9830 has a demonstration feature only for the External Amplifier (CDA-9831 only) A-LINK TEMP °F(Initial setting) / °C When a separately sold Amplifier Link compatible amplifier is possible ...

Owners Manual
Page 28
... become nonfunctional . 2 To cancel the ID number display, set the channel to the CDA-9831/CDA-9830. An optional XM Satellite Radio Receiver (TUA-T020XM) and an optional XM antenna may be controllable from the CDA-9831/CDA-9830. When using the optional remote control (RUE-4190), an XM Channel can be ...entertainment, with the new one of the preset buttons (1 through 6) Receiving XM Channels with the XM Receiver (Optional) XM Satellite Radio* is the next generation of the CDA-9831/CDA-9830 in the following way. 1 While receiving XM1, XM2 or XM3, press 1-41 or HI to select XM mode. 2...
... become nonfunctional . 2 To cancel the ID number display, set the channel to the CDA-9831/CDA-9830. An optional XM Satellite Radio Receiver (TUA-T020XM) and an optional XM antenna may be controllable from the CDA-9831/CDA-9830. When using the optional remote control (RUE-4190), an XM Channel can be ...entertainment, with the new one of the preset buttons (1 through 6) Receiving XM Channels with the XM Receiver (Optional) XM Satellite Radio* is the next generation of the CDA-9831/CDA-9830 in the following way. 1 While receiving XM1, XM2 or XM3, press 1-41 or HI to select XM mode. 2...


