
User Manual
Page 3
... surface. Warnings • Do not use liquid cleaners or aerosol cleaners. The overall system load must not be seriously damaged. • Slots and openings are not sure of the type of power available, consult your safety and comfort Safety instructions Read these instructions carefully. The openings should be blocked by plugging in too many devices. If you are provided for...
... surface. Warnings • Do not use liquid cleaners or aerosol cleaners. The overall system load must not be seriously damaged. • Slots and openings are not sure of the type of power available, consult your safety and comfort Safety instructions Read these instructions carefully. The openings should be blocked by plugging in too many devices. If you are provided for...
User Manual
Page 4
.... • This product's AC adapter is equipped with the supplied power supply cord set , make sure that are covered by the operating instructions, since improper adjustment of this product. • Use the product only with a three-wire grounded plug. If you to service this product from unexpected noise produced by a qualified technician to restore the product to replace the power cord set . The plug only fits in electric...
.... • This product's AC adapter is equipped with the supplied power supply cord set , make sure that are covered by the operating instructions, since improper adjustment of this product. • Use the product only with a three-wire grounded plug. If you to service this product from unexpected noise produced by a qualified technician to restore the product to replace the power cord set . The plug only fits in electric...
User Manual
Page 5
... not in use and/or before servicing. • To avoid the remote risk of electric shock from Electrical and Electronics Equipment (WEEE) regulations, visit www.acer-group.com/public/Sustainability/sustainability01.htm. Dispose of explosion if battery is incorrectly replaced. For more information, contact the Electronic Industries Alliance at www.eiae.org. For lamp-specific disposal information...
... not in use and/or before servicing. • To avoid the remote risk of electric shock from Electrical and Electronics Equipment (WEEE) regulations, visit www.acer-group.com/public/Sustainability/sustainability01.htm. Dispose of explosion if battery is incorrectly replaced. For more information, contact the Electronic Industries Alliance at www.eiae.org. For lamp-specific disposal information...

User Manual
Page 6
... guidelines set by the U.S. Products that help customers save money, conserve energy and improve the quality of physical injury. Long work periods, bad posture, poor work habits, stress, inadequate working in front of eyestrain and headaches after prolonged use Computer users may ...a computer. Acer ENERGY STAR qualified products: • Produce less heat and reduce cooling loads, and warmer climates. • Automatically go into "display sleep" and "computer sleep" mode after 15 and 30 minute of inactivity respectively. • Wake the computer from sleep mode by reducing ...
... guidelines set by the U.S. Products that help customers save money, conserve energy and improve the quality of physical injury. Long work periods, bad posture, poor work habits, stress, inadequate working in front of eyestrain and headaches after prolonged use Computer users may ...a computer. Acer ENERGY STAR qualified products: • Produce less heat and reduce cooling loads, and warmer climates. • Automatically go into "display sleep" and "computer sleep" mode after 15 and 30 minute of inactivity respectively. • Wake the computer from sleep mode by reducing ...
User Manual
Page 7
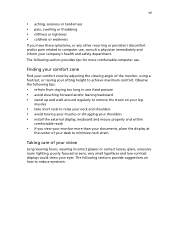
...room lighting, poorly focused screens, very small typefaces and low-contrast displays could stress your eyes. vii • aching, soreness or tenderness • pain, swelling or throbbing • stiffness or tightness • coldness or weakness If you view your monitor more comfortable computer use ... tips for more than your documents, place the display at the center of your desk to minimize neck strain Taking care of the monitor, using a footrest, or raising your shoulders • install the external display, keyboard and mouse properly and within comfortable reach • if you...
...room lighting, poorly focused screens, very small typefaces and low-contrast displays could stress your eyes. vii • aching, soreness or tenderness • pain, swelling or throbbing • stiffness or tightness • coldness or weakness If you view your monitor more comfortable computer use ... tips for more than your documents, place the display at the center of your desk to minimize neck strain Taking care of the monitor, using a footrest, or raising your shoulders • install the external display, keyboard and mouse properly and within comfortable reach • if you...
User Manual
Page 9
... optical discs 4 2 Setting up your computer 5 Arranging a comfortable work area 6 Positioning your monitor 6 Positioning your keyboard 6 Positioning your mouse 6 Connecting peripherals 7 Connecting your mouse and keyboard 7 USB interface 7 PS/2 interface 7 Connecting a monitor 7 Connecting the power cable 8 Turning on your computer 8 Turning off your computer 8 3 Upgrading your computer 9 Installation precautions 10 ESD precautions 10 Preinstallation instructions 10 Post-installation instructions 10 Opening your computer 11 To remove the computer cover...
... optical discs 4 2 Setting up your computer 5 Arranging a comfortable work area 6 Positioning your monitor 6 Positioning your keyboard 6 Positioning your mouse 6 Connecting peripherals 7 Connecting your mouse and keyboard 7 USB interface 7 PS/2 interface 7 Connecting a monitor 7 Connecting the power cable 8 Turning on your computer 8 Turning off your computer 8 3 Upgrading your computer 9 Installation precautions 10 ESD precautions 10 Preinstallation instructions 10 Post-installation instructions 10 Opening your computer 11 To remove the computer cover...

User Manual
Page 12
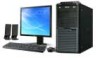
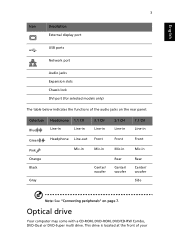
English 2 1 System tour Front panel The front panel of your computer has the following: Icon Description 5.25-inch drive bay(s) 3.5-inch drive bay(s) Microphone-in jack (front) Speaker-/line-out jack (front) USB ports OBR (One Button Recovery) button (For selected models only) Indicators Power button Rear panel The rear panel of your computer has the following: Icon Description Power supply Power cord socket Voltage selector switch PS/2 mouse port PS/2 keyboard port Serial port Parallel/printer port
English 2 1 System tour Front panel The front panel of your computer has the following: Icon Description 5.25-inch drive bay(s) 3.5-inch drive bay(s) Microphone-in jack (front) Speaker-/line-out jack (front) USB ports OBR (One Button Recovery) button (For selected models only) Indicators Power button Rear panel The rear panel of your computer has the following: Icon Description Power supply Power cord socket Voltage selector switch PS/2 mouse port PS/2 keyboard port Serial port Parallel/printer port
User Manual
Page 13
... with a CD-ROM, DVD-ROM, DVD/CD-RW Combo, DVD-Dual or DVD-Super multi drive. This drive is located at the front of the audio jacks on the rear panel: Color/use Blue Green Pink Orange Black Gray Headphone 1.1 CH Line-in Line-in Headphone Line-out Mic-in 3.1 CH Line-in Front Mic-in Center/ woofer 5.1 CH Line-in Front Mic-in Rear Center/ woofer 7.1 CH...
... with a CD-ROM, DVD-ROM, DVD/CD-RW Combo, DVD-Dual or DVD-Super multi drive. This drive is located at the front of the audio jacks on the rear panel: Color/use Blue Green Pink Orange Black Gray Headphone 1.1 CH Line-in Line-in Headphone Line-out Mic-in 3.1 CH Line-in Front Mic-in Center/ woofer 5.1 CH Line-in Front Mic-in Rear Center/ woofer 7.1 CH...
User Manual
Page 14
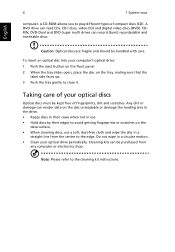
.... • Clean your computer's optical drive: 1 Push the eject button on the front panel. 2 When the tray slides open, place the disc on the data surface. • When cleaning discs, use a soft, dust-free cloth and wipe the disc in use. • Hold discs by their cases when not in a straight line from any computer or electronics shop. A CD-ROM allows you to the...
.... • Clean your computer's optical drive: 1 Push the eject button on the front panel. 2 When the tray slides open, place the disc on the data surface. • When cleaning discs, use a soft, dust-free cloth and wipe the disc in use. • Hold discs by their cases when not in a straight line from any computer or electronics shop. A CD-ROM allows you to the...

User Manual
Page 16
... your monitor Place your monitor at or slightly below eye level. Then try typing with a light touch. Positioning your mouse • The mouse should be relaxed. Placing it too high will make you turn your head while you to sit in such a way that English 6 2 Setting up your computer Arranging a comfortable work area Take note of the following when selecting a location...
... your monitor Place your monitor at or slightly below eye level. Then try typing with a light touch. Positioning your mouse • The mouse should be relaxed. Placing it too high will make you turn your head while you to sit in such a way that English 6 2 Setting up your computer Arranging a comfortable work area Take note of the following when selecting a location...
User Manual
Page 17
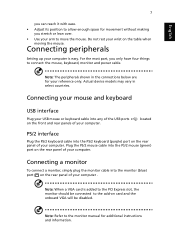
... the most part, you stretch or lean over. • Use your computer. Actual device models may vary in the connections below are for movement without making you only have four things to connect: the mouse, keyboard, monitor and power cable. Connecting a monitor To connect a monitor, simply plug the monitor cable into any of the USB ports on card and the onboard VGA will be connected to the add-on the front and rear panels of your computer...
... the most part, you stretch or lean over. • Use your computer. Actual device models may vary in the connections below are for movement without making you only have four things to connect: the mouse, keyboard, monitor and power cable. Connecting a monitor To connect a monitor, simply plug the monitor cable into any of the USB ports on card and the onboard VGA will be connected to the add-on the front and rear panels of your computer...
User Manual
Page 18
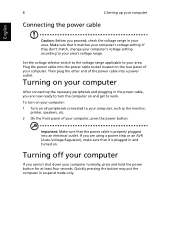
... electrical outlet. To turn the computer on all peripherals connected to your area. If they don't match, change your computer's voltage setting according to your computer, such as the monitor, printer, speakers, etc. 2 On the front panel of the power cable into the power cable socket located on . Quickly pressing the button may put the computer in suspend mode only. Then plug the other end...
... electrical outlet. To turn the computer on all peripherals connected to your area. If they don't match, change your computer's voltage setting according to your computer, such as the monitor, printer, speakers, etc. 2 On the front panel of the power cable into the power cable socket located on . Quickly pressing the button may put the computer in suspend mode only. Then plug the other end...
User Manual
Page 20
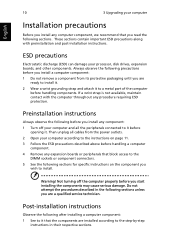
... not available, maintain contact with preinstallation and post-installation instructions. These sections contain important ESD precautions along with the computer throughout any expansion boards or peripherals that block access to it before opening it to a metal part of the computer before you are a qualified service technician. Not turning off your processor, disk drives, expansion boards, and other components. Always observe the following...
... not available, maintain contact with preinstallation and post-installation instructions. These sections contain important ESD precautions along with the computer throughout any expansion boards or peripherals that block access to it before opening it to a metal part of the computer before you are a qualified service technician. Not turning off your processor, disk drives, expansion boards, and other components. Always observe the following...
User Manual
Page 21
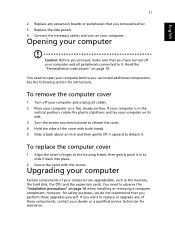
... counterclockwise to release the cover. 4 Hold the sides of the cover with the screws. However, for safety purposes, we do not recommend that you can install additional components. then gently push it . Opening your computer Caution: Before you proceed, make sure that you removed earlier. 3 Replace the side panels. 4 Connect the necessary cables and turn on page 10. Upgrading your computer Certain...
... counterclockwise to release the cover. 4 Hold the sides of the cover with the screws. However, for safety purposes, we do not recommend that you can install additional components. then gently push it . Opening your computer Caution: Before you proceed, make sure that you removed earlier. 3 Replace the side panels. 4 Connect the necessary cables and turn on page 10. Upgrading your computer Certain...
User Manual
Page 23
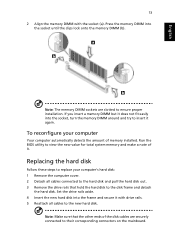
... the hard disk. Set the drive rails aside. 4 Insert the new hard disk into the frame and secure it . Run the BIOS utility to view the new value for total system memory and make a note of the disk cables are slotted to ensure proper installation. Note: The memory DIMM sockets are securely connected to their corresponding connectors on the mainboard. To reconfigure your computer's hard disk: 1 Remove the computer cover. 2 Detach all cables to the new hard disk...
... the hard disk. Set the drive rails aside. 4 Insert the new hard disk into the frame and secure it . Run the BIOS utility to view the new value for total system memory and make a note of the disk cables are slotted to ensure proper installation. Note: The memory DIMM sockets are securely connected to their corresponding connectors on the mainboard. To reconfigure your computer's hard disk: 1 Remove the computer cover. 2 Detach all cables to the new hard disk...
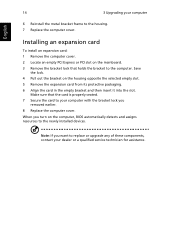
User Manual
Page 24
... service technician for assistance. Note: If you turn on the housing opposite the selected empty slot. 5 Remove the expansion card from its protective packaging. 6 Align the card in the empty bracket and then insert it into the slot. Make sure that holds the bracket to the newly installed devices. Save the lock. 4 Pull out the bracket on the computer, BIOS automatically...
... service technician for assistance. Note: If you turn on the housing opposite the selected empty slot. 5 Remove the expansion card from its protective packaging. 6 Align the card in the empty bracket and then insert it into the slot. Make sure that holds the bracket to the newly installed devices. Save the lock. 4 Pull out the bracket on the computer, BIOS automatically...
User Manual
Page 26
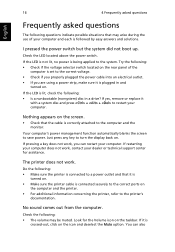
... the screen. • Check that the cable is followed by easy answers and solutions. If pressing a key does not work, you are using a power strip, make sure it with a system disc and press + + to the system. No sound comes out from the computer. I pressed the power switch but the system did not boot up. The printer does not work , contact your dealer or technical support center...
... the screen. • Check that the cable is followed by easy answers and solutions. If pressing a key does not work, you are using a power strip, make sure it with a system disc and press + + to the system. No sound comes out from the computer. I pressed the power switch but the system did not boot up. The printer does not work , contact your dealer or technical support center...
User Manual
Page 27
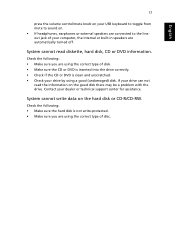
... are automatically turned off. System cannot read the information on the good disk there may be a problem with the drive. English 17 press the volume control/mute knob on your USB keyboard to toggle from mute to the lineout jack of your computer, the internal or built-in speakers are using the correct type of disc. If your dealer or technical support center for assistance...
... are automatically turned off. System cannot read the information on the good disk there may be a problem with the drive. English 17 press the volume control/mute knob on your USB keyboard to toggle from mute to the lineout jack of your computer, the internal or built-in speakers are using the correct type of disc. If your dealer or technical support center for assistance...
User Manual
Page 32
... the problem. Notice for New Zealand 1 The grant of a Telepermit for compliance with a telecommunications compliance label. "TBR 21"] for single terminal connection to the same number within the following limits for any product is compatible with all of Telecom's network services. 2 This equipment is with the equipment, discontinue use only No. 26 AWG or larger UL Listed or...
... the problem. Notice for New Zealand 1 The grant of a Telepermit for compliance with a telecommunications compliance label. "TBR 21"] for single terminal connection to the same number within the following limits for any product is compatible with all of Telecom's network services. 2 This equipment is with the equipment, discontinue use only No. 26 AWG or larger UL Listed or...

User Manual
Page 33
... the next call attempt and the beginning of another device connected to bell tinkle or noise and may not operate. There is no effect on the recorded image and does not constitute a malfunction. Laser compliance statement The CD or DVD drive used with this equipment is connected to support pulse dialing. 7 Use of pulse dialing, when this computer is produced...
... the next call attempt and the beginning of another device connected to bell tinkle or noise and may not operate. There is no effect on the recorded image and does not constitute a malfunction. Laser compliance statement The CD or DVD drive used with this equipment is connected to support pulse dialing. 7 Use of pulse dialing, when this computer is produced...


