User Manual
Page 6
... becomes extremely hot during operation. It can lead to fire. • When switching the projector off, suggest to removing the lamp assembly for ceiling mount installation. It may hurt you. Please be sure to break or drop it is unplugged. • The product will detect the life of ... best way is to become heated and deformed or even cause a fire. It could cause the object to wait for mounting the projector and ensure it . Only use acer ceiling mount kit for the fan to break on end vertically. Refer servicing only to lamp breakage, fire, electric shock or other ...
... becomes extremely hot during operation. It can lead to fire. • When switching the projector off, suggest to removing the lamp assembly for ceiling mount installation. It may hurt you. Please be sure to break or drop it is unplugged. • The product will detect the life of ... best way is to become heated and deformed or even cause a fire. It could cause the object to wait for mounting the projector and ensure it . Only use acer ceiling mount kit for the fan to break on end vertically. Refer servicing only to lamp breakage, fire, electric shock or other ...
User Manual
Page 10
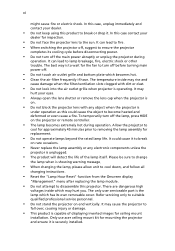
Setting 34 Audio 37 Timer 38 Language 38 Acer LAN webpage management 39 How to login in 39 Home 40 Control Panel 40 Network Setting 41 Alert Setting 41 Logout 42 Appendices 43 Troubleshooting 43 LED & Alarm Definition Listing 48 Replacing and cleaning the dust filters 49 Replacing the Lamp 50 Ceiling Mount Installation 51 Specifications 54 Compatibility modes 57 Regulations and safety notices 61
Setting 34 Audio 37 Timer 38 Language 38 Acer LAN webpage management 39 How to login in 39 Home 40 Control Panel 40 Network Setting 41 Alert Setting 41 Logout 42 Appendices 43 Troubleshooting 43 LED & Alarm Definition Listing 48 Replacing and cleaning the dust filters 49 Replacing the Lamp 50 Ceiling Mount Installation 51 Specifications 54 Compatibility modes 57 Regulations and safety notices 61

User Manual
Page 40
.... • Press to increase the amount of green in the image. • Press to increase the amount of image. • Desktop • Ceiling: Turns the image upside down for ceiling-mounted projection. Image Projection mode • Front: The factory default setting. • Projection Location • Rear: Reverses the image so you can project...
.... • Press to increase the amount of green in the image. • Press to increase the amount of image. • Desktop • Ceiling: Turns the image upside down for ceiling-mounted projection. Image Projection mode • Front: The factory default setting. • Projection Location • Rear: Reverses the image so you can project...

User Manual
Page 61
.... For tightning/loosening Tightening Screw Medium Rod Please obtain the appropriate screws for your type of ceiling. 2 Secure the ceiling rod using a ceiling mount, please refer to ceiling Long Rod Screw Type A 50 mm length/8 mm diameter - English 51 Ceiling Mount Installation If you wish to install the projector using the appropriate type of four-cylinder screws...
.... For tightning/loosening Tightening Screw Medium Rod Please obtain the appropriate screws for your type of ceiling. 2 Secure the ceiling rod using a ceiling mount, please refer to ceiling Long Rod Screw Type A 50 mm length/8 mm diameter - English 51 Ceiling Mount Installation If you wish to install the projector using the appropriate type of four-cylinder screws...

User Manual
Page 62
... Spacer - for proper heat distribution. For heat dissipation Note: It is recommended that you keep a reasonable space between the bracket and the projector to the ceiling mount bracket. For tightening/loosening Tightening Screw Screw Type A 50 mm length 08 mm diameter Large cylinder cap Allen K ey -
... Spacer - for proper heat distribution. For heat dissipation Note: It is recommended that you keep a reasonable space between the bracket and the projector to the ceiling mount bracket. For tightening/loosening Tightening Screw Screw Type A 50 mm length 08 mm diameter Large cylinder cap Allen K ey -

User Manual
Page 6
...may rise and cause damage when the filter/ventilation slots clogged with any electronic components unless the projector is operating. Only use acer ceiling mount kit for ceiling mount installation. To temporarily turn off . • Do not touch air outlet grille and bottom plate which may cause the ...not look into the air outlet grille when projector is unplugged. • The product will detect the life of displaying inverted images for mounting the projector and ensure it . Refer servicing only to turn off before disconnecting power. • Do not turn off , suggest to...
...may rise and cause damage when the filter/ventilation slots clogged with any electronic components unless the projector is operating. Only use acer ceiling mount kit for ceiling mount installation. To temporarily turn off . • Do not touch air outlet grille and bottom plate which may cause the ...not look into the air outlet grille when projector is unplugged. • The product will detect the life of displaying inverted images for mounting the projector and ensure it . Refer servicing only to turn off before disconnecting power. • Do not turn off , suggest to...
User Manual
Page 10
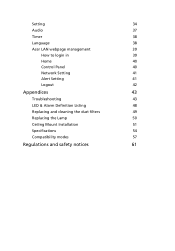
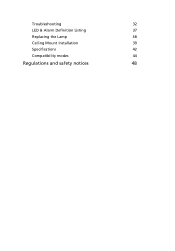
Troubleshooting 32 LED & Alarm Definition Listing 37 Replacing the Lamp 38 Ceiling Mount Installation 39 Specifications 42 Compatibility modes 44 Regulations and safety notices 48
Troubleshooting 32 LED & Alarm Definition Listing 37 Replacing the Lamp 38 Ceiling Mount Installation 39 Specifications 42 Compatibility modes 44 Regulations and safety notices 48

User Manual
Page 34
.... English 24 Tint Adjusts the color balance of red and green. • Press to increase the amount of image. • Desktop • Ceiling: Turns the image upside down for ceiling-mounted projection. Image Projection mode • Front: The factory default setting. • Projection Location • Rear: Reverses the image so you can project...
.... English 24 Tint Adjusts the color balance of red and green. • Press to increase the amount of image. • Desktop • Ceiling: Turns the image upside down for ceiling-mounted projection. Image Projection mode • Front: The factory default setting. • Projection Location • Rear: Reverses the image so you can project...

User Manual
Page 49
.... 20mm mm13 m4m9.9 8.4 mm 130 mm Note: Screws are not included. Please obtain the appropriate screws for your type of ceiling. 2 Secure the ceiling rod using a ceiling mount, please refer to ceiling Long Rod Screw Type A 50 mm length/8 mm diameter - Extension Rod Long cylinder Cap Allen Key - Attach to the steps below: 1 Drill four...
.... 20mm mm13 m4m9.9 8.4 mm 130 mm Note: Screws are not included. Please obtain the appropriate screws for your type of ceiling. 2 Secure the ceiling rod using a ceiling mount, please refer to ceiling Long Rod Screw Type A 50 mm length/8 mm diameter - Extension Rod Long cylinder Cap Allen Key - Attach to the steps below: 1 Drill four...

User Manual
Page 50
for proper heat distribution. Use two washers for extra support, if deemed necessary. 4 Attach the ceiling bracket to the ceiling mount bracket. For tightening/loosening Tightening Screw Screw Type A 50 mm length 08 mm diameter Large cylinder cap Allen Key - English 40 3 Use ...the appropriate number of screws for the projector size to attach the projector to the ceiling rod. For heat dissipation Note: It is ...
for proper heat distribution. Use two washers for extra support, if deemed necessary. 4 Attach the ceiling bracket to the ceiling mount bracket. For tightening/loosening Tightening Screw Screw Type A 50 mm length 08 mm diameter Large cylinder cap Allen Key - English 40 3 Use ...the appropriate number of screws for the projector size to attach the projector to the ceiling rod. For heat dissipation Note: It is ...


