
User Manual
Page 1
All other brands/product names are registered trademarks and Aspire is a trademark of Acer Inc. All rights reserved. Copyright Acer and the Acer logo are trademarks or registered trademarks of their respective companies. © 2005 by Acer Incorporated. Microsoft Windows and the Windows Logo are registered trademarks of Microsoft Corporation. First printing: April 2005 Intel and Pentium are registered trademarks of Intel Corp. and Acer America Corporation.
All other brands/product names are registered trademarks and Aspire is a trademark of Acer Inc. All rights reserved. Copyright Acer and the Acer logo are trademarks or registered trademarks of their respective companies. © 2005 by Acer Incorporated. Microsoft Windows and the Windows Logo are registered trademarks of Microsoft Corporation. First printing: April 2005 Intel and Pentium are registered trademarks of Intel Corp. and Acer America Corporation.

User Manual
Page 2
FCC notice This device has been tested and found to comply with the instructions, may cause harmful interference to Part 15 of the FCC Rules. This device generates, uses, and can radiate radio frequency energy and, if not installed and used in accordance with the limits for a Class B digital device pursuant to radio communications. English Notices Disposal instructions . These limits are...
FCC notice This device has been tested and found to comply with the instructions, may cause harmful interference to Part 15 of the FCC Rules. This device generates, uses, and can radiate radio frequency energy and, if not installed and used in accordance with the limits for a Class B digital device pursuant to radio communications. English Notices Disposal instructions . These limits are...
User Manual
Page 3
... le matériel brouilleur du Canada. Unplug this equipment. English reception, which can be determined by turning the device off and on, the user is encouraged to try to correct the interference by one or more of the following measures: • ... undesired operation. Operation is connected • Consult the dealer or an experienced radio/television technician for help Notice: Shielded cables All connections to other computing devices must accept any interference received, including interference that may be attached to maintain compliance with Part 15 of the FCC Rules. Use a ...
... le matériel brouilleur du Canada. Unplug this equipment. English reception, which can be determined by turning the device off and on, the user is encouraged to try to correct the interference by one or more of the following measures: • ... undesired operation. Operation is connected • Consult the dealer or an experienced radio/television technician for help Notice: Shielded cables All connections to other computing devices must accept any interference received, including interference that may be attached to maintain compliance with Part 15 of the FCC Rules. Use a ...
User Manual
Page 4
...power company. 7. The product may result in a fire or electric shock. Do not locate this product yourself, as they may touch dangerous voltage points or short-out parts that the total ampere rating of other controls may fall, causing serious damage to service this product where people will often require extensive work... power indicated on the power cord. Refer all products plugged into this product through the cabinet slots as opening or removing covers may expose you are provided for ventilation; Do not allow anything to rain or water. Do not use this product, make ...
...power company. 7. The product may result in a fire or electric shock. Do not locate this product yourself, as they may touch dangerous voltage points or short-out parts that the total ampere rating of other controls may fall, causing serious damage to service this product where people will often require extensive work... power indicated on the power cord. Refer all products plugged into this product through the cabinet slots as opening or removing covers may expose you are provided for ventilation; Do not allow anything to rain or water. Do not use this product, make ...
User Manual
Page 5
... CD or DVD drive in this computer is incorrectly replaced. Lithium battery statement CAUTION Danger of workstations regulations, do not place the model in your accessories box) for this copyright protection technology must be a detachable type: UL listed/ CSA certified, type SVT, rated 7A 125V minimum, VDE approved or its equivalent. Use only the proper type of power supply cord set (provided in...
... CD or DVD drive in this computer is incorrectly replaced. Lithium battery statement CAUTION Danger of workstations regulations, do not place the model in your accessories box) for this copyright protection technology must be a detachable type: UL listed/ CSA certified, type SVT, rated 7A 125V minimum, VDE approved or its equivalent. Use only the proper type of power supply cord set (provided in...

User Manual
Page 6
English Year 2000 compliance statement Your computer carries the "Hardware NSTL Tested Year 2000 Compliant" logo, which certifies that this model has been tested by NSTL using the YMark2000 test, and has been found to meet NSTL's standards for Year 2000 hardware compliance.
English Year 2000 compliance statement Your computer carries the "Hardware NSTL Tested Year 2000 Compliant" logo, which certifies that this model has been tested by NSTL using the YMark2000 test, and has been found to meet NSTL's standards for Year 2000 hardware compliance.
User Manual
Page 8
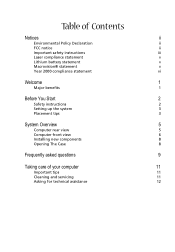
... statement v Lithium battery statement v Macrovision® statement v Year 2000 compliance statement vi Welcome 1 Major benefits 1 Before You Start 2 Safety instructions 2 Setting up the system 3 Placement tips 3 System Overview 5 Computer rear view 5 Computer front view 6 Installing new components 8 Opening The Case 8 Frequently asked questions 9 Taking care of your computer 11 Important tips 11 Cleaning and servicing 11 Asking for technical assistance 12
... statement v Lithium battery statement v Macrovision® statement v Year 2000 compliance statement vi Welcome 1 Major benefits 1 Before You Start 2 Safety instructions 2 Setting up the system 3 Placement tips 3 System Overview 5 Computer rear view 5 Computer front view 6 Installing new components 8 Opening The Case 8 Frequently asked questions 9 Taking care of your computer 11 Important tips 11 Cleaning and servicing 11 Asking for technical assistance 12
User Manual
Page 9
...® Windows® XP operating system, your Aspire offers a host of functions designed to your favorite song. • Maximize your use of a full-featured multimedia PC, offering increased productivity combined with first-class digital entertainment. You now have the convenience and flexibility of the Internet by downloading and playing exciting new multimedia files. • Enjoy your audio CDs...
...® Windows® XP operating system, your Aspire offers a host of functions designed to your favorite song. • Maximize your use of a full-featured multimedia PC, offering increased productivity combined with first-class digital entertainment. You now have the convenience and flexibility of the Internet by downloading and playing exciting new multimedia files. • Enjoy your audio CDs...
User Manual
Page 10
...a power strip is used, make sure that you start. Do not use liquid or aerosol cleaners. • Do not use your computer and the radio or television receiver. Refer servicing to qualified personnel. • Unplug your computer and monitor from the type of time. • Do not cover or ...Do not locate your computer. • Do not allow anything to rest on your computer. • Do not attempt to service your computer to a grounded (earthed) outlet. Do not disable this user guide handy at all warnings and instructions marked on the power cord. Safety instructions •...
...a power strip is used, make sure that you start. Do not use liquid or aerosol cleaners. • Do not use your computer and the radio or television receiver. Refer servicing to qualified personnel. • Unplug your computer and monitor from the type of time. • Do not cover or ...Do not locate your computer. • Do not allow anything to rest on your computer. • Do not attempt to service your computer to a grounded (earthed) outlet. Do not disable this user guide handy at all warnings and instructions marked on the power cord. Safety instructions •...
User Manual
Page 11
Setting up your new Aspire system. The box will be adjusted for maximum comfort. • Make sure your workspace. Refer to the OOBE poster for more help. Start by side in front of the monitor. Tilt and swivel the display to setting up your monitor at arm's length from that to adopt a comfortable typing position. • Choose a chair that you ever...
Setting up your new Aspire system. The box will be adjusted for maximum comfort. • Make sure your workspace. Refer to the OOBE poster for more help. Start by side in front of the monitor. Tilt and swivel the display to setting up your monitor at arm's length from that to adopt a comfortable typing position. • Choose a chair that you ever...
User Manual
Page 13
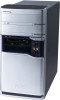
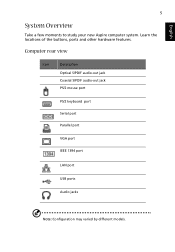
English 5 System Overview Take a few moments to study your new Aspire computer system. Computer rear view Icon Description Optical S/PDIF audio-out jack Coaxial S/PDIF audio-out jack PS/2 mouse port PS/2 keyboard port Serial port Parallel port VGA port IEEE 1394 port LAN port USB ports Audio jacks Note: Configuration may varied by different models. Learn the locations of the buttons, ports and other hardware features.
English 5 System Overview Take a few moments to study your new Aspire computer system. Computer rear view Icon Description Optical S/PDIF audio-out jack Coaxial S/PDIF audio-out jack PS/2 mouse port PS/2 keyboard port Serial port Parallel port VGA port IEEE 1394 port LAN port USB ports Audio jacks Note: Configuration may varied by different models. Learn the locations of the buttons, ports and other hardware features.
User Manual
Page 14
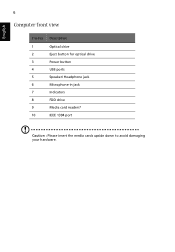
English 6 Computer front view E series Description 1 Optical drive 2 Eject button for optical drive 3 Power button 4 USB ports 5 Speaker/ Headphone jack 6 Microphone-in jack 7 Indicators 8 FDD drive 9 Media card readers* 10 IEEE 1394 port Caution : Please insert the media cards upside down to avoid damaging your hardware.
English 6 Computer front view E series Description 1 Optical drive 2 Eject button for optical drive 3 Power button 4 USB ports 5 Speaker/ Headphone jack 6 Microphone-in jack 7 Indicators 8 FDD drive 9 Media card readers* 10 IEEE 1394 port Caution : Please insert the media cards upside down to avoid damaging your hardware.
User Manual
Page 16
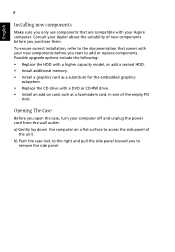
... pull the side panel toward you to add or replace components. a) Gently lay down the computer on card, such as a substitute for the embedded graphics subsystem. • Replace the CD drive with your dealer about the suitability of the unit. Opening The Case Before you open the case, turn your new components before you purchase them. English 8 Installing new components Make sure you only use components that...
... pull the side panel toward you to add or replace components. a) Gently lay down the computer on card, such as a substitute for the embedded graphics subsystem. • Replace the CD drive with your dealer about the suitability of the unit. Opening The Case Before you open the case, turn your new components before you purchase them. English 8 Installing new components Make sure you only use components that...
User Manual
Page 17
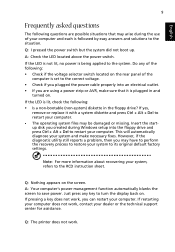
... to turn the display back on the screen. Do any key to the situation. Q: Nothing appears on . If the LED is not lit, no power is set to the correct voltage. • Check if you plugged the power cable properly into the floppy drive and press Ctrl + Alt + Del to its original default factory settings. A: Your computer's power management function automatically blanks the screen to the RCD instruction...
... to turn the display back on the screen. Do any key to the situation. Q: Nothing appears on . If the LED is not lit, no power is set to the correct voltage. • Check if you plugged the power cable properly into the floppy drive and press Ctrl + Alt + Del to its original default factory settings. A: Your computer's power management function automatically blanks the screen to the RCD instruction...
User Manual
Page 18
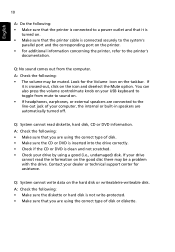
... external speakers are connected to the line-out jack of your computer, the internal or built-in speakers are automatically turned off. A: Check the following: • The volume may be muted. You can also press the volume control/mute knob on your dealer or technical support center for the Volume icon on the icon and deselect the Mute option. Contact your USB keyboard...
... external speakers are connected to the line-out jack of your computer, the internal or built-in speakers are automatically turned off. A: Check the following: • The volume may be muted. You can also press the volume control/mute knob on your dealer or technical support center for the Volume icon on the icon and deselect the Mute option. Contact your USB keyboard...
User Manual
Page 19
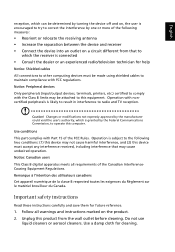
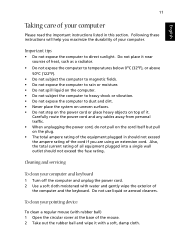
...the power cord and any cables away from personal traffic. • When unplugging the power cord, do not pull on the cord itself but pull on the plug. • The total ampere rating of the equipment plugged in this section. Cleaning and servicing To clean your computer Please read the important instructions listed ... Do not expose the computer to rain or moisture. • Do not spill liquid on top of the mouse. 2 Take out the rubber ball and wipe it with rubber ball) 1 Open the circular cover at the base of it. Following these instructions will help you are using an extension cord.
...the power cord and any cables away from personal traffic. • When unplugging the power cord, do not pull on the cord itself but pull on the plug. • The total ampere rating of the equipment plugged in this section. Cleaning and servicing To clean your computer Please read the important instructions listed ... Do not expose the computer to rain or moisture. • Do not spill liquid on top of the mouse. 2 Take out the rubber ball and wipe it with rubber ball) 1 Open the circular cover at the base of it. Following these instructions will help you are using an extension cord.
User Manual
Page 20
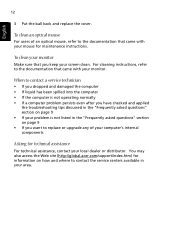
For cleaning instructions, refer to the documentation that came with your screen clean. You may also access the Web site (http://global.acer.com/support/index.htm) for information on page 9 • If you keep your monitor. To clean your monitor Make sure that came with your mouse for technical assistance For technical assistance, contact your area. When to contact a service technician •...
For cleaning instructions, refer to the documentation that came with your screen clean. You may also access the Web site (http://global.acer.com/support/index.htm) for information on page 9 • If you keep your monitor. To clean your monitor Make sure that came with your mouse for technical assistance For technical assistance, contact your area. When to contact a service technician •...


