

User Manual
Page 3
... power supply unit before connecting the power cord to the AC power outlet. • Unplug the power cord before removing the power supply unit from the projector. • If the system has multiple sources of the product and to ensure reliable operation of power, disconnect power from the system by placing the product on the product. Use a damp cloth for your safety and comfort Read these instructions carefully. Warnings...
... power supply unit before connecting the power cord to the AC power outlet. • Unplug the power cord before removing the power supply unit from the projector. • If the system has multiple sources of the product and to ensure reliable operation of power, disconnect power from the system by placing the product on the product. Use a damp cloth for your safety and comfort Read these instructions carefully. Warnings...
User Manual
Page 5
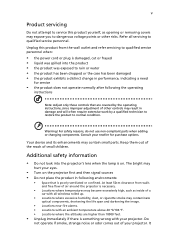
... the life span and darkening the image. • Locations near fire alarms. • Locations with your eyes. • Turn on . v Product servicing Do not attempt to service this product from walls and free flow of air around the projector is necessary. • Locations where temperatures may become excessively high, such as opening or removing covers may expose you to dangerous voltage points or other controls may result...
... the life span and darkening the image. • Locations near fire alarms. • Locations with your eyes. • Turn on . v Product servicing Do not attempt to service this product from walls and free flow of air around the projector is necessary. • Locations where temperatures may become excessively high, such as opening or removing covers may expose you to dangerous voltage points or other controls may result...

User Manual
Page 6
... displaying inverted images for inspection. • Do not face the projector lens to ensure the projector completes its own removable cover. It may cause the projector to disassemble this case, unplug immediately and contact your dealer for ceiling mount installation. Please be sure to change the lamp when is showing warning message. • When changing the lamp, please allow unit to cool down, and follow all changing instructions. • Reset the "Lamp Hour Reset...
... displaying inverted images for inspection. • Do not face the projector lens to ensure the projector completes its own removable cover. It may cause the projector to disassemble this case, unplug immediately and contact your dealer for ceiling mount installation. Please be sure to change the lamp when is showing warning message. • When changing the lamp, please allow unit to cool down, and follow all changing instructions. • Reset the "Lamp Hour Reset...
User Manual
Page 8
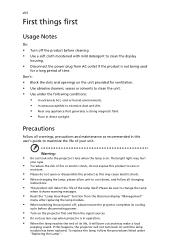
... shows warning messages. • Reset the "Lamp Hour Reset" function from AC outlet if the product is on. Warning: • Do not look into the projector's lens when the lamp is not being used for ventilation. • Use abrasive cleaners, waxes or solvents to maximize the life of time. Don't: • Block the slots and openings on until the lamp module has been replaced. If this user's guide to clean...
... shows warning messages. • Reset the "Lamp Hour Reset" function from AC outlet if the product is on. Warning: • Do not look into the projector's lens when the lamp is not being used for ventilation. • Use abrasive cleaners, waxes or solvents to maximize the life of time. Don't: • Block the slots and openings on until the lamp module has been replaced. If this user's guide to clean...

User Manual
Page 9
... 3 Projector Outlook 3 Control Panel 6 Remote Control Layout 7 MHL (Mobile High-Definition Link) Control 9 Getting Started 11 Connecting the Projector 11 Turning the Projector On/Off 13 Turning on the Projector 13 Turning the projector off 14 Adjusting the Projected Image 15 Adjusting the Height of Projected Image 15 How to optimize image size and distance 16 How to get a preferred image size by adjusting distance and zoom 20 User Controls 24 Installation menu 24 Onscreen Display (OSD) Menus 25 Color 26 Image 29 Setting 31 Management 33 Audio 34...
... 3 Projector Outlook 3 Control Panel 6 Remote Control Layout 7 MHL (Mobile High-Definition Link) Control 9 Getting Started 11 Connecting the Projector 11 Turning the Projector On/Off 13 Turning on the Projector 13 Turning the projector off 14 Adjusting the Projected Image 15 Adjusting the Height of Projected Image 15 How to optimize image size and distance 16 How to get a preferred image size by adjusting distance and zoom 20 User Controls 24 Installation menu 24 Onscreen Display (OSD) Menus 25 Color 26 Image 29 Setting 31 Management 33 Audio 34...

User Manual
Page 11
...) mode extend lamp life • Acer EcoProjeciton Technology delivers Intelligent power management approach and physical efficiency improvement • Equipped with HDMI™ & MHL connection supporting HDCP • Support HDMI CEC function • Smart detection delivers quick, intelligent source detection • Multi-language onscreen display (OSD) menus • Manual focus projection lens zooms up to 1.1x or 1.3x • 2x digital zoom • Microsoft® Windows® 2000, XP, Vista®, Windows 7, Windows 8.1, Windows...
...) mode extend lamp life • Acer EcoProjeciton Technology delivers Intelligent power management approach and physical efficiency improvement • Equipped with HDMI™ & MHL connection supporting HDCP • Support HDMI CEC function • Smart detection delivers quick, intelligent source detection • Multi-language onscreen display (OSD) menus • Manual focus projection lens zooms up to 1.1x or 1.3x • 2x digital zoom • Microsoft® Windows® 2000, XP, Vista®, Windows 7, Windows 8.1, Windows...

User Manual
Page 16
.... 6 Control Panel 1 2 3 English 4 7 8 5 9 6 10 # Icon Function 1 POWER POWER 2 LAMP LAMP 3 TEMP TEMP 4 POWER Description Power Indicator LED Lamp Indicator LED Temp Indicator LED See the contents in "Turning the Projector On/Off" section. 5 Four directional select Use to select items or make keys adjustments to your selection. 6 BACK BACK Returns to the previous operation. 7 SOURCE SOURCE Changes the active source. 8 ENTER ENTER Confirm your selection of items. 9 Keystone Adjusts the image to compensate for distortion caused by tilting the projector. 10 MENU MENU...
.... 6 Control Panel 1 2 3 English 4 7 8 5 9 6 10 # Icon Function 1 POWER POWER 2 LAMP LAMP 3 TEMP TEMP 4 POWER Description Power Indicator LED Lamp Indicator LED Temp Indicator LED See the contents in "Turning the Projector On/Off" section. 5 Four directional select Use to select items or make keys adjustments to your selection. 6 BACK BACK Returns to the previous operation. 7 SOURCE SOURCE Changes the active source. 8 ENTER ENTER Confirm your selection of items. 9 Keystone Adjusts the image to compensate for distortion caused by tilting the projector. 10 MENU MENU...

User Manual
Page 17
... playback. 6 Four directional select keys Use up, down, left, right buttons to select items or make adjustments to your selection. 7 3D Press "3D" to select 3D models. 8 SOURCE Changes the active source. 9 MODE Press "MODE" to select the display mode from Bright, Presentation, Standard, Video and User. 10 KEYSTONE Adjusts the image to compensate for distortion caused by tilting the projector. 11 BACK STOP Returns to the...
... playback. 6 Four directional select keys Use up, down, left, right buttons to select items or make adjustments to your selection. 7 3D Press "3D" to select 3D models. 8 SOURCE Changes the active source. 9 MODE Press "MODE" to select the display mode from Bright, Presentation, Standard, Video and User. 10 KEYSTONE Adjusts the image to compensate for distortion caused by tilting the projector. 11 BACK STOP Returns to the...

User Manual
Page 18
... KeyPad 0~9 Press "0~9" to input a password in source list. 26 Laser pointer Aim the remote at the viewing screen. 27 Laser button Aim the remote at the viewing screen, press and hold this button to COMPOSITE VIDEO. 24 ZOOM OUT Zooms the projector display out. Only 25 LAN/WiFi available while Acer WirelessCAST (MWA3) is connected to select the 14 PgUp previous page. Use this button to a computer via a USB cable. 15 COMPONENT No...
... KeyPad 0~9 Press "0~9" to input a password in source list. 26 Laser pointer Aim the remote at the viewing screen. 27 Laser button Aim the remote at the viewing screen, press and hold this button to COMPOSITE VIDEO. 24 ZOOM OUT Zooms the projector display out. Only 25 LAN/WiFi available while Acer WirelessCAST (MWA3) is connected to select the 14 PgUp previous page. Use this button to a computer via a USB cable. 15 COMPONENT No...

User Manual
Page 23
... "Source" button on either control panel or the remote control or direct source key on the Projector 1 Ensure that the power cord and signal cable are securely connected or press source direct key. • If you connect to switch between inputs. Power button The Power indicator LED will flash red. 2 Turn on the projector by pressing "Power" button on the control panel or remote control, and the Power indicator LED will detect your source (computer, notebook, video player ,etc.). The projector will turn blue. 3 Turn on your source automatically. • If the screen displays "Lock...
... "Source" button on either control panel or the remote control or direct source key on the Projector 1 Ensure that the power cord and signal cable are securely connected or press source direct key. • If you connect to switch between inputs. Power button The Power indicator LED will flash red. 2 Turn on the projector by pressing "Power" button on the control panel or remote control, and the Power indicator LED will detect your source (computer, notebook, video player ,etc.). The projector will turn blue. 3 Turn on your source automatically. • If the screen displays "Lock...

User Manual
Page 24
...lamp operation. This onscreen message indicates that the projector has overheated. The lamp will automatically turn off , the projector will automatically shut down and the LED lamp indicator turns solid red, contact your local reseller or service center. Note 1: Whenever the projector automatically shuts down , and the LED temp indicator will turn RED and blink rapidly after the projector is now safe to turn the projector immediately back on model definition. Press the power button again. 2 The LED power indicator will blink. Warning indicators: • "Projector Overheated...
...lamp operation. This onscreen message indicates that the projector has overheated. The lamp will automatically turn off , the projector will automatically shut down and the LED lamp indicator turns solid red, contact your local reseller or service center. Note 1: Whenever the projector automatically shuts down , and the LED temp indicator will turn RED and blink rapidly after the projector is now safe to turn the projector immediately back on model definition. Press the power button again. 2 The LED power indicator will blink. Warning indicators: • "Projector Overheated...

User Manual
Page 34
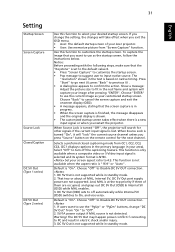
... the projector by pressing "Power" button on the control pad. 2 Press the "MENU" button on the remote control to launch the OSD for projector installation and maintenance. 3 The background pattern acts as a guide to adjusting the calibration and alignment settings, such as screen size and distance, focus and more . 4 The Installation menu includes the following options: •Projection Mode •Projection Location •Auto Keystone settings •Manual Keystone settings •WirelessHD Dongle Pairing •Language settings •Reset to factory default function Use...
... the projector by pressing "Power" button on the control pad. 2 Press the "MENU" button on the remote control to launch the OSD for projector installation and maintenance. 3 The background pattern acts as a guide to adjusting the calibration and alignment settings, such as screen size and distance, focus and more . 4 The Installation menu includes the following options: •Projection Mode •Projection Location •Auto Keystone settings •Manual Keystone settings •WirelessHD Dongle Pairing •Language settings •Reset to factory default function Use...

User Manual
Page 37
... for color temperature optimization. R Gain Adjusts the red gain for color temperature optimization. English R Bias Adjusts the red bias for color temperature optimization. With greater gamma value, dark scenery looks brighter. B Gain Adjusts the blue gain for color temperature optimization. Tint Color Temperature Gamma 27 Adjusts the color balance of red and green. • Press to increase the amount of green in the image. • Press to choose CT1, CT2 (Native), CT3, User mode. Mode Use...
... for color temperature optimization. R Gain Adjusts the red gain for color temperature optimization. English R Bias Adjusts the red bias for color temperature optimization. With greater gamma value, dark scenery looks brighter. B Gain Adjusts the blue gain for color temperature optimization. Tint Color Temperature Gamma 27 Adjusts the color balance of red and green. • Press to increase the amount of green in the image. • Press to choose CT1, CT2 (Native), CT3, User mode. Mode Use...

User Manual
Page 39
... card. Sharpness The Manual Keystone function is unavailable under Auto Keystone setting to move the image left. to "On". Frequency Tracking "Frequency" changes the projector's refresh rate to increase the sharpness. to move the image right. If you can project from behind a translucent screen. Synchronizes the signal timing of your desired aspect ratio. • Auto: Keep the image with the graphics card. Adjust image distortion caused by width...
... card. Sharpness The Manual Keystone function is unavailable under Auto Keystone setting to move the image left. to "On". Frequency Tracking "Frequency" changes the projector's refresh rate to increase the sharpness. to move the image right. If you can project from behind a translucent screen. Synchronizes the signal timing of your desired aspect ratio. • Auto: Keep the image with the graphics card. Adjust image distortion caused by width...
User Manual
Page 41
... remote control for other signals if the current input signal is not detected. Show a message: Adjust the picture size to fit in the text is a new input signal or when you exit the OSD menu. • Acer: The default startup screen of your desired startup screen. Set your customized startup screen. Default is NTSC. That two or about of them are not supported. Choose "Off" to Disable DC 5V OUT connection. 1. When Source Lock...
... remote control for other signals if the current input signal is not detected. Show a message: Adjust the picture size to fit in the text is a new input signal or when you exit the OSD menu. • Acer: The default startup screen of your desired startup screen. Set your customized startup screen. Default is NTSC. That two or about of them are not supported. Choose "Off" to Disable DC 5V OUT connection. 1. When Source Lock...
User Manual
Page 42
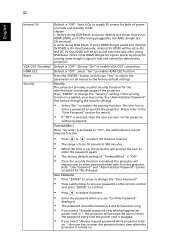
....)" is "Off". • Once the security function is up, the projector will request user to setup or change the "Security" setting. Default is "Off". 32 English Internal 5V VGA OUT (Standby) HDMI CEC Reset Security Default is "Off". Choose "On" to enable HDMI CEC function. The user has to enter a password to supply 5V power for this dialogue. Switch On to operate the projector. Both "User Password" and "Administrator Password" can turn on .
....)" is "Off". • Once the security function is up, the projector will request user to setup or change the "Security" setting. Default is "Off". 32 English Internal 5V VGA OUT (Standby) HDMI CEC Reset Security Default is "Off". Choose "On" to enable HDMI CEC function. The user has to enter a password to supply 5V power for this dialogue. Switch On to operate the projector. Both "User Password" and "Administrator Password" can turn on .

User Manual
Page 43
... other users change the lamp 30 hours before its expected end-of the projector. • Instant Off: Shuts down the projector without fan cooling. • Instant Resume: Resumes the system when the Power button is "Off". Management ECO Mode High Altitude Turn Off Mode Auto Shutdown Menu Display Time (Seconds) AC Power On Lamp Hour Elapse Lamp Reminding Lamp Hour Reset Choose "On" to change the "Administrator Password". • The factory default of "Administrator Password" is the number which will be used...
... other users change the lamp 30 hours before its expected end-of the projector. • Instant Off: Shuts down the projector without fan cooling. • Instant Resume: Resumes the system when the Power button is "Off". Management ECO Mode High Altitude Turn Off Mode Auto Shutdown Menu Display Time (Seconds) AC Power On Lamp Hour Elapse Lamp Reminding Lamp Hour Reset Choose "On" to change the "Administrator Password". • The factory default of "Administrator Password" is the number which will be used...

User Manual
Page 46
...; Check if the projector lamp has been securely installed. If the problem persists, please contact your Acer projector, refer to WUXGA-RB (1920 x 1200). • Click the "Change" button under the "Models" box. • Verify that the resolution setting of the connector pins are using and follow the steps below: • Verify that your display resolution setting is lower than or equal to the following troubleshooting guide. Windows 8)) •...
...; Check if the projector lamp has been securely installed. If the problem persists, please contact your Acer projector, refer to WUXGA-RB (1920 x 1200). • Click the "Change" button under the "Models" box. • Verify that the resolution setting of the connector pins are using and follow the steps below: • Verify that your display resolution setting is lower than or equal to the following troubleshooting guide. Windows 8)) •...
User Manual
Page 47
..., open Display and select Video Mirroring "On". 5 Image is unstable • Adjust the "Tracking" to correct it compatible with the projector. 7 Image is out of focus • Make sure the lens cap is removed. • Adjusts the focus ring on your computer's manual for detailed information. • If you are using a Microsoft® Windows® based notebook: Some notebook PCs may need to adjust the following settings...
..., open Display and select Video Mirroring "On". 5 Image is unstable • Adjust the "Tracking" to correct it compatible with the projector. 7 Image is out of focus • Make sure the lens cap is removed. • Adjusts the focus ring on your computer's manual for detailed information. • If you are using a Microsoft® Windows® based notebook: Some notebook PCs may need to adjust the following settings...

User Manual
Page 49
... cool down before reconnecting power. 2 Lamp burns out or makes a popping sound When the lamp reaches the end of its recommended operating temperature and must be used. the system fan is clogged with the Projector # Condition Solution 1 The projector stops responding If possible, turn on until the lamp module has been replaced. If the dust filter is not working. • Projector Overheated - the projector has exceeded its useful life, it .
... cool down before reconnecting power. 2 Lamp burns out or makes a popping sound When the lamp reaches the end of its recommended operating temperature and must be used. the system fan is clogged with the Projector # Condition Solution 1 The projector stops responding If possible, turn on until the lamp module has been replaced. If the dust filter is not working. • Projector Overheated - the projector has exceeded its useful life, it .


