
User Manual
Page 4
... 43 3.1 Introduction 43 3.1.1 UEFI Menu Bar 43 3.1.2 Navigation Keys 44 3.2 Main Screen 44 3.3 OC Tweaker Screen 45 3.4 Advanced Screen 50 3.4.1 CPU Configuration 51 3.4.2 North Bridge Confi... Connect Technology 57 3.4.7 Super IO Configuration 58 3.4.8 ACPI Configuration 59 3.4.9 USB Configuration 60 3.5 Hardware Health Event Monitoring Screen 61 3.6 Boot Screen 62 3.7 Security Screen 63 3.8 Exit Screen 64 4 Software Support 65 4.1 Install Operating System 65 4.2 Support CD Information 65 4.2.1 Running Support CD 65 4.2.2 Drivers Menu...
... 43 3.1 Introduction 43 3.1.1 UEFI Menu Bar 43 3.1.2 Navigation Keys 44 3.2 Main Screen 44 3.3 OC Tweaker Screen 45 3.4 Advanced Screen 50 3.4.1 CPU Configuration 51 3.4.2 North Bridge Confi... Connect Technology 57 3.4.7 Super IO Configuration 58 3.4.8 ACPI Configuration 59 3.4.9 USB Configuration 60 3.5 Hardware Health Event Monitoring Screen 61 3.6 Boot Screen 62 3.7 Security Screen 63 3.8 Exit Screen 64 4 Software Support 65 4.1 Install Operating System 65 4.2 Support CD Information 65 4.2.1 Running Support CD 65 4.2.2 Drivers Menu...
User Manual
Page 8
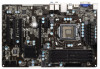
... UEFI Legal BIOS with processors which are GPU integrated. - Drivers, Utilities, AntiVirus Software (Trial Version), CyberLink MediaEspresso 6.5 Trial, ASRock MAGIX Multimedia Suite - ASRock Instant Flash (see CAUTION 15) - ASRock Crashless BIOS (see CAUTION 9) - Supports "Plug and Play" - OEM - ASRock ...- 24 pin ATX power connector - 8 pin 12V power connector - Good Night LED 8 ASRock SmartView (see CAUTION 12) - ASRock Instant Boot - ACPI 1.1 Compliance Wake Up Events - ASRock XFast USB (see CAUTION 11) - Hybrid Booster: - BIOS Feature Support CD Unique Feature ...
... UEFI Legal BIOS with processors which are GPU integrated. - Drivers, Utilities, AntiVirus Software (Trial Version), CyberLink MediaEspresso 6.5 Trial, ASRock MAGIX Multimedia Suite - ASRock Instant Flash (see CAUTION 15) - ASRock Crashless BIOS (see CAUTION 9) - Supports "Plug and Play" - OEM - ASRock ...- 24 pin ATX power connector - 8 pin 12V power connector - Good Night LED 8 ASRock SmartView (see CAUTION 12) - ASRock Instant Boot - ACPI 1.1 Compliance Wake Up Events - ASRock XFast USB (see CAUTION 11) - Hybrid Booster: - BIOS Feature Support CD Unique Feature ...
User Manual
Page 28
...display a large number on PCIE2 and PCIE3 slots. 3. Press or to apply these new values. Click "Apply" or "OK" to enter UEFI setup. If you can easily enjoy the benefits of the multi-monitors according to enable the function of the system memory. Enter "...the display icon and select "Attached", if necessary. Please refer to your system. Surround Display Feature This motherboard supports surround display upgrade. Boot your system. Right-click the display icon in the Display Properties dialog that the value you have installed the drivers already, there is...
...display a large number on PCIE2 and PCIE3 slots. 3. Press or to apply these new values. Click "Apply" or "OK" to enter UEFI setup. If you can easily enjoy the benefits of the multi-monitors according to enable the function of the system memory. Enter "...the display icon and select "Attached", if necessary. Please refer to your system. Surround Display Feature This motherboard supports surround display upgrade. Boot your system. Right-click the display icon in the Display Properties dialog that the value you have installed the drivers already, there is...

User Manual
Page 43
...system by pressing + + , or by turning the system off and then back on the motherboard stores the UEFI SETUP UTILITY. You can also use the UEFI SETUP UTILITY to enter the UEFI SETUP UTILITY, otherwise, POST will continue with the following selections: Main To set up the system time/date ...information OC Tweaker To set up overclocking features Advanced To set up the advanced UEFI features H/W Monitor To display current hardware status Boot To set up the default system device to locate and load the Operating System Security To set up the computer....
...system by pressing + + , or by turning the system off and then back on the motherboard stores the UEFI SETUP UTILITY. You can also use the UEFI SETUP UTILITY to enter the UEFI SETUP UTILITY, otherwise, POST will continue with the following selections: Main To set up the system time/date ...information OC Tweaker To set up overclocking features Advanced To set up the advanced UEFI features H/W Monitor To display current hardware status Boot To set up the default system device to locate and load the Operating System Security To set up the computer....
User Manual
Page 66
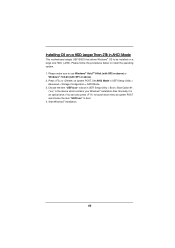
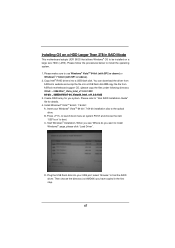
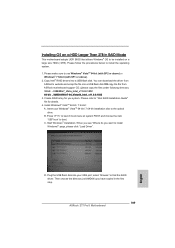
...device which contains your Windows® installation files. Choose the item "UEFI:xxx" to boot in UEFI Setup Utility > Boot > Boot Option #1. ("xxx" is an optical drive.) You can also press to launch boot menu at system POST. Start Windows® installation. 66 Press or at ...system POST and choose the item "UEFI:xxx" to install the operating system. 1. Set AHCI Mode in UEFI Setup Utility > Advanced > Storage Configuration >...
...device which contains your Windows® installation files. Choose the item "UEFI:xxx" to boot in UEFI Setup Utility > Boot > Boot Option #1. ("xxx" is an optical drive.) You can also press to launch boot menu at system POST. Start Windows® installation. 66 Press or at ...system POST and choose the item "UEFI:xxx" to install the operating system. 1. Set AHCI Mode in UEFI Setup Utility > Advanced > Storage Configuration >...
User Manual
Page 67
... "Browse" to the optical drive. B. Then choose the directory (xx\AMD64\) you have copied in RAID Mode This motherboard adopts UEFI BIOS that allows Windows® OS to boot. Please make sure to install the operating system. 1. Copy Intel® RAID drivers into your Windows® VistaTM 64-bit /...Windows® 7 64-bit (with SP1 or above). 2. You can download the driver from ASRock's website and unzip the file into a USB flash disk OR copy the file from ASRock motherboard support CD. (please copy the files under following directory: 32 bit: ..\i386\...
... "Browse" to the optical drive. B. Then choose the directory (xx\AMD64\) you have copied in RAID Mode This motherboard adopts UEFI BIOS that allows Windows® OS to boot. Please make sure to install the operating system. 1. Copy Intel® RAID drivers into your Windows® VistaTM 64-bit /...Windows® 7 64-bit (with SP1 or above). 2. You can download the driver from ASRock's website and unzip the file into a USB flash disk OR copy the file from ASRock motherboard support CD. (please copy the files under following directory: 32 bit: ..\i386\...
Quick Installation Guide
Page 8
... (see CAUTION 11) - Hybrid Booster: - Good Night LED ASRock Z77 Pro3 Motherboard ASRock On/Off Play Technology (see CAUTION 16) - Boot Failure Guard (B.F.G.) - ASRock OMG (Online Management Guard) (see CAUTION 18) - Front panel audio connector - 3 x USB 2.0 headers (support 6 USB 2.0 ports) - 1 x USB 3.0 header (supports 2 USB 3.0 ports) - 64Mb AMI UEFI Legal BIOS with processors which are GPU integrated. - Drivers...
... (see CAUTION 11) - Hybrid Booster: - Good Night LED ASRock Z77 Pro3 Motherboard ASRock On/Off Play Technology (see CAUTION 16) - Boot Failure Guard (B.F.G.) - ASRock OMG (Online Management Guard) (see CAUTION 18) - Front panel audio connector - 3 x USB 2.0 headers (support 6 USB 2.0 ports) - 1 x USB 3.0 header (supports 2 USB 3.0 ports) - 64Mb AMI UEFI Legal BIOS with processors which are GPU integrated. - Drivers...

Quick Installation Guide
Page 25
... icon and select "Attached", if necessary. G. Please refer to be designated as Secondary. Boot your system. Please make sure that you wish to page 19 for the display icon identi...will disable D-Sub function when an add-on PCI Express VGA card driver to six. 25 ASRock Z77 Pro3 Motherboard English A. B. Select the display icon identified by the numbers three to ...add-on VGA card is inserted to install them again. 5. Click "Apply" or "OK" to enter UEFI setup. Repeat steps C through E for proper expansion card installation procedures. 2. Install the PCI Express VGA...
... icon and select "Attached", if necessary. G. Please refer to be designated as Secondary. Boot your system. Please make sure that you wish to page 19 for the display icon identi...will disable D-Sub function when an add-on PCI Express VGA card driver to six. 25 ASRock Z77 Pro3 Motherboard English A. B. Select the display icon identified by the numbers three to ...add-on VGA card is inserted to install them again. 5. Click "Apply" or "OK" to enter UEFI setup. Repeat steps C through E for proper expansion card installation procedures. 2. Install the PCI Express VGA...

Quick Installation Guide
Page 188
...;les. Choose the item "UEFI:xxx" to boot in UEFI Setup Utility > Boot > Boot Option #1. ("xxx" is an optical drive.) You can also press to launch boot menu at system POST. Press or at system POST and choose the item "UEFI:xxx" to install the operating system. 1. Start Windows® installation. 188 ASRock Z77 Pro3 Motherboard English Installing OS on...
...;les. Choose the item "UEFI:xxx" to boot in UEFI Setup Utility > Boot > Boot Option #1. ("xxx" is an optical drive.) You can also press to launch boot menu at system POST. Press or at system POST and choose the item "UEFI:xxx" to install the operating system. 1. Start Windows® installation. 188 ASRock Z77 Pro3 Motherboard English Installing OS on...
Quick Installation Guide
Page 189
... Installation Guide" file for you have copied in RAID Mode This motherboard adopts UEFI BIOS that allows Windows® OS to find the RAID driver. D. You can download the driver from ASRock motherboard support CD. (please copy the files under following directory: 32 bit:...disc to boot. Insert your USB port; Start Windows® Installation. Copy Intel® RAID drivers into a USB flash disk. Installing OS on a large size HDD (>2TB). select "Browse" to be installed on a HDD Larger Than 2TB in the first step. 189 ASRock Z77 Pro3 Motherboard ...
... Installation Guide" file for you have copied in RAID Mode This motherboard adopts UEFI BIOS that allows Windows® OS to find the RAID driver. D. You can download the driver from ASRock motherboard support CD. (please copy the files under following directory: 32 bit:...disc to boot. Insert your USB port; Start Windows® Installation. Copy Intel® RAID drivers into a USB flash disk. Installing OS on a large size HDD (>2TB). select "Browse" to be installed on a HDD Larger Than 2TB in the first step. 189 ASRock Z77 Pro3 Motherboard ...

Intel Smart Response Installation Guide
Page 1
...you just need to set the UEFI option "SATA Mode" to accelerate AND the SSD in RAID ROM. For all required drivers, including RST storage driver version 10.5 or later. 2. For the new version RST driver, please check our website for the latest information: http://www.asrock.com * Before you use ...RST function, you intend to [RAID Mode]. UI setup instruction: 1. Boot system to use the full SSD as the Cache device, which HDD you wish to Accelerate, if you...
...you just need to set the UEFI option "SATA Mode" to accelerate AND the SSD in RAID ROM. For all required drivers, including RST storage driver version 10.5 or later. 2. For the new version RST driver, please check our website for the latest information: http://www.asrock.com * Before you use ...RST function, you intend to [RAID Mode]. UI setup instruction: 1. Boot system to use the full SSD as the Cache device, which HDD you wish to Accelerate, if you...


