
Intel Rapid Storage Guide
Page 12
...steps to enter the option ROM user interface. 2. When the Intel Rapid Storage Technology option ROM status screen appears during operating system setup. Press Enter to RAID. 5. The F6 installation method is not required for Microsoft Windows Vista* or Note Microsoft Windows 7*. Switch the SATA Operation Mode ... motherboard to select the drive. Click the Storage Configuration menu. 4. Unless you have selected RAID 1, use the up or down arrow keys to save the BIOS settings and exit the BIOS Setup program. Click F10 to select the strip size and press Enter. 5. Click F2 or ...
...steps to enter the option ROM user interface. 2. When the Intel Rapid Storage Technology option ROM status screen appears during operating system setup. Press Enter to RAID. 5. The F6 installation method is not required for Microsoft Windows Vista* or Note Microsoft Windows 7*. Switch the SATA Operation Mode ... motherboard to select the drive. Click the Storage Configuration menu. 4. Unless you have selected RAID 1, use the up or down arrow keys to save the BIOS settings and exit the BIOS Setup program. Click F10 to select the strip size and press Enter. 5. Click F2 or ...

Intel Rapid Storage Guide
Page 13
... a third party SCSI or RAID driver. When you see a message in the status line that says, Please insert the disk labeled Manufacturer-supplied hardware support disk into Drive A:, insert ;a floppy disk containing the following steps to confirm your controller from the list of Windows XP* setup (during operating system setup: 1. Leave 13 You...
... a third party SCSI or RAID driver. When you see a message in the status line that says, Please insert the disk labeled Manufacturer-supplied hardware support disk into Drive A:, insert ;a floppy disk containing the following steps to confirm your controller from the list of Windows XP* setup (during operating system setup: 1. Leave 13 You...
Intel Rapid Storage Guide
Page 14
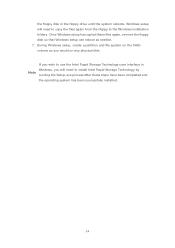
...installation folders. If you wish to use the Intel Rapid Storage Technology user interface in the floppy drive until the system reboots. During Windows setup, create a partition and file system on any physical disk. the floppy disk in Windows, you will need to install Intel Rapid Storage ...Technology by Note running the Setup.exe process after these files again, remove the floppy disk so that Windows setup can reboot as you would on the RAID volume as needed. 7. Once Windows setup has copied these steps have been completed and the operating ...
...installation folders. If you wish to use the Intel Rapid Storage Technology user interface in the floppy drive until the system reboots. During Windows setup, create a partition and file system on any physical disk. the floppy disk in Windows, you will need to install Intel Rapid Storage ...Technology by Note running the Setup.exe process after these files again, remove the floppy disk so that Windows setup can reboot as you would on the RAID volume as needed. 7. Once Windows setup has copied these steps have been completed and the operating ...

Intel Rapid Storage Guide
Page 16
...174; Rapid Storage Technology driver during operating system installation. Setup will happen immediately after pressing F6. Press F6 when you see a prompt that says, Press F6 if you need to use the F6 installation method to install a RAID Note driver on your system, you can use a ...continue loading drivers. You do not have a floppy drive on Microsoft Windows Vista* and Microsoft Windows 7* because Intel provided a RAID driver as part of Windows XP* setup (during text-mode phase). How to load the driver during OS installation using the F6 installation method. 1. Use the following...
...174; Rapid Storage Technology driver during operating system installation. Setup will happen immediately after pressing F6. Press F6 when you see a prompt that says, Press F6 if you need to use the F6 installation method to install a RAID Note driver on your system, you can use a ...continue loading drivers. You do not have a floppy drive on Microsoft Windows Vista* and Microsoft Windows 7* because Intel provided a RAID driver as part of Windows XP* setup (during text-mode phase). How to load the driver during OS installation using the F6 installation method. 1. Use the following...

Intel Rapid Storage Guide
Page 18
...folder after extraction. 2. Perform the following command line options: -A -A -PC:\, as outlined in the Drivers64 folder after extraction. How to install the RAID or AHCI driver via unattended install. 1. o If the system has a 32-bit processor, the files will be located in order to do unattended ...unattended method of the README.TXT. Extract the IAAHCI.INF, IAAHCI.CAT, IASTOR.INF, IASTOR.CAT, IASTOR.SYS, and TXTSETUP.OEM files from the setup files. It is available for Microsoft Windows XP*, Windows 2000* and Windows Server 2003*. o If the system has a 64-bit processor, the ...
...folder after extraction. 2. Perform the following command line options: -A -A -PC:\, as outlined in the Drivers64 folder after extraction. How to install the RAID or AHCI driver via unattended install. 1. o If the system has a 32-bit processor, the files will be located in order to do unattended ...unattended method of the README.TXT. Extract the IAAHCI.INF, IAAHCI.CAT, IASTOR.INF, IASTOR.CAT, IASTOR.SYS, and TXTSETUP.OEM files from the setup files. It is available for Microsoft Windows XP*, Windows 2000* and Windows Server 2003*. o If the system has a 64-bit processor, the ...

User Manual
Page 3
... and Quad SLITM Operation Guide 24 2.8 CrossFireXTM, 3-Way CrossFireXTM and Quad CrossFireXTM Operation Guide 28 2.9 Surround Display Feature 33 2.10 Jumpers Setup 34 2.11 Onboard Headers and Connectors 34 2.12 Smart Switches 42 2.13 Dr. Debug 43 2.14 Serial ATA (SATA) / Serial...64-bit / VistaTM / VistaTM 64-bit / XP / XP 64-bit With RAID Functions 52 2.20.1 Installing Windows® XP / XP 64-bit With RAID Functions 52 2.20.2 Setting Up a "RAID Ready" System 53 2.20.3 Migrating a "RAID Ready" System to RAID 0, RAID 1 or RAID 5 54 2.20.4 Installing Windows® 7 / 7 64-bit / VistaTM...
... and Quad SLITM Operation Guide 24 2.8 CrossFireXTM, 3-Way CrossFireXTM and Quad CrossFireXTM Operation Guide 28 2.9 Surround Display Feature 33 2.10 Jumpers Setup 34 2.11 Onboard Headers and Connectors 34 2.12 Smart Switches 42 2.13 Dr. Debug 43 2.14 Serial ATA (SATA) / Serial...64-bit / VistaTM / VistaTM 64-bit / XP / XP 64-bit With RAID Functions 52 2.20.1 Installing Windows® XP / XP 64-bit With RAID Functions 52 2.20.2 Setting Up a "RAID Ready" System 53 2.20.3 Migrating a "RAID Ready" System to RAID 0, RAID 1 or RAID 5 54 2.20.4 Installing Windows® 7 / 7 64-bit / VistaTM...

User Manual
Page 4
... / VistaTM 64-bit / XP / XP 64-bit Without RAID Functions 56 2.21.1 Installing Windows® XP / XP 64-bit Without RAID Functions 56 2.21.2 Installing Windows® 7 / 7 64-bit / VistaTM / VistaTM 64-bit Without RAID Functions 57 2.22 Teaming Function Operation Guide 58 3 UEFI SETUP UTILITY 62 3.1 Introduction 62 3.1.1 UEFI Menu Bar 62 3.1.2 Navigation...
... / VistaTM 64-bit / XP / XP 64-bit Without RAID Functions 56 2.21.1 Installing Windows® XP / XP 64-bit Without RAID Functions 56 2.21.2 Installing Windows® 7 / 7 64-bit / VistaTM / VistaTM 64-bit Without RAID Functions 57 2.22 Teaming Function Operation Guide 58 3 UEFI SETUP UTILITY 62 3.1 Introduction 62 3.1.1 UEFI Menu Bar 62 3.1.2 Navigation...

User Manual
Page 52
... first. A. B. Then you want to install Windows® XP / XP 64-bit on your SATA / SATAII / SATA3 HDDs with RAID functions, please follow below steps. Please insert a floppy diskette into the floppy drive. The system will see the message on the ...floppy diskette and copy SATA / SATAII / SATA3 drivers into your optical drive to format and copy files [YN]? WARNING! Enter UEFI SETUP UTILITY Advanced screen Storage Configuration. STEP 1: Set up UEFI. STEP 2: Make a SATA / SATAII / SATA3 Driver Diskette. 2.19 Driver Installation...
... first. A. B. Then you want to install Windows® XP / XP 64-bit on your SATA / SATAII / SATA3 HDDs with RAID functions, please follow below steps. Please insert a floppy diskette into the floppy drive. The system will see the message on the ...floppy diskette and copy SATA / SATAII / SATA3 drivers into your optical drive to format and copy files [YN]? WARNING! Enter UEFI SETUP UTILITY Advanced screen Storage Configuration. STEP 1: Set up UEFI. STEP 2: Make a SATA / SATAII / SATA3 Driver Diskette. 2.19 Driver Installation...

User Manual
Page 53
...SATA3 hard drive. 2. Set up a "RAID Ready" system with a single SATA / SATAII / SATA3 hard disk. Begin Windows® setup by using "RAID Installation Guide" to manage RAID functions, you install. After making a SATA / SATAII / SATA3 driver diskette and using RAID migration feature of Windows® XP / ... "Intel Rapid Storage" will be seamlessly upgraded to RAID 0, RAID 1 or RAID 5 at the following path: .. \ RAID Installation Guide STEP 4: Install Windows® XP / XP 64-bit OS on your system as step 2 of Windows® setup, press F6 to your system. When prompted, insert...
...SATA3 hard drive. 2. Set up a "RAID Ready" system with a single SATA / SATAII / SATA3 hard disk. Begin Windows® setup by using "RAID Installation Guide" to manage RAID functions, you install. After making a SATA / SATAII / SATA3 driver diskette and using RAID migration feature of Windows® XP / ... "Intel Rapid Storage" will be seamlessly upgraded to RAID 0, RAID 1 or RAID 5 at the following path: .. \ RAID Installation Guide STEP 4: Install Windows® XP / XP 64-bit OS on your system as step 2 of Windows® setup, press F6 to your system. When prompted, insert...

User Manual
Page 54
... Intel(R) Rapid Storage software, if not already installed, using the setup package obtained from a CD-ROM or from the Actions menu. If you can follow the procedures of the hard drive already in order to RAID 0, RAID 1 or RAID 5 If you have an existing "RAID Ready" system, then you will add the Intel(R) Rapid Storage...
... Intel(R) Rapid Storage software, if not already installed, using the setup package obtained from a CD-ROM or from the Actions menu. If you can follow the procedures of the hard drive already in order to RAID 0, RAID 1 or RAID 5 If you have an existing "RAID Ready" system, then you will add the Intel(R) Rapid Storage...

User Manual
Page 55
...figuration. After the installation of Windows® 7 / 7 64-bit / VistaTM / VistaTM 64-bit OS, if you want to manage RAID functions, you are allowed to [RAID]. Enter UEFI SETUP UTILITY Advanced screen Storage Configuration. STEP 2: Use "RAID Installation Guide" to check the installation guide in the folder at the following path...
...figuration. After the installation of Windows® 7 / 7 64-bit / VistaTM / VistaTM 64-bit OS, if you want to manage RAID functions, you are allowed to [RAID]. Enter UEFI SETUP UTILITY Advanced screen Storage Configuration. STEP 2: Use "RAID Installation Guide" to check the installation guide in the folder at the following path...

User Manual
Page 56
...Windows® XP / XP 64-bit OS on your system. 56 Select the driver to install according to install a third-party AHCI driver. Enter UEFI SETUP UTILITY Advanced screen Storage Configuration. Set the option "SATA Mode" to [AHCI]. (For SATA3_0, SATA3_1 and SATA2_2 to SATA2_5 ports.) Set the ...® XP / XP 64-bit OS on your system. 2.21 Installing Windows® 7 / 7 64-bit / VistaTM / VistaTM 64-bit / XP / XP 64-bit Without RAID Functions If you want to install Windows® 7 / 7 64-bit / VistaTM / VistaTM 64-bit / XP / XP 64bit OS on your SATA / SATAII / SATA3 HDDs without...
...Windows® XP / XP 64-bit OS on your system. 56 Select the driver to install according to install a third-party AHCI driver. Enter UEFI SETUP UTILITY Advanced screen Storage Configuration. Set the option "SATA Mode" to [AHCI]. (For SATA3_0, SATA3_1 and SATA2_2 to SATA2_5 ports.) Set the ...® XP / XP 64-bit OS on your system. 2.21 Installing Windows® 7 / 7 64-bit / VistaTM / VistaTM 64-bit / XP / XP 64-bit Without RAID Functions If you want to install Windows® 7 / 7 64-bit / VistaTM / VistaTM 64-bit / XP / XP 64bit OS on your SATA / SATAII / SATA3 HDDs without...

User Manual
Page 57
...Windows® 7 / 7 64-bit / VistaTM / VistaTM 64-bit OS on your system. 57 Enter UEFI SETUP UTILITY Advanced screen Storage Configuration. Enter UEFI SETUP UTILITY Advanced screen Storage Configuration. Set the option "SATA Mode" to [IDE]. (For SATA3_0, SATA3_1 ...HDDs without NCQ function STEP 1: Set up UEFI. B. Using SATA / SATAII / STA3 HDDs without RAID functions, please follow below steps. B. 2.21.2 Installing Windows® 7 / 7 64-bit / VistaTM / VistaTM 64-bit Without RAID Functions If you want to SATA3_M4 ports.) STEP 2: Install Windows® 7 / 7 64-bit /...
...Windows® 7 / 7 64-bit / VistaTM / VistaTM 64-bit OS on your system. 57 Enter UEFI SETUP UTILITY Advanced screen Storage Configuration. Enter UEFI SETUP UTILITY Advanced screen Storage Configuration. Set the option "SATA Mode" to [IDE]. (For SATA3_0, SATA3_1 ...HDDs without NCQ function STEP 1: Set up UEFI. B. Using SATA / SATAII / STA3 HDDs without RAID functions, please follow below steps. B. 2.21.2 Installing Windows® 7 / 7 64-bit / VistaTM / VistaTM 64-bit Without RAID Functions If you want to SATA3_M4 ports.) STEP 2: Install Windows® 7 / 7 64-bit /...

Quick Installation Guide
Page 44
... Mode" to [IDE]. (For SATA3_M1 to install Windows® XP / XP 64-bit OS on your SATA / SATAII / SATA3 HDDs without RAID functions, please follow below procedures according to the OS you install. 2.14.1 Installing Windows® XP / XP 64-bit Without.../ 7 64-bit / VistaTM / VistaTM 64-bit / XP / XP 64-bit Without RAID Functions If you want to SATA3_M4 ports.) STEP 2: Install Windows® XP / XP 64-bit OS on your system. 44 ASRock P67 Extreme6 Motherboard English A. B. Enter UEFI SETUP UTILITY Advanced screen Storage Configuration. Using SATA / SATAII / SATA3 HDDs without...
... Mode" to [IDE]. (For SATA3_M1 to install Windows® XP / XP 64-bit OS on your SATA / SATAII / SATA3 HDDs without RAID functions, please follow below procedures according to the OS you install. 2.14.1 Installing Windows® XP / XP 64-bit Without.../ 7 64-bit / VistaTM / VistaTM 64-bit / XP / XP 64-bit Without RAID Functions If you want to SATA3_M4 ports.) STEP 2: Install Windows® XP / XP 64-bit OS on your system. 44 ASRock P67 Extreme6 Motherboard English A. B. Enter UEFI SETUP UTILITY Advanced screen Storage Configuration. Using SATA / SATAII / SATA3 HDDs without...

Quick Installation Guide
Page 45
...; 7 / 7 64-bit / VistaTM / VistaTM 64-bit OS on your system. 45 ASRock P67 Extreme6 Motherboard English Using SATA / SATAII / SATA3 HDDs with NCQ function STEP 1: Set Up UEFI. A. Enter UEFI SETUP UTILITY Advanced screen Storage Configuration. Set the option "SATA Mode" to [AHCI]. (...bit / VistaTM / VistaTM 64-bit OS on your system. B. A. B. 2.14.2 Installing Windows® 7 / 7 64-bit / VistaTM / VistaTM 64-bit Without RAID Functions If you want to install Windows® 7 / 7 64-bit / VistaTM / VistaTM 64-bit OS on your SATA / SATAII / SATA3 HDDs without NCQ function ...
...; 7 / 7 64-bit / VistaTM / VistaTM 64-bit OS on your system. 45 ASRock P67 Extreme6 Motherboard English Using SATA / SATAII / SATA3 HDDs with NCQ function STEP 1: Set Up UEFI. A. Enter UEFI SETUP UTILITY Advanced screen Storage Configuration. Set the option "SATA Mode" to [AHCI]. (...bit / VistaTM / VistaTM 64-bit OS on your system. B. A. B. 2.14.2 Installing Windows® 7 / 7 64-bit / VistaTM / VistaTM 64-bit Without RAID Functions If you want to install Windows® 7 / 7 64-bit / VistaTM / VistaTM 64-bit OS on your SATA / SATAII / SATA3 HDDs without NCQ function ...

Quick Installation Guide
Page 236
...2 Windows® XP / XP 64 비트 OS 2.14.2 RAID Windows® 7 / 7 64 비트 / VistaTM / VistaTM 64 비트 설치 SATA / SATAII / SATA3 HDD 에 RAID Windows® 7 / 7 64 비트 / VistaTM / VistaTM ...; / VistaTM / VistaTM 64 비트 OS 니다 . 236 ASRock P67 Extreme6 Motherboard 한 국 어 UEFI SETUP UTILITY (UEFI Advanced screen ( 고급화 면 ) → Storage Configuration B. UEFI SETUP UTILITY (UEFI Advanced screen ( 고급화 면 ) → ...
...2 Windows® XP / XP 64 비트 OS 2.14.2 RAID Windows® 7 / 7 64 비트 / VistaTM / VistaTM 64 비트 설치 SATA / SATAII / SATA3 HDD 에 RAID Windows® 7 / 7 64 비트 / VistaTM / VistaTM ...; / VistaTM / VistaTM 64 비트 OS 니다 . 236 ASRock P67 Extreme6 Motherboard 한 국 어 UEFI SETUP UTILITY (UEFI Advanced screen ( 고급화 면 ) → Storage Configuration B. UEFI SETUP UTILITY (UEFI Advanced screen ( 고급화 면 ) → ...

Quick Installation Guide
Page 284
...;元 / XP / XP 64 2.14.1 在不帶 RAID Windows® XP / XP 64 位元 RAID 功能的 SATA/SATAII/SATA3 Windows® XP / XP ...SETUP UTILITY (UEFI Advanced Screen ( 高級 Storage Configuration B. 將"SATA Mode"(SATA IDE SATA3_0, SATA3_1 和 SATA2_2 到 SATA2_5 接口。) 將"Marvell SATA3 Operation Mode"(Marvell SATA3 [IDE SATA3_M1 到 SATA3_M4 接口。) 步驟 2 Windows® XP / XP 64 簡體中文 284 ASRock P67 Extreme6...
...;元 / XP / XP 64 2.14.1 在不帶 RAID Windows® XP / XP 64 位元 RAID 功能的 SATA/SATAII/SATA3 Windows® XP / XP ...SETUP UTILITY (UEFI Advanced Screen ( 高級 Storage Configuration B. 將"SATA Mode"(SATA IDE SATA3_0, SATA3_1 和 SATA2_2 到 SATA2_5 接口。) 將"Marvell SATA3 Operation Mode"(Marvell SATA3 [IDE SATA3_M1 到 SATA3_M4 接口。) 步驟 2 Windows® XP / XP 64 簡體中文 284 ASRock P67 Extreme6...

Quick Installation Guide
Page 285
... VistaTM 64 位元 RAID 功能的 SATA/SATAII/SATA3 Windows® 7 / 7 64 位元 / VistaTM / VistaTM 64 Using SATA / SATAII / SATA3 HDDs without NCQ function NCQ 功能的 SATA / SATAII / SATA3 硬盤 ) 步驟 1: 設置 UEFI。 A. 進入 UEFI SETUP UTILITY (UEFI Advanced Screen ( ... SATA3_M1 到 SATA3_M4 接口。) 步驟 2 Windows® 7 / 7 64 位元 / VistaTM / VistaTM 64 簡體中文 285 ASRock P67 Extreme6 Motherboard
... VistaTM 64 位元 RAID 功能的 SATA/SATAII/SATA3 Windows® 7 / 7 64 位元 / VistaTM / VistaTM 64 Using SATA / SATAII / SATA3 HDDs without NCQ function NCQ 功能的 SATA / SATAII / SATA3 硬盤 ) 步驟 1: 設置 UEFI。 A. 進入 UEFI SETUP UTILITY (UEFI Advanced Screen ( ... SATA3_M1 到 SATA3_M4 接口。) 步驟 2 Windows® 7 / 7 64 位元 / VistaTM / VistaTM 64 簡體中文 285 ASRock P67 Extreme6 Motherboard

Quick Installation Guide
Page 309
...® XP / XP 64 位元 RAID 功能的 SATA / SATAII / SATA3 Windows® XP / XP 64 Using SATA / SATAII / SATA3 HDDs without NCQ and Hot Plug functions NCQ SATA / SATAII / SATA3 硬碟 ) 步驟 1: 設置 BIOS。 A. 進入 UEFI SETUP UTILITY (UEFI Advanced Screen ( 進階 ... SATA3 Operation Mode"(Marvell SATA3 [IDE SATA3_M1 到 SATA3_M4 接頭。) 步驟 2 Windows® XP / XP 64 繁體中文 309 ASRock P67 Extreme6 Motherboard
...® XP / XP 64 位元 RAID 功能的 SATA / SATAII / SATA3 Windows® XP / XP 64 Using SATA / SATAII / SATA3 HDDs without NCQ and Hot Plug functions NCQ SATA / SATAII / SATA3 硬碟 ) 步驟 1: 設置 BIOS。 A. 進入 UEFI SETUP UTILITY (UEFI Advanced Screen ( 進階 ... SATA3 Operation Mode"(Marvell SATA3 [IDE SATA3_M1 到 SATA3_M4 接頭。) 步驟 2 Windows® XP / XP 64 繁體中文 309 ASRock P67 Extreme6 Motherboard

Quick Installation Guide
Page 310
.../ VistaTM 64 位元 RAID 功能的 SATA / SATAII / SATA3 Windows® 7 / 7 64 位元 / VistaTM / VistaTM 64 Using SATA / SATAII / SATA3 HDDs without NCQ and Hot Plug functions NCQ SATA / SATAII / SATA3 硬碟 ) 步驟 1: 設置 BIOS。 A. 進入 UEFI SETUP UTILITY (UEFI Advanced Screen ( &#...[AHCI SATA3_M1 到 SATA3_M4 接頭。) 步驟 2 Windows® 7 / 7 64 位元 / VistaTM / VistaTM 64 繁體中文 310 ASRock P67 Extreme6 Motherboard
.../ VistaTM 64 位元 RAID 功能的 SATA / SATAII / SATA3 Windows® 7 / 7 64 位元 / VistaTM / VistaTM 64 Using SATA / SATAII / SATA3 HDDs without NCQ and Hot Plug functions NCQ SATA / SATAII / SATA3 硬碟 ) 步驟 1: 設置 BIOS。 A. 進入 UEFI SETUP UTILITY (UEFI Advanced Screen ( &#...[AHCI SATA3_M1 到 SATA3_M4 接頭。) 步驟 2 Windows® 7 / 7 64 位元 / VistaTM / VistaTM 64 繁體中文 310 ASRock P67 Extreme6 Motherboard


