
RAID Installation Guide
Page 1
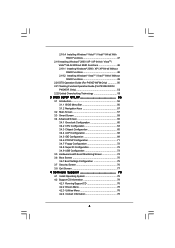
Guide to RAID Configurations 3 2.1 Introduction of RAID 3 2.2 RAID Configuration Precautions 5 2.3 Installing Windows® XP / XP 64-bit / VistaTM / VistaTM 64-bit With RAID Functions 6 2.4 Setting the BIOS RAID Items 11 2.5 Configuring the Intel RAID BIOS 11 2.6 Deleting RAID Volume 15 1 Guide to SATA Hard Disks Installation 2 1.1 Serial ATA (SATA) Hard Disks Installation 2 2. Guide to SATA Hard Disks Installation and RAID Configuration 1.
Guide to RAID Configurations 3 2.1 Introduction of RAID 3 2.2 RAID Configuration Precautions 5 2.3 Installing Windows® XP / XP 64-bit / VistaTM / VistaTM 64-bit With RAID Functions 6 2.4 Setting the BIOS RAID Items 11 2.5 Configuring the Intel RAID BIOS 11 2.6 Deleting RAID Volume 15 1 Guide to SATA Hard Disks Installation 2 1.1 Serial ATA (SATA) Hard Disks Installation 2 2. Guide to SATA Hard Disks Installation and RAID Configuration 1.
RAID Installation Guide
Page 6
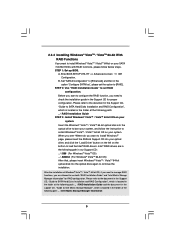
... Support CD into the floppy diskette. B. C. The system will lose ALL data in it! STEP 1: Set up , press key, and then a window for proper configuration. A. Set "SATAII Configuration" to [Enhanced], and then in the option "Configure SATAII as the boot device. Then you want to ... SETUP UTILITY Advanced screen IDE Configuration. WARNING! Formatting the floppy diskette will start to configure the RAID function, you want to install Windows® XP / XP 64-bit on your SATA / SATAII HDDs with RAID functions, please follow below procedures according to the OS you...
... Support CD into the floppy diskette. B. C. The system will lose ALL data in it! STEP 1: Set up , press key, and then a window for proper configuration. A. Set "SATAII Configuration" to [Enhanced], and then in the option "Configure SATAII as the boot device. Then you want to ... SETUP UTILITY Advanced screen IDE Configuration. WARNING! Formatting the floppy diskette will start to configure the RAID function, you want to install Windows® XP / XP 64-bit on your SATA / SATAII HDDs with RAID functions, please follow below procedures according to the OS you...
RAID Installation Guide
Page 7
...the following path: .. \ RAID Installation Guide and the document in the support CD, "Guide to Intel Matrix Storage Manager", which is located in Windows® environment, please install SATA / SATAII drivers from the installation CD. 4. Assemble the system and attach a single SATA / SATAII hard drive...174; RAID driver. At the beginning of page 6. After making a SATA / SATAII driver diskette and using RAID migration feature of Windows® XP / Windows® XP-64bit OS, if you can be presented. After the installation of Intel Matrix Storage. The following path: .. \ Intel...
...the following path: .. \ RAID Installation Guide and the document in the support CD, "Guide to Intel Matrix Storage Manager", which is located in Windows® environment, please install SATA / SATAII drivers from the installation CD. 4. Assemble the system and attach a single SATA / SATAII hard drive...174; RAID driver. At the beginning of page 6. After making a SATA / SATAII driver diskette and using RAID migration feature of Windows® XP / Windows® XP-64bit OS, if you can be presented. After the installation of Intel Matrix Storage. The following path: .. \ Intel...
RAID Installation Guide
Page 8
...use this , you migrated to a RAID 0 volume, use the following steps to perform a migration from Existing Hard Drive Wizard. Windows XP64)" for Windows® XP or "Intel(R) ICH10R SATA RAID Controller (Desktop - This will activate the Create RAID volume from a single non-RAID ... use Disk Management from the Internet. It's important to understand what will occur during the migration process because any existing partitions within Windows® in the system; You may select: "Intel(R) ICH10R SATA RAID Controller (Desktop - After setting up a "RAID Ready...
...use this , you migrated to a RAID 0 volume, use the following steps to perform a migration from Existing Hard Drive Wizard. Windows XP64)" for Windows® XP or "Intel(R) ICH10R SATA RAID Controller (Desktop - This will activate the Create RAID volume from a single non-RAID ... use Disk Management from the Internet. It's important to understand what will occur during the migration process because any existing partitions within Windows® in the system; You may select: "Intel(R) ICH10R SATA RAID Controller (Desktop - After setting up a "RAID Ready...
RAID Installation Guide
Page 9
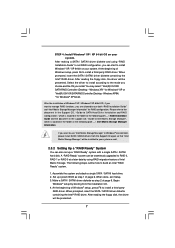
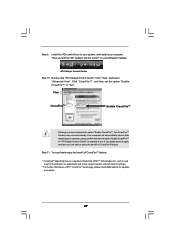
... allowed to use both "RAID Installation Guide" and "Intel Matrix Storage Manager Information" for proper configuration. B. After the installation of Windows® VistaTM / VistaTM 64-bit OS, if you want to manage RAID functions, you are in the following path in the ... \ Intel Matrix Storage Manager Information 9 A. page, please insert the ASRock Support CD into the optical drive to boot your system, and follow below steps. STEP 2: Use "RAID Installation Guide" to install Windows?" 2.3.4 Installing Windows® VistaTM / VistaTM 64-bit With RAID Functions If you want ...
... allowed to use both "RAID Installation Guide" and "Intel Matrix Storage Manager Information" for proper configuration. B. After the installation of Windows® VistaTM / VistaTM 64-bit OS, if you want to manage RAID functions, you are in the following path in the ... \ Intel Matrix Storage Manager Information 9 A. page, please insert the ASRock Support CD into the optical drive to boot your system, and follow below steps. STEP 2: Use "RAID Installation Guide" to install Windows?" 2.3.4 Installing Windows® VistaTM / VistaTM 64-bit With RAID Functions If you want ...

RAID Installation Guide
Page 10
If you want to use "Intel Matrix Storage Manager" in Windows® environment, please install SATA / SATAII drivers from the Support CD again so that "Intel Matrix Storage Manager" will be installed to your system as well. 10
If you want to use "Intel Matrix Storage Manager" in Windows® environment, please install SATA / SATAII drivers from the Support CD again so that "Intel Matrix Storage Manager" will be installed to your system as well. 10
RAID Installation Guide
Page 11
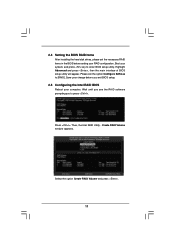
... configuration. Wait until you see the RAID software prompting you exit BIOS setup. 2.5 Configuring the Intel RAID BIOS Reboot your computer. Press . Create RAID Volume window appears. Highlight Advanced and press , then the main interface of BIOS setup utility will appear. Save your change before setting your system, and press key...
... configuration. Wait until you see the RAID software prompting you exit BIOS setup. 2.5 Configuring the Intel RAID BIOS Reboot your computer. Press . Create RAID Volume window appears. Highlight Advanced and press , then the main interface of BIOS setup utility will appear. Save your change before setting your system, and press key...
RAID Installation Guide
Page 15
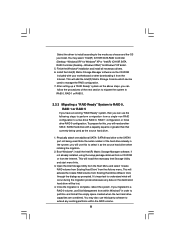
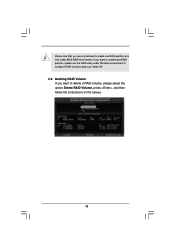
If you want to create extra RAID partition, please use the RAID utility under BIOS RAID environment. Please note that you are only allowed to create one RAID partition at a time under Windows environment to configure RAID functions after you install OS. 2.6 Deleting RAID Volume If you want to delete a RAID volume, please select the option Delete RAID Volume, press , and then follow the instructions on the screen. 15
If you want to create extra RAID partition, please use the RAID utility under BIOS RAID environment. Please note that you are only allowed to create one RAID partition at a time under Windows environment to configure RAID functions after you install OS. 2.6 Deleting RAID Volume If you want to delete a RAID volume, please select the option Delete RAID Volume, press , and then follow the instructions on the screen. 15
User Manual
Page 3
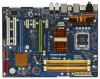
...5 1.1 Package Contents 5 1.2 Specifications 6 1.3 Motherboard Layout (P45XE-WiFiN / P45XE-R 11 1.4 Motherboard Layout (P45XE 12 1.5 ASRock DualLAN_SPDIF I/O (P45XE-WiFiN 13 1.6 ASRock DualLAN_SPDIF I/O (P45XE-R 14 1.7 ASRock SPDIF I/O Plus (P45XE 15 1.8 ASRock WiFi-802.11n Module Specifications (For P45XE-WiFiN Only 16 2 Installation 17 2.1 Screw Holes 17 2.2 Pre-...2.17 Driver Installation Guide 44 2.18 Installing Windows® XP / XP 64-bit / VistaTM / VistaTM 64-bit With RAID Functions (For P45XE-WiFiN / P45XE-R Only 44 2.18.1 Installing Windows® XP / XP 64-bit With RAID...
...5 1.1 Package Contents 5 1.2 Specifications 6 1.3 Motherboard Layout (P45XE-WiFiN / P45XE-R 11 1.4 Motherboard Layout (P45XE 12 1.5 ASRock DualLAN_SPDIF I/O (P45XE-WiFiN 13 1.6 ASRock DualLAN_SPDIF I/O (P45XE-R 14 1.7 ASRock SPDIF I/O Plus (P45XE 15 1.8 ASRock WiFi-802.11n Module Specifications (For P45XE-WiFiN Only 16 2 Installation 17 2.1 Screw Holes 17 2.2 Pre-...2.17 Driver Installation Guide 44 2.18 Installing Windows® XP / XP 64-bit / VistaTM / VistaTM 64-bit With RAID Functions (For P45XE-WiFiN / P45XE-R Only 44 2.18.1 Installing Windows® XP / XP 64-bit With RAID...
User Manual
Page 4
...; 2000 / XP / XP 64-bit Without RAID Functions 48 2.19.2 Installing Windows® VistaTM / VistaTM 64-bit Without RAID Functions 49 2.20 DTS Operation Guide (For P45XE-WiFiN Only 50 2.21 Teaming Function Operation Guide (For P45XE-WiFiN / P45XE-R Only 52 2.22 Untied Overclocking Technology 55 3 BIOS SETUP UTILITY 56 3.1 Introduction 56 3.1.1 BIOS Menu Bar 56...
...; 2000 / XP / XP 64-bit Without RAID Functions 48 2.19.2 Installing Windows® VistaTM / VistaTM 64-bit Without RAID Functions 49 2.20 DTS Operation Guide (For P45XE-WiFiN Only 50 2.21 Teaming Function Operation Guide (For P45XE-WiFiN / P45XE-R Only 52 2.22 Untied Overclocking Technology 55 3 BIOS SETUP UTILITY 56 3.1 Introduction 56 3.1.1 BIOS Menu Bar 56...
User Manual
Page 6
...110dB dynamic range (ALC890 Audio Codec) P45XE - 7.1 CH Windows® VistaTM Premium Level HD Audio (ALC888 Audio Codec) 6 DTS (Digital Theater Systems) support (see CAUTION 5) - DAC with 110dB dynamic range (ALC890 Audio Codec) - Northbridge: Intel® P45 - Southbridge: Intel® ICH10R (P45XE-WiFiN / P45XE-R) - Max. ATX Form Factor: 12... CrossFireTM - 2 x PCI Express 2.0 x16 slots (green @ x16 mode, blue @ x8 mode) - 3 x PCI Express x1 slots - 2 x PCI slots P45XE-WiFiN - 7.1 CH Windows® VistaTM Premium Level HD Audio with FSB2000/1600/1333/1066/800 MHz (see CAUTION 2) -
...110dB dynamic range (ALC890 Audio Codec) P45XE - 7.1 CH Windows® VistaTM Premium Level HD Audio (ALC888 Audio Codec) 6 DTS (Digital Theater Systems) support (see CAUTION 5) - DAC with 110dB dynamic range (ALC890 Audio Codec) - Northbridge: Intel® P45 - Southbridge: Intel® ICH10R (P45XE-WiFiN / P45XE-R) - Max. ATX Form Factor: 12... CrossFireTM - 2 x PCI Express 2.0 x16 slots (green @ x16 mode, blue @ x8 mode) - 3 x PCI Express x1 slots - 2 x PCI slots P45XE-WiFiN - 7.1 CH Windows® VistaTM Premium Level HD Audio with FSB2000/1600/1333/1066/800 MHz (see CAUTION 2) -
User Manual
Page 8
... Guard (B.F.G.) Hardware - CPU Fan Tachometer - Microsoft® Windows® 2000 / XP / XP 64-bit / VistaTM / VistaTM 64-bit compliant (see CAUTION 13) - Supports "Plug and Play" - ASRock OC Tuner (see CAUTION 17) Certifications - CPU Frequency Stepless...Booster: - Chassis Fan Tachometer - CD in header - - 1 x IR header - 1 x COM port header - 1 x HDMI_SPDIF header - 1 x IEEE 1394 header (P45XE-WiFiN / P45XE-R) - Front panel audio connector - 2 x USB 2.0 headers (support 4 USB 2.0 ports) (see CAUTION 11) - 1 x USB/WiFi header (see CAUTION 16) - ...
... Guard (B.F.G.) Hardware - CPU Fan Tachometer - Microsoft® Windows® 2000 / XP / XP 64-bit / VistaTM / VistaTM 64-bit compliant (see CAUTION 13) - Supports "Plug and Play" - ASRock OC Tuner (see CAUTION 17) Certifications - CPU Frequency Stepless...Booster: - Chassis Fan Tachometer - CD in header - - 1 x IR header - 1 x COM port header - 1 x HDMI_SPDIF header - 1 x IEEE 1394 header (P45XE-WiFiN / P45XE-R) - Front panel audio connector - 2 x USB 2.0 headers (support 4 USB 2.0 ports) (see CAUTION 11) - 1 x USB/WiFi header (see CAUTION 16) - ...
User Manual
Page 9
... system limitation, the actual memory size may be overclocked to "DTS Operation Guide" on page 13, 14 and 15 for system usage under Microsoft® Windows® VistaTM 64-bit / VistaTM / XP 64-bit / XP SP1 or SP2 / 2000 SP4. 9 Please refer to FSB2000 MHz. 2. For audio ...disk to adjust the settings after audio driver installation. About the setting of memory modules on page 36 for USB 2.0 works fine under Windows® XP and Windows® VistaTM. Overclocking may be less than 4GB for the reservation for proper connection. 9. WARNING Please realize that there is a ...
... system limitation, the actual memory size may be overclocked to "DTS Operation Guide" on page 13, 14 and 15 for system usage under Microsoft® Windows® VistaTM 64-bit / VistaTM / XP 64-bit / XP SP1 or SP2 / 2000 SP4. 9 Please refer to FSB2000 MHz. 2. For audio ...disk to adjust the settings after audio driver installation. About the setting of memory modules on page 36 for USB 2.0 works fine under Windows® XP and Windows® VistaTM. Overclocking may be less than 4GB for the reservation for proper connection. 9. WARNING Please realize that there is a ...
User Manual
Page 10
... under Windows® 2000. ASRock website: http://www.asrock.com 14. Frequencies other words, it back again. ASRock WiFi-802.11n module and RAID / AHCI functions are not supported under Windows® environment. USB/WiFi header can also be used to support WiFi+AP function with ASRock WiFi-802....11g or WiFi802.11n module, an easy-to support 2 USB 2.0 ports. ASRock website http://www.asrock.com 13. Featuring an advanced proprietary ...
... under Windows® 2000. ASRock website: http://www.asrock.com 14. Frequencies other words, it back again. ASRock WiFi-802.11n module and RAID / AHCI functions are not supported under Windows® environment. USB/WiFi header can also be used to support WiFi+AP function with ASRock WiFi-802....11g or WiFi802.11n module, an easy-to support 2 USB 2.0 ports. ASRock website http://www.asrock.com 13. Featuring an advanced proprietary ...
User Manual
Page 16
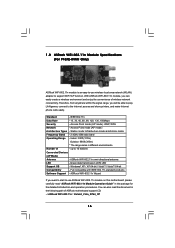
... package for the detailed introduction and operation procedures. Windows® XP / XP 64-bit / VistaTM / VistaTM 64-bit Compatibility - 1.8 ASRock WiFi-802.11n Module Specifications (For P45XE-WiFiN Only) ASRock WiFi-802.11n module is an easy-to-use wireless local area network (WLAN) adapter to use ASRock WiFi-802.11n module on this motherboard, please...
... package for the detailed introduction and operation procedures. Windows® XP / XP 64-bit / VistaTM / VistaTM 64-bit Compatibility - 1.8 ASRock WiFi-802.11n Module Specifications (For P45XE-WiFiN Only) ASRock WiFi-802.11n module is an easy-to-use wireless local area network (WLAN) adapter to use ASRock WiFi-802.11n module on this motherboard, please...
User Manual
Page 24
...motherboard, a CrossFireTM Edition graphics card and a compatible standard Radeon (CrossFireTM Ready) graphics card from ATITM or any 3D application. For Windows® XP Vendor Chipset ATI Radeon HD 3870 X2 Radeon HD 3870 Radeon HD 3850 Radeon HD 3650 Radeon HD 3450 Radeon HD2900XT...7.11 Gigabyte GV-RX26T256HP-B Catalyst 7.9 MSI RX2600PRO-T2D256EZ Catalyst 7.9 GeCube RX1950XTX Catalyst 7.11 Gecube Radeon X1950Pro 256MB Catalyst 7.11 For Windows® Vista Vendor Chipset ATI Radeon HD 3870 X2 Radeon HD 3870 Radeon HD 3850 Radeon HD 3650 Radeon HD 3450 Radeon HD2900XT ...
...motherboard, a CrossFireTM Edition graphics card and a compatible standard Radeon (CrossFireTM Ready) graphics card from ATITM or any 3D application. For Windows® XP Vendor Chipset ATI Radeon HD 3870 X2 Radeon HD 3870 Radeon HD 3850 Radeon HD 3650 Radeon HD 3450 Radeon HD2900XT...7.11 Gigabyte GV-RX26T256HP-B Catalyst 7.9 MSI RX2600PRO-T2D256EZ Catalyst 7.9 GeCube RX1950XTX Catalyst 7.11 Gecube Radeon X1950Pro 256MB Catalyst 7.11 For Windows® Vista Vendor Chipset ATI Radeon HD 3870 X2 Radeon HD 3870 Radeon HD 3850 Radeon HD 3650 Radeon HD 3450 Radeon HD2900XT ...
User Manual
Page 26
... computer and boot into OS. Please check AMD website for details. You must have Windows® XP Service Pack 2 or higher installed in your system. Step 8. For Windows® XP OS: A. ATITM recommends Windows® XP Service Pack 2 or higher to installation. Please check Microsoft website for...you have Microsoft .NET Framework installed prior to D-Sub adapter.) Step 5. The Catalyst Uninstaller is no need to your system. Step 7. For Windows® VistaTM OS: Install the CATALYST Control Center. Power on PCIE2 slot. (You may use the DVI to D-Sub adapter to convert the ...
... computer and boot into OS. Please check AMD website for details. You must have Windows® XP Service Pack 2 or higher installed in your system. Step 8. For Windows® XP OS: A. ATITM recommends Windows® XP Service Pack 2 or higher to installation. Please check Microsoft website for...you have Microsoft .NET Framework installed prior to D-Sub adapter.) Step 5. The Catalyst Uninstaller is no need to your system. Step 7. For Windows® VistaTM OS: Install the CATALYST Control Center. Power on PCIE2 slot. (You may use the DVI to D-Sub adapter to convert the ...
User Manual
Page 27
Then you will automatically reboot. Double-click "ATI Catalyst Control Center". Click "View", and select "Advanced View". After restarting your Windows® taskbar. You can freely enjoy the benefit of CrossFireTM feature. * CrossFireTM appearing here is a registered trademark of ATITM Technologies Inc., and is selected or ...
Then you will automatically reboot. Double-click "ATI Catalyst Control Center". Click "View", and select "Advanced View". After restarting your Windows® taskbar. You can freely enjoy the benefit of CrossFireTM feature. * CrossFireTM appearing here is a registered trademark of ATITM Technologies Inc., and is selected or ...
User Manual
Page 31
...97 audio panel. Set the Front Panel Control option from sound sources such as below: A. C. D. Enter BIOS Setup Utility. Enter Windows system. Click the icon on the chassis must support HDA to enter Realtek HD Audio Manager. Connect Mic_IN (MIC) to create a ...wireless environment and enjoy the convenience of audio devices. 1. For Windows® 2000 / XP / XP 64-bit OS: Click "Audio I/O", select "Connector Settings" , choose "Disable front panel jack detection", and...
...97 audio panel. Set the Front Panel Control option from sound sources such as below: A. C. D. Enter BIOS Setup Utility. Enter Windows system. Click the icon on the chassis must support HDA to enter Realtek HD Audio Manager. Connect Mic_IN (MIC) to create a ...wireless environment and enjoy the convenience of audio devices. 1. For Windows® 2000 / XP / XP 64-bit OS: Click "Audio I/O", select "Connector Settings" , choose "Disable front panel jack detection", and...
User Manual
Page 32
.... Pin 1-3 Connected 3-Pin Fan Installation 32 Please connect a chassis fan cable to this connector and match the black wire to Pin 1-3. For Windows® VistaTM / VistaTM 64-bit OS: Click the right-top "Folder" icon , choose "Disable front panel jack detection", and save the change...12 No. 15) PLED+ PLEDPWRBTN# GND 1 DUMMY RESET# GND HDLEDHDLED+ 1 SPEAKER DUMMY DUMMY +5V This header accommodates several system front panel functions. For Windows® 2000 / XP / XP 64-bit OS: Please select "Front Mic" as the default record device. System Panel Header (9-pin PANEL1) (see p.11...
.... Pin 1-3 Connected 3-Pin Fan Installation 32 Please connect a chassis fan cable to this connector and match the black wire to Pin 1-3. For Windows® VistaTM / VistaTM 64-bit OS: Click the right-top "Folder" icon , choose "Disable front panel jack detection", and save the change...12 No. 15) PLED+ PLEDPWRBTN# GND 1 DUMMY RESET# GND HDLEDHDLED+ 1 SPEAKER DUMMY DUMMY +5V This header accommodates several system front panel functions. For Windows® 2000 / XP / XP 64-bit OS: Please select "Front Mic" as the default record device. System Panel Header (9-pin PANEL1) (see p.11...


