RAID Installation Guide
Page 5
...-ROM as the boot device. When you see these messages, Please choose: 1. Enter BIOS SETUP UTILITY Advanced screen IDE Configuration. 1.3 Installing Windows® XP / XP 64-bit / VistaTM / VistaTM 64-bit With RAID Functions If you want to install Windows® XP, Windows® XP 64-bit, Windows® VistaTM or Windows® VistaTM 64-bit on your SATA / SATAII HDDs with RAID functions, please follow below steps. Insert the ASRock Support CD into your optical drive to [RAID...
...-ROM as the boot device. When you see these messages, Please choose: 1. Enter BIOS SETUP UTILITY Advanced screen IDE Configuration. 1.3 Installing Windows® XP / XP 64-bit / VistaTM / VistaTM 64-bit With RAID Functions If you want to install Windows® XP, Windows® XP 64-bit, Windows® VistaTM or Windows® VistaTM 64-bit on your SATA / SATAII HDDs with RAID functions, please follow below steps. Insert the ASRock Support CD into your optical drive to [RAID...

RAID Installation Guide
Page 7
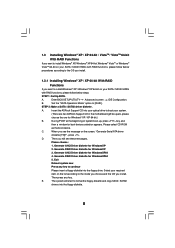
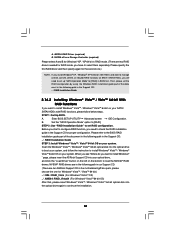
... BIOS RAID installation guide part of the document in the following path in the Support CD: .. \ RAID Installation Guide STEP 3: Install Windows® VistaTM / VistaTM 64-bit OS on your optical drive, and click the "Load Driver" button on the left on the bottom to load the NVIDIA® RAID drivers. NVIDIA® RAID drivers are two ASRock Support CD in BIOS first. NOTE. STEP 2: Use "RAID Installation Guide" to [RAID]. STEP 1: Set Up BIOS. Set the "SATA Operation Mode" option to set RAID configuration. Before you start to configure RAID...
... BIOS RAID installation guide part of the document in the following path in the Support CD: .. \ RAID Installation Guide STEP 3: Install Windows® VistaTM / VistaTM 64-bit OS on your optical drive, and click the "Load Driver" button on the left on the bottom to load the NVIDIA® RAID drivers. NVIDIA® RAID drivers are two ASRock Support CD in BIOS first. NOTE. STEP 2: Use "RAID Installation Guide" to [RAID]. STEP 1: Set Up BIOS. Set the "SATA Operation Mode" option to set RAID configuration. Before you start to configure RAID...
RAID Installation Guide
Page 11
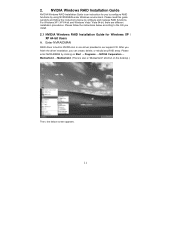
... our support CD. Please read this guide carefully and follow the instructions below to configure and manage RAID functions. Please enter NVRAIDMAN by using NVIDIAMAN under Windows environment. Enter NVRAIDMAN RAID driver is also a "Mediashield" shortcut on the desktop.) Then, the below screen appears. 11 For Windows XP / XP 64-bit and Windows Vista / Vista 64-bit, there are different installation procedures. After you finish the driver installation, you install. 2.1 NVIDIA Windows RAID Installation Guide...
... our support CD. Please read this guide carefully and follow the instructions below to configure and manage RAID functions. Please enter NVRAIDMAN by using NVIDIAMAN under Windows environment. Enter NVRAIDMAN RAID driver is also a "Mediashield" shortcut on the desktop.) Then, the below screen appears. 11 For Windows XP / XP 64-bit and Windows Vista / Vista 64-bit, there are different installation procedures. After you finish the driver installation, you install. 2.1 NVIDIA Windows RAID Installation Guide...
User Manual
Page 7
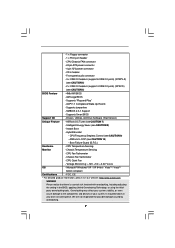
... and Play" - ASRock OC Tuner (see CAUTION 10) - Voltage Monitoring: +12V, +5V, +3.3V, Vcore OS - It should be done at your system. Hybrid Booster: - CPU Temperature Sensing Monitor - Supports Smart BIOS Support CD - Chassis Temperature Sensing - Front panel audio connector - 3 x USB 2.0 headers (support 6 USB 2.0 ports) (N73PV-S) (see CAUTION 6) - 2 x USB 2.0 headers (support 4 USB 2.0 ports) (N73V-S) (see CAUTION 6) BIOS Feature - 4Mb AMI BIOS - Supports jumperfree - Drivers, Utilities, AntiVirus Software (Trial Version) Unique Feature - CPU Quiet Fan...
... and Play" - ASRock OC Tuner (see CAUTION 10) - Voltage Monitoring: +12V, +5V, +3.3V, Vcore OS - It should be done at your system. Hybrid Booster: - CPU Temperature Sensing Monitor - Supports Smart BIOS Support CD - Chassis Temperature Sensing - Front panel audio connector - 3 x USB 2.0 headers (support 6 USB 2.0 ports) (N73PV-S) (see CAUTION 6) - 2 x USB 2.0 headers (support 4 USB 2.0 ports) (N73V-S) (see CAUTION 6) BIOS Feature - 4Mb AMI BIOS - Supports jumperfree - Drivers, Utilities, AntiVirus Software (Trial Version) Unique Feature - CPU Quiet Fan...

User Manual
Page 8
.... 3. Frequencies other words, it back again. You can also connect SATA hard disk to spray thermal grease between the CPU and the heatsink when you install the PC system. 8 Power Management for the latest information. 5. To improve heat dissipation, remember to SATAII connector directly. 6. CAUTION! 1. About the setting of the system or damage the CPU. 10. This motherboard supports Untied Overclocking Technology. For Windows® XP 64-bit...
.... 3. Frequencies other words, it back again. You can also connect SATA hard disk to spray thermal grease between the CPU and the heatsink when you install the PC system. 8 Power Management for the latest information. 5. To improve heat dissipation, remember to SATAII connector directly. 6. CAUTION! 1. About the setting of the system or damage the CPU. 10. This motherboard supports Untied Overclocking Technology. For Windows® XP 64-bit...
User Manual
Page 18
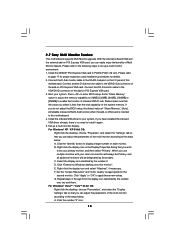
...-on PCI Express VGA card. Click "Extend my Windows desktop onto this motherboard. Install the NVIDIA® PCI Express VGA card to enter BIOS setup. Boot your system. Press to PCIE2 (PCIE x16 slot). A. When you can adjust the parameters of the add-on PCI Express VGA card. 3. F. Click the number "2" icon. 18 Please refer to this motherboard. 4. Connect the D-Sub monitor cable to be designated as appropriate for the second monitor. If you have installed the onboard VGA driver already...
...-on PCI Express VGA card. Click "Extend my Windows desktop onto this motherboard. Install the NVIDIA® PCI Express VGA card to enter BIOS setup. Boot your system. Press to PCIE2 (PCIE x16 slot). A. When you can adjust the parameters of the add-on PCI Express VGA card. 3. F. Click the number "2" icon. 18 Please refer to this motherboard. 4. Connect the D-Sub monitor cable to be designated as appropriate for the second monitor. If you have installed the onboard VGA driver already...

User Manual
Page 22
... High Definition Audio supports Jack Sensing, but the panel wire on the lower right hand taskbar to enter Realtek HD Audio Manager. F. For Windows® XP / XP 64-bit OS: Click "Audio I/O", select "Connector Settings" , choose "Disable front panel jack detection", and save the change by clicking "OK". Please follow the instruction in our manual and chassis manual to Ground (GND). B. Connect Ground (GND) to install your system. 2. Enter BIOS Setup Utility. Set the Front Panel Control option from sound...
... High Definition Audio supports Jack Sensing, but the panel wire on the lower right hand taskbar to enter Realtek HD Audio Manager. F. For Windows® XP / XP 64-bit OS: Click "Audio I/O", select "Connector Settings" , choose "Disable front panel jack detection", and save the change by clicking "OK". Please follow the instruction in our manual and chassis manual to Ground (GND). B. Connect Ground (GND) to install your system. 2. Enter BIOS Setup Utility. Set the Front Panel Control option from sound...

User Manual
Page 24
... below SATAII hard disk setup guide. 2.10 SATAII Hard Disk Setup Guide Before installing SATAII hard disk to SATAII mode in advance; Please visit the vendors' website for changing various ATA features. In order to enable SATAII function, please follow the below instruction with the best performance. otherwise, your reference. SAMSUNG 7531 8642 If pin 3 and pin 4 are shorted, SATA 1.5Gb/s will be enabled. Some default setting of different vendors, the jumper pin setting methods...
... below SATAII hard disk setup guide. 2.10 SATAII Hard Disk Setup Guide Before installing SATAII hard disk to SATAII mode in advance; Please visit the vendors' website for changing various ATA features. In order to enable SATAII function, please follow the below instruction with the best performance. otherwise, your reference. SAMSUNG 7531 8642 If pin 3 and pin 4 are shorted, SATA 1.5Gb/s will be enabled. Some default setting of different vendors, the jumper pin setting methods...

User Manual
Page 28
...: 1. Enter BIOS SETUP UTILITY Advanced screen IDE Configuration. STEP 2: Make a SATA / SATAII driver diskette. A. Set the "SATA Operation Mode" option to continue 28 C. D. Generate AHCI Driver diskette for WindowsXP64 5. 2.14 Driver Installation Guide To install the drivers to your system, please insert the support CD to install Windows® XP / Windows® XP 64-bit on your SATA / SATAII HDDs without RAID functions, please follow the order from up , press key, and then a window for boot devices selection appears. B. Therefore, the drivers you install...
...: 1. Enter BIOS SETUP UTILITY Advanced screen IDE Configuration. STEP 2: Make a SATA / SATAII driver diskette. A. Set the "SATA Operation Mode" option to continue 28 C. D. Generate AHCI Driver diskette for WindowsXP64 5. 2.14 Driver Installation Guide To install the drivers to your system, please insert the support CD to install Windows® XP / Windows® XP 64-bit on your SATA / SATAII HDDs without RAID functions, please follow the order from up , press key, and then a window for boot devices selection appears. B. Therefore, the drivers you install...
User Manual
Page 31
... 64-bit on your SATA / SATAII HDDs with RAID functions, please follow the instruction to select them separately. Enter BIOS SETUP UTILITY Advanced screen IDE Configuration. Then, please set RAID configuration. Set the "SATA Operation Mode" option to set the RAID configuration by using the Windows RAID installation guide part of the document in the following path in BIOS first. STEP 2: Use "RAID Installation Guide" to [RAID]. " page, please insert the ASRock Support CD into the optical drive again to [RAID] in the Support CD: .. \ RAID Installation Guide STEP...
... 64-bit on your SATA / SATAII HDDs with RAID functions, please follow the instruction to select them separately. Enter BIOS SETUP UTILITY Advanced screen IDE Configuration. Then, please set RAID configuration. Set the "SATA Operation Mode" option to set the RAID configuration by using the Windows RAID installation guide part of the document in the following path in BIOS first. STEP 2: Use "RAID Installation Guide" to [RAID]. " page, please insert the ASRock Support CD into the optical drive again to [RAID] in the Support CD: .. \ RAID Installation Guide STEP...
User Manual
Page 38
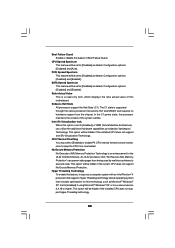
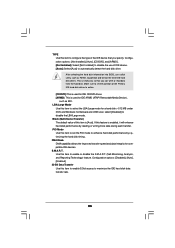
... using Microsoft® Windows® XP, or Linux kernel version 2.4.18 or higher. Set to the IA-32 Intel Architecture. CPU Thermal Throttling You may select [Enabled] to enable P4 CPU internal thermal control mechanism to [Disabled] as default. Hyper Threading Technology To enable this technology, such as default. Boot Failure Guard Enable or disable the feature of the system caches. SATA Spread Spectrum This feature will be set to execute code. Configuration options: [Disabled] and [Auto...
... using Microsoft® Windows® XP, or Linux kernel version 2.4.18 or higher. Set to the IA-32 Intel Architecture. CPU Thermal Throttling You may select [Enabled] to enable P4 CPU internal thermal control mechanism to [Disabled] as default. Hyper Threading Technology To enable this technology, such as default. Boot Failure Guard Enable or disable the feature of the system caches. SATA Spread Spectrum This feature will be set to execute code. Configuration options: [Disabled] and [Auto...
User Manual
Page 41
... utility to enable this feature is [Auto]. Configuration options: [Auto], [1.24V], [1.31V], [1.375V] and [1.42V]. Chipset Voltage Use this item to select Chipset Voltage. Besides the BIOS option, you want to enable this function, please set this to [Enabled]. Configuration options: [Auto], [1.79V], [1.85V], [1.91V], [1.97V], [2.03V], [2.09V], [2.14V] and [2.20V]. Intelligent Energy Saver Intelligent Energy Saver is [Disabled]. The default value of this feature is [Auto]. Front Panel Select [Auto], [Enabled] or [Disabled] for the onboard...
... utility to enable this feature is [Auto]. Configuration options: [Auto], [1.24V], [1.31V], [1.375V] and [1.42V]. Chipset Voltage Use this item to select Chipset Voltage. Besides the BIOS option, you want to enable this function, please set this to [Enabled]. Configuration options: [Auto], [1.79V], [1.85V], [1.91V], [1.97V], [2.03V], [2.09V], [2.14V] and [2.20V]. Intelligent Energy Saver Intelligent Energy Saver is [Disabled]. The default value of this feature is [Auto]. Front Panel Select [Auto], [Enabled] or [Disabled] for the onboard...

User Manual
Page 43
... Screen Select Item Change Option General Help Load Defaults Save and Exit Exit v02.54 (C) Copyright 1985-2005, American Megatrends, Inc. 43 Configuration options: [IDE], [RAID] and [AHCI]. * If you select [RAID] mode, SATA / SATAII HDDs can be accessed until you finish configuring RAID functions in the following instruction, which can not be applied to adjust SATA Operation Mode. BIOS SETUP UTILITY Advanced Primary IDE Master Device Vendor Size LBA Mode Block Mode PIO Mode Async DMA Ultra DMA S.M.A.R.T. OnBoard SATA Controller Use...
... Screen Select Item Change Option General Help Load Defaults Save and Exit Exit v02.54 (C) Copyright 1985-2005, American Megatrends, Inc. 43 Configuration options: [IDE], [RAID] and [AHCI]. * If you select [RAID] mode, SATA / SATAII HDDs can be accessed until you finish configuring RAID functions in the following instruction, which can not be applied to adjust SATA Operation Mode. BIOS SETUP UTILITY Advanced Primary IDE Master Device Vendor Size LBA Mode Block Mode PIO Mode Async DMA Ultra DMA S.M.A.R.T. OnBoard SATA Controller Use...
User Manual
Page 44
... to enable 32-bit access to set the PIO mode to enable or disable the S.M.A.R.T. (Self-Monitoring, Analysis, and Reporting Technology) feature. for Netware and UNIX user, select [Disabled] to automatically detect the hard disk drive. After selecting the hard disk information into BIOS, use of this item to set the partition of the IDE device that you specify. Configuration options: [Disabled], [Auto], [Enabled]. 32-Bit Data Transfer Use this feature is [Auto]. LBA/Large Mode Use this item to enhance hard disk...
... to enable 32-bit access to set the PIO mode to enable or disable the S.M.A.R.T. (Self-Monitoring, Analysis, and Reporting Technology) feature. for Netware and UNIX user, select [Disabled] to automatically detect the hard disk drive. After selecting the hard disk information into BIOS, use of this item to set the partition of the IDE device that you specify. Configuration options: [Disabled], [Auto], [Enabled]. 32-Bit Data Transfer Use this feature is [Auto]. LBA/Large Mode Use this item to enhance hard disk...
User Manual
Page 46
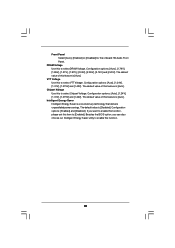
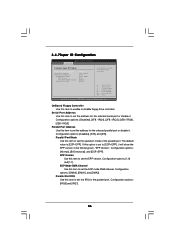
... set the operation mode of the parallel port. 3.4.7Super IO Configuration BIOS SETUP UTILITY Advanced Configure Super IO Chipset OnBoard Floppy Controller Serial Port Address Parallel Port Address Parallel Port Mode EPP Version ECP Mode DMA Channel Parallel Port IRQ [Enabled] [3F8 / IRQ4] [378] [ECP + EPP] [1.9] [DMA3] [IRQ7] Allow BIOS to enable or disable floppy drive controller. Configuration options: [1.9] and [1.7]. ECP Mode DMA Channel Use this item to Enable or Disable Floppy Controller. +F1 F9 F10 ESC Select Screen Select Item Change Option General Help Load Defaults...
... set the operation mode of the parallel port. 3.4.7Super IO Configuration BIOS SETUP UTILITY Advanced Configure Super IO Chipset OnBoard Floppy Controller Serial Port Address Parallel Port Address Parallel Port Mode EPP Version ECP Mode DMA Channel Parallel Port IRQ [Enabled] [3F8 / IRQ4] [378] [ECP + EPP] [1.9] [DMA3] [IRQ7] Allow BIOS to enable or disable floppy drive controller. Configuration options: [1.9] and [1.7]. ECP Mode DMA Channel Use this item to Enable or Disable Floppy Controller. +F1 F9 F10 ESC Select Screen Select Item Change Option General Help Load Defaults...
User Manual
Page 47
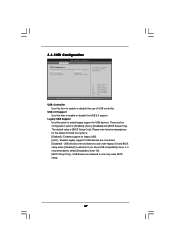
... support if USB devices are four configuration options: [Enabled], [Auto], [Disabled] and [BIOS Setup Only]. USB devices are not allowed to enter OS. [BIOS Setup Only] - USB Controller Use this item to enable or disable the USB 2.0 support. Enables support for the details of USB controller. 3.4.8USB Configuration BIOS SETUP UTILITY Advanced USB Configuration USB Controller USB 2.0 Support Legacy USB Support [Enabled] [Enabled] [BIOS Setup Only] To enable or disable the onboard USB controllers. +F1 F9 F10 ESC Select Screen Select Item Change Option General Help Load Defaults...
... support if USB devices are four configuration options: [Enabled], [Auto], [Disabled] and [BIOS Setup Only]. USB devices are not allowed to enter OS. [BIOS Setup Only] - USB Controller Use this item to enable or disable the USB 2.0 support. Enables support for the details of USB controller. 3.4.8USB Configuration BIOS SETUP UTILITY Advanced USB Configuration USB Controller USB 2.0 Support Legacy USB Support [Enabled] [Enabled] [BIOS Setup Only] To enable or disable the onboard USB controllers. +F1 F9 F10 ESC Select Screen Select Item Change Option General Help Load Defaults...

User Manual
Page 52
... about ASRock, welcome to activate the devices. 4.2.3 Utilities Menu The Utilities Menu shows the applications software that enhance the motherboard features. 4.2.1 Running The Support CD To begin using the support CD, insert the CD into your CD-ROM drive. or you need to contact ASRock or want to display the menus. 4.2.2 Drivers Menu The Drivers Menu shows the available devices drivers if the system detects installed devices. Because motherboard settings and hardware options vary, use the setup procedures...
... about ASRock, welcome to activate the devices. 4.2.3 Utilities Menu The Utilities Menu shows the applications software that enhance the motherboard features. 4.2.1 Running The Support CD To begin using the support CD, insert the CD into your CD-ROM drive. or you need to contact ASRock or want to display the menus. 4.2.2 Drivers Menu The Drivers Menu shows the available devices drivers if the system detects installed devices. Because motherboard settings and hardware options vary, use the setup procedures...
Quick Installation Guide
Page 7
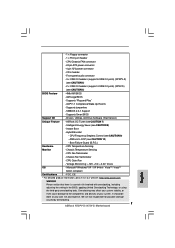
... including adjusting the setting in header - CPU/Chassis FAN connector - 24 pin ATX power connector - 4 pin 12V power connector - CPU Quiet Fan - Voltage Monitoring: +12V, +5V, +3.3V, Vcore OS - ASRock OC Tuner (see CAUTION 9) - Front panel audio connector - 3 x USB 2.0 headers (support 6 USB 2.0 ports) (N73PV-S) (see CAUTION 6) - 2 x USB 2.0 headers (support 4 USB 2.0 ports) (N73V-S) (see CAUTION 8) - Drivers, Utilities, AntiVirus Software (Trial Version) Unique Feature - Intelligent Energy Saver (see CAUTION 6) BIOS Feature - 4Mb AMI BIOS - ASRock U-COP (see...
... including adjusting the setting in header - CPU/Chassis FAN connector - 24 pin ATX power connector - 4 pin 12V power connector - CPU Quiet Fan - Voltage Monitoring: +12V, +5V, +3.3V, Vcore OS - ASRock OC Tuner (see CAUTION 9) - Front panel audio connector - 3 x USB 2.0 headers (support 6 USB 2.0 ports) (N73PV-S) (see CAUTION 6) - 2 x USB 2.0 headers (support 4 USB 2.0 ports) (N73V-S) (see CAUTION 8) - Drivers, Utilities, AntiVirus Software (Trial Version) Unique Feature - Intelligent Energy Saver (see CAUTION 6) BIOS Feature - 4Mb AMI BIOS - ASRock U-COP (see...

Quick Installation Guide
Page 8
... installing SATAII hard disk to SATAII mode. Power Management for details. 3. ASRock website: http://www.asrock.com 8. ASRock website: http://www.asrock.com 9. Before you resume the system, please check if the CPU fan on page 24 of "User Manual" in the support CD. 2. Please read the "SATAII Hard Disk Setup Guide" on the motherboard functions properly and unplug the power cord, then plug it back again. For Windows® XP 64-bit...
... installing SATAII hard disk to SATAII mode. Power Management for details. 3. ASRock website: http://www.asrock.com 8. ASRock website: http://www.asrock.com 9. Before you resume the system, please check if the CPU fan on page 24 of "User Manual" in the support CD. 2. Please read the "SATAII Hard Disk Setup Guide" on the motherboard functions properly and unplug the power cord, then plug it back again. For Windows® XP 64-bit...

Quick Installation Guide
Page 22
... the reset button on the system chassis. If the Main Menu does not appear automatically, locate and double-click on the motherboard stores BIOS Setup Utility. The BIOS Setup program is designed to the User Manual (PDF file) contained in your CD-ROM drive. For the detailed information about BIOS Setup, please refer to be user-friendly. It will enhance motherboard features. otherwise, POST continues with the motherboard contains necessary drivers and useful utilities that will display the Main Menu...
... the reset button on the system chassis. If the Main Menu does not appear automatically, locate and double-click on the motherboard stores BIOS Setup Utility. The BIOS Setup program is designed to the User Manual (PDF file) contained in your CD-ROM drive. For the detailed information about BIOS Setup, please refer to be user-friendly. It will enhance motherboard features. otherwise, POST continues with the motherboard contains necessary drivers and useful utilities that will display the Main Menu...


