User Manual
Page 9
... POST or press key to BIOS setup menu to the memory support list on the same motherboard. 9 With OC DNA, you adopt. Whether 1066MHz memory speed is subject to SATAII mode. The maximum shared memory size is defined by the chipset vendor and is supported depends on this motherboard, please refer to access ASRock Instant Flash. Before installing SATAII hard disk to SATAII connector, please read the "SATAII Hard Disk Setup Guide" on page 25 to your USB flash drive, floppy disk or hard drive...
... POST or press key to BIOS setup menu to the memory support list on the same motherboard. 9 With OC DNA, you adopt. Whether 1066MHz memory speed is subject to SATAII mode. The maximum shared memory size is defined by the chipset vendor and is supported depends on this motherboard, please refer to access ASRock Instant Flash. Before installing SATAII hard disk to SATAII connector, please read the "SATAII Hard Disk Setup Guide" on page 25 to your USB flash drive, floppy disk or hard drive...

User Manual
Page 19
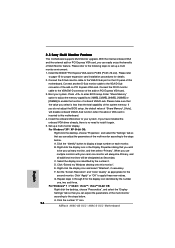
... "Apply" or "OK" to enter BIOS setup. A. Connect the D-Sub monitor cable to your system. Install the onboard VGA driver to the VGA/D-Sub port on the I/O panel of the add-on PCI Express VGA card. Please refer to the steps below . For Windows® XP / XP 64-bit OS: Right click the desktop, choose "Properties", and select the "Settings" tab so that you have installed the onboard VGA driver already, there is less than...
... "Apply" or "OK" to enter BIOS setup. A. Connect the D-Sub monitor cable to your system. Install the onboard VGA driver to the VGA/D-Sub port on the I/O panel of the add-on PCI Express VGA card. Please refer to the steps below . For Windows® XP / XP 64-bit OS: Right click the desktop, choose "Properties", and select the "Settings" tab so that you have installed the onboard VGA driver already, there is less than...

User Manual
Page 23
.... 8) 12 24 Please connect an ATX power supply to this motherboard provides 4-Pin CPU fan (Quiet Fan) support, the 3-Pin CPU fan still can work successfully even without the fan speed control function. Enter BIOS Setup Utility. You don't need to this header. System Panel Header (9-pin PANEL1) (see p.11 No. 18) 1 SPEAKER DUMMY DUMMY +5V Please connect the chassis speaker to this connector and match the black wire to Pin 1-3. D. Chassis Speaker Header (4-pin SPEAKER 1) (see p.11 No. 19) PLED+ PLEDPWRBTN# GND 1 DUMMY RESET# GND HDLEDHDLED+ This...
.... 8) 12 24 Please connect an ATX power supply to this motherboard provides 4-Pin CPU fan (Quiet Fan) support, the 3-Pin CPU fan still can work successfully even without the fan speed control function. Enter BIOS Setup Utility. You don't need to this header. System Panel Header (9-pin PANEL1) (see p.11 No. 18) 1 SPEAKER DUMMY DUMMY +5V Please connect the chassis speaker to this connector and match the black wire to Pin 1-3. D. Chassis Speaker Header (4-pin SPEAKER 1) (see p.11 No. 19) PLED+ PLEDPWRBTN# GND 1 DUMMY RESET# GND HDLEDHDLED+ This...

User Manual
Page 25
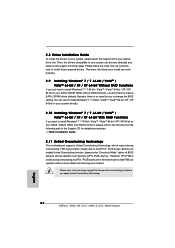
... the below SATAII hard disk setup guide. HITACHI Please use the Feature Tool, a DOS-bootable tool, for your reference. Western Digital 7531 8642 If pin 5 and pin 6 are shorted, SATA 1.5Gb/s will be enabled. On the other hand, if you want to enable SATAII 3.0Gb/s, please remove the jumpers from pin 3 and pin 4. Please visit HITACHI's website for details: http://www.hitachigst.com/hdd/support/download.htm The...
... the below SATAII hard disk setup guide. HITACHI Please use the Feature Tool, a DOS-bootable tool, for your reference. Western Digital 7531 8642 If pin 5 and pin 6 are shorted, SATA 1.5Gb/s will be enabled. On the other hand, if you want to enable SATAII 3.0Gb/s, please remove the jumpers from pin 3 and pin 4. Please visit HITACHI's website for details: http://www.hitachigst.com/hdd/support/download.htm The...
User Manual
Page 29
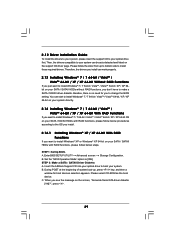
... change the BIOS setting. 2.12 Driver Installation Guide To install the drivers to your system, please insert the support CD to your system can be auto-detected and listed on the support CD driver page. B. Enter BIOS SETUP UTILITY Advanced screen Storage Configuration. Please follow below procedures according to the OS you install. 2.14.1 Installing Windows® XP / XP 64-bit With RAID Functions If you don't have to your optical drive first. Set the "SATA Operation Mode" option to install Windows...
... change the BIOS setting. 2.12 Driver Installation Guide To install the drivers to your system, please insert the support CD to your system can be auto-detected and listed on the support CD driver page. B. Enter BIOS SETUP UTILITY Advanced screen Storage Configuration. Please follow below procedures according to the OS you install. 2.14.1 Installing Windows® XP / XP 64-bit With RAID Functions If you don't have to your optical drive first. Set the "SATA Operation Mode" option to install Windows...
User Manual
Page 30
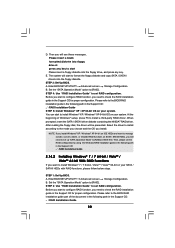
... the Support CD: .. \ RAID Installation Guide 2.14.2 Installing Windows® 7 / 7 64-bit / VistaTM / VistaTM 64-bit With RAID Functions If you want to install Windows® 7 / 7 64-bit / VistaTM / VistaTM 64-bit on SATA / SATAII HDDs, you will be presented. STEP 1: Set Up BIOS. The system will start Please insert a floppy diskette into the floppy diskette. Set the "SATA Operation Mode" option to format the floppy diskette and copy SATA / SATAII drivers into the floppy drive, and press any key...
... the Support CD: .. \ RAID Installation Guide 2.14.2 Installing Windows® 7 / 7 64-bit / VistaTM / VistaTM 64-bit With RAID Functions If you want to install Windows® 7 / 7 64-bit / VistaTM / VistaTM 64-bit on SATA / SATAII HDDs, you will be presented. STEP 1: Set Up BIOS. The system will start Please insert a floppy diskette into the floppy diskette. Set the "SATA Operation Mode" option to format the floppy diskette and copy SATA / SATAII drivers into the floppy drive, and press any key...

User Manual
Page 31
... from ASRock support CD. Before you install Windows® 7 / 7 64-bit / VistaTM / VistaTM 64-bit on IDE HDDs and want to load RAID driver from [Auto] to [RAID] in the fixed mode so that , please insert Windows® VistaTM / VistaTM 64-bit optical disk into the optical drive to boot your system, and follow the instruction to fixed PCI / PCIE buses. If you enable Untied Overclocking function, please enter "Overclock Mode" option of BIOS setup to set up "SATA Operation Mode" to [CPU, PCIE, Async...
... from ASRock support CD. Before you install Windows® 7 / 7 64-bit / VistaTM / VistaTM 64-bit on IDE HDDs and want to load RAID driver from [Auto] to [RAID] in the fixed mode so that , please insert Windows® VistaTM / VistaTM 64-bit optical disk into the optical drive to boot your system, and follow the instruction to fixed PCI / PCIE buses. If you enable Untied Overclocking function, please enter "Overclock Mode" option of BIOS setup to set up "SATA Operation Mode" to [CPU, PCIE, Async...

User Manual
Page 44
... in case of this to enable CPU internal thermal control mechanism to enable or disable the onboard LAN feature. The default value is [Auto]. 3.4.2 Chipset Configuration BIOS SETUP UTILITY Advanced Chipset Settings Onboard LAN Onboard HD Audio Front Panel Share Memory Primary Graphics Adapter [Auto] [Auto] [Enabled] [Auto] [PCI] CPU Thermal Throttle [Enabled] Auto/Enable/Disable Onboard HD Audio. +F1 F9 F10 ESC Select Screen Select Item Change Option General Help Load Defaults Save and Exit Exit v02.54 (C) Copyright 1985-2003, American Megatrends, Inc. CPU Thermal Throttle Use...
... in case of this to enable CPU internal thermal control mechanism to enable or disable the onboard LAN feature. The default value is [Auto]. 3.4.2 Chipset Configuration BIOS SETUP UTILITY Advanced Chipset Settings Onboard LAN Onboard HD Audio Front Panel Share Memory Primary Graphics Adapter [Auto] [Auto] [Enabled] [Auto] [PCI] CPU Thermal Throttle [Enabled] Auto/Enable/Disable Onboard HD Audio. +F1 F9 F10 ESC Select Screen Select Item Change Option General Help Load Defaults Save and Exit Exit v02.54 (C) Copyright 1985-2003, American Megatrends, Inc. CPU Thermal Throttle Use...

User Manual
Page 47
... the type of device connected to operate RAID function on SATA / SATAII HDDs, please do not change the setting of "IDE1 Slave" as the example in NVIDIA BIOS / Windows RAID Utility. * If you finish configuring RAID functions in the following instruction, which can be applied to enable or disable the "OnBoard IDE Controller" feature. Configuration options: [IDE] and [RAID]. * If you select [RAID] mode, SATA / SATAII HDDs can not be accessed until you install OS on SATA / SATAII HDDs, please select [RAID]. The default...
... the type of device connected to operate RAID function on SATA / SATAII HDDs, please do not change the setting of "IDE1 Slave" as the example in NVIDIA BIOS / Windows RAID Utility. * If you finish configuring RAID functions in the following instruction, which can be applied to enable or disable the "OnBoard IDE Controller" feature. Configuration options: [IDE] and [RAID]. * If you select [RAID] mode, SATA / SATAII HDDs can not be accessed until you install OS on SATA / SATAII HDDs, please select [RAID]. The default...
User Manual
Page 48
.../DVD], and [ARMD]. [Not Installed]: Select [Not Installed] to disable the use a disk utility, such as MO. DMA Mode DMA capability allows the improved transfer-speed and data-integrity for Netware and UNIX user, select [Disabled] to enable or disable the S.M.A.R.T. (Self-Monitoring, Analysis, and Reporting Technology) feature. Configuration options: [Disabled], [Auto], [Enabled]. 32Bit Data Transfer Use this item to enable 32-bit access to automatically detect the hard disk drive. After selecting the hard disk information into BIOS, use of IDE device. [Auto...
.../DVD], and [ARMD]. [Not Installed]: Select [Not Installed] to disable the use a disk utility, such as MO. DMA Mode DMA capability allows the improved transfer-speed and data-integrity for Netware and UNIX user, select [Disabled] to enable or disable the S.M.A.R.T. (Self-Monitoring, Analysis, and Reporting Technology) feature. Configuration options: [Disabled], [Auto], [Enabled]. 32Bit Data Transfer Use this item to enable 32-bit access to automatically detect the hard disk drive. After selecting the hard disk information into BIOS, use of IDE device. [Auto...

User Manual
Page 52
...Disabled] to enable or disable the USB 2.0 support. Legacy USB Support Use this item to enter OS. [BIOS Setup Only] - 3.4.8USB Configuration BIOS SETUP UTILITY Advanced USB Configuration USB Controller USB 2.0 Support Legacy USB Support [Enabled] [Enabled] [Enabled] To enable or disable the onboard USB controllers. +F1 F9 F10 ESC Select Screen Select Item Change Option General Help Load Defaults Save and Exit Exit v02.54 (C) Copyright 1985-2003, American Megatrends, Inc. Enables support for legacy USB. [Auto] - Enables legacy support if USB devices are four configuration options...
...Disabled] to enable or disable the USB 2.0 support. Legacy USB Support Use this item to enter OS. [BIOS Setup Only] - 3.4.8USB Configuration BIOS SETUP UTILITY Advanced USB Configuration USB Controller USB 2.0 Support Legacy USB Support [Enabled] [Enabled] [Enabled] To enable or disable the onboard USB controllers. +F1 F9 F10 ESC Select Screen Select Item Change Option General Help Load Defaults Save and Exit Exit v02.54 (C) Copyright 1985-2003, American Megatrends, Inc. Enables support for legacy USB. [Auto] - Enables legacy support if USB devices are four configuration options...

User Manual
Page 55
Boot From Onboard LAN Use this item to [On], it . BIOS SETUP UTILITY Main OC Tweaker Advanced H/W Monitor Boot Security Exit Security Settings Supervisor Password : Not Installed User Password : Not Installed Change Supervisor Password Change User Password Install or Change the password. Select Screen Select Item Enter Change F1 General Help F9 Load Defaults F10 Save and Exit ESC Exit v02.54 (C) Copyright 1985-2005, American Megatrends, Inc. 55 For the user password, you may also clear it will automatically activate the Numeric...
Boot From Onboard LAN Use this item to [On], it . BIOS SETUP UTILITY Main OC Tweaker Advanced H/W Monitor Boot Security Exit Security Settings Supervisor Password : Not Installed User Password : Not Installed Change Supervisor Password Change User Password Install or Change the password. Select Screen Select Item Enter Change F1 General Help F9 Load Defaults F10 Save and Exit ESC Exit v02.54 (C) Copyright 1985-2005, American Megatrends, Inc. 55 For the user password, you may also clear it will automatically activate the Numeric...
User Manual
Page 57
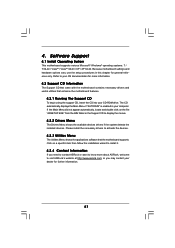
... the CD into your OS documentation for general reference only. Refer to visit ASRock's website at http://www.asrock.com; 4. Software Support 4.1 Install Operating System This motherboard supports various Microsoft® Windows® operating systems: 7 / 7 64-bit / VistaTM / VistaTM 64-bit / XP / XP 64-bit. Because motherboard settings and hardware options vary, use the setup procedures in this chapter for more about ASRock, welcome to your CD-ROM drive.
... the CD into your OS documentation for general reference only. Refer to visit ASRock's website at http://www.asrock.com; 4. Software Support 4.1 Install Operating System This motherboard supports various Microsoft® Windows® operating systems: 7 / 7 64-bit / VistaTM / VistaTM 64-bit / XP / XP 64-bit. Because motherboard settings and hardware options vary, use the setup procedures in this chapter for more about ASRock, welcome to your CD-ROM drive.
Quick Installation Guide
Page 7
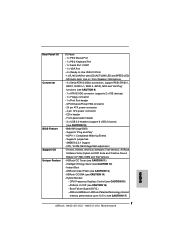
...2 x IDE devices) - 1 x Floppy connector - 1 x Print Port header - ASRock AM2 Boost: ASRock Patented Technology to boost memory performance up to -Use USB 2.0 Ports - 1 x RJ-45 LAN Port with LED (ACT/LINK LED and SPEED LED) - ASRock OC Tuner (see CAUTION 17) English 7 ASRock N68C-GS UCC / N68C-S UCC Motherboard Drivers, Utilities, AntiVirus Software (Trial Version), ASRock Software Suite (CyberLink DVD Suite and Creative Sound Blaster X-Fi MB) (OEM and Trial Version) - Supports "Plug and Play" - Instant Boot - ASRock Instant Flash (see CAUTION 15) - Boot Failure Guard (B.F.G.) - CPU...
...2 x IDE devices) - 1 x Floppy connector - 1 x Print Port header - ASRock AM2 Boost: ASRock Patented Technology to boost memory performance up to -Use USB 2.0 Ports - 1 x RJ-45 LAN Port with LED (ACT/LINK LED and SPEED LED) - ASRock OC Tuner (see CAUTION 17) English 7 ASRock N68C-GS UCC / N68C-S UCC Motherboard Drivers, Utilities, AntiVirus Software (Trial Version), ASRock Software Suite (CyberLink DVD Suite and Creative Sound Blaster X-Fi MB) (OEM and Trial Version) - Supports "Plug and Play" - Instant Boot - ASRock Instant Flash (see CAUTION 15) - Boot Failure Guard (B.F.G.) - CPU...
Quick Installation Guide
Page 9
... a user-friendly ASRock overclocking tool which allows you to SATAII mode. Featuring an advanced proprietary hardware and software design, Intelligent Energy Saver is subject to access ASRock Instant Flash. The voltage regulator can also connect SATA hard disk to improve efficiency when the CPU cores are idle. The software name itself - The maximum shared memory size is defined by the chipset vendor and is a revolutionary technology that the USB flash drive or hard drive must use...
... a user-friendly ASRock overclocking tool which allows you to SATAII mode. Featuring an advanced proprietary hardware and software design, Intelligent Energy Saver is subject to access ASRock Instant Flash. The voltage regulator can also connect SATA hard disk to improve efficiency when the CPU cores are idle. The software name itself - The maximum shared memory size is defined by the chipset vendor and is a revolutionary technology that the USB flash drive or hard drive must use...
Quick Installation Guide
Page 16
... the "Display Settings" tab so that you do not adjust the BIOS setup, the default value of Multi Monitor feature. Click the number "2" icon. 16 ASRock N68C-GS UCC / N68C-S UCC Motherboard English With the internal onboard VGA and the external add-on PCI Express VGA card. 3. Connect another D-Sub monitor cable to enter BIOS setup. Boot your system. Right-click the display icon in the Display Properties dialog that the value you use multiple monitors with your primary monitor, and...
... the "Display Settings" tab so that you do not adjust the BIOS setup, the default value of Multi Monitor feature. Click the number "2" icon. 16 ASRock N68C-GS UCC / N68C-S UCC Motherboard English With the internal onboard VGA and the external add-on PCI Express VGA card. 3. Connect another D-Sub monitor cable to enter BIOS setup. Boot your system. Right-click the display icon in the Display Properties dialog that the value you use multiple monitors with your primary monitor, and...
Quick Installation Guide
Page 22
...-bit on your system can be auto-detected and listed on the support CD driver page. Before you enable Untied Overclocking function, please enter "Overclock Mode" option of BIOS setup to set the selection from up to bottom side to install those required drivers. Please refer to the warning on your optical drive first. 2.8 Driver Installation Guide To install the drivers to your system, please insert the support CD to your SATA / SATAII HDDs without RAID...
...-bit on your system can be auto-detected and listed on the support CD driver page. Before you enable Untied Overclocking function, please enter "Overclock Mode" option of BIOS setup to set the selection from up to bottom side to install those required drivers. Please refer to the warning on your optical drive first. 2.8 Driver Installation Guide To install the drivers to your system, please insert the support CD to your SATA / SATAII HDDs without RAID...
Quick Installation Guide
Page 23
... ASRock N68C-GS UCC / N68C-S UCC Motherboard English Software Support CD information This motherboard supports various Microsoft® Windows® operating systems: 7 / 7 64-bit / VistaTM / VistaTM 64-bit / XP / XP 64-bit. When you to the User Manual (PDF file) contained in your CDROM drive. The BIOS Setup program is a menu-driven program, which allows you start up the computer, please press during the Power-On-Self-Test (POST) to be user-friendly. BIOS Information The Flash Memory on...
... ASRock N68C-GS UCC / N68C-S UCC Motherboard English Software Support CD information This motherboard supports various Microsoft® Windows® operating systems: 7 / 7 64-bit / VistaTM / VistaTM 64-bit / XP / XP 64-bit. When you to the User Manual (PDF file) contained in your CDROM drive. The BIOS Setup program is a menu-driven program, which allows you start up the computer, please press during the Power-On-Self-Test (POST) to be user-friendly. BIOS Information The Flash Memory on...

RAID Installation Guide
Page 7
... below steps. Enter BIOS SETUP UTILITY Advanced screen Storage Configuration. NOTE. When you see "Where do not need to check the RAID installation guide in the Support CD: .. \ RAID Installation Guide NOTE. If you install Windows® 7 / 7 64-bit / VistaTM / VistaTM 64-bit on IDE HDDs and want to continue the installation. NVIDIA® RAID drivers are in the following path in the Support CD for proper configuration. Then, please set the RAID configuration by using the Windows RAID installation guide in the...
... below steps. Enter BIOS SETUP UTILITY Advanced screen Storage Configuration. NOTE. When you see "Where do not need to check the RAID installation guide in the Support CD: .. \ RAID Installation Guide NOTE. If you install Windows® 7 / 7 64-bit / VistaTM / VistaTM 64-bit on IDE HDDs and want to continue the installation. NVIDIA® RAID drivers are in the following path in the Support CD for proper configuration. Then, please set the RAID configuration by using the Windows RAID installation guide in the...

RAID Installation Guide
Page 11
... desktop.) Then, the below according to configure and manage RAID functions. After you finish the driver installation, you to configure RAID functions by clicking on Start → Programs → NVIDIA Corporation → Mediashield → Mediashield. (There is built in NVIDIA ALL in one driver provided in our support CD. NVIDIA Windows RAID Installation Guide NVIDIA Windows RAID Installation Guide is an instruction for Windows XP / XP 64-bit Users A. Please enter NVRAIDMAN by using...
... desktop.) Then, the below according to configure and manage RAID functions. After you finish the driver installation, you to configure RAID functions by clicking on Start → Programs → NVIDIA Corporation → Mediashield → Mediashield. (There is built in NVIDIA ALL in one driver provided in our support CD. NVIDIA Windows RAID Installation Guide NVIDIA Windows RAID Installation Guide is an instruction for Windows XP / XP 64-bit Users A. Please enter NVRAIDMAN by using...


