User Manual
Page 4
... 5 2 3.1 Introduction 52 3.1.1 BIOS Menu Bar 52 3.1.2 Navigation Keys 53 3.2 Main Screen 53 3.3 Advanced Screen 54 3.3.1 CPU Configuration 54 3.3.2 Chipset Configuration 59 3.3.3 ACPI Configuration 61 3.3.4 IDE Configuration 63 3.3.5 PCIPnP ...
... 5 2 3.1 Introduction 52 3.1.1 BIOS Menu Bar 52 3.1.2 Navigation Keys 53 3.2 Main Screen 53 3.3 Advanced Screen 54 3.3.1 CPU Configuration 54 3.3.2 Chipset Configuration 59 3.3.3 ACPI Configuration 61 3.3.4 IDE Configuration 63 3.3.5 PCIPnP ...
User Manual
Page 5
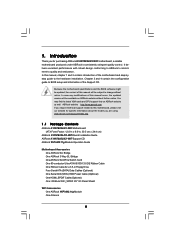
... One 80-conductor Ultra ATA 66/100/133 IDE Ribbon Cable One Ribbon Cable for purchasing ASRock K10N780SLIX3-WiFi motherboard, a reliable motherboard produced under ASRock's consistently stringent quality control. It delivers excellent performance with robust design conforming to ASRock's commitment to BIOS setup and information of this manual occur, the updated version will be available on...
... One 80-conductor Ultra ATA 66/100/133 IDE Ribbon Cable One Ribbon Cable for purchasing ASRock K10N780SLIX3-WiFi motherboard, a reliable motherboard produced under ASRock's consistently stringent quality control. It delivers excellent performance with robust design conforming to ASRock's commitment to BIOS setup and information of this manual occur, the updated version will be available on...
User Manual
Page 7
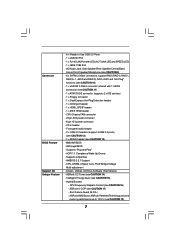
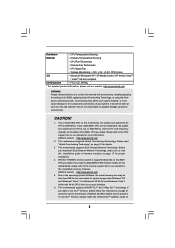
... power connector - 8 pin 12V power connector - Supports "Plug and Play" - Supports jumperfree - ASRock U-COP (see CAUTION 16) - Drivers, Utilities, AntiVirus Software (Trial Version) - Connector BIOS Feature Support CD Unique Feature - 6 x Ready-to 12.5% (see CAUTION 14) - CPU Frequency... header - 2 x USB 2.0 headers (support 4 USB 2.0 ports) (see CAUTION 12) - 1 x WiFi/E header (see CAUTION 15) - Intelligent Energy Saver (see CAUTION 13) - 8Mb AMI BIOS - AMI Legal BIOS - HD Audio Jack: Side Speaker/Rear Speaker/Central/Bass/ Line in header - Hybrid Booster: -
... power connector - 8 pin 12V power connector - Supports "Plug and Play" - Supports jumperfree - ASRock U-COP (see CAUTION 16) - Drivers, Utilities, AntiVirus Software (Trial Version) - Connector BIOS Feature Support CD Unique Feature - 6 x Ready-to 12.5% (see CAUTION 14) - CPU Frequency... header - 2 x USB 2.0 headers (support 4 USB 2.0 ports) (see CAUTION 12) - 1 x WiFi/E header (see CAUTION 15) - Intelligent Energy Saver (see CAUTION 13) - 8Mb AMI BIOS - AMI Legal BIOS - HD Audio Jack: Side Speaker/Rear Speaker/Central/Bass/ Line in header - Hybrid Booster: -
User Manual
Page 8
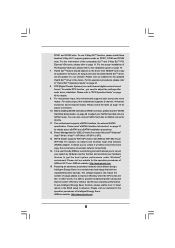
... Please refer to read "Untied Overclocking Technology" on the AM2+ CPU you adopt. ASRock website http://www.asrock.com 2. Before you install AM2 CPU on page 17 for details. 3. ASRock website http://www.asrock.com 5. To use SLITM function, please follow the instructions on page 21 and 22...CPU, there is no such limitation. 6. Hardware - Overclocking may be HT3.0 (up to the components and devices of ASRock SLI/XFire Switch Card in the BIOS, applying Untied Overclocking Technology, or using the thirdparty overclocking tools. We are not responsible for more information. If you ...
... Please refer to read "Untied Overclocking Technology" on the AM2+ CPU you adopt. ASRock website http://www.asrock.com 2. Before you install AM2 CPU on page 17 for details. 3. ASRock website http://www.asrock.com 5. To use SLITM function, please follow the instructions on page 21 and 22...CPU, there is no such limitation. 6. Hardware - Overclocking may be HT3.0 (up to the components and devices of ASRock SLI/XFire Switch Card in the BIOS, applying Untied Overclocking Technology, or using the thirdparty overclocking tools. We are not responsible for more information. If you ...
User Manual
Page 9
... / XP 64-bit / XP SP1 or SP2. 13. To use Intelligent Energy Saver function, please enable Cool 'n' Quiet option in the BIOS setup in the future. Hybrid SLITM feature should depend on page 40 to adjust your hardware devices to SATAII connector directly. 11. To enable DTS...updated Hybrid SLITM driver in advance. Please visit our website for the operation procedures of ASRock OC Tuner. It allows you need to SATAII mode. WiFi/E header supports WiFi+AP function with ASRock WiFi-802.11g or WiFi-802.11n module, an easy-to the installation guide on PCIE1, PCIE2 and PCIE4...
... / XP 64-bit / XP SP1 or SP2. 13. To use Intelligent Energy Saver function, please enable Cool 'n' Quiet option in the BIOS setup in the future. Hybrid SLITM feature should depend on page 40 to adjust your hardware devices to SATAII connector directly. 11. To enable DTS...updated Hybrid SLITM driver in advance. Please visit our website for the operation procedures of ASRock OC Tuner. It allows you need to SATAII mode. WiFi/E header supports WiFi+AP function with ASRock WiFi-802.11g or WiFi-802.11n module, an easy-to the installation guide on PCIE1, PCIE2 and PCIE4...
User Manual
Page 10
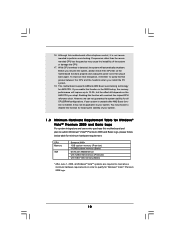
...and the heatsink when you resume the system, please check if the CPU fan on the AM2 CPU you enable this function in the BIOS setup, the memory performance will improve up to qualify for Windows® VistaTM Premium 2008 and Basic Logo For system integrators and users ... To improve heat dissipation, remember to perform over-clocking. However, we can not guarantee the system stability for AM2 CPU. This motherboard supports ASRock AM2 Boost overclocking technology for all Windows® VistaTM systems are required to meet above minimum hardware requirements in order to 12.5%, but the ...
...and the heatsink when you resume the system, please check if the CPU fan on the AM2 CPU you enable this function in the BIOS setup, the memory performance will improve up to qualify for Windows® VistaTM Premium 2008 and Basic Logo For system integrators and users ... To improve heat dissipation, remember to perform over-clocking. However, we can not guarantee the system stability for AM2 CPU. This motherboard supports ASRock AM2 Boost overclocking technology for all Windows® VistaTM systems are required to meet above minimum hardware requirements in order to 12.5%, but the ...
User Manual
Page 28
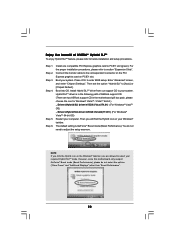
...Windows® taskbar. The default setting is in the motherboard gift box pack, please choose the one compatible PCI Express graphics card to enter BIOS setup. Step 3. For the proper installation procedures, please refer to adjust the setup anymore. Install Hybrid SLITM driver from our support CD ...Slots". Then set the option "Hybrid SLI" to your system. Enjoy the benefit of ASRock support CD: (There are allowed to select your required Hybrid SLITM mode. Then you are two ASRock support CD in the following path of NVIDIA® Hybrid SLITM To enjoy Hybrid SLITM feature...
...Windows® taskbar. The default setting is in the motherboard gift box pack, please choose the one compatible PCI Express graphics card to enter BIOS setup. Step 3. For the proper installation procedures, please refer to adjust the setup anymore. Install Hybrid SLITM driver from our support CD ...Slots". Then set the option "Hybrid SLI" to your system. Enjoy the benefit of ASRock support CD: (There are allowed to select your required Hybrid SLITM mode. Then you are two ASRock support CD in the following path of NVIDIA® Hybrid SLITM To enjoy Hybrid SLITM feature...
User Manual
Page 29
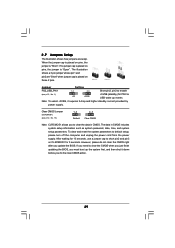
... to enable (see p.12, No. 13) 1_2 2_3 Default Clear CMOS Note: CLRCMOS1 allows you to clear the CMOS when you just finish updating the BIOS, you must boot up events. The data in CMOS. Note: To select +5VSB, it down before you do not clear the CMOS right after you... seconds, use a jumper cap to default setup, please turn off the computer and unplug the power cord from the power supply. If you update the BIOS. 2.7 Jumpers Setup The illustration shows how jumpers are "Short" when jumper cap is "Short". However, please do the clear-CMOS action. 29
... to enable (see p.12, No. 13) 1_2 2_3 Default Clear CMOS Note: CLRCMOS1 allows you to clear the CMOS when you just finish updating the BIOS, you must boot up events. The data in CMOS. Note: To select +5VSB, it down before you do not clear the CMOS right after you... seconds, use a jumper cap to default setup, please turn off the computer and unplug the power cord from the power supply. If you update the BIOS. 2.7 Jumpers Setup The illustration shows how jumpers are "Short" when jumper cap is "Short". However, please do the clear-CMOS action. 29
User Manual
Page 32
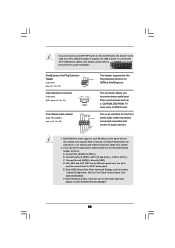
...30) GND PRESENCE# MIC_RET OUT_RET 1 OUT2_L J_SENSE OUT2_R MIC2_R MIC2_L This is an interface for ASRock DeskExpress. This connector allows you to receive stereo audio input from [Auto] to [Enabled]. If you use WiFi+AP functin on this motherboard, this header can be used as a 4-Pin USB 2.0 ...audio panel. MIC_RET and OUT_RET are for proper installation. Please follow the instruction in our manual and chassis manual to OUT2_L. B. D. Enter BIOS Setup Utility. Click the icon on the chassis must support HDA to function correctly. Connect Audio_R (RIN) to OUT2_R and Audio_L (LIN) ...
...30) GND PRESENCE# MIC_RET OUT_RET 1 OUT2_L J_SENSE OUT2_R MIC2_R MIC2_L This is an interface for ASRock DeskExpress. This connector allows you to receive stereo audio input from [Auto] to [Enabled]. If you use WiFi+AP functin on this motherboard, this header can be used as a 4-Pin USB 2.0 ...audio panel. MIC_RET and OUT_RET are for proper installation. Please follow the instruction in our manual and chassis manual to OUT2_L. B. D. Enter BIOS Setup Utility. Click the icon on the chassis must support HDA to function correctly. Connect Audio_R (RIN) to OUT2_R and Audio_L (LIN) ...
User Manual
Page 37
...of Hot Plug feature. Currently, on the basis of your SATAII hard disk. NOTE: 1. If you set "SATA Operation Mode" option in BIOS setup to 3000Mb/s, which is not supported with eSATAII interface, you can insert or remove your eSATAII devices to exchange your computer, offering the ...should have. 5. If you to enjoy the SATAII function provided by the I/O of the advantageous transfer speed and the facilitating mobile capability, in BIOS setup to the eSATAII ports only when the system is eSATAII? However, eSATAII provides the data transfer rate up to 3.0Gb/s, and the ...
...of Hot Plug feature. Currently, on the basis of your SATAII hard disk. NOTE: 1. If you set "SATA Operation Mode" option in BIOS setup to 3000Mb/s, which is not supported with eSATAII interface, you can insert or remove your eSATAII devices to exchange your computer, offering the ...should have. 5. If you to enjoy the SATAII function provided by the I/O of the advantageous transfer speed and the facilitating mobile capability, in BIOS setup to the eSATAII ports only when the system is eSATAII? However, eSATAII provides the data transfer rate up to 3.0Gb/s, and the ...
User Manual
Page 45
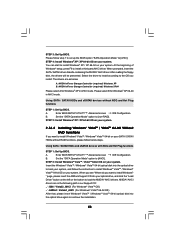
...beginning of system boot-up to bottom side to install those required drivers. Generate RAID Driver diskette for WindowsXP/XP64 2. Please follow below steps. Enter BIOS SETUP UTILITY Advanced screen IDE Configuration. Then you see these messages, Please choose: 1. B. When you will start to your system can work properly... WindowsXP 3. Then, the drivers compatible to format the floppy diskette and copy SATA / SATAII drivers into the floppy diskette. 45 A. Insert the ASRock Support CD into the floppy drive. C. Generate AHCI Driver diskette for WindowsXP64 4.
...beginning of system boot-up to bottom side to install those required drivers. Generate RAID Driver diskette for WindowsXP/XP64 2. Please follow below steps. Enter BIOS SETUP UTILITY Advanced screen IDE Configuration. Then you see these messages, Please choose: 1. B. When you will start to your system can work properly... WindowsXP 3. Then, the drivers compatible to format the floppy diskette and copy SATA / SATAII drivers into the floppy diskette. 45 A. Insert the ASRock Support CD into the floppy drive. C. Generate AHCI Driver diskette for WindowsXP64 4.
User Manual
Page 46
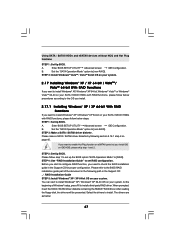
... VistaTM / Windows® VistaTM 64-bit optical disk into your SATA / SATAII HDDs without NCQ and Hot Plug functions STEP 1: Set Up BIOS. Enter BIOS SETUP UTILITY Advanced screen IDE Configuration. STEP 2: Install Windows® XP / XP 64-bit OS on your system. 2.16.2 Installing Windows®... / VistaTM 64-bit Without RAID Functions If you want to load the NVIDIA® AHCI drivers. Enter BIOS SETUP UTILITY Advanced screen IDE Configuration. " page, please insert the ASRock Support CD into the optical drive again to [AHCI]. When prompted, insert the SATA / SATAII driver diskette...
... VistaTM / Windows® VistaTM 64-bit optical disk into your SATA / SATAII HDDs without NCQ and Hot Plug functions STEP 1: Set Up BIOS. Enter BIOS SETUP UTILITY Advanced screen IDE Configuration. STEP 2: Install Windows® XP / XP 64-bit OS on your system. 2.16.2 Installing Windows®... / VistaTM 64-bit Without RAID Functions If you want to load the NVIDIA® AHCI drivers. Enter BIOS SETUP UTILITY Advanced screen IDE Configuration. " page, please insert the ASRock Support CD into the optical drive again to [AHCI]. When prompted, insert the SATA / SATAII driver diskette...
User Manual
Page 47
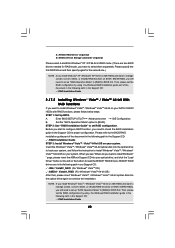
...on your system. After reading the floppy disk, the drivers will be presented. STEP 2: Make a SATA / SATAII driver diskette. Enter BIOS SETUP UTILITY Advanced screen IDE Configuration. Set the "SATA Operation Mode" option to install. If you want to enable Hot Plug function on...Mode" option to install a third-party RAID driver. Please follow below : 47 Enter BIOS SETUP UTILITY Advanced screen B. STEP 1: Set Up BIOS. STEP 4: Use "RAID Installation Guide" to set up the BIOS option "SATA Operation Mode" to set RAID configuration. Using SATA / SATAII HDDs and...
...on your system. After reading the floppy disk, the drivers will be presented. STEP 2: Make a SATA / SATAII driver diskette. Enter BIOS SETUP UTILITY Advanced screen IDE Configuration. Set the "SATA Operation Mode" option to install. If you want to enable Hot Plug function on...Mode" option to install a third-party RAID driver. Please follow below : 47 Enter BIOS SETUP UTILITY Advanced screen B. STEP 1: Set Up BIOS. STEP 4: Use "RAID Installation Guide" to set up the BIOS option "SATA Operation Mode" to set RAID configuration. Using SATA / SATAII HDDs and...
User Manual
Page 48
... the Windows® VistaTM / Windows® VistaTM 64-bit optical disk into the optical drive to boot your system. " page, please insert the ASRock Support CD into the optical drive again to [RAID] in the Support CD: .. \ RAID Installation Guide 48 Then, please set up "SATA Operation... If you need to set the RAID configuration by using the Windows RAID installation guide part of the document in the following path in BIOS first. NVIDIA nForce Storage Controller (required) Please select A and B for proper configuration. Please refer to set the RAID configuration by ...
... the Windows® VistaTM / Windows® VistaTM 64-bit optical disk into the optical drive to boot your system. " page, please insert the ASRock Support CD into the optical drive again to [RAID] in the Support CD: .. \ RAID Installation Guide 48 Then, please set up "SATA Operation... If you need to set the RAID configuration by using the Windows RAID installation guide part of the document in the following path in BIOS first. NVIDIA nForce Storage Controller (required) Please select A and B for proper configuration. Please refer to set the RAID configuration by ...

User Manual
Page 51
..., Async.]. Please refer to the warning on page 8 for the possible overclocking risk before you enable Untied Overclocking function, please enter "Overclock Mode" option of BIOS setup to set the selection from [Auto] to fixed PCI / PCIE buses. Before you apply Untied Overclocking Technology. 51 2.19 Untied Overclocking Technology This motherboard...
..., Async.]. Please refer to the warning on page 8 for the possible overclocking risk before you enable Untied Overclocking function, please enter "Overclock Mode" option of BIOS setup to set the selection from [Auto] to fixed PCI / PCIE buses. Before you apply Untied Overclocking Technology. 51 2.19 Untied Overclocking Technology This motherboard...

User Manual
Page 52
... is constantly being updated, the following selections: Main To set up the system time/date information Advanced To set up the advanced BIOS features H/W Monitor To display current hardware status Boot To set up the computer. 3. You may also restart by pressing the reset button on ... Bar The top of the screen has a menu bar with its test routines. The Flash Memory on . BIOS SETUP UTILITY 3.1 Introduction This section explains how to use the BIOS SETUP UTILITY to enter the BIOS SETUP UTILITY after POST, restart the system by pressing + + , or by turning the system off and...
... is constantly being updated, the following selections: Main To set up the system time/date information Advanced To set up the advanced BIOS features H/W Monitor To display current hardware status Boot To set up the computer. 3. You may also restart by pressing the reset button on ... Bar The top of the screen has a menu bar with its test routines. The Flash Memory on . BIOS SETUP UTILITY 3.1 Introduction This section explains how to use the BIOS SETUP UTILITY to enter the BIOS SETUP UTILITY after POST, restart the system by pressing + + , or by turning the system off and...

User Manual
Page 53
... UTILITY Main Advanced H/W Monitor Boot Security Exit System Overview System Time System Date [17:00:09] [Sat 04/12/2008] BIOS Version : K10N780SLIX3-WiFi P1.00 Processor Type : AMD Athlon(tm) 64 X2 Dual Core Processor 6000+ (64bit) Processor Speed : 3000MHz Microcode Update : 40F33/0 L1 Cache Size :...None : None : None Use [Enter], [TAB] or [SHIFT-TAB] to the Exit Screen or exit the current screen 3.2 Main Screen When you enter the BIOS SETUP UTILITY, the Main screen will appear and display the system overview. System Date [Day Month/Date/Year] Use this item to specify the system...
... UTILITY Main Advanced H/W Monitor Boot Security Exit System Overview System Time System Date [17:00:09] [Sat 04/12/2008] BIOS Version : K10N780SLIX3-WiFi P1.00 Processor Type : AMD Athlon(tm) 64 X2 Dual Core Processor 6000+ (64bit) Processor Speed : 3000MHz Microcode Update : 40F33/0 L1 Cache Size :...None : None : None Use [Enter], [TAB] or [SHIFT-TAB] to the Exit Screen or exit the current screen 3.2 Main Screen When you enter the BIOS SETUP UTILITY, the Main screen will appear and display the system overview. System Date [Day Month/Date/Year] Use this item to specify the system...
User Manual
Page 54
...Copyright 1985-2003, American Megatrends, Inc. Configuration options: [Auto], [CPU, PCIE, Sync.] and [CPU, PCIE, Async.]. 54 Main BIOS SETUP UTILITY Advanced H/W Monitor Boot Security Exit Advanced Settings WARNING : Setting wrong values in this section may set the configurations for details.... appears only when you may cause the system to [Enabled], you will enable ASRock AM2 Boost function, which will be set this option to malfunction. 3.3.1 CPU Configuration BIOS SETUP UTILITY Advanced CPU Configuration AM2 Boost Overclock Mode CPU Frequency (MHz) PCIE Frequency...
...Copyright 1985-2003, American Megatrends, Inc. Configuration options: [Auto], [CPU, PCIE, Sync.] and [CPU, PCIE, Async.]. 54 Main BIOS SETUP UTILITY Advanced H/W Monitor Boot Security Exit Advanced Settings WARNING : Setting wrong values in this section may set the configurations for details.... appears only when you may cause the system to [Enabled], you will enable ASRock AM2 Boost function, which will be set this option to malfunction. 3.3.1 CPU Configuration BIOS SETUP UTILITY Advanced CPU Configuration AM2 Boost Overclock Mode CPU Frequency (MHz) PCIE Frequency...

User Manual
Page 56
... item will show when "Multiplier/Voltage Change" is not recommended to [Manual]; This item will show when "Multiplier/Voltage Change" is not recommended to [Manual]; BIOS SETUP UTILITY Advanced CPU Configuration AM2 Boost Overclock Mode CPU Frequency (MHz) PCIE Frequency (MHz) CPU/LDT Spread Spectrum SATA Spread Spectrum Boot Failure Guard...
... item will show when "Multiplier/Voltage Change" is not recommended to [Manual]; This item will show when "Multiplier/Voltage Change" is not recommended to [Manual]; BIOS SETUP UTILITY Advanced CPU Configuration AM2 Boost Overclock Mode CPU Frequency (MHz) PCIE Frequency (MHz) CPU/LDT Spread Spectrum SATA Spread Spectrum Boot Failure Guard...
User Manual
Page 59
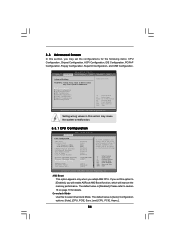
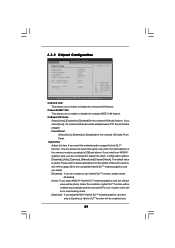
... to adjust this condition, Hybrid SLITM function will be enabled automatically and the onboard GPU core / shader clock will be enabled auto 59 3.3.2 Chipset Configuration BIOS SETUP UTILITY Advanced Chipset Settings Onboard LAN Onboard 1394 Onboard HD Audio Front Panel Hybrid SLI Primary Graphics Adapter CPU - Hybrid SLI Adjust this item...
... to adjust this condition, Hybrid SLITM function will be enabled automatically and the onboard GPU core / shader clock will be enabled auto 59 3.3.2 Chipset Configuration BIOS SETUP UTILITY Advanced Chipset Settings Onboard LAN Onboard 1394 Onboard HD Audio Front Panel Hybrid SLI Primary Graphics Adapter CPU - Hybrid SLI Adjust this item...


