ASRock G PRO Support and Manuals
Get Help and Manuals for this ASRock item
View All Support Options Below
Free ASRock G PRO manuals!
Problems with ASRock G PRO?
Ask a Question
Free ASRock G PRO manuals!
Problems with ASRock G PRO?
Ask a Question
Popular ASRock G PRO Manual Pages
User Manual - Page 1
G Pro / GV Pro User Manual
Published October 2002 Copyright©2002 ASRock INC. All rights reserved.
1
User Manual - Page 3
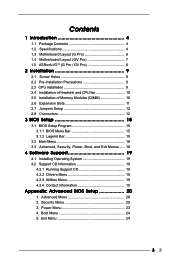
... Specifications 4 1.3 Motherboard Layout (G Pro 6 1.4 Motherboard Layout (GV Pro 7 1.5 ASRock I/OTM (G Pro / GV Pro 8
2 Installation 9
2.1 Screw Holes 9 2.2 Pre-installation Precautions 9 2.3 CPU Installation 9 2.4 Installation of Heatsink and CPU fan 10 2.5 Installation of Memory Modules (DIMM 10 2.6 Expansion Slots 11 2.7 Jumpers Setup 12 2.8 Connectors 12
3 BIOS Setup 15
3.1 BIOS...
User Manual - Page 4
... more advanced BIOS setup information.
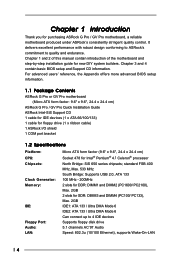
1.1 Package Contents
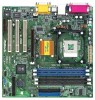
ASRock G Pro or GV Pro motherboard (Micro ATX form factor: 9.6" x 9.6", 24.4 x 24.4 cm)
ASRock G Pro / GV Pro Quick Installation Guide ASRock Intel-SiS Support CD 1 cable for IDE devices (1 x ATA 66/100/133) 1 cable for floppy drive (1 x ribbon cable) 1 ASRock I/O shield 1 COM port bracket
1.2 Specifications
Platform: CPU: Chipsets...
User Manual - Page 5
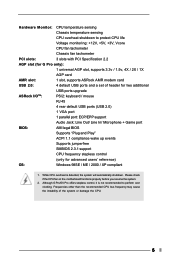
... PCI Specification 2.2
AGP slot (for G Pro only):
1 universal AGP slot, supports 3.3v / 1.5v, 4X / 2X / 1X
AGP card
AMR slot:
1 slot, supports ASRock AMR modem card
USB 2.0:
4 default USB ports and a set of the system or damage the CPU.
5 Frequencies other than the recommended CPU bus frequency may cause the instability of header for two additional
USB ports upgrade
ASRock...
User Manual - Page 7
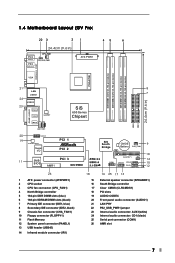
1.4 Motherboard Layout (GV Pro)
22...
01 23
01 23
20
AUDIO1
19
AUDIO CODEC
Super I/O
PCI 1 PCI 2
11
2MB
PCI 3
BIOS
AMR1
GV PRO
SiS South
Bridge
CMOS
9
Battery CHA_FAN1...
CLRCMOS1
FLOPPY1
IR1
COM1
USB45
SPEAKER1 RESET HDLED
PANEL1
PWRBTN PLED
10
14 15 12
26
1
ATX power connector (ATXPWR1)
2
CPU socket
3
CPU...
User Manual - Page 9
...place.
9 Step 3. Carefully insert the CPU into the holes indicated by circles to secure the motherboard to motherboard components.
2.1 Screw Holes
Place screws into the socket until it fits in the bag that its marked corner
matches the base of the following precautions before touching any motherboard settings.
1. Chapter 2 Installation
G Pro / GV Pro is detached from the wall socket...
User Manual - Page 11

... both G Pro and GV Pro motherboards.
Align the card connector with the slot and press firmly until the retaining clip snap back in a chassis). Step 6.
Step 2. Step 3. Replace the system cover.
11 Fasten the card to install a graphics card. Before installing the expansion card, read the documentation of the expansion card and make necessary hardware settings for later...
User Manual - Page 15
... by pressing + + , or by turning the system off and then back on the motherboard stores the BIOS Setup Utility. Because the BIOS software is constantly being updated, the following BIOS setup screens and descriptions are for you see on your system using the BIOS Setup Utility. You can also restart by pressing the reset button on the system chassis...
User Manual - Page 16
...: 1980 - 2099
GE-PRO BIOS L0.10 Generic-X86 2000 MHz 512 KB
F23 / 08 224 MB + 32 MB Share Memory None None
256 MB / 133 Mhz None
F1:Help Esc:Exit
:Select Item :Select Menu
+/-:Change Values Enter:Select Sub-Menu
F9:Setup Defaults F10:Save & Exit
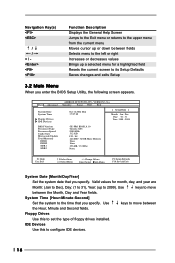
System Date [Month/Day/Year]
Set the system date...
User Manual - Page 17
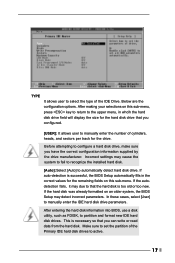
After making your selections on an older system, the BIOS Setup may detect incorrect parameters. Incorrect settings may due to that you have the correct configuration information supplied by the drive manufacturer. After entering the hard disk information into BIOS, use a disk utility, such as FDISK, to manually enter the IDE hard disk drive parameters. Below...
User Manual - Page 19
Chapter 4 Software Support
4.1 Install Operating System
This motherboard supports various Windows operating systems (98SE/ ME/ 2000/ XP). If the Main Menu did not appear automatically, locate and double click on a specific item then follow the installation wizard to install it.
4.2.4 ASRock PC-DIY Live Demo Program
ASRock presents you a multimedia PC-DIY live demo, which shows you how to your ...
User Manual - Page 20
Wrong setup may cause problems during operation. OnBoard VGA Share Memory: This allows you leave... used for better system stability. CPU Host Frequency: [Auto]: The motherboard detects the jumper setup and sets the CPU host frequency automatically. [Manual]: This allows user to select the value as operating frequency.
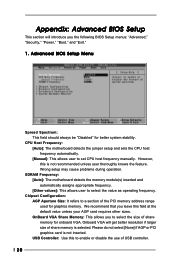
Appendix: Advanced BIOS Setup
This section will get better resolution...
User Manual - Page 23
...Setup... you desire.
23 If [Always] option is selected, the "Password Check" is selected, the AC power resumes and the system starts...-soft-off mode. If [Power On] is performed before BIOS setup.
PME# Power On: Use this to enable or disable ...BIOS setup.
3.
If [Power Off] is performed before both boot-up time you to select whether to auto-detect or disable the ACPI Suspend-to set...
User Manual - Page 24
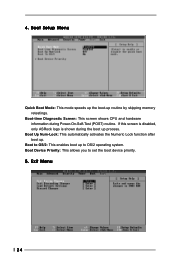
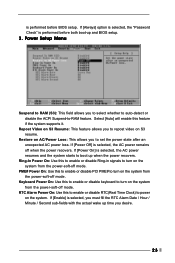
.../2 operating system. Boot Setup Menu
Quick Boot Mode: This mode speeds up the boot-up . Boot to OS/2: This enables boot up process.
4. Boot-time Diagnostic Screen: This screen shows CPU and hardware information during the boot up to set the boot device priority.
5.
If this screen is disabled, only ASRock logo is shown...
User Manual - Page 25
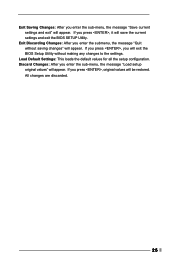
... you enter the sub-menu, the message "Save current settings and exit" will exit the BIOS Setup Utility without saving changes" will save the current settings and exit the BIOS SETUP Utility. If you press , you will appear. If you enter the sub-menu, the message "Load setup
original values" will be restored. Discard Changes: After you...
ASRock G PRO Reviews
We have not received any reviews for ASRock yet.