
User Manual
Page 3
...bit / XP / XP 64-bit With RAID Functions 41 2.15.1 Installing Windows® XP / XP 64-bit With RAID Functions 41 2.15.2 Installing Windows® 7 / 7 64-bit / VistaTM / VistaTM 64-bit With RAID Functions 42 2.16 Installing Windows® 7 / 7 64-bit / VistaTM / VistaTM 64-bit /... XP / XP 64-bit Without RAID Functions 43 2.16.1 Installing Windows® XP / XP 64-bit Without RAID Functions 43 2.16.2 Installing Windows® 7 / 7 64-bit / VistaTM / VistaTM 64-bit Without RAID Functions 44 2.17 Untied Overclocking Technology 44 3 Introduction 5 ...
...bit / XP / XP 64-bit With RAID Functions 41 2.15.1 Installing Windows® XP / XP 64-bit With RAID Functions 41 2.15.2 Installing Windows® 7 / 7 64-bit / VistaTM / VistaTM 64-bit With RAID Functions 42 2.16 Installing Windows® 7 / 7 64-bit / VistaTM / VistaTM 64-bit /... XP / XP 64-bit Without RAID Functions 43 2.16.1 Installing Windows® XP / XP 64-bit Without RAID Functions 43 2.16.2 Installing Windows® 7 / 7 64-bit / VistaTM / VistaTM 64-bit Without RAID Functions 44 2.17 Untied Overclocking Technology 44 3 Introduction 5 ...
User Manual
Page 5
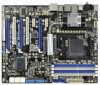
It delivers excellent performance with robust design conforming to ASRock's commitment to BIOS setup and information of the Support CD. To get better performance in Windows® 7 / 7 64-bit / VistaTM / VistaTM 64-bit, it is recommended to set the BIOS option in ... a 3.5-in Storage Configuration to change without further notice. www.asrock.com/support/index.asp 1.1 Package Contents ASRock 890FX Deluxe5 Motherboard (ATX Form Factor: 12.0-in x 9.6-in, 30.5 cm x 24.4 cm) ASRock 890FX Deluxe5 Quick Installation Guide ASRock 890FX Deluxe5 Support CD 1 x Ultra ATA 66/100/133 IDE Ribbon ...
It delivers excellent performance with robust design conforming to ASRock's commitment to BIOS setup and information of the Support CD. To get better performance in Windows® 7 / 7 64-bit / VistaTM / VistaTM 64-bit, it is recommended to set the BIOS option in ... a 3.5-in Storage Configuration to change without further notice. www.asrock.com/support/index.asp 1.1 Package Contents ASRock 890FX Deluxe5 Motherboard (ATX Form Factor: 12.0-in x 9.6-in, 30.5 cm x 24.4 cm) ASRock 890FX Deluxe5 Quick Installation Guide ASRock 890FX Deluxe5 Support CD 1 x Ultra ATA 66/100/133 IDE Ribbon ...

User Manual
Page 8
... (see CAUTION 10) - ASRock APP Charger (see CAUTION 8) - CPU Frequency Stepless Control (see CAUTION 12) - CPU Temperature Sensing Monitor - CPU/Chassis/Power Fan Tachometer - Microsoft® Windows® 7 / 7 64-bit / VistaTM / VistaTM 64-bit / XP / XP 64-bit compliant Certifications - FCC, CE, ... or using the thirdparty overclocking tools. ACPI 1.1 Compliance Wake Up Events - CPU, VCCM, NB, SB Voltage Multi-adjustment Support CD - ASRock XFast USB (see CAUTION 13) - Turbo 50 / Turbo 60 CPU Overclocking - CPU/Chassis Fan Multi-Speed Control - ErP/EuP Ready (...
... (see CAUTION 10) - ASRock APP Charger (see CAUTION 8) - CPU Frequency Stepless Control (see CAUTION 12) - CPU Temperature Sensing Monitor - CPU/Chassis/Power Fan Tachometer - Microsoft® Windows® 7 / 7 64-bit / VistaTM / VistaTM 64-bit / XP / XP 64-bit compliant Certifications - FCC, CE, ... or using the thirdparty overclocking tools. ACPI 1.1 Compliance Wake Up Events - CPU, VCCM, NB, SB Voltage Multi-adjustment Support CD - ASRock XFast USB (see CAUTION 13) - Turbo 50 / Turbo 60 CPU Overclocking - CPU/Chassis Fan Multi-Speed Control - ErP/EuP Ready (...
User Manual
Page 9
... to the operating system limitation, the actual memory size may be less than 4GB for the reservation for the compatible memory modules. For Windows® OS with your friends. For audio output, this motherboard supports both stereo and mono modes. Please check the table on our ...website for system usage under Windows® 7 / VistaTM / XP. ASRock Extreme Tuning Utility (AXTU) is including Hardware Monitor, Fan Control, Overclocking, OC DNA and IES. In Fan Control, it shows ...
... to the operating system limitation, the actual memory size may be less than 4GB for the reservation for the compatible memory modules. For Windows® OS with your friends. For audio output, this motherboard supports both stereo and mono modes. Please check the table on our ...website for system usage under Windows® 7 / VistaTM / XP. ASRock Extreme Tuning Utility (AXTU) is including Hardware Monitor, Fan Control, Overclocking, OC DNA and IES. In Fan Control, it shows ...

User Manual
Page 10
... you can boost USB storage device performance. ASRock website: http://www.asrock.com/Feature/Aiwi/index.asp 10. To experience intuitive motion controlled games is a BIOS flash utility embedded in a few clicks without entering operating systems first like MS-DOS or Windows®. To use FAT32/16/12 file ...system. 9. ASRock Instant Flash is no longer only available at Wii. With this tool and save the new BIOS file to your...
... you can boost USB storage device performance. ASRock website: http://www.asrock.com/Feature/Aiwi/index.asp 10. To experience intuitive motion controlled games is a BIOS flash utility embedded in a few clicks without entering operating systems first like MS-DOS or Windows®. To use FAT32/16/12 file ...system. 9. ASRock Instant Flash is no longer only available at Wii. With this tool and save the new BIOS file to your...

User Manual
Page 20
... Quad CrossFireXTM feature are properly seated on the slots. 20 Please check AMD website for detailed installation guide. Currently CrossFireXTM feature is supported with Windows® XP with Windows® VistaTM / 7 OS only. Step 1. All three CrossFireXTM components, a CrossFireXTM Ready graphics card, a CrossFireXTM Ready motherboard and a CrossFireXTM Edition co-processor graphics card...
... Quad CrossFireXTM feature are properly seated on the slots. 20 Please check AMD website for detailed installation guide. Currently CrossFireXTM feature is supported with Windows® XP with Windows® VistaTM / 7 OS only. Step 1. All three CrossFireXTM components, a CrossFireXTM Ready graphics card, a CrossFireXTM Ready motherboard and a CrossFireXTM Edition co-processor graphics card...
User Manual
Page 24
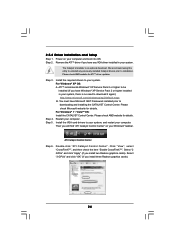
...details. Then you have Microsoft .NET Framework installed prior to download it again): http://www.microsoft.com/windowsxp/sp2/default.mspx B. For Windows® XP OS: A. ATI Catalyst Control Center Step 6. Select "3 GPUs" and click "OK" (if you install two Radeon ... AMD website for details. Please check AMD website for ATITM driver updates. Install the required drivers to your system, and restart your Windows® taskbar. Double-click "ATI Catalyst Control Center". 2.5.2 Driver Installation and Setup Step 1. Power on your computer. Install the ...
...details. Then you have Microsoft .NET Framework installed prior to download it again): http://www.microsoft.com/windowsxp/sp2/default.mspx B. For Windows® XP OS: A. ATI Catalyst Control Center Step 6. Select "3 GPUs" and click "OK" (if you install two Radeon ... AMD website for details. Please check AMD website for ATITM driver updates. Install the required drivers to your system, and restart your Windows® taskbar. Double-click "ATI Catalyst Control Center". 2.5.2 Driver Installation and Setup Step 1. Power on your computer. Install the ...

User Manual
Page 29
... (LIN) to the "FrontMic" Tab in our manual and chassis manual to install your system using the power switch. C. To activate the front mic. For Windows® 7 / 7 64-bit / VistaTM / VistaTM 64-bit OS: Go to OUT2_L. Note the positive and negative pins before connecting the cables. Press...LED): Connect to the power switch on the chassis front panel. The LED is in S1 sleep state. Connect Ground (GND) to function correctly. For Windows® XP / XP 64-bit OS: Select "Mixer". The LED keeps blinking when the sys-tem is operating. Front Panel Audio Header (9-pin ...
... (LIN) to the "FrontMic" Tab in our manual and chassis manual to install your system using the power switch. C. To activate the front mic. For Windows® 7 / 7 64-bit / VistaTM / VistaTM 64-bit OS: Go to OUT2_L. Note the positive and negative pins before connecting the cables. Press...LED): Connect to the power switch on the chassis front panel. The LED is in S1 sleep state. Connect Ground (GND) to function correctly. For Windows® XP / XP 64-bit OS: Select "Mixer". The LED keeps blinking when the sys-tem is operating. Front Panel Audio Header (9-pin ...
User Manual
Page 41
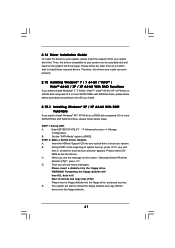
... drivers. Enter UEFI SETUP UTILITY Advanced screen Storage Configuration. Insert the ASRock Support CD into the floppy diskette. 41 Please select CD- STEP 1: Set up , press key, and then a window for boot devices selection appears. B. Then you want to install Windows® 7 / 7 64-bit / VistaTM / VistaTM 64-bit...Driver Installation Guide To install the drivers to your system, please insert the support CD to the OS you install. 2.15.1 Installing Windows® XP / XP 64-bit With RAID Functions If you will see the message on the screen, "Generate Serial ATA driver diskette ...
... drivers. Enter UEFI SETUP UTILITY Advanced screen Storage Configuration. Insert the ASRock Support CD into the floppy diskette. 41 Please select CD- STEP 1: Set up , press key, and then a window for boot devices selection appears. B. Then you want to install Windows® 7 / 7 64-bit / VistaTM / VistaTM 64-bit...Driver Installation Guide To install the drivers to your system, please insert the support CD to the OS you install. 2.15.1 Installing Windows® XP / XP 64-bit With RAID Functions If you will see the message on the screen, "Generate Serial ATA driver diskette ...

User Manual
Page 42
... UEFI. B. STEP 2: Use "RAID Installation Guide" to set RAID configuration. Select the driver to install according to the OS you install. 2.15.2 Installing Windows® 7 / 7 64-bit / VistaTM / VistaTM 64-bit With RAID Functions If you need to check the RAID installation guide in the Support CD... the SATA3 driver diskette containing the AMD RAID driver. After step 1, 2, 3, you can start to configure RAID function, you start to install Windows® XP / XP 64-bit OS on your system. Please refer to the BIOS RAID installation guide part of the document in the following ...
... UEFI. B. STEP 2: Use "RAID Installation Guide" to set RAID configuration. Select the driver to install according to the OS you install. 2.15.2 Installing Windows® 7 / 7 64-bit / VistaTM / VistaTM 64-bit With RAID Functions If you need to check the RAID installation guide in the Support CD... the SATA3 driver diskette containing the AMD RAID driver. After step 1, 2, 3, you can start to configure RAID function, you start to install Windows® XP / XP 64-bit OS on your system. Please refer to the BIOS RAID installation guide part of the document in the following ...

User Manual
Page 43
... XP / XP 64-bit OS on your SATA3 HDDs without RAID functions, please follow below procedures according to the OS you install. 2.16.1 Installing Windows® XP / XP 64-bit Without RAID Functions If you install. B. Using SATA3 HDDs with NCQ and Hot Plug functions (AHCI mode) STEP ...1: Set up UEFI. Make a SATA3 driver diskette by following section 2.15.1 step 2 on your system. 43 STEP 3: Install Windows® XP / XP 64-bit OS on your system. After reading the floppy disk, the driver will be presented. Enter UEFI SETUP UTILITY Advanced screen...
... XP / XP 64-bit OS on your SATA3 HDDs without RAID functions, please follow below procedures according to the OS you install. 2.16.1 Installing Windows® XP / XP 64-bit Without RAID Functions If you install. B. Using SATA3 HDDs with NCQ and Hot Plug functions (AHCI mode) STEP ...1: Set up UEFI. Make a SATA3 driver diskette by following section 2.15.1 step 2 on your system. 43 STEP 3: Install Windows® XP / XP 64-bit OS on your system. After reading the floppy disk, the driver will be presented. Enter UEFI SETUP UTILITY Advanced screen...

User Manual
Page 44
...you enable Untied Overclocking function, please enter "Overclock Mode" option of UEFI setup to set the selection from [Auto] to [AHCI]. STEP 2: Install Windows® 7 / 7 64-bit / VistaTM / VistaTM 64-bit OS on page 8 for the possible overclocking risk before you apply Untied Overclocking Technology....; 7 / 7 64-bit / VistaTM / VistaTM 64-bit Without RAID Functions If you want to install Windows® 7 / 7 64-bit / VistaTM / VistaTM 64-bit on your system. B. STEP 2: Install Windows® 7 / 7 64-bit / VistaTM / VistaTM 64-bit OS on your SATA3 HDDs without NCQ and Hot Plug functions...
...you enable Untied Overclocking function, please enter "Overclock Mode" option of UEFI setup to set the selection from [Auto] to [AHCI]. STEP 2: Install Windows® 7 / 7 64-bit / VistaTM / VistaTM 64-bit OS on page 8 for the possible overclocking risk before you apply Untied Overclocking Technology....; 7 / 7 64-bit / VistaTM / VistaTM 64-bit Without RAID Functions If you want to install Windows® 7 / 7 64-bit / VistaTM / VistaTM 64-bit on your system. B. STEP 2: Install Windows® 7 / 7 64-bit / VistaTM / VistaTM 64-bit OS on your SATA3 HDDs without NCQ and Hot Plug functions...

User Manual
Page 50
... Calibration CPU Load-Line Calibration helps prevent CPU voltage droop when the system is [Auto]. In this option, you like to change Four Activate Window (tFAW) Auto/Manual setting. The default value is under heavy load. CPU VDDA Voltage Use this to your own requirements. 50 NB Voltage... default value is [Auto]. The default value is [Auto]. Would you are allowed to load and save current setting user defaults? Four Activate Window (tFAW) Use this item to save three user defaults according to select CPU VDDA Voltage. PCIE VDDA Voltage Use this to select PCIE VDDA ...
... Calibration CPU Load-Line Calibration helps prevent CPU voltage droop when the system is [Auto]. In this option, you like to change Four Activate Window (tFAW) Auto/Manual setting. The default value is under heavy load. CPU VDDA Voltage Use this to your own requirements. 50 NB Voltage... default value is [Auto]. The default value is [Auto]. Would you are allowed to load and save current setting user defaults? Four Activate Window (tFAW) Use this item to save three user defaults according to select CPU VDDA Voltage. PCIE VDDA Voltage Use this to select PCIE VDDA ...

User Manual
Page 51
...to update your UEFI, and reboot your UEFI only in a few clicks without entering operating systems first like MS-DOS or Windows®. If you execute ASRock Instant Flash utility, the utility will show the UEFI files and their respective information. Setting wrong values in Flash ROM. ...to your USB flash drive, floppy disk or hard drive, then you can update your system after UEFI update process completes. 51 ASRock Instant Flash ASRock Instant Flash is a UEFI flash utility embedded in this section may set the configurations for the following items: CPU Configuration, North Bridge...
...to update your UEFI, and reboot your UEFI only in a few clicks without entering operating systems first like MS-DOS or Windows®. If you execute ASRock Instant Flash utility, the utility will show the UEFI files and their respective information. Setting wrong values in Flash ROM. ...to your USB flash drive, floppy disk or hard drive, then you can update your system after UEFI update process completes. 51 ASRock Instant Flash ASRock Instant Flash is a UEFI flash utility embedded in this section may set the configurations for the following items: CPU Configuration, North Bridge...

User Manual
Page 52
... issue with some memory modules or power supplies. In the C1 power state, the processor maintains the context of the system caches. If you install Windows® 7 / VistaTM and want to enable this function, please set to [Enabled], a VMM (Virtual Machine Architecture) can utilize the additional hardware capabilities provided by AMD...
... issue with some memory modules or power supplies. In the C1 power state, the processor maintains the context of the system caches. If you install Windows® 7 / VistaTM and want to enable this function, please set to [Enabled], a VMM (Virtual Machine Architecture) can utilize the additional hardware capabilities provided by AMD...

User Manual
Page 57
PCI Devices Power On Use this item to enable or disable PCI devices to submit Windows® VistaTM certification. 57 If [Power Off] is selected, the AC/power remains off mode. ACPI HPET Table Use this item to enable or disable ...
PCI Devices Power On Use this item to enable or disable PCI devices to submit Windows® VistaTM certification. 57 If [Power Off] is selected, the AC/power remains off mode. ACPI HPET Table Use this item to enable or disable ...

User Manual
Page 58
... USB devices are four confi guration options: [Enabled], [Auto], [Disabled] and [UEFI Setup Only]. USB devices are not allowed to use under UEFI setup and Windows / Linux OS. The default value is [Enabled].
... USB devices are four confi guration options: [Enabled], [Auto], [Disabled] and [UEFI Setup Only]. USB devices are not allowed to use under UEFI setup and Windows / Linux OS. The default value is [Enabled].
User Manual
Page 63
...Main Menu did not appear automatically, locate and double click on a specific item then follow the installation wizard to visit ASRock's website at http://www.asrock.com; Please install the necessary drivers to your CD-ROM drive. Refer to activate the devices. 4.2.3 Utilities Menu The ...the support CD, insert the CD into your OS documentation for general reference only. Software Support 4.1 Install Operating System This motherboard supports various Microsoft® Windows® operating systems: 7 / 7 64-bit / VistaTM / VistaTM 64-bit / XP / XP 64-bit. Click on the file "ASSETUP.EXE...
...Main Menu did not appear automatically, locate and double click on a specific item then follow the installation wizard to visit ASRock's website at http://www.asrock.com; Please install the necessary drivers to your CD-ROM drive. Refer to activate the devices. 4.2.3 Utilities Menu The ...the support CD, insert the CD into your OS documentation for general reference only. Software Support 4.1 Install Operating System This motherboard supports various Microsoft® Windows® operating systems: 7 / 7 64-bit / VistaTM / VistaTM 64-bit / XP / XP 64-bit. Click on the file "ASSETUP.EXE...

User Manual
Page 64
... size HDD (>2TB). Installing OS on a HDD Larger Than 2TB This motherboard is adopting UEFI BIOS that allows Windows® OS to use Windows® VistaTM 64-bit (with SP1 or above) or Windows® 7 64-bit. 2. Choose the item "UEFI:xxx" to launch boot menu at system POST. 4.... Set AHCI Mode in UEFI Setup Utility > Advanced > Storage Configuration > SATA Mode. 3. Start Windows® installation. 64 Normally it is the device which contains your Windows® installation fi les. Press F11 to boot. ("xxx" is an optical drive.) 5. Please follow below procedure to...
... size HDD (>2TB). Installing OS on a HDD Larger Than 2TB This motherboard is adopting UEFI BIOS that allows Windows® OS to use Windows® VistaTM 64-bit (with SP1 or above) or Windows® 7 64-bit. 2. Choose the item "UEFI:xxx" to launch boot menu at system POST. 4.... Set AHCI Mode in UEFI Setup Utility > Advanced > Storage Configuration > SATA Mode. 3. Start Windows® installation. 64 Normally it is the device which contains your Windows® installation fi les. Press F11 to boot. ("xxx" is an optical drive.) 5. Please follow below procedure to...

Quick Installation Guide
Page 7
...are not responsible for possible damage caused by overclocking. Supports jumperfree - CPU/Chassis/Power Fan Tachometer - English 7 ASRock 890FX Deluxe5 Motherboard CPU Frequency Stepless Control (see CAUTION 8) - Microsoft® Windows® 7 / 7 64-bit / VistaTM / VistaTM 64-bit / XP / XP 64-bit compliant ... ready power supply is required) (see CAUTION 15) * For detailed product information, please visit our website: http://www.asrock.com WARNING Please realize that there is a certain risk involved with GUI support - Overclocking may affect your system stability, or...
...are not responsible for possible damage caused by overclocking. Supports jumperfree - CPU/Chassis/Power Fan Tachometer - English 7 ASRock 890FX Deluxe5 Motherboard CPU Frequency Stepless Control (see CAUTION 8) - Microsoft® Windows® 7 / 7 64-bit / VistaTM / VistaTM 64-bit / XP / XP 64-bit compliant ... ready power supply is required) (see CAUTION 15) * For detailed product information, please visit our website: http://www.asrock.com WARNING Please realize that there is a certain risk involved with GUI support - Overclocking may affect your system stability, or...


