RAID Installation Guide
Page 2
... improve data access and storage since the disk array management software will double the data transfer rate of Independent Disks", which is striped across multiple drives and duplicated on another set of the same model and capacity when creating a RAID set the option to RAID mode by following the detailed instruction of the "User Manual" in our support CD or "Quick Installation Guide", then you to configure RAID functions by using RAID 1 techniques...
... improve data access and storage since the disk array management software will double the data transfer rate of Independent Disks", which is striped across multiple drives and duplicated on another set of the same model and capacity when creating a RAID set the option to RAID mode by following the detailed instruction of the "User Manual" in our support CD or "Quick Installation Guide", then you to configure RAID functions by using RAID 1 techniques...
RAID Installation Guide
Page 4
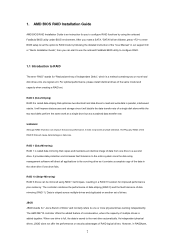
... the floppy disk, the driver will see the message on your system. STEP 1: Set up , press key, and then a window for Windows XP 64-bit.) NOTE. D. The system will start to set the RAID configuration by using the Windows RAID installation guide in this RAID installation guide for proper configuration. When prompted, insert the SATA / SATAII driver diskette containing AMD RAID driver. B. When you install. (Select "AMD AHCI Compatible RAID Controller-x86 platform" for Windows XP, or "AMD AHCI Compatible RAID Controller-x64 platform" for boot devices selection appears...
... the floppy disk, the driver will see the message on your system. STEP 1: Set up , press key, and then a window for Windows XP 64-bit.) NOTE. D. The system will start to set the RAID configuration by using the Windows RAID installation guide in this RAID installation guide for proper configuration. When prompted, insert the SATA / SATAII driver diskette containing AMD RAID driver. B. When you install. (Select "AMD AHCI Compatible RAID Controller-x86 platform" for Windows XP, or "AMD AHCI Compatible RAID Controller-x64 platform" for boot devices selection appears...
RAID Installation Guide
Page 5
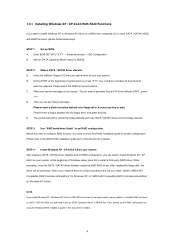
... AMD onboard BIOS will display the following path in BIOS. 1.4 Create Disk Array Power on SATA / SATAII HDDs, you still need to check this is the first time you have booted with RAID functions, please follow the instruction to install Windows 7 / 7 64-bit / Vista / Vista 64-bit OS on your optical drive, and click the "Load Driver" button on the left on the bottom to load the AMD RAID drivers. AMD RAID drivers are no SATA / SATAII device used, please set RAID configuration...
... AMD onboard BIOS will display the following path in BIOS. 1.4 Create Disk Array Power on SATA / SATAII HDDs, you still need to check this is the first time you have booted with RAID functions, please follow the instruction to install Windows 7 / 7 64-bit / Vista / Vista 64-bit OS on your optical drive, and click the "Load Driver" button on the left on the bottom to load the AMD RAID drivers. AMD RAID drivers are no SATA / SATAII device used, please set RAID configuration...
RAID Installation Guide
Page 10
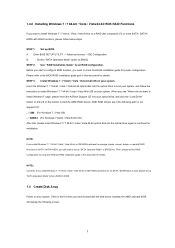
... the PC with the AMD SB710 Controller, where you install RAIDXpert, you are not supported. RAIDXpert uses this guide carefully and follow the instructions below to configure and manage RAID functions. 2.1 Components of all major events/alarms, memory cache management, drive event logging, logical drive maintenance, rebuild, and access to install RAIDXpert on your Windows-based PC or Server. 1. AMD Windows RAID Installation Guide AMD Windows RAID Installation Guide is installed. RAIDXpert RAID management software: The RAIDXpert software installs on a network.
... the PC with the AMD SB710 Controller, where you install RAIDXpert, you are not supported. RAIDXpert uses this guide carefully and follow the instructions below to configure and manage RAID functions. 2.1 Components of all major events/alarms, memory cache management, drive event logging, logical drive maintenance, rebuild, and access to install RAIDXpert on your Windows-based PC or Server. 1. AMD Windows RAID Installation Guide AMD Windows RAID Installation Guide is installed. RAIDXpert RAID management software: The RAIDXpert software installs on a network.
User Manual
Page 9
... that the USB flash drive or hard drive must use Intelligent Energy Saver function, please enable Cool 'n' Quiet option in the BIOS setup in advance. Please be noticed that delivers unparalleled power savings. 8. The voltage regulator can press key during the POST or press key to BIOS setup menu to control your OC settings as a game joystick to access ASRock Instant Flash. To experience intuitive motion controlled games is capable of overclocking settings. To use FAT32/16...
... that the USB flash drive or hard drive must use Intelligent Energy Saver function, please enable Cool 'n' Quiet option in the BIOS setup in advance. Please be noticed that delivers unparalleled power savings. 8. The voltage regulator can press key during the POST or press key to BIOS setup menu to control your OC settings as a game joystick to access ASRock Instant Flash. To experience intuitive motion controlled games is capable of overclocking settings. To use FAT32/16...

User Manual
Page 11
...2 x 240-pin DDR3 DIMM Slots (SATAII_1 (PORT 0)) (Dual Channel: DDR3_A1, DDR3_B1; Blue) 18 USB 2.0 Header (USB4_5, Blue) 6 CPU Fan Connector (CPU_FAN1) 19 USB 2.0 Header (USB6_7, Blue) 7 ATX Power Connector (ATXPWR1) 20 Chassis Fan Connector (CHA_FAN1) 8 Chassis Speaker Header 21 Floppy Connector (FLOPPY1) (SPEAKER 1, White) 22 Print Port Header (LPT1, White) 9 Clear CMOS Jumper (CLRCMOS1) 23 Front Panel Audio Header 10 Primary IDE Connector (IDE1, Blue) (HD_AUDIO1, White) 11 Northbridge Controller 24 PCI Slots (PCI1- 2) 12 Southbridge Controller 25 SPI Flash Memory (8Mb) 13...
...2 x 240-pin DDR3 DIMM Slots (SATAII_1 (PORT 0)) (Dual Channel: DDR3_A1, DDR3_B1; Blue) 18 USB 2.0 Header (USB4_5, Blue) 6 CPU Fan Connector (CPU_FAN1) 19 USB 2.0 Header (USB6_7, Blue) 7 ATX Power Connector (ATXPWR1) 20 Chassis Fan Connector (CHA_FAN1) 8 Chassis Speaker Header 21 Floppy Connector (FLOPPY1) (SPEAKER 1, White) 22 Print Port Header (LPT1, White) 9 Clear CMOS Jumper (CLRCMOS1) 23 Front Panel Audio Header 10 Primary IDE Connector (IDE1, Blue) (HD_AUDIO1, White) 11 Northbridge Controller 24 PCI Slots (PCI1- 2) 12 Southbridge Controller 25 SPI Flash Memory (8Mb) 13...
User Manual
Page 29
... auto-detected and listed on the screen, "Generate Serial ATA driver diskette [YN]?", press . A. Therefore, the drivers you see these messages, Please insert a blank formatted diskette into floppy drive A: press any key to start to format the floppy diskette and copy SATA / SATAII drivers into your optical drive to boot your optical drive first. Enter BIOS SETUP UTILITY Advanced screen Storage Configuration. Set the "SATA Operation Mode" option to install Windows® XP / XP 64-bit on a RAID disk composed of system boot...
... auto-detected and listed on the screen, "Generate Serial ATA driver diskette [YN]?", press . A. Therefore, the drivers you see these messages, Please insert a blank formatted diskette into floppy drive A: press any key to start to format the floppy diskette and copy SATA / SATAII drivers into your optical drive to boot your optical drive first. Enter BIOS SETUP UTILITY Advanced screen Storage Configuration. Set the "SATA Operation Mode" option to install Windows® XP / XP 64-bit on a RAID disk composed of system boot...
User Manual
Page 30
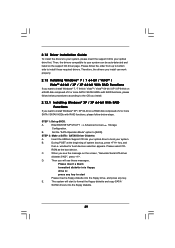
... Support CD for Windows® XP 64-bit.) NOTE. After reading the floppy disk, the driver will be presented. Then, please set RAID configuration. A. Set the "SATA Operation Mode" option to set up BIOS. Please refer to the BIOS RAID installation guide part of Windows® setup, press F6 to the OS you install. (Select "AMD AHCI Compatible RAID Controllerx86 platform" for Windows® XP, or "AMD AHCI Compatible RAID Controller-x64 platform" for proper configuration. STEP 3: Use "RAID Installation Guide" to set the RAID configuration by using the Windows RAID installation guide...
... Support CD for Windows® XP 64-bit.) NOTE. After reading the floppy disk, the driver will be presented. Then, please set RAID configuration. A. Set the "SATA Operation Mode" option to set up BIOS. Please refer to the BIOS RAID installation guide part of Windows® setup, press F6 to the OS you install. (Select "AMD AHCI Compatible RAID Controllerx86 platform" for Windows® XP, or "AMD AHCI Compatible RAID Controller-x64 platform" for proper configuration. STEP 3: Use "RAID Installation Guide" to set the RAID configuration by using the Windows RAID installation guide...

User Manual
Page 38
...BIOS SETUP UTILITY Main OC Tweaker Advanced H/W Monitor Boot Security Exit EZ Overclocking Load Optimized CPU OC Setting Load Optimized mGPU OC Setting CPU Configuration Overclock Mode CPU Frequency (MHz) PCIE Frequency (MHz) Spread Spectrum Boot Failure Guard Boot Failure Guard Count Advanced Clock Calibration CPU Active Core Control Processor Maximum Frequency North Bridge Maximum Frequency Processor Maximum Voltage Multiplier/Voltage Change [Press Enter] [Press Enter] [Auto] [200] [100] [Auto] [Enabled] [3] [Disabled] [Disabled] x13.5 2700 MHZ x10.0 2000 MHz 1.325 V [Manual] Overclocking...
...BIOS SETUP UTILITY Main OC Tweaker Advanced H/W Monitor Boot Security Exit EZ Overclocking Load Optimized CPU OC Setting Load Optimized mGPU OC Setting CPU Configuration Overclock Mode CPU Frequency (MHz) PCIE Frequency (MHz) Spread Spectrum Boot Failure Guard Boot Failure Guard Count Advanced Clock Calibration CPU Active Core Control Processor Maximum Frequency North Bridge Maximum Frequency Processor Maximum Voltage Multiplier/Voltage Change [Press Enter] [Press Enter] [Auto] [200] [100] [Auto] [Enabled] [3] [Disabled] [Disabled] x13.5 2700 MHZ x10.0 2000 MHz 1.325 V [Manual] Overclocking...
User Manual
Page 39
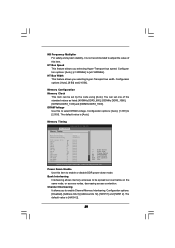
...DRAM voltage. Power Down Enable Use this to enable or disable DDR power down mode. Memory Configuration Memory Clock This item can set by the code using [Auto]. The default value is [Auto]. Memory Timing BIOS SETUP UTILITY OC Tweaker Memory Timing Power Down Enable Bank Interleaving Channel Interleaving [Disabled] [Auto] [HASH 2] CAS Latency (CL) 10 TRCD 11 TRP 11 TRAS 29 TRTP 6 TRRD 5 TWTR 6 TWR 12 TRC 40 TRWTWB 8 TRWTTO 7 TWRRD 2 TWRWR 2 TRDRD 4 [Auto] [Auto] [Auto] [Auto] [Auto] [Auto] [Auto] [Auto] [Auto] [Auto] [Auto] [Auto] [Auto] [Auto...
...DRAM voltage. Power Down Enable Use this to enable or disable DDR power down mode. Memory Configuration Memory Clock This item can set by the code using [Auto]. The default value is [Auto]. Memory Timing BIOS SETUP UTILITY OC Tweaker Memory Timing Power Down Enable Bank Interleaving Channel Interleaving [Disabled] [Auto] [HASH 2] CAS Latency (CL) 10 TRCD 11 TRP 11 TRAS 29 TRTP 6 TRRD 5 TWTR 6 TWR 12 TRC 40 TRWTWB 8 TRWTTO 7 TWRRD 2 TWRWR 2 TRDRD 4 [Auto] [Auto] [Auto] [Auto] [Auto] [Auto] [Auto] [Auto] [Auto] [Auto] [Auto] [Auto] [Auto] [Auto...
User Manual
Page 42
Configuration options: [Auto], [0.75x], [1.00x], [1.25x] and [1.50x]. The default value is [Auto]. CHA DQS Drive Use this to enable or disable the Onboard GPU Clock Override feature. 42 The default value is [Auto]. Configuration options: [Auto], [0.75x], [1.00x], [1.25x] and [1.50x]. Chipset Settings Onboard GPU Clock Override This allows you to adjust values for CHA DQS Drive. Configuration options: [Auto], [0.75x], [1.00x], [1.25x] and [1.50x]. Configuration options: [Auto], [0.75x], [1.00x], [1.25x] and [1.50x]. The default value is [Auto]. CHB...
Configuration options: [Auto], [0.75x], [1.00x], [1.25x] and [1.50x]. The default value is [Auto]. CHA DQS Drive Use this to enable or disable the Onboard GPU Clock Override feature. 42 The default value is [Auto]. Configuration options: [Auto], [0.75x], [1.00x], [1.25x] and [1.50x]. Chipset Settings Onboard GPU Clock Override This allows you to adjust values for CHA DQS Drive. Configuration options: [Auto], [0.75x], [1.00x], [1.25x] and [1.50x]. Configuration options: [Auto], [0.75x], [1.00x], [1.25x] and [1.50x]. The default value is [Auto]. CHB...
User Manual
Page 45
... may reduce CPU voltage and memory frequency, and lead to [Enabled], a VMM (Virtual Machine Architecture) can utilize the additional hardware capabilities provided by AMD-V. The default value is [Enabled]. CPU Thermal Throttle Use this item to keep the CPU from the chipset. Cool 'n' Quiet Use this item to enable CPU internal thermal control mechanism to enable or disable AMD's Cool 'n' QuietTM technology. L3 Cache Allocation The default value is supported through the native processor instructions HLT and...
... may reduce CPU voltage and memory frequency, and lead to [Enabled], a VMM (Virtual Machine Architecture) can utilize the additional hardware capabilities provided by AMD-V. The default value is [Enabled]. CPU Thermal Throttle Use this item to keep the CPU from the chipset. Cool 'n' Quiet Use this item to enable CPU internal thermal control mechanism to enable or disable AMD's Cool 'n' QuietTM technology. L3 Cache Allocation The default value is supported through the native processor instructions HLT and...
User Manual
Page 48
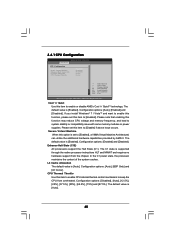
...] [Auto] [Disabled] [Disabled] Select the type of device connected to the configurations of this item to adjust SATA Operation Mode. Configuration options: [AHCI], [RAID] and [IDE]. 3.4.4 Storage Configuration BIOS SETUP UTILITY Advanced Storage Configuration Onboard SATA Controller SATA Operation Mode IDE1 Master IDE1 Slave SATAII_1 SATAII_2 SATAII_3 SATAII_4 [Enabled] [IDE] [Hard Disk] [Not Detected] [Not Detected] [Not Detected] [Not Detected] [Not Detected] Configure onboard serial ATA controller. +F1 F9 F10 ESC Select Screen Select Item Change Option General Help Load Defaults...
...] [Auto] [Disabled] [Disabled] Select the type of device connected to the configurations of this item to adjust SATA Operation Mode. Configuration options: [AHCI], [RAID] and [IDE]. 3.4.4 Storage Configuration BIOS SETUP UTILITY Advanced Storage Configuration Onboard SATA Controller SATA Operation Mode IDE1 Master IDE1 Slave SATAII_1 SATAII_2 SATAII_3 SATAII_4 [Enabled] [IDE] [Hard Disk] [Not Detected] [Not Detected] [Not Detected] [Not Detected] [Not Detected] Configure onboard serial ATA controller. +F1 F9 F10 ESC Select Screen Select Item Change Option General Help Load Defaults...
User Manual
Page 49
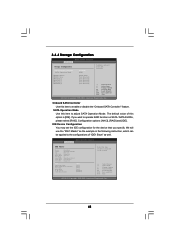
... Windows; If this feature is used for IDE CD/DVD drives. [ARMD]: This is enabled, it will enhance hard disk performance by optimizing the hard disk timing. This is [Auto]. Configuration options: [Disabled], [Auto], [Enabled]. 32Bit Data Transfer Use this item to enable or disable the S.M.A.R.T. (Self-Monitoring, Analysis, and Reporting Technology) feature. LBA/Large Mode Use this item to select the LBA/Large mode for Netware and UNIX user, select [Disabled] to disable the LBA/Large mode. Use...
... Windows; If this feature is used for IDE CD/DVD drives. [ARMD]: This is enabled, it will enhance hard disk performance by optimizing the hard disk timing. This is [Auto]. Configuration options: [Disabled], [Auto], [Enabled]. 32Bit Data Transfer Use this item to enable or disable the S.M.A.R.T. (Self-Monitoring, Analysis, and Reporting Technology) feature. LBA/Large Mode Use this item to select the LBA/Large mode for Netware and UNIX user, select [Disabled] to disable the LBA/Large mode. Use...

User Manual
Page 53
... BIOS setup and Windows / Linux OS. 3.4.8 USB Configuration BIOS SETUP UTILITY Advanced USB Configuration USB Controller USB 2.0 Support Legacy USB Support [Enabled] [Enabled] [Enabled] USB Keyboard/Remote Power On [Disabled] USB Mouse Power On [Disabled] To enable or disable the onboard USB controllers. +F1 F9 F10 ESC Select Screen Select Item Change Option General Help Load Defaults Save and Exit Exit v02.54 (C) Copyright 1985-2005, American Megatrends, Inc. USB 2.0 Support Use this option to enable or disable USB Mouse Power On on the system. USB devices are connected...
... BIOS setup and Windows / Linux OS. 3.4.8 USB Configuration BIOS SETUP UTILITY Advanced USB Configuration USB Controller USB 2.0 Support Legacy USB Support [Enabled] [Enabled] [Enabled] USB Keyboard/Remote Power On [Disabled] USB Mouse Power On [Disabled] To enable or disable the onboard USB controllers. +F1 F9 F10 ESC Select Screen Select Item Change Option General Help Load Defaults Save and Exit Exit v02.54 (C) Copyright 1985-2005, American Megatrends, Inc. USB 2.0 Support Use this option to enable or disable USB Mouse Power On on the system. USB devices are connected...
User Manual
Page 56
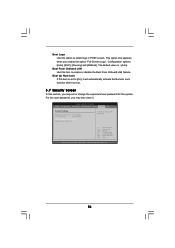
... 1985-2005, American Megatrends, Inc. 56 The default value is set or change the supervisor/user password for the system. Boot Up Num-Lock If this item is [Auto]. This option only appears when you enable the option "Full Screen Logo". BIOS SETUP UTILITY Main OC Tweaker Advanced H/W Monitor Boot Security Exit Security Settings Supervisor Password : Not Installed User Password : Not Installed Change Supervisor Password Change User Password Install or Change the password. Boot Logo Use this item to enable or disable the Boot From Onboard LAN feature.
... 1985-2005, American Megatrends, Inc. 56 The default value is set or change the supervisor/user password for the system. Boot Up Num-Lock If this item is [Auto]. This option only appears when you enable the option "Full Screen Logo". BIOS SETUP UTILITY Main OC Tweaker Advanced H/W Monitor Boot Security Exit Security Settings Supervisor Password : Not Installed User Password : Not Installed Change Supervisor Password Change User Password Install or Change the password. Boot Logo Use this item to enable or disable the Boot From Onboard LAN feature.
User Manual
Page 58
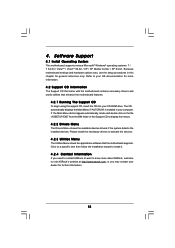
... activate the devices. 4.2.3 Utilities Menu The Utilities Menu shows the applications software that enhance the motherboard features. 4.2.1 Running The Support CD To begin using the support CD, insert the CD into your CD-ROM drive. 4. Because motherboard settings and hardware options vary, use the setup procedures in the Support CD to your OS documentation for general reference only. Refer to display the menus. 4.2.2 Drivers Menu The Drivers Menu shows the available devices drivers if the...
... activate the devices. 4.2.3 Utilities Menu The Utilities Menu shows the applications software that enhance the motherboard features. 4.2.1 Running The Support CD To begin using the support CD, insert the CD into your CD-ROM drive. 4. Because motherboard settings and hardware options vary, use the setup procedures in the Support CD to your OS documentation for general reference only. Refer to display the menus. 4.2.2 Drivers Menu The Drivers Menu shows the available devices drivers if the...
Quick Installation Guide
Page 9
... can update your USB flash drive, floppy disk or hard drive, then you can start experiencing the exciting motion controlled games. Please visit our website for the user to your OC settings as a profile and share with others. Just launch this utility, you have to do is able to improve efficiency when the CPU cores are idle. ASRock AIWI is the world's first utility to access ASRock Instant Flash. Connecting your...
... can update your USB flash drive, floppy disk or hard drive, then you can start experiencing the exciting motion controlled games. Please visit our website for the user to your OC settings as a profile and share with others. Just launch this utility, you have to do is able to improve efficiency when the CPU cores are idle. ASRock AIWI is the world's first utility to access ASRock Instant Flash. Connecting your...
Quick Installation Guide
Page 21
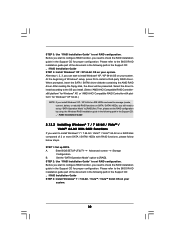
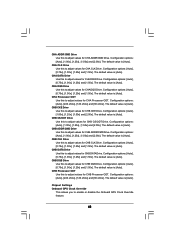
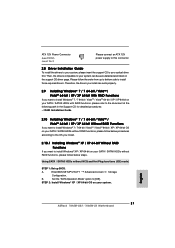
... your system. Set the "SATA Operation Mode" option to your SATA / SATAII HDDs with RAID functions, please refer to the document at the following path in the Support CD for detailed procedures: ..\ RAID Installation Guide 2.10 Installing Windows® 7 / 7 64-bit / VistaTM / VistaTM 64-bit / XP / XP 64-bit Without RAID Functions If you install can be auto-detected and listed on the support CD driver page. English 21 ASRock 760GM-GS3 / 760GM-S3 Motherboard B. Enter BIOS SETUP UTILITY Advanced screen Storage Configuration. Please...
... your system. Set the "SATA Operation Mode" option to your SATA / SATAII HDDs with RAID functions, please refer to the document at the following path in the Support CD for detailed procedures: ..\ RAID Installation Guide 2.10 Installing Windows® 7 / 7 64-bit / VistaTM / VistaTM 64-bit / XP / XP 64-bit Without RAID Functions If you install can be auto-detected and listed on the support CD driver page. English 21 ASRock 760GM-GS3 / 760GM-S3 Motherboard B. Enter BIOS SETUP UTILITY Advanced screen Storage Configuration. Please...
Quick Installation Guide
Page 23
... in the Support CD to the User Manual (PDF file) contained in your CD-ROM drive. otherwise, POST continues with the motherboard contains necessary drivers and useful utilities that will display the Main Menu automatically if "AUTORUN" is designed to select among the predetermined choices. The Support CD that came with its various sub-menus and to be user-friendly. 3. When you wish to enter BIOS Setup utility; If you start up...
... in the Support CD to the User Manual (PDF file) contained in your CD-ROM drive. otherwise, POST continues with the motherboard contains necessary drivers and useful utilities that will display the Main Menu automatically if "AUTORUN" is designed to select among the predetermined choices. The Support CD that came with its various sub-menus and to be user-friendly. 3. When you wish to enter BIOS Setup utility; If you start up...


