
User Manual
Page 4
... 2.4 Expansion Slots (PCI and PCI Express Slots) 16 2.5 Jumpers Setup 17 2.6 Onboard Headers and Connectors 18 Chapter 3 Software and Utilities Operation 22 3.1 Installing Drivers 22 3.2 ASRock Live Update & APP Shop 23 3.2.1 UI Overview 23 3.2.2 Apps 24 3.2.3 BIOS & Drivers 27 3.2.4 Setting 28 Chapter 4 BIOS SETUP UTILITY 29 4.1 Introduction 29...
... 2.4 Expansion Slots (PCI and PCI Express Slots) 16 2.5 Jumpers Setup 17 2.6 Onboard Headers and Connectors 18 Chapter 3 Software and Utilities Operation 22 3.1 Installing Drivers 22 3.2 ASRock Live Update & APP Shop 23 3.2.1 UI Overview 23 3.2.2 Apps 24 3.2.3 BIOS & Drivers 27 3.2.4 Setting 28 Chapter 4 BIOS SETUP UTILITY 29 4.1 Introduction 29...
User Manual
Page 6
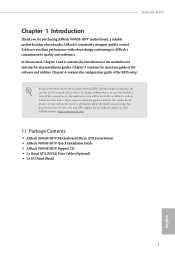
... support related to quality and endurance. ASRock website http://www.asrock.com. 1.1 Package Contents • ASRock 760GM-HDV Motherboard (Micro ATX Form Factor) • ASRock 760GM-HDV Quick Installation Guide • ASRock 760GM-HDV Support CD • 2 x Serial ATA (SATA) Data Cables (Optional) • 1 x I/O Panel Shield 1 English Because the motherboard specifications and the BIOS software might be updated, the content of this motherboard...
... support related to quality and endurance. ASRock website http://www.asrock.com. 1.1 Package Contents • ASRock 760GM-HDV Motherboard (Micro ATX Form Factor) • ASRock 760GM-HDV Quick Installation Guide • ASRock 760GM-HDV Support CD • 2 x Serial ATA (SATA) Data Cables (Optional) • 1 x I/O Panel Shield 1 English Because the motherboard specifications and the BIOS software might be updated, the content of this motherboard...

User Manual
Page 22
... you clear the CMOS, the case open may be cleared only if the CMOS battery is "Open". If you to clear the data in CMOS. 760GM-HDV 2.5 Jumpers Setup The illustration shows how jumpers are setup. However, please do not clear the CMOS right after clearing the CMOS. If you need to... profile will be detected. When the jumper cap is placed on the pins, the jumper is removed. After waiting for 5 seconds. Please adjust the BIOS option "Clear Status" to clear the CMOS when you just finish updating the BIOS, you must boot up the system first, and then shut it down before you...
... you clear the CMOS, the case open may be cleared only if the CMOS battery is "Open". If you to clear the data in CMOS. 760GM-HDV 2.5 Jumpers Setup The illustration shows how jumpers are setup. However, please do not clear the CMOS right after clearing the CMOS. If you need to... profile will be detected. When the jumper cap is placed on the pins, the jumper is removed. After waiting for 5 seconds. Please adjust the BIOS option "Clear Status" to clear the CMOS when you just finish updating the BIOS, you must boot up the system first, and then shut it down before you...

User Manual
Page 32
760GM-HDV 3.2.3 BIOS & Drivers Installing BIOS or Drivers When the "BIOS & Drivers" tab is selected, you want to update. Click to select one or more items you will see more details. Step 3 Click Update to see a list of recommended or critical updates for the BIOS or drivers. Please update them all soon. Step 1 Please check the item information before update. Click on Step 2 to start the update process. 27 English
760GM-HDV 3.2.3 BIOS & Drivers Installing BIOS or Drivers When the "BIOS & Drivers" tab is selected, you want to update. Click to select one or more items you will see more details. Step 3 Click Update to see a list of recommended or critical updates for the BIOS or drivers. Please update them all soon. Step 1 Please check the item information before update. Click on Step 2 to start the update process. 27 English

User Manual
Page 34
... system by pressing + + , or by pressing the reset button on the system chassis. 760GM-HDV Chapter 4 BIOS SETUP UTILITY 4.1 Introduction This section explains how to use the BIOS SETUP UTILITY to enter the BIOS SETUP UTILITY after you power on the computer, otherwise, the Power-On-Self-Test (POST)... and descriptions are for reference purpose only, and they may run the BIOS SETUP UTILITY by turning the system off and then back on your system. Because the BIOS software is constantly being updated, the following selections: Main For setting system time/date information OC Tweaker...
... system by pressing + + , or by pressing the reset button on the system chassis. 760GM-HDV Chapter 4 BIOS SETUP UTILITY 4.1 Introduction This section explains how to use the BIOS SETUP UTILITY to enter the BIOS SETUP UTILITY after you power on the computer, otherwise, the Power-On-Self-Test (POST)... and descriptions are for reference purpose only, and they may run the BIOS SETUP UTILITY by turning the system off and then back on your system. Because the BIOS software is constantly being updated, the following selections: Main For setting system time/date information OC Tweaker...

User Manual
Page 36
... Time [Hour:Minute:Second] Use this item to specify the system time. 760GM-HDV 4.2 Main Screen When you enter the BIOS SETUP UTILITY, the Main screen will appear and display the system overview. BIOS SETUP UTILITY Main OC Tweaker Advanced H/W Monitor Boot Security Exit System Overview System... Time System Date [17:00:09] [Wed 11/14/2012] BIOS Version : 760GM-HDV P1.00 Processor Type : AMD FX(tm)-8100 Eight-Core Processor (64bit) Processor Speed : 2800MHz Microcode Update : 600F12/6000626 L1 Cache Size : 384KB L2 Cache Size : 8192KB L3 Cache Size ...
... Time [Hour:Minute:Second] Use this item to specify the system time. 760GM-HDV 4.2 Main Screen When you enter the BIOS SETUP UTILITY, the Main screen will appear and display the system overview. BIOS SETUP UTILITY Main OC Tweaker Advanced H/W Monitor Boot Security Exit System Overview System... Time System Date [17:00:09] [Wed 11/14/2012] BIOS Version : 760GM-HDV P1.00 Processor Type : AMD FX(tm)-8100 Eight-Core Processor (64bit) Processor Speed : 2800MHz Microcode Update : 600F12/6000626 L1 Cache Size : 384KB L2 Cache Size : 8192KB L3 Cache Size ...

User Manual
Page 37
...v02.54 (C) Copyright 1985-2005, American Megatrends, Inc. Configuration options: [Auto] and [Manual]. The default value is constantly being updated, the following BIOS setup screens and descriptions are for better system stability. 4.3 OC Tweaker Screen In the OC Tweaker screen, you see on your screen.... Screen Select Item Enter Go to adjust CPU frequency. Boot Failure Guard If the computer fails to your own risk and expense. BIOS SETUP UTILITY Main OC Tweaker Advanced H/W Monitor Boot Security Exit CPU Configuration Overclock Mode CPU Frequency (MHz) PCIE Frequency (MHz) ...
...v02.54 (C) Copyright 1985-2005, American Megatrends, Inc. Configuration options: [Auto] and [Manual]. The default value is constantly being updated, the following BIOS setup screens and descriptions are for better system stability. 4.3 OC Tweaker Screen In the OC Tweaker screen, you see on your screen.... Screen Select Item Enter Go to adjust CPU frequency. Boot Failure Guard If the computer fails to your own risk and expense. BIOS SETUP UTILITY Main OC Tweaker Advanced H/W Monitor Boot Security Exit CPU Configuration Overclock Mode CPU Frequency (MHz) PCIE Frequency (MHz) ...

User Manual
Page 43
4.4 Advanced Screen In this section may cause the system to malfunction. BIOS Update Utility Instant Flash Save BIOS files in your BIOS. BIOS SETUP UTILITY Main OC Tweaker Advanced H/W Monitor Boot Security Exit Advanced Settings Options for CPU WARNING : Setting ...cause system to malfunction. CPU Configuration Chipset Configuration ACPI Configuration Storage Configuration PCIPnP Configuration USB Configuration BIOS Update Utility Instant Flash Select Screen Select Item Enter Go to update your USB storage device and run Instant Flash to Sub Screen F1 General Help F9 Load Defaults...
4.4 Advanced Screen In this section may cause the system to malfunction. BIOS Update Utility Instant Flash Save BIOS files in your BIOS. BIOS SETUP UTILITY Main OC Tweaker Advanced H/W Monitor Boot Security Exit Advanced Settings Options for CPU WARNING : Setting ...cause system to malfunction. CPU Configuration Chipset Configuration ACPI Configuration Storage Configuration PCIPnP Configuration USB Configuration BIOS Update Utility Instant Flash Select Screen Select Item Enter Go to update your USB storage device and run Instant Flash to Sub Screen F1 General Help F9 Load Defaults...


