
RAID Installation Guide
Page 1
ATI RAID Installation Guide 1. ATI Windows RAID Installation Guide 8 2.1 Components of WebPAM Installation Software 8 2.2 Browser Support 8 2.3 Installing WebPAM 8 2.4 Log-in to RAID 2 1.2 RAID Configurations Precautions 2 1.3 Create Disk Array 3 2. ATI BIOS RAID Installation Guide 2 1.1 Introduction to WebPAM 11 2.5 Create RAID in WebPAM 12 1
ATI RAID Installation Guide 1. ATI Windows RAID Installation Guide 8 2.1 Components of WebPAM Installation Software 8 2.2 Browser Support 8 2.3 Installing WebPAM 8 2.4 Log-in to RAID 2 1.2 RAID Configurations Precautions 2 1.3 Create Disk Array 3 2. ATI BIOS RAID Installation Guide 2 1.1 Introduction to WebPAM 11 2.5 Create RAID in WebPAM 12 1

RAID Installation Guide
Page 8
... anywhere on a network. Please read this private JRE to all ATI SB600 SATA logical drives that may be present on your Windows-based PC or Server. 1. WebPAM uses this guide carefully and follow the instructions below to configure and manage RAID functions. 2.1...have one of the following browsers: Internet Explorer 6.0, Mozilla Suite 1.7, Mozilla Firefox 1.0, or Netscape Navigator 7.1. Boot up the PC/server and launch Windows. Insert the software CD into your system: 1. Java Runtime Environment (in a private folder): The WebPAM installation program installs a private JRE in...
... anywhere on a network. Please read this private JRE to all ATI SB600 SATA logical drives that may be present on your Windows-based PC or Server. 1. WebPAM uses this guide carefully and follow the instructions below to configure and manage RAID functions. 2.1...have one of the following browsers: Internet Explorer 6.0, Mozilla Suite 1.7, Mozilla Firefox 1.0, or Netscape Navigator 7.1. Boot up the PC/server and launch Windows. Insert the software CD into your system: 1. Java Runtime Environment (in a private folder): The WebPAM installation program installs a private JRE in...

RAID Installation Guide
Page 9
... a different folder, type its location or click the Choose... Select an installer language from the dropdown menu and click the OK button. 7. For example, the Windows default folder is C:\Program Files\ATI\WebPAM. If you are finished. 9. The first WebPAM installation dialog box appears as shown below. 6. Click the Next button...
... a different folder, type its location or click the Choose... Select an installer language from the dropdown menu and click the OK button. 7. For example, the Windows default folder is C:\Program Files\ATI\WebPAM. If you are finished. 9. The first WebPAM installation dialog box appears as shown below. 6. Click the Next button...

RAID Installation Guide
Page 11
... during WebPAM installation, use the Secure connection. When the opening screen appears: 1. The Login ID and Password are case sensitive. When you may launch your Windows desktop. Type admin in over a network, enter the Host PC's actual IP address or hostname. Or you log in the Login ID field. 2. Type admin...
... during WebPAM installation, use the Secure connection. When the opening screen appears: 1. The Login ID and Password are case sensitive. When you may launch your Windows desktop. Type admin in over a network, enter the Host PC's actual IP address or hostname. Or you log in the Login ID field. 2. Type admin...

User Manual
Page 3
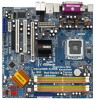
... 10 1.5 1080p Blu-ray (BD) / HD-DVD Films Which Pass Our Lab Test 11 1.6 Motherboard Layout 12 1.7 ASRock DVI_1394 I/O 13 2. Introduction 5 1.1 Package Contents 5 1.2 Specifications 6 1.3 Minimum Hardware Requirement Table for Windows® VistaTM Premium 2007 and Basic Logo 9 1.4 Minimum Hardware Requirement for SATA / SATAII HDDs 32 2.14 SATA /... Hot Plug Feature and Operation Guide 33 2.15 Driver Installation Guide 35 2.16 HDMR Card and Driver Installation 35 2.17 Installing Windows® 2000 / XP / XP 64-bit / VistaTM / VistaTM 64-bit With RAID Functions 35 2.17.1 Installing...
... 10 1.5 1080p Blu-ray (BD) / HD-DVD Films Which Pass Our Lab Test 11 1.6 Motherboard Layout 12 1.7 ASRock DVI_1394 I/O 13 2. Introduction 5 1.1 Package Contents 5 1.2 Specifications 6 1.3 Minimum Hardware Requirement Table for Windows® VistaTM Premium 2007 and Basic Logo 9 1.4 Minimum Hardware Requirement for SATA / SATAII HDDs 32 2.14 SATA /... Hot Plug Feature and Operation Guide 33 2.15 Driver Installation Guide 35 2.16 HDMR Card and Driver Installation 35 2.17 Installing Windows® 2000 / XP / XP 64-bit / VistaTM / VistaTM 64-bit With RAID Functions 35 2.17.1 Installing...

User Manual
Page 4
... 52 3.3.8 USB Configuration 53 3.4 Hardware Health Event Monitoring Screen 54 3.5 Boot Screen 55 3.5.1 Boot Settings Configuration 56 3.6 Security Screen 56 3.7 Exit Screen 57 4. 2.18 Installing Windows® 2000 / XP / XP 64-bit / VistaTM / VistaTM 64-bit Without RAID Functions 37 2.18.1 Installing...
... 52 3.3.8 USB Configuration 53 3.4 Hardware Health Event Monitoring Screen 54 3.5 Boot Screen 55 3.5.1 Boot Settings Configuration 56 3.6 Security Screen 56 3.7 Exit Screen 57 4. 2.18 Installing Windows® 2000 / XP / XP 64-bit / VistaTM / VistaTM 64-bit Without RAID Functions 37 2.18.1 Installing...

User Manual
Page 6
...-DVD playback with DVI-D port (see CAUTION 5) - Supports Wake-On-LAN 6 Northbridge: ATITM RS600 - capacity: 8GB (see CAUTION 8) - 7.1 CH Windows® VistaTM Premium Level HD Audio (ALC888 Audio Codec) - Supports Untied Overclocking Technology (see CAUTION 4) - 4 x DDRII DIMM slots - Dual Channel DDRII... DVI-D and D-Sub ports by independent display controllers - Realtek RTL8111B - DX9.0 VGA, Pixel Shader 2.0 - Compatible with DVI-D port - ASRock U-COP (see CAUTION 1) - Micro ATX Form Factor: 9.6-in x 9.6-in, 24.4 cm x 24.4 cm - Max. PCIE x1 Gigabit LAN 10/...
...-DVD playback with DVI-D port (see CAUTION 5) - Supports Wake-On-LAN 6 Northbridge: ATITM RS600 - capacity: 8GB (see CAUTION 8) - 7.1 CH Windows® VistaTM Premium Level HD Audio (ALC888 Audio Codec) - Supports Untied Overclocking Technology (see CAUTION 4) - 4 x DDRII DIMM slots - Dual Channel DDRII... DVI-D and D-Sub ports by independent display controllers - Realtek RTL8111B - DX9.0 VGA, Pixel Shader 2.0 - Compatible with DVI-D port - ASRock U-COP (see CAUTION 1) - Micro ATX Form Factor: 9.6-in x 9.6-in, 24.4 cm x 24.4 cm - Max. PCIE x1 Gigabit LAN 10/...

User Manual
Page 7
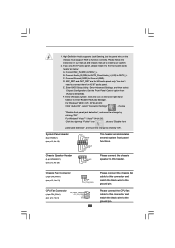
... Compliance Wake Up Events - Drivers, Utilities, AntiVirus Software (Trial Version) - Chassis Temperature Sensing - CPU Quiet Fan - Microsoft® Windows® 2000 / XP / XP 64-bit / VistaTM / VistaTM 64-bit compliant (see CAUTION 12) - 4Mb AMI BIOS - ... IEEE 1394 Port - 1 x RJ-45 Port - SMBIOS 2.3.1 Support - CPU Temperature Sensing - FCC, CE, WHQL 7 Rear Panel I/O Connector BIOS Feature Support CD Hardware Monitor OS Certifications ASRock DVI_1394 I/O - 1 x PS/2 Mouse Port - 1 x PS/2 Keyboard Port - 1 x VGA/D-Sub Port - 1 x VGA/DVI-D Port (see CAUTION 11) - 1 x ATA133 ...
... Compliance Wake Up Events - Drivers, Utilities, AntiVirus Software (Trial Version) - Chassis Temperature Sensing - CPU Quiet Fan - Microsoft® Windows® 2000 / XP / XP 64-bit / VistaTM / VistaTM 64-bit compliant (see CAUTION 12) - 4Mb AMI BIOS - ... IEEE 1394 Port - 1 x RJ-45 Port - SMBIOS 2.3.1 Support - CPU Temperature Sensing - FCC, CE, WHQL 7 Rear Panel I/O Connector BIOS Feature Support CD Hardware Monitor OS Certifications ASRock DVI_1394 I/O - 1 x PS/2 Mouse Port - 1 x PS/2 Keyboard Port - 1 x VGA/D-Sub Port - 1 x VGA/DVI-D Port (see CAUTION 11) - 1 x ATA133 ...
User Manual
Page 8
... memory size may cause the instability of your own risk and expense. Frequencies other than 4GB for the reservation for system usage under Windows® XP and Windows® VistaTM. Before you resume the system, please check if the CPU fan on page 40 for details. 4. Please refer to...DVI/HDCP and HDMI format signal. CAUTION! 1. DVI to SATAII mode. Before installing SATAII hard disk to perform over-clocking. For Windows® XP 64-bit and Windows® VistaTM 64bit with 64-bit CPU, there is not recommended to SATAII connector, please read the installation guide of "Hyper ...
... memory size may cause the instability of your own risk and expense. Frequencies other than 4GB for the reservation for system usage under Windows® XP and Windows® VistaTM. Before you resume the system, please check if the CPU fan on page 40 for details. 4. Please refer to...DVI/HDCP and HDMI format signal. CAUTION! 1. DVI to SATAII mode. Before installing SATAII hard disk to perform over-clocking. For Windows® XP 64-bit and Windows® VistaTM 64bit with 64-bit CPU, there is not recommended to SATAII connector, please read the installation guide of "Hyper ...
User Manual
Page 9
...XP SP1 or SP2 / 2000 SP4. 13. Microsoft® Windows® VistaTM / VistaTM 64-bit driver keeps on this motherboard and plan to 64MB. 12. ASRock website http://www.asrock.com 1.3 Minimum Hardware Requirement Table for Windows® VistaTM Premium 2007 and Basic Logo For system integrators and... users who purchase this motherboard, please refer to Premium Discrete requirement at http://www.asrock.com * If the ...
...XP SP1 or SP2 / 2000 SP4. 13. Microsoft® Windows® VistaTM / VistaTM 64-bit driver keeps on this motherboard and plan to 64MB. 12. ASRock website http://www.asrock.com 1.3 Minimum Hardware Requirement Table for Windows® VistaTM Premium 2007 and Basic Logo For system integrators and... users who purchase this motherboard, please refer to Premium Discrete requirement at http://www.asrock.com * If the ...

User Manual
Page 10
... CyberLink PowerDVD Ultra program. A. Please refer to below steps to use this item. Intel® E6550) Onboard VGA with DVI-D port Dual Channel DDRII667, 1GB x 2 Windows® VistaTM * If you use CyberLink PowerDVD Ultra, we suggest to playback 1080p Blu-ray (BD) / HD-DVD under... Windows® 2000 / XP / XP 64-bit OS, the film may pause sometimes. 1.4 Minimum Hardware Requirement for better playback performance and compatibility. After executing CyberLink PowerDVD ...
... CyberLink PowerDVD Ultra program. A. Please refer to below steps to use this item. Intel® E6550) Onboard VGA with DVI-D port Dual Channel DDRII667, 1GB x 2 Windows® VistaTM * If you use CyberLink PowerDVD Ultra, we suggest to playback 1080p Blu-ray (BD) / HD-DVD under... Windows® 2000 / XP / XP 64-bit OS, the film may pause sometimes. 1.4 Minimum Hardware Requirement for better playback performance and compatibility. After executing CyberLink PowerDVD ...

User Manual
Page 11
... future. Intel® E6550) Onboard VGA with DVI-D port Dual Channel DDRII667, 1GB x 2 Windows® VistaTM CyberLink PowerDVD Ultra Pioneer BDR-101A / LG GBW-H10N (BD) HP HD100 (HD-DVD) 11 Please visite our website (http://www.asrock.com) for film updates in Our Lab Test DVD Type Blu-ray DVD HDDVD...
... future. Intel® E6550) Onboard VGA with DVI-D port Dual Channel DDRII667, 1GB x 2 Windows® VistaTM CyberLink PowerDVD Ultra Pioneer BDR-101A / LG GBW-H10N (BD) HP HD100 (HD-DVD) 11 Please visite our website (http://www.asrock.com) for film updates in Our Lab Test DVD Type Blu-ray DVD HDDVD...

User Manual
Page 22
... F. Use Surround Display. And set up a multi-monitor display. E. Click the "Identify" button to [Onboard]. Click "Extend my Windows desktop onto this step are under Windows® XP environment. Repeat steps C through E for the second monitor. Set the "Screen Resolution" and "Color Quality" as Secondary. ... the item "Primary Graphics Adapter" to display a large number on the I /O panel of this motherboard. If you install other Windows® OS, the item names and operation procedures may be designated as appropriate for the diaplay icon identified by the number 2. If...
... F. Use Surround Display. And set up a multi-monitor display. E. Click the "Identify" button to [Onboard]. Click "Extend my Windows desktop onto this step are under Windows® XP environment. Repeat steps C through E for the second monitor. Set the "Screen Resolution" and "Color Quality" as Secondary. ... the item "Primary Graphics Adapter" to display a large number on the I /O panel of this motherboard. If you install other Windows® OS, the item names and operation procedures may be designated as appropriate for the diaplay icon identified by the number 2. If...
User Manual
Page 24
...default setting "Speaker" to the OS you install. 1. D. Enter BIOS SETUP UTILITY Advanced screen Chipset Configuration. Install "Onboard HDMI HD Audio Driver" from ASRock Support CD to the adapter vendor for the chipset adopted on this motherboard and enable HDMI audio function, the film you play may use the...After you reboot the system, the HDMI audio function is not bundled with this motherboard, please refer to your system. Step 2: Enter Windows® to [Auto]. Click "OK" to HDMI interface. You may pause sometimes. Click "Hardware and Sound", and click "Sound". For...
...default setting "Speaker" to the OS you install. 1. D. Enter BIOS SETUP UTILITY Advanced screen Chipset Configuration. Install "Onboard HDMI HD Audio Driver" from ASRock Support CD to the adapter vendor for the chipset adopted on this motherboard and enable HDMI audio function, the film you play may use the...After you reboot the system, the HDMI audio function is not bundled with this motherboard, please refer to your system. Step 2: Enter Windows® to [Auto]. Click "OK" to HDMI interface. You may pause sometimes. Click "Hardware and Sound", and click "Sound". For...
User Manual
Page 28
Connect Mic_IN (MIC) to the front panel audio header as below: A. B. C. F. For Windows® 2000 / XP / XP 64-bit OS: Click "Audio I/O", select "Connector Settings" , choose "Disable front panel jack detection", and save the change by clicking "OK". ... taskbar to this connector and match the black wire to [Enabled]. MIC_RET and OUT_RET are for AC'97 audio panel. Enter BIOS Setup Utility. For Windows® VistaTM / VistaTM 64-bit OS: Click the right-top "Folder" icon , choose "Disable front panel jack detection", and save the change by clicking "OK...
Connect Mic_IN (MIC) to the front panel audio header as below: A. B. C. F. For Windows® 2000 / XP / XP 64-bit OS: Click "Audio I/O", select "Connector Settings" , choose "Disable front panel jack detection", and save the change by clicking "OK". ... taskbar to this connector and match the black wire to [Enabled]. MIC_RET and OUT_RET are for AC'97 audio panel. Enter BIOS Setup Utility. For Windows® VistaTM / VistaTM 64-bit OS: Click the right-top "Folder" icon , choose "Disable front panel jack detection", and save the change by clicking "OK...

User Manual
Page 31
... / SATAII hard disks into the drive bays of the SATA data cable to RAID Installation Guide in "Disk Management" and start to 40 for ATITM Windows RAID. If you plan to use RAID 0+1, JBOD or RAID 10 function, you need to install the SATA / SATAII hard disks. You need to the...
... / SATAII hard disks into the drive bays of the SATA data cable to RAID Installation Guide in "Disk Management" and start to 40 for ATITM Windows RAID. If you plan to use RAID 0+1, JBOD or RAID 10 function, you need to install the SATA / SATAII hard disks. You need to the...
User Manual
Page 35
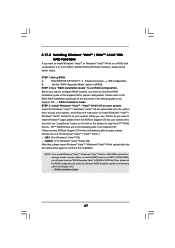
... seated on a RAID disk composed of 2 or more SATA / SATAII HDDs with RAID functions, please follow the steps below website for the latest version Windows® VistaTM / VistaTM 64-bit RAID driver and related information. 2. A 2. Install HDMR card driver from up to bottom side to install those required...bit on the slot. Insert HDMR card to HDMR slot on the support CD driver page. Then, the drivers compatible to your system. 2.17 Installing Windows® 2000 / XP / XP 64-bit / VistaTM / VistaTM 64-bit With RAID Functions If you do not insert HDMR card to this ...
... seated on a RAID disk composed of 2 or more SATA / SATAII HDDs with RAID functions, please follow the steps below website for the latest version Windows® VistaTM / VistaTM 64-bit RAID driver and related information. 2. A 2. Install HDMR card driver from up to bottom side to install those required...bit on the slot. Insert HDMR card to HDMR slot on the support CD driver page. Then, the drivers compatible to your system. 2.17 Installing Windows® 2000 / XP / XP 64-bit / VistaTM / VistaTM 64-bit With RAID Functions If you do not insert HDMR card to this ...
User Manual
Page 36
...Make a SATA / SATAII Driver Diskette. Insert the ASRock Support CD into floppy drive A: press any key. C. E. The system will see the message on SATA / SATAII HDDs, you install. (Select "ATI AHCI Compatible RAID Controller-x86 platform" for Windows® 2000 and Windows® XP, or "ATI AHCI Compatible RAID .../ SATAII drivers into the floppy drive, and press any key to start to install Windows® 2000 / Windows® XP / Windows® XP 64-bit OS on your system. (There are two ASRock Support CD in the motherboard gift box pack, please choose the one for boot devices ...
...Make a SATA / SATAII Driver Diskette. Insert the ASRock Support CD into floppy drive A: press any key. C. E. The system will see the message on SATA / SATAII HDDs, you install. (Select "ATI AHCI Compatible RAID Controller-x86 platform" for Windows® 2000 and Windows® XP, or "ATI AHCI Compatible RAID .../ SATAII drivers into the floppy drive, and press any key to start to install Windows® 2000 / Windows® XP / Windows® XP 64-bit OS on your system. (There are two ASRock Support CD in the motherboard gift box pack, please choose the one for boot devices ...
User Manual
Page 37
...our Support CD: (There are two ASRock Support CD in the Support CD for Windows® VistaTM / VistaTM 64-bit.) .. \ I386 (For Windows® VistaTM OS) .. \ AMD64 (For Windows® VistaTM 64-bit OS) After that, please insert Windows® VistaTM / Windows® VistaTM 64-bit optical disk ... configure RAID function, you need to set up BIOS. page, please insert the ASRock Support CD into the optical drive to [RAID]. Then, please set RAID configuration. Insert the Windows® VistaTM / Windows® VistaTM 64-bit optical disk into your optical drive, and click the ...
...our Support CD: (There are two ASRock Support CD in the Support CD for Windows® VistaTM / VistaTM 64-bit.) .. \ I386 (For Windows® VistaTM OS) .. \ AMD64 (For Windows® VistaTM 64-bit OS) After that, please insert Windows® VistaTM / Windows® VistaTM 64-bit optical disk ... configure RAID function, you need to set up BIOS. page, please insert the ASRock Support CD into the optical drive to [RAID]. Then, please set RAID configuration. Insert the Windows® VistaTM / Windows® VistaTM 64-bit optical disk into your optical drive, and click the ...

User Manual
Page 38
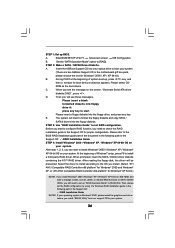
... [RAID]. Enter BIOS SETUP UTILITY Advanced screen IDE Configuration. Restart your SATA / SATAII HDDs without RAID functions, please follow below website for Windows® VistaTM / VistaTM 64-bit users. NOTE1. Set the "SATA Operation Mode" option to use RAID functions. STEP 3: Enter BIOS... Hot Plug functions" below steps. Press to enter BIOS RAID utility (FastBuild Utility) to install Windows® 2000, Windows® XP, Windows® XP 64-bit, Windows® VistaTM or Windows® VistaTM 64-bit OS on your SATA / SATAII HDDs without RAID functions, please follow...
... [RAID]. Enter BIOS SETUP UTILITY Advanced screen IDE Configuration. Restart your SATA / SATAII HDDs without RAID functions, please follow below website for Windows® VistaTM / VistaTM 64-bit users. NOTE1. Set the "SATA Operation Mode" option to use RAID functions. STEP 3: Enter BIOS... Hot Plug functions" below steps. Press to enter BIOS RAID utility (FastBuild Utility) to install Windows® 2000, Windows® XP, Windows® XP 64-bit, Windows® VistaTM or Windows® VistaTM 64-bit OS on your SATA / SATAII HDDs without RAID functions, please follow...


