

Operating Instructions
Page 3
... CD OPERATIONS ...8 RADIO OPERATIONS ...10 TAPE OPERATIONS ...11 TIMER OPERATIONS ...14 REFERENCE ...16 En System and accessories Main unit Speakers Remote control FM antenna AM antenna GROUND CLAMP ELECTRIC SERVICE EQUIPMENT POWER SERVICE GROUNDING ELECTRODE SYSTEM (NEC ART 250 PART H) Maintenance Clean the ...number of your set ) below. Article 810 of the National Electrical Code, ANSI/NFPA 70, provides information on proper grounding of your Aiwa dealer. Model No. _____ Serial No. _____ 3 Be sure the antenna system is located away from power lines. 2 Outdoor antenna grounding...
... CD OPERATIONS ...8 RADIO OPERATIONS ...10 TAPE OPERATIONS ...11 TIMER OPERATIONS ...14 REFERENCE ...16 En System and accessories Main unit Speakers Remote control FM antenna AM antenna GROUND CLAMP ELECTRIC SERVICE EQUIPMENT POWER SERVICE GROUNDING ELECTRODE SYSTEM (NEC ART 250 PART H) Maintenance Clean the ...number of your set ) below. Article 810 of the National Electrical Code, ANSI/NFPA 70, provides information on proper grounding of your Aiwa dealer. Model No. _____ Serial No. _____ 3 Be sure the antenna system is located away from power lines. 2 Outdoor antenna grounding...
Operating Instructions
Page 4
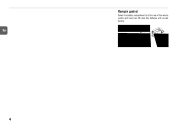
En 4 R P 3 C 6 R ( o A E A nR P T A n A I )e O ¥c N Rt e S p2 lC ao c n e n e c t Remote control Detach the battery compartment lid at the rear of the remote control and insert two R6 (size AA) batteries with correct polarity.
En 4 R P 3 C 6 R ( o A E A nR P T A n A I )e O ¥c N Rt e S p2 lC ao c n e n e c t Remote control Detach the battery compartment lid at the rear of the remote control and insert two R6 (size AA) batteries with correct polarity.

Operating Instructions
Page 6
... number. 2 REPEAT Selects CD repeat playback mode. Radio: tunes in the supplied AM and FM antennas. 2 AUX jacks Accept analog sound signals from external equipment. Remote control MODE Selects random play, programmed play, AI edit recording or programmed edit recording mode for your equipment. To switch function to external input, press...
... number. 2 REPEAT Selects CD repeat playback mode. Radio: tunes in the supplied AM and FM antennas. 2 AUX jacks Accept analog sound signals from external equipment. Remote control MODE Selects random play, programmed play, AI edit recording or programmed edit recording mode for your equipment. To switch function to external input, press...

Operating Instructions
Page 7
... the vocals and midrange En - Playback will start automatically if a disc or tape is displayed. Volume Press VOLUME DOWN or UP (VOL k/i on the remote control), AUX or CD. Q SOUND system The Q SOUND system creates a wider sound area by processing the original music signals electronically. "Q SOUND" is...SOUND Press QSOUND so that "Q SOUND" disappears from 0 (minimum) to 30 and MAX (maximum). Tip: Volume level setting is turned on the remote control repeatedly) to match the music type. "EQ OFF" is activated, the sound may be distorted. Alternatively, press TAPE, TUNER/BAND (BAND on the...
... the vocals and midrange En - Playback will start automatically if a disc or tape is displayed. Volume Press VOLUME DOWN or UP (VOL k/i on the remote control), AUX or CD. Q SOUND system The Q SOUND system creates a wider sound area by processing the original music signals electronically. "Q SOUND" is...SOUND Press QSOUND so that "Q SOUND" disappears from 0 (minimum) to 30 and MAX (maximum). Tip: Volume level setting is turned on the remote control repeatedly) to match the music type. "EQ OFF" is activated, the sound may be distorted. Alternatively, press TAPE, TUNER/BAND (BAND on the...

Operating Instructions
Page 8
... the tracks with the numbered buttons cancels the random play . Release at the same time. Press DISPLAY on . Place a disc with the remote control (Direct play) Press the numbered buttons to start play mode. 8 You can select random and repeat all playback at the desired point.... To cancel, press MODE repeatedly or s in fast forward or reverse) Hold down f or g. To switch to start play 1 Press MODE on the remote control once in random order. and 24-hour standard time. Then close the disc compartment. En 3 Press a. This unit plays back finalized CD-R/RW discs...
... the tracks with the numbered buttons cancels the random play . Release at the same time. Press DISPLAY on . Place a disc with the remote control (Direct play) Press the numbered buttons to start play mode. 8 You can select random and repeat all playback at the desired point.... To cancel, press MODE repeatedly or s in fast forward or reverse) Hold down f or g. To switch to start play 1 Press MODE on the remote control once in random order. and 24-hour standard time. Then close the disc compartment. En 3 Press a. This unit plays back finalized CD-R/RW discs...

Operating Instructions
Page 9
... Press the numbered buttons on the display. To repeat a selected set of tracks Select the tracks with programmed playback, then press REPEAT on the remote control to select "REPEAT ALL" or "REPEAT 1". En 3 Repeat step 2 to the program Repeat step 2 before starting playback. The tracks are... soiled, a CD may not be selected instead. The track number for the current track flashes on the remote control repeatedly to select repeat playback. (See "Programmed playback" on the remote control twice in succession. To cancel, press REPEAT repeatedly so that the repeat indicator goes off.
... Press the numbered buttons on the display. To repeat a selected set of tracks Select the tracks with programmed playback, then press REPEAT on the remote control to select "REPEAT ALL" or "REPEAT 1". En 3 Repeat step 2 to the program Repeat step 2 before starting playback. The tracks are... soiled, a CD may not be selected instead. The track number for the current track flashes on the remote control repeatedly to select repeat playback. (See "Programmed playback" on the remote control twice in succession. To cancel, press REPEAT repeatedly so that the repeat indicator goes off.

Operating Instructions
Page 10
... from any other stations. • Each band can tune in the desired preset station directly by pressing the numbered buttons on the remote control so that "MONO" is displayed. The unit searches for FM stereo reception. The preset number flashes during reception. Presetting stations ...press +10 and 0. - The unit switches to monaural reduces noise. Preset tuning Preset up to monaural FM reception Press MODE on the remote control. - Adjustments To switch to 32 of 16 preset stations. •If power is interrupted for a station automatically (Auto search) Hold...
... from any other stations. • Each band can tune in the desired preset station directly by pressing the numbered buttons on the remote control so that "MONO" is displayed. The unit searches for FM stereo reception. The preset number flashes during reception. Presetting stations ...press +10 and 0. - The unit switches to monaural reduces noise. Preset tuning Preset up to monaural FM reception Press MODE on the remote control. - Adjustments To switch to 32 of 16 preset stations. •If power is interrupted for a station automatically (Auto search) Hold...

Operating Instructions
Page 12
..."4" flashes. When recording on side A finishes, "SIDE CHA" appears on side B. To pause recording (only for side B appears on the remote control in recording pause mode. To record a selected set of desired tracks within the length of your tape into account and rearranges the recording order...recording pause mode. Each time the button is pressed, a 4-second blank space is displayed. Proceed step 6. 5 Press the numbered buttons on the remote control to select the first track to start from a point halfway in the tape. • AI Edit Recording cannot be specified. - "4" ...
..."4" flashes. When recording on side A finishes, "SIDE CHA" appears on side B. To pause recording (only for side B appears on the remote control in recording pause mode. To record a selected set of desired tracks within the length of your tape into account and rearranges the recording order...recording pause mode. Each time the button is pressed, a 4-second blank space is displayed. Proceed step 6. 5 Press the numbered buttons on the remote control to select the first track to start from a point halfway in the tape. • AI Edit Recording cannot be specified. - "4" ...

Operating Instructions
Page 13
... select a track with adhesive tape. When recording on side A finishes, "SIDE CHA" appears on the remote control to select side A or B, and press s to clear the program for side A 9 Press MODE on the remote control to switch to side B, turn over the tape, and press w to start recording on the tape...the plastic tab of the tracks for the side. 8 Press MODE on the remote control to switch back to side A and press w to start recording on the remote control to step 9. To record on side A. Side A 7 Press MODE on the remote control to switch to side B and select the tracks for side A.
... select a track with adhesive tape. When recording on side A finishes, "SIDE CHA" appears on the remote control to select side A or B, and press s to clear the program for side A 9 Press MODE on the remote control to switch to side B, turn over the tape, and press w to start recording on the tape...the plastic tab of the tracks for the side. 8 Press MODE on the remote control to switch back to side A and press w to start recording on the remote control to step 9. To record on side A. Side A 7 Press MODE on the remote control to switch to side B and select the tracks for side A.


