

Operating Instructions
Page 3
...exhibits a marked change in the Operating Instructions. Refer to operate normally - The unit does not seem to them when contacting your Aiwa dealer. TABLE OF CONTENTS PRECAUTIONS ...2 PREPARATIONS ...4 PARTS AND CONTROLS ...5 ADJUSTMENTS BEFORE OPERATION ...7 CD OPERATIONS ...8 RADIO OPERATIONS ...10... TAPE OPERATIONS ...11 TIMER OPERATIONS ...14 REFERENCE ...16 En System and accessories Main unit Speakers Remote control FM antenna AM antenna GROUND CLAMP ELECTRIC SERVICE EQUIPMENT POWER SERVICE GROUNDING ELECTRODE SYSTEM (NEC ART 250 PART H) Maintenance...
...exhibits a marked change in the Operating Instructions. Refer to operate normally - The unit does not seem to them when contacting your Aiwa dealer. TABLE OF CONTENTS PRECAUTIONS ...2 PREPARATIONS ...4 PARTS AND CONTROLS ...5 ADJUSTMENTS BEFORE OPERATION ...7 CD OPERATIONS ...8 RADIO OPERATIONS ...10... TAPE OPERATIONS ...11 TIMER OPERATIONS ...14 REFERENCE ...16 En System and accessories Main unit Speakers Remote control FM antenna AM antenna GROUND CLAMP ELECTRIC SERVICE EQUIPMENT POWER SERVICE GROUNDING ELECTRODE SYSTEM (NEC ART 250 PART H) Maintenance...
Operating Instructions
Page 4
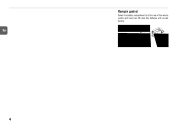
En 4 R P 3 C 6 R ( o A E A nR P T A n A I )e O ¥c N Rt e S p2 lC ao c n e n e c t Remote control Detach the battery compartment lid at the rear of the remote control and insert two R6 (size AA) batteries with correct polarity.
En 4 R P 3 C 6 R ( o A E A nR P T A n A I )e O ¥c N Rt e S p2 lC ao c n e n e c t Remote control Detach the battery compartment lid at the rear of the remote control and insert two R6 (size AA) batteries with correct polarity.

Operating Instructions
Page 6
.... ROCK, POP, JAZZ or EQ OFF. sSTOP 6 To switch function to external input, press AUX. 3 SPEAKERS3 terminals Connect the speaker cords of the specified number. Remote control MODE Selects random play, programmed play, AI edit recording or programmed edit recording mode for your equipment. EQ Selects a sound equalization curve;
.... ROCK, POP, JAZZ or EQ OFF. sSTOP 6 To switch function to external input, press AUX. 3 SPEAKERS3 terminals Connect the speaker cords of the specified number. Remote control MODE Selects random play, programmed play, AI edit recording or programmed edit recording mode for your equipment. EQ Selects a sound equalization curve;

Operating Instructions
Page 7
...selected equalization mode button (EQ on . Adjust from the display. Power Turning the unit on Press POWER 6 STANDBY/ON (POWER on the remote control), AUX or CD. Q SOUND system The Q SOUND system creates a wider sound area by processing the original music signals electronically. Press...activated, the sound may be distorted. "EQ OFF" is turned on the remote control repeatedly). Alternatively, press TAPE, TUNER/BAND (BAND on the remote control). Press 3-MODE EQUALIZER (ROCK, POP, JAZZ) (EQ P on the remote control). POP: More presence in the vocals and midrange En - Volume ...
...selected equalization mode button (EQ on . Adjust from the display. Power Turning the unit on Press POWER 6 STANDBY/ON (POWER on the remote control), AUX or CD. Q SOUND system The Q SOUND system creates a wider sound area by processing the original music signals electronically. Press...activated, the sound may be distorted. "EQ OFF" is turned on the remote control repeatedly). Alternatively, press TAPE, TUNER/BAND (BAND on the remote control). Press 3-MODE EQUALIZER (ROCK, POP, JAZZ) (EQ P on the remote control). POP: More presence in the vocals and midrange En - Volume ...

Operating Instructions
Page 8
... when the unit is turned off . Release at the same time. Random play 1 Press MODE on the remote control once in stop mode. To display the time while the power is on the remote control. To select a track with the label side up. Repeat playback plays all playback at the desired point...
... when the unit is turned off . Release at the same time. Random play 1 Press MODE on the remote control once in stop mode. To display the time while the power is on the remote control. To select a track with the label side up. Repeat playback plays all playback at the desired point...

Operating Instructions
Page 9
...-:- -". • Do not place more than one disc. • Do not tilt the unit with programmed playback, then press REPEAT on the remote control to either side of selected tracks and total playing time will be played normally. 9 to select repeat playback. (See "Programmed playback" on the...The unit may cause malfunction. • Do not load an unrecorded CD-R/RW disc. "M" flashes on the remote control to open the disc compartment during play Press REPEAT on the remote control twice in succession. The tracks are displayed in stop mode. If it is activated during "REPEAT 1"...
...-:- -". • Do not place more than one disc. • Do not tilt the unit with programmed playback, then press REPEAT on the remote control to either side of selected tracks and total playing time will be played normally. 9 to select repeat playback. (See "Programmed playback" on the...The unit may cause malfunction. • Do not load an unrecorded CD-R/RW disc. "M" flashes on the remote control to open the disc compartment during play Press REPEAT on the remote control twice in succession. The tracks are displayed in stop mode. If it is activated during "REPEAT 1"...

Operating Instructions
Page 10
... "1" and the "M" indicator are higher than approximately 12 hours, all preset stations are received in the band which are displayed on the remote control so that "MONO" is displayed. "STEREO" is 9 kHz/step, change the tuning interval. The preset number flashes during reception.... Manual tuning 1 Press TUNER/BAND (BAND on the remote control. - Tip: When FM stereo reception is poor, switching to select a band. Adjustments To switch to be reset. To search for a ...
... "1" and the "M" indicator are higher than approximately 12 hours, all preset stations are received in the band which are displayed on the remote control so that "MONO" is displayed. "STEREO" is 9 kHz/step, change the tuning interval. The preset number flashes during reception.... Manual tuning 1 Press TUNER/BAND (BAND on the remote control. - Tip: When FM stereo reception is poor, switching to select a band. Adjustments To switch to be reset. To search for a ...

Operating Instructions
Page 12
... program a track with a track number larger than 30. 1 Insert the recording tape. 2 Press CD and load the disc. 3 Press MODE four times on the remote control. When recording on side A finishes, "SIDE CHA" appears on side A. "PRGM C-00" is added. To stop mode. To record a blank space longer ...determines the tracks to start from a point halfway in the tape. • You cannot program more than the CD length. 6 Press MODE once on the remote control in stop recording Press s. For a 60-minutes tape press 6 and 0. • for TUNER or AUX source) Press a. The tape is longer...
... program a track with a track number larger than 30. 1 Insert the recording tape. 2 Press CD and load the disc. 3 Press MODE four times on the remote control. When recording on side A finishes, "SIDE CHA" appears on side A. "PRGM C-00" is added. To stop mode. To record a blank space longer ...determines the tracks to start from a point halfway in the tape. • You cannot program more than the CD length. 6 Press MODE once on the remote control in stop recording Press s. For a 60-minutes tape press 6 and 0. • for TUNER or AUX source) Press a. The tape is longer...

Operating Instructions
Page 13
... again, cover the detection slot with adhesive tape. En Tab for side A 9 Press MODE on the remote control to switch to side B, turn over the tape, and press w to start recording on the remote control to select side A or B, and press s to clear the program for the selected side. Recording... MODE on side A. 6 Repeat step 5 to select the rest of the tracks for the side. 8 Press MODE on the remote control to switch back to side A and press w to start recording on the remote control to select side A or B. 2 Press f or g repeatedly. Proceed to side B and select the tracks for side ...
... again, cover the detection slot with adhesive tape. En Tab for side A 9 Press MODE on the remote control to switch to side B, turn over the tape, and press w to start recording on the remote control to select side A or B, and press s to clear the program for the selected side. Recording... MODE on side A. 6 Repeat step 5 to select the rest of the tracks for the side. 8 Press MODE on the remote control to switch back to side A and press w to start recording on the remote control to select side A or B. 2 Press f or g repeatedly. Proceed to side B and select the tracks for side ...


