
User Guide
Page 17
... and configuration of the Print Server. ■ The 3Com OfficeConnect Wireless 54Mbps 11g Print Server ■ The Print Server Setup CD ■ A laptop or desktop computer with an Ethernet interface and Windows operating system installed. ■ An Ethernet cable (not supplied) ■ 5V power supply for the Print Server ■ USB cable (not supplied) ■ USB printer ■ Printer Driver CD Installation Procedure Use...
... and configuration of the Print Server. ■ The 3Com OfficeConnect Wireless 54Mbps 11g Print Server ■ The Print Server Setup CD ■ A laptop or desktop computer with an Ethernet interface and Windows operating system installed. ■ An Ethernet cable (not supplied) ■ 5V power supply for the Print Server ■ USB cable (not supplied) ■ USB printer ■ Printer Driver CD Installation Procedure Use...
User Guide
Page 30
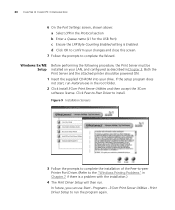
... be powered ON. 1 Insert the supplied CD-ROM into your drive. Programs - 3Com Print Server Utilities - Figure 9 Installation Screens 3 Follow the prompts to complete the installation of the Peer-to-peer Printer Port Driver. (Refer to install. Both the Print Server and the attached printer should be installed on your changes and close this screen. 7 Follow...
... be powered ON. 1 Insert the supplied CD-ROM into your drive. Programs - 3Com Print Server Utilities - Figure 9 Installation Screens 3 Follow the prompts to complete the installation of the Peer-to-peer Printer Port Driver. (Refer to install. Both the Print Server and the attached printer should be installed on your changes and close this screen. 7 Follow...

User Guide
Page 33
... can no longer print, delete the port (see the current print jobs. ■ If the printer attached to the Print Server is changed , just run this setup program, use the Windows Delete Port facility: ■ Right-click any printer in the Printers folder, and select Properties. ■ Locate the Delete Port button. Programs - 3Com Print Server Utilities -
... can no longer print, delete the port (see the current print jobs. ■ If the printer attached to the Print Server is changed , just run this setup program, use the Windows Delete Port facility: ■ Right-click any printer in the Printers folder, and select Properties. ■ Locate the Delete Port button. Programs - 3Com Print Server Utilities -

User Guide
Page 34
...installation. 34 CHAPTER 4: CLIENT PC CONFIGURATION Figure 13 Port Settings (Peer-to-peer Driver) Items shown on the banner page. ■ Retry Interval: Sets how often Windows will poll the Print Server to establish a connection when the printer is shown in the Printer's Properties. ■...; Banner: Check this option to print a banner page before each print job. ■ If using a PostScript Printer, check the PostScript ...
...installation. 34 CHAPTER 4: CLIENT PC CONFIGURATION Figure 13 Port Settings (Peer-to-peer Driver) Items shown on the banner page. ■ Retry Interval: Sets how often Windows will poll the Print Server to establish a connection when the printer is shown in the Printer's Properties. ■...; Banner: Check this option to print a banner page before each print job. ■ If using a PostScript Printer, check the PostScript ...

User Guide
Page 55
...UPPER case. 5 If the connection can be established, and the printer on that port is on the IPP Server. 7 Click Next, and complete the Wizard. Figure 30 Windows 2000: No printer driver 6 Click OK, and then select the printer manufacturer and model to match the printer connected to a printer on.... The IPP printer is the port number. 4 These entries are case sensitive. Internet Printing Protocol (IPP) 55 Figure 29 Windows 2000 - They must be entered as follows: Port 1 ip_address:631/ipp/P1 where ip_address represents the IP Address of the IPP Server, and 631 is now ready for use.
...UPPER case. 5 If the connection can be established, and the printer on that port is on the IPP Server. 7 Click Next, and complete the Wizard. Figure 30 Windows 2000: No printer driver 6 Click OK, and then select the printer manufacturer and model to match the printer connected to a printer on.... The IPP printer is the port number. 4 These entries are case sensitive. Internet Printing Protocol (IPP) 55 Figure 29 Windows 2000 - They must be entered as follows: Port 1 ip_address:631/ipp/P1 where ip_address represents the IP Address of the IPP Server, and 631 is now ready for use.
User Guide
Page 61
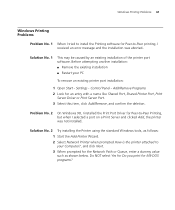
... Problem No. 1 When I tried to install the Printing software for Peer-to-Peer printing, I selected a port on a Print Server and clicked Add, the printer was aborted.. Control Panel - Do NOT select Yes for Do you print for an entry with a name like Shared Port, Shared Printer Port, Print Server Driver or Print Server Port. 3 Select this item, click Add/Remove...
... Problem No. 1 When I tried to install the Printing software for Peer-to-Peer printing, I selected a port on a Print Server and clicked Add, the printer was aborted.. Control Panel - Do NOT select Yes for Do you print for an entry with a name like Shared Port, Shared Printer Port, Print Server Driver or Print Server Port. 3 Select this item, click Add/Remove...
User Guide
Page 64
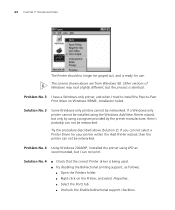
... wizard, but only by the printer manufacturer, then it probably can not be networked. If you can not select a Printer Driver for your printer within the Add Printer wizard, then the printer can not print. Other versions of Windows may look slightly different, but I tried to install the Peer-to-Peer... Print driver on the Printer, and select Properties. ■ Select the Ports tab. ■ Uncheck the Enable bidirectional support checkbox. Problem No. 3 I have a Windows-only printer, ...
... wizard, but only by the printer manufacturer, then it probably can not be networked. If you can not select a Printer Driver for your printer within the Add Printer wizard, then the printer can not print. Other versions of Windows may look slightly different, but I tried to install the Peer-to-Peer... Print driver on the Printer, and select Properties. ■ Select the Ports tab. ■ Uncheck the Enable bidirectional support checkbox. Problem No. 3 I have a Windows-only printer, ...
User Guide
Page 74
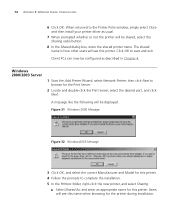
... and select Sharing. ■ Select Shared As: and enter an appropriate name for the Print Server. 2 Locate and double-click the Print Server, select the desired port, and click Next. Windows 2000/2003 Server 1 Start the Add Printer Wizard, select Network Printer, then click Next to save and exit...this printer. 4 Follow the prompts to the Printer Ports window, simply select Close and then install your printer driver as described in Chapter 4. 74 APPENDIX B: WINDOWS SERVER CONFIGURATION 6 Click OK. The shared name is how other users will be displayed: Figure 31 Windows 2000 Message...
... and select Sharing. ■ Select Shared As: and enter an appropriate name for the Print Server. 2 Locate and double-click the Print Server, select the desired port, and click Next. Windows 2000/2003 Server 1 Start the Add Printer Wizard, select Network Printer, then click Next to save and exit...this printer. 4 Follow the prompts to the Printer Ports window, simply select Close and then install your printer driver as described in Chapter 4. 74 APPENDIX B: WINDOWS SERVER CONFIGURATION 6 Click OK. The shared name is how other users will be displayed: Figure 31 Windows 2000 Message...

User Guide
Page 75
Client PCs can now be configured as Windows 98. Windows 2000/2003 Server 75 ■ If desired, click Additional Drivers and install printer drivers for other versions of Windows, such as described in Chapter 4. Configuration is now complete. This will assist users during the installation process. 6 Click OK to close this Window.
Client PCs can now be configured as Windows 98. Windows 2000/2003 Server 75 ■ If desired, click Additional Drivers and install printer drivers for other versions of Windows, such as described in Chapter 4. Configuration is now complete. This will assist users during the installation process. 6 Click OK to close this Window.

User Guide
Page 88
...previously assigned to use. Repeat this procedure for any other ports on the Print Server (L1 for Port 1, L2 for port 2). 12 Click Finish, then select appropriate drivers for any other logical printers you wish to the Print Server device. 11 In the Printer Name field, enter the Logical Port name ...on the Print Server, or for Windows 98 etc as described in the Printer Agent List window...
...previously assigned to use. Repeat this procedure for any other ports on the Print Server (L1 for Port 1, L2 for port 2). 12 Click Finish, then select appropriate drivers for any other logical printers you wish to the Print Server device. 11 In the Printer Name field, enter the Logical Port name ...on the Print Server, or for Windows 98 etc as described in the Printer Agent List window...


