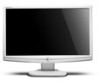
eMachines E192HQV Support and Manuals
Get Help and Manuals for this eMachines item
View All Support Options Below
Free eMachines E192HQV manuals!
Problems with eMachines E192HQV?
Ask a Question
Free eMachines E192HQV manuals!
Problems with eMachines E192HQV?
Ask a Question
Popular eMachines E192HQV Manual Pages
User Manual - Page 3
Contents
Using Your eMachines Flat-Panel Monitor 1
Unpacking the monitor 2 Setting up the monitor 2
Attaching the base 2 Connecting cables 3 Connecting a security cable 4 Turning on the monitor 4 Adjusting monitor settings 5 Monitor buttons 5 On-screen display options 6 Changing Windows screen settings 8 Power management 9 Energy declaration 9 Maintaining 10 Troubleshooting 10 No ...
User Manual - Page 5
Using Your eMachines Flat-Panel Monitor
• Unpacking the monitor • Setting up the monitor • Turning on the monitor • Adjusting monitor settings • Power management • Maintaining • Troubleshooting
1
User Manual - Page 6
...'s release button while you are missing any items, call Customer Care.
Using Your eMachines Flat-Panel Monitor
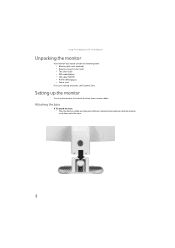
Unpacking the monitor
Your monitor box should contain the following items:
• Monitor (with neck attached) • Base (to connect to the neck) • This User Guide • VGA cable(Option)€ • DVI cable (Option) € • Audio...
User Manual - Page 7
www.emachines.com
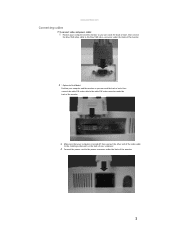
Connecting cables
To connect video and power cables:
1 Position your computer and the monitor so you can reach the back of each, then connect
the blue VGA video cable to the blue VGA video connector under the back of the monitor.
2 * Option for Dual Model
Position your computer and the monitor so you can reach...
User Manual - Page 9
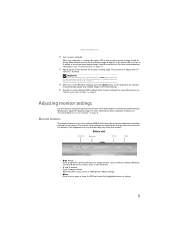
... the current screen resolution.
4 After you do not see the Windows desktop, press the Auto button on the bottom of your computer is open or close the OSD and select the highlighted menu or setting.
5 Monitor buttons
This monitor features an on-screen display (OSD) that shown.)
Bottom view
Auto button
Menu button
< button
> button...
User Manual - Page 10
...
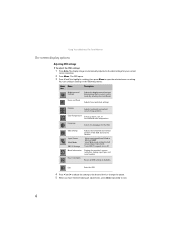
Turns DDC/CI support on or off.
Reset to Defaults Resets all adjustments, press Auto repeatedly to defaults. Exit
Exits the OSD.
4 Press < and > to adjust the setting to the desired level or change the option. 5 When you have finished making all OSD settings to exit.
6 Using Your eMachines Flat-Panel Monitor
On-screen display...
User Manual - Page 11
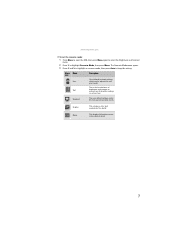
Graphic
This enhances color and emphasizes fine detail. www.emachines.com
To set the scenario mode:
1 Press Menu to open the OSD, then press Menu again...general-purpose mode.
Movie
This displays full-motion scenes in the clearest detail.
7 Standard
This uses default settings, and is the best balance of
Text
brightness and contrast to highlight Scenario Mode, then press Menu. Menu ...
User Manual - Page 12
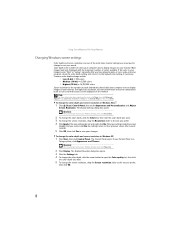
... the screen, click Start, then click Help and Support.
If the new settings do not look best displayed with the maximum number of colors available. If your Control Panel is the number of pixels (individual colored dots) your computer uses to display images on your Windows desktop, then click Personalize.
2 To change the color...
User Manual - Page 13
... mouse or press any keyboard key. www.emachines.com
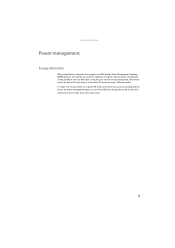
Power management
Energy declaration
When connected to change the period of non-use. In the Active Off mode the power LED turns amber. To "wake" the monitor when it is in the Control Panel to a computer that supports the VESA Display Power Management Signaling (DPMS...
User Manual - Page 14
....
For more information about connecting the power cord, see "Setting up the monitor" on page 2. Using Your eMachines Flat-Panel Monitor
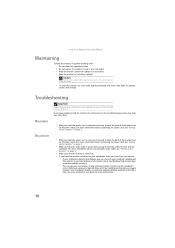
Maintaining
To keep the monitor in this troubleshooting section may help you solve them. If you have two options:
• If your notebook's video port, you have problems with water only. For more information about connecting the...
User Manual - Page 15
... back of the monitor and your
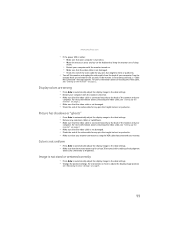
computer. Picture has shadows or "ghosts"
• Press Auto to automatically adjust the display image to the ideal settings. • Remove any extension cables or switchboxes. • Make sure that the video cable is connected securely to the ideal settings. • Change the position settings. For instructions on how to...
User Manual - Page 16
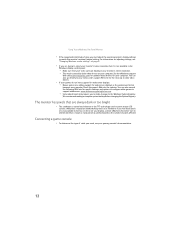
... may be caused by older video drivers on your computer. Check the game's Web site for your monitor's native resolution. • This may require you to make changes to match the monitor's optimal (native) setting. See the eMachines support
Web site (www.emachines.com) for updated video drivers for updates. You can display at your computer. We recommend making a complete system backup...
User Manual - Page 19
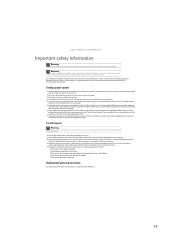
... instructions marked on this product near water or a heat source such as hazardous locations. No user serviceable parts inside.
Your eMachines product is a safety feature.
Call eMachines Customer Care for advice on whether the monitor is safe to meet the latest standards for safety of any kind into a grounding-type outlet. Replacement parts and accessories
Use only replacement...
User Manual - Page 21

...emachines.com
Acer America Corporation 333 West San Carlos St., San Jose
CA 95110, U. E192HQV... (2) this declaration:
Product:
LCD Monitor
Model Number:
E182H;E182HV ; Operation is responsible for radio noise emissions from digital apparatus as set out in the radio interference ...Part 15 of the FCC Rules. E192HQ;E192HQV ; S. A. E192HQ xxx; E182HV xxx; San Jose, CA 95110 U.
S.
User Manual - Page 22
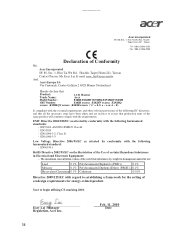
... affixing CE marking 2010. EN55022, AS/NZS CISPR22 Class B. -. www.emachines.com
Acer Incorporated
8F, 88, Sec. 1, Hsin Tai Wu Rd., ...Hereby declare that:
Product:
LCD Monitor
Trade Name:
Acer
Model Number:
E182H;E182HV;E192HQ;E192HQV;E202H
SKU Number:
E182H xxxxxx ;E182HV xxxxxx ;E192HQ
xxxxxx ;E192HQV xxxxxx ;E202H xxxxxx ("x"...setting of ecodesign requirements for energy-related product.
eMachines E192HQV Reviews
We have not received any reviews for eMachines yet.