eMachines E230H Support and Manuals
Get Help and Manuals for this eMachines item

View All Support Options Below
Free eMachines E230H manuals!
Problems with eMachines E230H?
Ask a Question
Free eMachines E230H manuals!
Problems with eMachines E230H?
Ask a Question
Popular eMachines E230H Manual Pages
User Manual - Page 3

... eMachines Flat-Panel Monitor 1
Unpacking the monitor 2 Setting up the monitor 2
Attaching the base 2 Connecting cables 3 Connecting a security cable 4 Turning on the monitor 4 Adjusting monitor settings 5 Monitor buttons 5 On-screen display options 6 Changing Windows screen settings 8 Power management 9 Energy declaration 9 Maintaining 10 Troubleshooting 10 No power 10 No picture...
User Manual - Page 5

Using Your eMachines Flat-Panel Monitor
• Unpacking the monitor • Setting up the monitor • Turning on the monitor • Adjusting monitor settings • Power management • Maintaining • Troubleshooting
1
User Manual - Page 6

Using Your eMachines Flat-Panel Monitor
Unpacking the monitor
Your monitor box should contain the following items:
• Monitor (with neck attached) • Base (to connect to the neck) • ThisUser Guide • VGA cable (Option) • DVI cable (Option) • HDMI cable (Option) • Audio cable (Option) • Power cord
If you slide the monitor
neck down...
User Manual - Page 7

Connect HDMI Cable (Only HDMI-Input Model) Position your computer.
4 Connect the power cord to the white DVI video connector under the back of the monitor. www.emachines.com
Connecting cables
To connect video and power cables:
1 Position your computer and the monitor so you can reach the back of each, then connect
the blue...
User Manual - Page 9

... > buttons Press to adjust volume. For more information, see "Changing Windows screen settings" on -screen display menu (OSD). For more troubleshooting information, see"Troubleshooting" on page 10.
3 Adjust the tilt of the monitor for the current screen resolution.
4 After you do not see the Windows desktop, press the Auto button on the bottom of your computer...
User Manual - Page 10

...-D or HDMI Select Wide mode setting for the OSD. Using Your eMachines Flat-Panel Monitor
On-screen display options
Adjusting OSD settings
To adjust the OSD settings:
1 Press Auto. The display image is automatically adjusted to exit.
6
Language
Selects the language for Full screen, Aspect ratio mode
Turns DDC/CI support on or off.
Adjusts focus...
User Manual - Page 11

This is the best general-purpose mode.
Menu Mode icon
Description
User-defined (custom) settings,
User
which can be adjusted to highlight Scenario Mode, then press Menu.
www.emachines.com
To set the scenario mode:
1 Press Menu to open the OSD, then press Menu again to select the Brightness and Contrast
menu.
2 Press > to...
User Manual - Page 12

...Windows desktop, then click Properties.
2 Click Display. Using Your eMachines Flat-Panel Monitor
Changing Windows screen settings
Color depth and screen resolution are two of the most basic monitor settings...Start, then click Help and Support. To change the screen resolution, drag the Resolution slider to the size you prefer,
then click OK.
8
Common color depth settings include:
• Low ...
User Manual - Page 13

... a computer that supports the VESA Display Power Management Signaling (DPMS) protocol, the monitor can conserve significant energy by reducing power consumption during periods of time after which the monitor enters these low power states.
9 When your computer goes into the energy-saving mode, the monitor enters the Active Off mode (sleep). www.emachines.com
Power...
User Manual - Page 14

... picture
• Make sure that the monitor is connected correctly to both at the same time.
For more information about connecting the power cord, see "Setting up the monitor" on .
• If you have the monitor connected to your notebook's video port, you have problems with water only. Using Your eMachines Flat-Panel Monitor
Maintaining
To keep the monitor...
User Manual - Page 15

... for at least 30 minutes before making a final judgment
about connecting the video cable, see "Adjusting monitor settings" on page 5.
11 For instructions on how to adjust the display image position,
see "Setting up for ten seconds. www.emachines.com
• If the power LED is amber: • Make sure that your computer is turned...
User Manual - Page 16

... of cable you need, see "Changing Windows screen settings" on page 8.
• If you are trying to identify whether a repair or replacement is normal and inherent in the TFT technology used in active-matrix LCD
screens. See the eMachines support
Web site (www.emachines.com) for updated video drivers for updates. You can display at your monitor's native resolution. • This may...
User Manual - Page 19

... electrician to install the appropriate outlet. ■ If you set at least 6 inches (15 cm), around the system for
24 hours. Do not block or cover these instructions to help guard against personal injury and damage to your system. ■ Do not expose the monitor to rain or use eMachines products in the monitor case are...
User Manual - Page 21

...:
Acer Representative
Phone No.:
254-298-4000
Fax No.:
254-298-4147
Canada
Industry Canada (IC) Unintentional emitter per ICES-003
This digital apparatus does not exceed the Class B limits for this device must accept any interference received, including interference that may not cause harmful interference, and (2) this declaration:
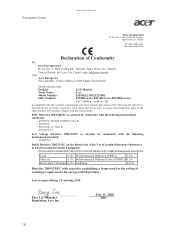
Product:
LCD Monitor
Model Number...
User Manual - Page 22
...:
-. Feb. 11, 2010
Date
18 Year to establishing a framework for the setting of ecodesign requirements for energy-related product. EN61000-3-3
Low Voltage Directive 2006/95/EC as attested by conformity with the following EC directives, and that : Product: Trade Name: Model Number: SKU Number:
LCD Monitor Acer E203H;E213H;E223HQ E203Hxxxxxx; Easy Lai /Manager Regulation...
eMachines E230H Reviews
We have not received any reviews for eMachines yet.