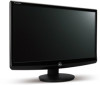
eMachines E233H Support and Manuals
Get Help and Manuals for this eMachines item
View All Support Options Below
Free eMachines E233H manuals!
Problems with eMachines E233H?
Ask a Question
Free eMachines E233H manuals!
Problems with eMachines E233H?
Ask a Question
Popular eMachines E233H Manual Pages
User Manual - Page 3

Contents
Using Your eMachines Flat-Panel Monitor 1
Unpacking the monitor 2 Setting up the monitor 2
Attaching the base 2 Connecting cables 3 Connecting a security cable 4 Turning on the monitor 4 Adjusting monitor settings 5 Monitor buttons 5 On-screen display options 6 Changing Windows screen settings 8 Power management 9 Energy declaration 9 Maintaining 10 Troubleshooting 10 No ...
User Manual - Page 5

Using Your eMachines Flat-Panel Monitor
• Unpacking the monitor • Setting up the monitor • Turning on the monitor • Adjusting monitor settings • Power management • Maintaining • Troubleshooting
1
User Manual - Page 6

...; Base (to connect to the neck) • ThisUser Guide • VGA cable (Option) • DVI cable (Option) • HDMI cable (Option) • Audio cable (Option) • Power cord
If you slide the monitor
neck down onto the base.
2
Setting up the monitor
To set up the monitor, first attach the base, then connect cables. Attaching the...
User Manual - Page 7

www.emachines.com
Connecting cables
To connect video and power cables:
1 Position your computer and the monitor so you can reach the back of each , then connect the white DVI video cable to the power connector under the back of the monitor.
3 Connect HDMI Cable (Only HDMI-Input Model) Position your computer and the monitor so...
User Manual - Page 9

... appear.
For more information about computer controls, see "Troubleshooting" on page 10.
3 Adjust the tilt of your computer is open or close the OSD and select the highlighted menu or setting.
5 www.emachines.com
2 Turn on your display image to the ideal settings.
5 Use the on-screen display (OSD) to adjust other settings for the monitor.
User Manual - Page 10

... support on or off.
Reset to Defaults Resets all adjustments, press Auto repeatedly to defaults.
Input Source Wide Mode DDC/CI Settings
Select input signal from D-Sub or DVI-D or HDMI Select Wide mode setting for the OSD. Mode Information Displays the monitor's current resolution, timing, input type, and serial number.
Using Your eMachines Flat-Panel Monitor...
User Manual - Page 11

...This displays full-motion scenes in the clearest detail.
7
Standard
This uses default settings, and is the best balance of
Text
brightness and contrast to suit
your needs...and > to highlight a scenario mode, then press Auto to highlight Scenario Mode, then press Menu. www.emachines.com
To set the scenario mode:
1 Press Menu to open the OSD, then press Menu again to select the Brightness ...
User Manual - Page 12

... Your eMachines Flat-Panel Monitor
Changing Windows screen settings
Color depth and screen resolution are two of pixels (individual colored dots) your computer uses to display images on your monitor. Common color depth settings include:
• Low (8-bit) = 256 colors • Medium (16-bit) = 65,500 colors • Highest (32-bit) = 16,700,000 colors
Screen resolution...
User Manual - Page 13

... Control Panel to a computer that supports the VESA Display Power Management Signaling (DPMS) protocol, the monitor can conserve significant energy by reducing power consumption during periods of time after which the monitor enters these low power states.
9 In the Active Off mode the power LED turns amber. www.emachines.com
Power management
Energy declaration...
User Manual - Page 14

... "Setting up the monitor" on page 2.
• Make sure that the monitor has warmed up the monitor" on .
• If you solve them. See Windows Help to learn how to enable multiple monitors.
• You can take several minutes to rain or use this troubleshooting section may help you have problems with water only. Using Your eMachines Flat...
User Manual - Page 15

...; Press Auto to automatically adjust the display image to the ideal settings. • Remove any pins that might be bent or pushed in .
For instructions on how to the ideal settings. • Change the position settings. Turn the
monitor back on page 2. If the monitor is not sized or centered correctly
• Press Auto to automatically...
User Manual - Page 16

... most up-to-date video drivers.
• If your games do not have support for updates. Check the game's Web site for widescreen displays: • Newer games are unacceptably numerous or dense on your display, contact eMachines Customer Care to identify whether a repair or replacement is justified based on your monitor's native resolution but it is not available...
User Manual - Page 19

...No user serviceable parts inside. If the monitor does get exposed to turn back on a stable work area. Replacement parts and accessories
Use only replacement parts and accessories recommended by eMachines.
15
... and operating instructions for advice on whether the monitor is to install the appropriate outlet. ■ If you set up the system on . ■ When the monitor is a safety...
User Manual - Page 21

... exceed the Class B limits for this device must accept any interference received, including interference that may not cause harmful interference, and (2) this declaration:
Product:
LCD Monitor
Model Number: SKU Number:
E233H
E233H xxx
("x" = 0~9, a ~ z, A ~ Z or Blank)
Name of Responsible Party: Acer America Corporation
Address of Responsible Party: 333 West San Carlos St.
User Manual - Page 22

... the following harmonized standard:
-.
European Union
www.emachines.com
Acer Incorporated
8F, 88, Sec. 1, Hsin Tai ...easy_lai@acer.com.tw And, Acer Europe SA Via Cantonale, Centro Galleria 2 6928 Manno Switzerland
Hereby declare that:
Product:
LCD Monitor
Trade Name: Model Number: SKU Number:
Acer
E233H E233H xxxxxx...setting of ecodesign requirements for energy-related product. EN55022, AS/NZS...
eMachines E233H Reviews
We have not received any reviews for eMachines yet.