
RX-A3080/RX-A2080 Quick Start Guide
Page 8
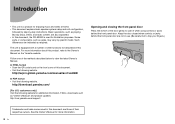
... this document, the RX-A3080 is a product for enjoying music and video at home. • This document explains basic speaker system setup and unit configuration, followed by step-by specific model. Basic operations, such as "Owner's Manual" and product updates. The unit is equipped with a number of this document. http://usa.yamaha.com/support/ Opening...
... this document, the RX-A3080 is a product for enjoying music and video at home. • This document explains basic speaker system setup and unit configuration, followed by step-by specific model. Basic operations, such as "Owner's Manual" and product updates. The unit is equipped with a number of this document. http://usa.yamaha.com/support/ Opening...

RX-A3080/RX-A2080 Quick Start Guide
Page 9
...process of connecting a TV or playback device, such as a BD/DVD or CD player, and speakers to help you can do with the unit" in this document. See the Owner's Manual to the AV receiver. Search "AV SETUP GUIDE" on a media server (PC or NAS) • Playing iTunes music or iPhone/iPad.../iPod touch music over a network (AirPlay) • Playing music in multiple rooms (Zone function) • Configuring the advanced settings (ADVANCED SETUP menu) For more information, see "What you get the most out of the following, which are not described in the Owner's Manual. AV...
...process of connecting a TV or playback device, such as a BD/DVD or CD player, and speakers to help you can do with the unit" in this document. See the Owner's Manual to the AV receiver. Search "AV SETUP GUIDE" on a media server (PC or NAS) • Playing iTunes music or iPhone/iPad.../iPod touch music over a network (AirPlay) • Playing music in multiple rooms (Zone function) • Configuring the advanced settings (ADVANCED SETUP menu) For more information, see "What you get the most out of the following, which are not described in the Owner's Manual. AV...
RX-A3080/RX-A2080 Quick Start Guide
Page 27
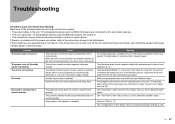
... instructions do not help, turn on each speaker cable firmly and reconnect to check the speaker output. Use "Configuration" in the "Setup" menu (p. 26) to the unit and speakers (p. 11). No sound. The power turns off the unit, disconnect the power cable, and contact the nearest authorized Yamaha dealer or service center. Cause The protection...
... instructions do not help, turn on each speaker cable firmly and reconnect to check the speaker output. Use "Configuration" in the "Setup" menu (p. 26) to the unit and speakers (p. 11). No sound. The power turns off the unit, disconnect the power cable, and contact the nearest authorized Yamaha dealer or service center. Cause The protection...

RX-A3080/RX-A2080 Owner s Manual
Page 2
...Front panel ...13 Front display (indicators) ...15 Rear panel...16 Remote control ...18 PREPARATIONS 19 General setup procedure 19 1 Connecting speakers 20 Basic speaker configuration ...21 Advanced speaker configuration ...30 2 Connecting a TV and playback devices 42 Input/output jacks and cables ...42 Connecting...52 6 Connecting the power cable 52 7 Selecting an on-screen menu language 53 8 Configuring the necessary speaker settings 54 9 Optimizing the speaker settings automatically (YPAO 55 Multi Measure...57 Angle/Height Measure ...58 Measuring at one listening position (single ...
...Front panel ...13 Front display (indicators) ...15 Rear panel...16 Remote control ...18 PREPARATIONS 19 General setup procedure 19 1 Connecting speakers 20 Basic speaker configuration ...21 Advanced speaker configuration ...30 2 Connecting a TV and playback devices 42 Input/output jacks and cables ...42 Connecting...52 6 Connecting the power cable 52 7 Selecting an on-screen menu language 53 8 Configuring the necessary speaker settings 54 9 Optimizing the speaker settings automatically (YPAO 55 Multi Measure...57 Angle/Height Measure ...58 Measuring at one listening position (single ...

RX-A3080/RX-A2080 Owner s Manual
Page 3
...Playing back music stored on media servers (PCs/NAS 101 Media sharing setup...101 Playback of PC music contents ...102 Listening to Internet radio 105 Playback of Internet radio ...105 Setup menu items...126 Speaker ...131 Sound ...136 Scene ...142 Video/HDMI ...143 Network...146 ...Bluetooth ...149 Multi Zone ...150 System ...152 Configuring the system settings (ADVANCED SETUP menu 158 ADVANCED SETUP menu items ...159 Changing the speaker impedance setting (SPEAKER IMP 159 Turning on/off the remote control sensor (REMOTE SENSOR 159 Selecting the remote control ID ...
...Playing back music stored on media servers (PCs/NAS 101 Media sharing setup...101 Playback of PC music contents ...102 Listening to Internet radio 105 Playback of Internet radio ...105 Setup menu items...126 Speaker ...131 Sound ...136 Scene ...142 Video/HDMI ...143 Network...146 ...Bluetooth ...149 Multi Zone ...150 System ...152 Configuring the system settings (ADVANCED SETUP menu 158 ADVANCED SETUP menu items ...159 Changing the speaker impedance setting (SPEAKER IMP 159 Turning on/off the remote control sensor (REMOTE SENSOR 159 Selecting the remote control ID ...

RX-A3080/RX-A2080 Owner s Manual
Page 12
... some sources) X For details, search for "MusicCast CONTROLLER" on media servers (PCs/NAS) - Select from your Yamaha network products. Functions • Connection guide (speakers, TV and video/audio devices) • Setup guide (YPAO settings and various setup assistance with the cable connections. Functions • Selecting and playing back various content - Play back music files...
... some sources) X For details, search for "MusicCast CONTROLLER" on media servers (PCs/NAS) - Select from your Yamaha network products. Functions • Connection guide (speakers, TV and video/audio devices) • Setup guide (YPAO settings and various setup assistance with the cable connections. Functions • Selecting and playing back various content - Play back music files...

RX-A3080/RX-A2080 Owner s Manual
Page 19
...) 6 Connecting the power cable p.52) 7 Selecting an on-screen menu language p.53) 8 Configuring the necessary speaker settings p.54) 9 Optimizing the speaker settings automatically (YPAO p.55) 10 Connecting to a network device wirelessly p.67) 11 Connecting to the MusicCast network... p.73) This completes all the preparations. PREPARATIONS General setup procedure 1 Connecting speakers p.20) 2 Connecting a TV and playback devices p.42) 3 Connecting the radio antennas p.49) 4 Connecting a network cable...
...) 6 Connecting the power cable p.52) 7 Selecting an on-screen menu language p.53) 8 Configuring the necessary speaker settings p.54) 9 Optimizing the speaker settings automatically (YPAO p.55) 10 Connecting to a network device wirelessly p.67) 11 Connecting to the MusicCast network... p.73) This completes all the preparations. PREPARATIONS General setup procedure 1 Connecting speakers p.20) 2 Connecting a TV and playback devices p.42) 3 Connecting the radio antennas p.49) 4 Connecting a network cable...

RX-A3080/RX-A2080 Owner s Manual
Page 21
... to the ceiling or when using the Dolby Enabled speakers as the presence speakers, configure the "Layout (Front Presence/Rear Presence)" setting in your room Depending on the number of speakers, place the speakers and subwoofer in the "Setup" menu before performing YPAO (p.54). • (RX-A3080 only) By using an external power amplifier (p.31), you can...
... to the ceiling or when using the Dolby Enabled speakers as the presence speakers, configure the "Layout (Front Presence/Rear Presence)" setting in your room Depending on the number of speakers, place the speakers and subwoofer in the "Setup" menu before performing YPAO (p.54). • (RX-A3080 only) By using an external power amplifier (p.31), you can...

RX-A3080/RX-A2080 Owner s Manual
Page 22
... to the ceiling or when using the Dolby Enabled speakers as the presence speakers, configure the "Layout (Front Presence/Rear Presence)" setting in the "Setup" menu before performing YPAO (p.54). • This speaker system creates rear Virtual Presence Speaker (VPS) using the Dolby Enabled speakers as the presence speakers, configure the "Layout (Front Presence)" setting in the...
... to the ceiling or when using the Dolby Enabled speakers as the presence speakers, configure the "Layout (Front Presence/Rear Presence)" setting in the "Setup" menu before performing YPAO (p.54). • This speaker system creates rear Virtual Presence Speaker (VPS) using the Dolby Enabled speakers as the presence speakers, configure the "Layout (Front Presence)" setting in the...

RX-A3080/RX-A2080 Owner s Manual
Page 23
... also creates Virtual Surround Back Speaker (VSBS) using the surround speakers to add a sense of depth to the ceiling or when using the Dolby Enabled speakers as the presence speakers, configure the "Layout (Front Presence)" setting in the "Setup" menu before performing YPAO (p.54). • This speaker system creates rear Virtual Presence Speaker (VPS) using the surround...
... also creates Virtual Surround Back Speaker (VSBS) using the surround speakers to add a sense of depth to the ceiling or when using the Dolby Enabled speakers as the presence speakers, configure the "Layout (Front Presence)" setting in the "Setup" menu before performing YPAO (p.54). • This speaker system creates rear Virtual Presence Speaker (VPS) using the surround...

RX-A3080/RX-A2080 Owner s Manual
Page 24
5.1 system X You can enjoy surround sound even without the center speaker (4.1 system). 5.1 system (front 5.1-channel) (using surround speakers) We recommend using this speaker system when you cannot place speakers in the rear side of the room. 1 2 4 9 3 5 X When placing surround speakers in the front side, set "Layout (Surround)" in the "Setup" menu to "Front" before performing YPAO (p.54). En 24
5.1 system X You can enjoy surround sound even without the center speaker (4.1 system). 5.1 system (front 5.1-channel) (using surround speakers) We recommend using this speaker system when you cannot place speakers in the rear side of the room. 1 2 4 9 3 5 X When placing surround speakers in the front side, set "Layout (Surround)" in the "Setup" menu to "Front" before performing YPAO (p.54). En 24

RX-A3080/RX-A2080 Owner s Manual
Page 25
En 25 X Add the center speaker to the ceiling or when using this speaker system when you cannot place speakers in the "Setup" menu before performing YPAO (p.54). 5.1 system (front 5.1-channel) (using front presence speakers) We recommend using the Dolby Enabled speakers as the presence speakers, configure the "Layout (Front Presence)" setting in the rear side of the room. E 1 2 R 9 3 2.1 system X When using front presence speakers installed to configure a 3.1 system.
En 25 X Add the center speaker to the ceiling or when using this speaker system when you cannot place speakers in the "Setup" menu before performing YPAO (p.54). 5.1 system (front 5.1-channel) (using front presence speakers) We recommend using the Dolby Enabled speakers as the presence speakers, configure the "Layout (Front Presence)" setting in the rear side of the room. E 1 2 R 9 3 2.1 system X When using front presence speakers installed to configure a 3.1 system.

RX-A3080/RX-A2080 Owner s Manual
Page 28
... power amplifier (Hi-Fi amplifier, etc.) to "Basic" (default). • To use two of them as surround speakers (*5) or front presence speakers (*6). X • When using 2 subwoofers, configure the "Layout (Subwoofer)" setting (p.134) in the "Setup" menu after connecting the power cable to an AC wall outlet. • When apply this case, the unit...
... power amplifier (Hi-Fi amplifier, etc.) to "Basic" (default). • To use two of them as surround speakers (*5) or front presence speakers (*6). X • When using 2 subwoofers, configure the "Layout (Subwoofer)" setting (p.134) in the "Setup" menu after connecting the power cable to an AC wall outlet. • When apply this case, the unit...

RX-A3080/RX-A2080 Owner s Manual
Page 31
■ Available speaker configurations (RX-A3080) Output channel (max) 7 9 7 11 11 11 9 7 7 7 7 11 9 Bi-amp ) ) ) ) ) Main zone External speakers Surround back Surround back Front presence Surround back Surround back Front presence Surround back Front presence Rear presence Surround back Surround back ... +1Zone 37 Y • When applying one of these configurations, you need to the EXTRA SP 1-2 jacks in "Power Amp Assign" (p.131) in the "Setup" menu. En 31 The following explanation is based on the assumption that you can select a zone (Zone2 or Zone3) to be assigned to configure the...
■ Available speaker configurations (RX-A3080) Output channel (max) 7 9 7 11 11 11 9 7 7 7 7 11 9 Bi-amp ) ) ) ) ) Main zone External speakers Surround back Surround back Front presence Surround back Surround back Front presence Surround back Front presence Rear presence Surround back Surround back ... +1Zone 37 Y • When applying one of these configurations, you need to the EXTRA SP 1-2 jacks in "Power Amp Assign" (p.131) in the "Setup" menu. En 31 The following explanation is based on the assumption that you can select a zone (Zone2 or Zone3) to be assigned to configure the...

RX-A3080/RX-A2080 Owner s Manual
Page 39
...8226; You can select a zone (Zone2 or Zone3) to be assigned to the instruction manual of the speakers for Zone2/3 speakers, configure the "Power Amp Assign" setting in the "Setup" menu after connecting the power cable to the EXTRA SP 1-2 terminals. En 39 To utilize the EXTRA... FRONT L R EXTRA SP1 L F.PRESENCE ■ Connecting Zone2/3 speakers When using Zone2/3 speakers, connect them to an AC wall outlet (p.54). To enable the bi-amp function, configure the "Power Amp Assign" setting in the "Setup" menu after connecting the power cable to the FRONT terminals and EXTRA...
...8226; You can select a zone (Zone2 or Zone3) to be assigned to the instruction manual of the speakers for Zone2/3 speakers, configure the "Power Amp Assign" setting in the "Setup" menu after connecting the power cable to the EXTRA SP 1-2 terminals. En 39 To utilize the EXTRA... FRONT L R EXTRA SP1 L F.PRESENCE ■ Connecting Zone2/3 speakers When using Zone2/3 speakers, connect them to an AC wall outlet (p.54). To enable the bi-amp function, configure the "Power Amp Assign" setting in the "Setup" menu after connecting the power cable to the FRONT terminals and EXTRA...

RX-A3080/RX-A2080 Owner s Manual
Page 45
...device has an HDMI output jack. X If you make more than one audio connection for watching video (p.74). In addition, a TV, etc., placed in the "Setup" menu. HDMI OUT 2 jack HDMI HDMI OUT (HDCP2.2) 2 1 ARC HDMI OUT 3 jack HDMI OUT (HDCP2.2) 3 (ZONE OUT) HDMI HDMI OUT (... OUT B AV 2 (5 STB) (FRONT) 1 PRE OUT TRIGGER OUT 1 12V 0.1A MAX. BACK (REAR) SUBWOOFER CENTER R SURROUND L R SURROUND BACK L FRONT SPEAKERS R EXTRA SP2 L R.PRESENCE CENTER NA O) AM HDMI HDMI output HDMI HDMI ZONE 2/ZONE 3/F.PRESENCE Video device En 45 As necessary, you have not changed the...
...device has an HDMI output jack. X If you make more than one audio connection for watching video (p.74). In addition, a TV, etc., placed in the "Setup" menu. HDMI OUT 2 jack HDMI HDMI OUT (HDCP2.2) 2 1 ARC HDMI OUT 3 jack HDMI OUT (HDCP2.2) 3 (ZONE OUT) HDMI HDMI OUT (... OUT B AV 2 (5 STB) (FRONT) 1 PRE OUT TRIGGER OUT 1 12V 0.1A MAX. BACK (REAR) SUBWOOFER CENTER R SURROUND L R SURROUND BACK L FRONT SPEAKERS R EXTRA SP2 L R.PRESENCE CENTER NA O) AM HDMI HDMI output HDMI HDMI ZONE 2/ZONE 3/F.PRESENCE Video device En 45 As necessary, you have not changed the...

RX-A3080/RX-A2080 Owner s Manual
Page 52
...BACK (REAR) SUBWOOFER CENTER SURROUND BACK L FRONT SPEAKERS R EXTRA SP2 L R.PRESENCE CENTER R FRONT L Trigger In (+12V) Power amplifier (such as MX-A5000) ZONE 2/ZONE 3/F.PRESENCE System connector jack Yamaha subwoofer X You can control an external device in the "Setup" menu. 6 Connecting the power cable Before connecting ...the trigger function by connecting the external device to an AC wall outlet. TOTAL 2 12V 0.1A MAX. If you have a Yamaha subwoofer that supports a system connection or a device with a trigger input jack, you set VOLTAGE SELECTOR of the TRIGGER OUT ...
...BACK (REAR) SUBWOOFER CENTER SURROUND BACK L FRONT SPEAKERS R EXTRA SP2 L R.PRESENCE CENTER R FRONT L Trigger In (+12V) Power amplifier (such as MX-A5000) ZONE 2/ZONE 3/F.PRESENCE System connector jack Yamaha subwoofer X You can control an external device in the "Setup" menu. 6 Connecting the power cable Before connecting ...the trigger function by connecting the external device to an AC wall outlet. TOTAL 2 12V 0.1A MAX. If you have a Yamaha subwoofer that supports a system connection or a device with a trigger input jack, you set VOLTAGE SELECTOR of the TRIGGER OUT ...

RX-A3080/RX-A2080 Owner s Manual
Page 54
...select "Configuration" ! For now, press RETURN and proceed to Step 3. 3 Press SETUP. 4 Use the cursor keys to select "Speaker" and press ENTER. 5 Use the cursor keys to display video from the menu, press SETUP. If you turn on the unit. 2 Turn on the unit for the first time..., the message regarding the network setup appears. X If you are using any of advanced speaker configurations, select "Power Amp Assign" (p.131), then select your front presence speaker layout. "Front Presence" ! En 54 MAIN 2 3 4 SLEEP ZONE z PARTY PURE...
...select "Configuration" ! For now, press RETURN and proceed to Step 3. 3 Press SETUP. 4 Use the cursor keys to select "Speaker" and press ENTER. 5 Use the cursor keys to display video from the menu, press SETUP. If you turn on the unit. 2 Turn on the unit for the first time..., the message regarding the network setup appears. X If you are using any of advanced speaker configurations, select "Power Amp Assign" (p.131), then select your front presence speaker layout. "Front Presence" ! En 54 MAIN 2 3 4 SLEEP ZONE z PARTY PURE...

RX-A3080/RX-A2080 Owner s Manual
Page 55
... - YPAO MIC jack The unit (front) YPAO MIC E 1 2 R 9 3 4 YPAO 5 microphone Ear height The following regarding the network setup appears. Y Note the following screen appears on the front panel. VOLUME CROSSOVER/ HIGH CUT 9 4 Place the YPAO microphone at your listening position (... video from them to your room. DECODE VOLUME ENHANCER STRAIGHT MEMORY TUNING BAND TUNING 9 Optimizing the speaker settings automatically (YPAO) The Yamaha Parametric room Acoustic Optimizer (YPAO) function detects speaker connections, measures the distances from the unit.
... - YPAO MIC jack The unit (front) YPAO MIC E 1 2 R 9 3 4 YPAO 5 microphone Ear height The following regarding the network setup appears. Y Note the following screen appears on the front panel. VOLUME CROSSOVER/ HIGH CUT 9 4 Place the YPAO microphone at your listening position (... video from them to your room. DECODE VOLUME ENHANCER STRAIGHT MEMORY TUNING BAND TUNING 9 Optimizing the speaker settings automatically (YPAO) The Yamaha Parametric room Acoustic Optimizer (YPAO) function detects speaker connections, measures the distances from the unit.

RX-A3080/RX-A2080 Owner s Manual
Page 142
... RADIO, Bluetooth, USB] Station, Music Content [Input sources: others] --- Video Video Mode (p.143), Video Adjustment (p.123) Volume Master Volume (p.74) Lipsync Lipsync (p.121), Delay (p.136) Speaker Setup Setting Pattern (p.131), Parametric EQ (p.134) Zone Interlock Power (p.114), Input (p.150), Volume (p.150) *1 *1 The "Volume" setting is not available with Zone4. X The scene assignments... SCENE name and press ENTER. 2 To include items as the scene assignments. X To restore the default setting, select "RESET". 4 To exit from the menu, Press SETUP.
... RADIO, Bluetooth, USB] Station, Music Content [Input sources: others] --- Video Video Mode (p.143), Video Adjustment (p.123) Volume Master Volume (p.74) Lipsync Lipsync (p.121), Delay (p.136) Speaker Setup Setting Pattern (p.131), Parametric EQ (p.134) Zone Interlock Power (p.114), Input (p.150), Volume (p.150) *1 *1 The "Volume" setting is not available with Zone4. X The scene assignments... SCENE name and press ENTER. 2 To include items as the scene assignments. X To restore the default setting, select "RESET". 4 To exit from the menu, Press SETUP.


