
System Administration Guide
Page 7
... using an SMB Environment 149 Problems using a UNIX Environment 151 Problems using a Windows Environment 153 Problems using EtherTalk 156 Problems using CentreWare Internet Services 158 Problems using E-mail Print/Mail Notice Service/iFax 159 16 Glossary 161 Terms Defined 161 17 Index ...165 Xerox CopyCentre/WorkCentre/WorkCentre Pro 123/128/133 System Administration Guide 7
... using an SMB Environment 149 Problems using a UNIX Environment 151 Problems using a Windows Environment 153 Problems using EtherTalk 156 Problems using CentreWare Internet Services 158 Problems using E-mail Print/Mail Notice Service/iFax 159 16 Glossary 161 Terms Defined 161 17 Index ...165 Xerox CopyCentre/WorkCentre/WorkCentre Pro 123/128/133 System Administration Guide 7

System Administration Guide
Page 38
... PC-850 PC-852 PC-1004 (OS/2) PC Turkish Windows 3.1 Latin 1 Windows 3.1 Latin 2 Windows 3.1 Latin 5 DeskTop PS Text MC Text Microsoft Publishing Math 8 PS Math Pi Font Legal ISO 4 United Kingdom ISO 6 ASCII ISO 11 Swedish:names ISO 15 Italian ISO 17 Spanish 38 Xerox CopyCentre/WorkCentre/WorkCentre Pro 123/128/133 System Administration Guide 2 Product...
... PC-850 PC-852 PC-1004 (OS/2) PC Turkish Windows 3.1 Latin 1 Windows 3.1 Latin 2 Windows 3.1 Latin 5 DeskTop PS Text MC Text Microsoft Publishing Math 8 PS Math Pi Font Legal ISO 4 United Kingdom ISO 6 ASCII ISO 11 Swedish:names ISO 15 Italian ISO 17 Spanish 38 Xerox CopyCentre/WorkCentre/WorkCentre Pro 123/128/133 System Administration Guide 2 Product...

System Administration Guide
Page 42
... A Novell-accredited computer which can run Windows 95, Windows 98, Windows NT 4.0 or Windows 2000. NetWare 3.x/4.x/ 5.x/6.x is required to support Bindery. NetWare 4.11 or later is required to support NDS. NetWare client computers A Novell-accredited computer which corresponds to the frame type of the file server. 42 Xerox CopyCentre/WorkCentre/WorkCentre Pro 123/128/133 System Administration...
... A Novell-accredited computer which can run Windows 95, Windows 98, Windows NT 4.0 or Windows 2000. NetWare 3.x/4.x/ 5.x/6.x is required to support Bindery. NetWare 4.11 or later is required to support NDS. NetWare client computers A Novell-accredited computer which corresponds to the frame type of the file server. 42 Xerox CopyCentre/WorkCentre/WorkCentre Pro 123/128/133 System Administration...
System Administration Guide
Page 44
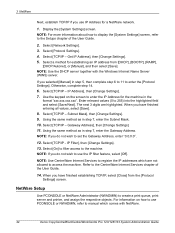
...highlighted field and select [Save/Next]. Get IP Address], then [Change Settings]. 5. NOTE: Use the DHCP server together with NetWare. 44 Xerox CopyCentre/WorkCentre/WorkCentre Pro 123/128/133 System Administration Guide Enter relevant values (0 to the Setups chapter of the User Guide. 14. The next 3 digits...Filter], then [Change Settings]. 13. Select [TCP/IP - NOTE: Use CentreWare Internet Services to register the IP addresses which comes with the Windows Internet Name Server (WINS) server. 3 NetWare Next, establish TCP/IP if you do not wish to access the machine. Use the keypad...
...highlighted field and select [Save/Next]. Get IP Address], then [Change Settings]. 5. NOTE: Use the DHCP server together with NetWare. 44 Xerox CopyCentre/WorkCentre/WorkCentre Pro 123/128/133 System Administration Guide Enter relevant values (0 to the Setups chapter of the User Guide. 14. The next 3 digits...Filter], then [Change Settings]. 13. Select [TCP/IP - NOTE: Use CentreWare Internet Services to register the IP addresses which comes with the Windows Internet Name Server (WINS) server. 3 NetWare Next, establish TCP/IP if you do not wish to access the machine. Use the keypad...
System Administration Guide
Page 49
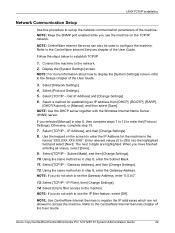
... chapter of the User Guide. Display the [System Settings] screen. Select [Protocol Settings]. 5. NOTE: Use the DHCP server together with the Windows Internet Name Server (WINS) server. If you use the IP filter feature, select [Off]. NOTE: For more information about how to display ...255) into the highlighted field and select [Next]. Select [On] to filter access to the CentreWare Internet Services chapter of the machine. Xerox CopyCentre/WorkCentre/WorkCentre Pro 123/128/133 System Administration Guide 49 Otherwise, complete step 15. 7. Select [TCP/IP - NOTE: Keep the SNMP port ...
... chapter of the User Guide. Display the [System Settings] screen. Select [Protocol Settings]. 5. NOTE: Use the DHCP server together with the Windows Internet Name Server (WINS) server. If you use the IP filter feature, select [Off]. NOTE: For more information about how to display ...255) into the highlighted field and select [Next]. Select [On] to filter access to the CentreWare Internet Services chapter of the machine. Xerox CopyCentre/WorkCentre/WorkCentre Pro 123/128/133 System Administration Guide 49 Otherwise, complete step 15. 7. Select [TCP/IP - NOTE: Keep the SNMP port ...

System Administration Guide
Page 53
... /var / spool / lpd mkdir PrinterName chmod 744 PrinterName Follow the steps below . There are case-sensitive. page 54 Using the Command Window TTY Method Follow the steps below . Xerox CopyCentre/WorkCentre/WorkCentre Pro 123/128/133 System Administration Guide 53 Choose the method that will then be located on a disk partition large enough to...
... /var / spool / lpd mkdir PrinterName chmod 744 PrinterName Follow the steps below . There are case-sensitive. page 54 Using the Command Window TTY Method Follow the steps below . Xerox CopyCentre/WorkCentre/WorkCentre Pro 123/128/133 System Administration Guide 53 Choose the method that will then be located on a disk partition large enough to...

System Administration Guide
Page 54
...name of the print queue that has been created. 5. NOTE: The queuename is set to lp to spool jobs to the machine. 54 Xerox CopyCentre/WorkCentre/WorkCentre Pro 123/128/133 System Administration Guide Using the System Administrator Manager (SAM) GUI Method Follow the steps below to exit the Bourne shell....menu. 5. Type exit to the machine. 4. Start the SAM application. 2. Type enable queuename to enable the queue to print to close the command window. 8. Type exit to the HP-UX documentation for the machine from the Menu Bar. 4. NOTE: The Printer Name is the name of the ...
...name of the print queue that has been created. 5. NOTE: The queuename is set to lp to spool jobs to the machine. 54 Xerox CopyCentre/WorkCentre/WorkCentre Pro 123/128/133 System Administration Guide Using the System Administrator Manager (SAM) GUI Method Follow the steps below to exit the Bourne shell....menu. 5. Type exit to the machine. 4. Start the SAM application. 2. Type enable queuename to enable the queue to print to close the command window. 8. Type exit to the HP-UX documentation for the machine from the Menu Bar. 4. NOTE: The Printer Name is the name of the ...

System Administration Guide
Page 55
... TCP/IP installation is used for full details. Print (lp) The lp command is now complete. Xerox CopyCentre/WorkCentre/WorkCentre Pro 123/128/133 System Administration Guide 55 If the test print fails, refer to the machine. ...Select [OK]. 7. Perform the following command options are available. Command format lp [-d printer name] [-n number of copies] File name Command options The following steps. 1. Read and respond to the machine. 3. Start the Open Windows...
... TCP/IP installation is used for full details. Print (lp) The lp command is now complete. Xerox CopyCentre/WorkCentre/WorkCentre Pro 123/128/133 System Administration Guide 55 If the test print fails, refer to the machine. ...Select [OK]. 7. Perform the following command options are available. Command format lp [-d printer name] [-n number of copies] File name Command options The following steps. 1. Read and respond to the machine. 3. Start the Open Windows...

System Administration Guide
Page 56
However, this is only effective when the machine is only valid in the spool mode. 56 Xerox CopyCentre/WorkCentre/WorkCentre Pro 123/128/133 System Administration Guide NOTE: Some options which are not listed here (e.g. -m option) and which are available. • Printer name This option .... If one lp command. The cancel command can be used. • -n number of copies This option specifies the number of the print data to be a Windows NT machine to fxPS, enter the following command options are not processed by the lpadmin command as shown below. If this option.
However, this is only effective when the machine is only valid in the spool mode. 56 Xerox CopyCentre/WorkCentre/WorkCentre Pro 123/128/133 System Administration Guide NOTE: Some options which are not listed here (e.g. -m option) and which are available. • Printer name This option .... If one lp command. The cancel command can be used. • -n number of copies This option specifies the number of the print data to be a Windows NT machine to fxPS, enter the following command options are not processed by the lpadmin command as shown below. If this option.

System Administration Guide
Page 58
... used . • job number This option specifies the job number of a job number, you can be specified in the non-spool mode. 58 Xerox CopyCentre/WorkCentre/WorkCentre Pro 123/128/133 System Administration Guide This option is invalid in the non-spool mode. • User name is invalid in one lpr command.... This option is only valid when you log-in the spool mode. In the non-spool mode, the client must be a Windows NT machine ...
... used . • job number This option specifies the job number of a job number, you can be specified in the non-spool mode. 58 Xerox CopyCentre/WorkCentre/WorkCentre Pro 123/128/133 System Administration Guide This option is invalid in the non-spool mode. • User name is invalid in one lpr command.... This option is only valid when you log-in the spool mode. In the non-spool mode, the client must be a Windows NT machine ...

System Administration Guide
Page 59
...; -o [printer name] This option displays the print data for job number 351, enter the following command options are specified, or if there is available to Windows NT clients but not to inquire about the status of multiple files sent in the non-spool mode. Command format lpstat [option] Command options The... lpstat command is received, the file will be deleted. You cannot delete print data sent by commas and enclose all your print data by file. Xerox CopyCentre/WorkCentre/WorkCentre Pro 123/128/133 System Administration Guide 59
...; -o [printer name] This option displays the print data for job number 351, enter the following command options are specified, or if there is available to Windows NT clients but not to inquire about the status of multiple files sent in the non-spool mode. Command format lpstat [option] Command options The... lpstat command is received, the file will be deleted. You cannot delete print data sent by commas and enclose all your print data by file. Xerox CopyCentre/WorkCentre/WorkCentre Pro 123/128/133 System Administration Guide 59

System Administration Guide
Page 60
... name] [-l] [user name] [+interval] Command options The following command: %lpstat -ofxPS The lpq command is available to Windows NT clients but not to inquire about print data received from a specified user. 60 Xerox CopyCentre/WorkCentre/WorkCentre Pro 123/128/133 System Administration Guide NOTE: In the non-spool mode, this option is sending the...
... name] [-l] [user name] [+interval] Command options The following command: %lpstat -ofxPS The lpq command is available to Windows NT clients but not to inquire about print data received from a specified user. 60 Xerox CopyCentre/WorkCentre/WorkCentre Pro 123/128/133 System Administration Guide NOTE: In the non-spool mode, this option is sending the...

System Administration Guide
Page 69
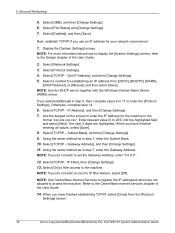
...[TCP/IP - Select a method for the machine in step 7, enter the Gateway Address. NOTE: Use the DHCP server together with the Windows Internet Name Server (WINS) server. Select [TCP/IP - Using the same method as in step 5, then complete steps 6 to 11 ...EtherTalk Installation Initially, boot the EtherTalk port. 1. Select [TCP/IP - NOTE: If you have finished entering all values, select [Save]. 8. Xerox CopyCentre/WorkCentre/WorkCentre Pro 123/128/133 System Administration Guide 69 Select [Port Settings]. 5. The next 3 digits are highlighted. Select [On] to filter access to ...
...[TCP/IP - Select a method for the machine in step 7, enter the Gateway Address. NOTE: Use the DHCP server together with the Windows Internet Name Server (WINS) server. Select [TCP/IP - Using the same method as in step 5, then complete steps 6 to 11 ...EtherTalk Installation Initially, boot the EtherTalk port. 1. Select [TCP/IP - NOTE: If you have finished entering all values, select [Save]. 8. Xerox CopyCentre/WorkCentre/WorkCentre Pro 123/128/133 System Administration Guide 69 Select [Port Settings]. 5. The next 3 digits are highlighted. Select [On] to filter access to ...

System Administration Guide
Page 72
... both as a protocol in small networks where existing legacy clients require it. 72 Xerox CopyCentre/WorkCentre/WorkCentre Pro 123/128/133 System Administration Guide 6 Microsoft Networking SMB Environments Server Message Block (SMB) is a protocol for SMB. For more information on Windows OS. This section explains the installation procedure for connecting a printer to make SMB...
... both as a protocol in small networks where existing legacy clients require it. 72 Xerox CopyCentre/WorkCentre/WorkCentre Pro 123/128/133 System Administration Guide 6 Microsoft Networking SMB Environments Server Message Block (SMB) is a protocol for SMB. For more information on Windows OS. This section explains the installation procedure for connecting a printer to make SMB...
System Administration Guide
Page 74
... the DHCP server together with the Windows Internet Name Server (WINS) server. If you have finished entering all values, select [Save]. 8. The next 3 digits are not allowed to enter the IP Address for establishing an IP address from the [Protocol Settings] screen. 74 Xerox CopyCentre/WorkCentre/WorkCentre Pro 123/128/133 System Administration Guide...
... the DHCP server together with the Windows Internet Name Server (WINS) server. If you have finished entering all values, select [Save]. 8. The next 3 digits are not allowed to enter the IP Address for establishing an IP address from the [Protocol Settings] screen. 74 Xerox CopyCentre/WorkCentre/WorkCentre Pro 123/128/133 System Administration Guide...

System Administration Guide
Page 75
... Settings This section explains how the System Administrator uses [config.txt] to your Windows manual. 2. Double click the [admintool] folder. Select the machine as the printer. 3. Xerox CopyCentre/WorkCentre/WorkCentre Pro 123/128/133 System Administration Guide 75 Changing the Settings Workstation Setup Install the.... Repeat the test for all workstations that it prints correctly. 4. Refer to the Problem Solving chapter for the machine using a Windows networked computer. If the test print fails, refer to the HTML document in CentreWare Utilities CD-ROM. You can check the name...
... Settings This section explains how the System Administrator uses [config.txt] to your Windows manual. 2. Double click the [admintool] folder. Select the machine as the printer. 3. Xerox CopyCentre/WorkCentre/WorkCentre Pro 123/128/133 System Administration Guide 75 Changing the Settings Workstation Setup Install the.... Repeat the test for all workstations that it prints correctly. 4. Refer to the Problem Solving chapter for the machine using a Windows networked computer. If the test print fails, refer to the HTML document in CentreWare Utilities CD-ROM. You can check the name...

System Administration Guide
Page 76
...option set correctly in the following table. For Windows 95/Windows 98/Windows Me, enter the password (SMB Administrator Password) only. Make changes to Setting Format of the machine) WORKGROUP On On 76 Xerox CopyCentre/WorkCentre/WorkCentre Pro 123/128/133 System Administration Guide Open ...[message.txt] and check that it displays the information shown in [config.txt]. 7. 6 Microsoft Networking 3. For Windows NT 4.0/Windows 2000/Windows XP, enter the user name (...
...option set correctly in the following table. For Windows 95/Windows 98/Windows Me, enter the password (SMB Administrator Password) only. Make changes to Setting Format of the machine) WORKGROUP On On 76 Xerox CopyCentre/WorkCentre/WorkCentre Pro 123/128/133 System Administration Guide Open ...[message.txt] and check that it displays the information shown in [config.txt]. 7. 6 Microsoft Networking 3. For Windows NT 4.0/Windows 2000/Windows XP, enter the user name (...

System Administration Guide
Page 79
... encountered during machine setup, refer to the glossary for assistance. CAUTION: Do not connect the network cable to the machine until instructed to print from a Windows computer through LPD or Port9100. Xerox CopyCentre/WorkCentre/WorkCentre Pro 123/128/133 System Administration Guide 79
... encountered during machine setup, refer to the glossary for assistance. CAUTION: Do not connect the network cable to the machine until instructed to print from a Windows computer through LPD or Port9100. Xerox CopyCentre/WorkCentre/WorkCentre Pro 123/128/133 System Administration Guide 79

System Administration Guide
Page 80
... printing through Port9100, change the necessary settings on the machine and the Windows computers. When printing from Windows 95/Windows 98/Windows Me computers through LPD or Port9100. 80 Xerox CopyCentre/WorkCentre/WorkCentre Pro 123/128/133 System Administration Guide When printing from Windows NT4.0/Windows 2000/Windows XP/Windows Server 2003 computers, use our TCP/IP Direct Print Utility. 7 TCP...
... printing through Port9100, change the necessary settings on the machine and the Windows computers. When printing from Windows 95/Windows 98/Windows Me computers through LPD or Port9100. 80 Xerox CopyCentre/WorkCentre/WorkCentre Pro 123/128/133 System Administration Guide When printing from Windows NT4.0/Windows 2000/Windows XP/Windows Server 2003 computers, use our TCP/IP Direct Print Utility. 7 TCP...

System Administration Guide
Page 82
Get IP Address] and [Change Settings]. 5. NOTE: Use the DHCP server together with the optional PostScript Kit. 82 Xerox CopyCentre/WorkCentre/WorkCentre Pro 123/128/133 System Administration Guide If you have finished entering all values, select [Save]. 8. Select [TCP/IP - Enter relevant values...same method as in step 7, enter the Subnet Mask. 10. When you selected [Manual] in CentreWare Utilities CD-ROM or document provided with the Windows Internet Name Server (WINS) server. Refer to the HTML document in step 5, then complete steps 6 to 11 to enter [Protocol Settings]. Select [...
Get IP Address] and [Change Settings]. 5. NOTE: Use the DHCP server together with the optional PostScript Kit. 82 Xerox CopyCentre/WorkCentre/WorkCentre Pro 123/128/133 System Administration Guide If you have finished entering all values, select [Save]. 8. Select [TCP/IP - Enter relevant values...same method as in step 7, enter the Subnet Mask. 10. When you selected [Manual] in CentreWare Utilities CD-ROM or document provided with the Windows Internet Name Server (WINS) server. Refer to the HTML document in step 5, then complete steps 6 to 11 to enter [Protocol Settings]. Select [...


