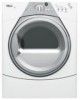
Use and Care Guide
Page 2
We have provided many important safety messages in this manual and on your appliance. This symbol alerts you to reduce the chance of others . All safety messages will follow the safety alert symbol ... or hurt you and others are not followed. 2 Always read and obey all safety messages. TABLE OF CONTENTS DRYER SAFETY 2 INSTALLATION INSTRUCTIONS 3 Tools and Parts 3 Optional Pedestal 4 Location Requirements 4 Electrical Requirements 6 Electrical Connection 8 Venting Requirements 13 Plan Vent System 14 Install Vent System 15 Install Leveling Legs 15 Connect Vent 15...
We have provided many important safety messages in this manual and on your appliance. This symbol alerts you to reduce the chance of others . All safety messages will follow the safety alert symbol ... or hurt you and others are not followed. 2 Always read and obey all safety messages. TABLE OF CONTENTS DRYER SAFETY 2 INSTALLATION INSTRUCTIONS 3 Tools and Parts 3 Optional Pedestal 4 Location Requirements 4 Electrical Requirements 6 Electrical Connection 8 Venting Requirements 13 Plan Vent System 14 Install Vent System 15 Install Leveling Legs 15 Connect Vent 15...
Use and Care Guide
Page 18
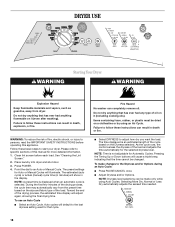
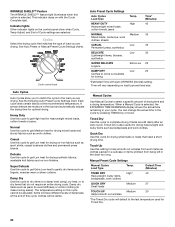
... Lint Screen." 2. The preset settings for the selected dryness level. Toward the end of the load and adjusts the time automatically for Auto or Manual Cycles will cause a triple beep, indicating that has ever had any type of the cycle based on the Dryness selected. Items containing foam, rubber... of the load. Follow these instructions can completely remove oil. Point the dial to start your dryer. To use an Auto Cycle ■ Select an Auto Cycle. During the first few minutes of fire, electric shock, or injury to the Dryness and/or Options during an Auto Cycle: ■ Press...
... Lint Screen." 2. The preset settings for the selected dryness level. Toward the end of the load and adjusts the time automatically for Auto or Manual Cycles will cause a triple beep, indicating that has ever had any type of the cycle based on the Dryness selected. Items containing foam, rubber... of the load. Follow these instructions can completely remove oil. Point the dial to start your dryer. To use an Auto Cycle ■ Select an Auto Cycle. During the first few minutes of fire, electric shock, or injury to the Dryness and/or Options during an Auto Cycle: ■ Press...
Use and Care Guide
Page 19
...increased shrinkage or wrinkling. You can also use a Manual Cycle ■ Point the dial to avoid unintended use of your dryer is closed. ■ If you choose an Auto Cycle. Stopping or Restarting Your Dryer To pause/stop the dryer at any time Open the door or press PAUSE/CANCEL... minutes. This is heard. NOTE: You cannot choose a Dryness Level with Manual Cycles. ■ Press TEMP ADJUST until the desired drying time is running , the display shows the exact number of all cycles. To restart the dryer Close the door. Press and hold START for a guide to Time, Temperature...
...increased shrinkage or wrinkling. You can also use a Manual Cycle ■ Point the dial to avoid unintended use of your dryer is closed. ■ If you choose an Auto Cycle. Stopping or Restarting Your Dryer To pause/stop the dryer at any time Open the door or press PAUSE/CANCEL... minutes. This is heard. NOTE: You cannot choose a Dryness Level with Manual Cycles. ■ Press TEMP ADJUST until the desired drying time is running , the display shows the exact number of all cycles. To restart the dryer Close the door. Press and hold START for a guide to Time, Temperature...
Use and Care Guide
Page 20
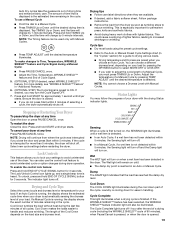
...this cycle to select a specific amount of Cycle settings are still damp after an Auto Cycle. Manual Cycles Use Manual Cycles to get Low heat for drying no -iron finishes. Default Time (Minutes) TIMED DRY... *The Timed Dry cycle will have different levels of dampness. Damp dry items such as sport shirts, casual business clothes and permanent press blends. Items will default to gently dry items... Each cycle dries certain fabrics at the recommended temperature. A sensor detects the moisture in the dryer too long. Heavy Duty Use this cycle to dry items to a damp level using Low ...
...this cycle to select a specific amount of Cycle settings are still damp after an Auto Cycle. Manual Cycles Use Manual Cycles to get Low heat for drying no -iron finishes. Default Time (Minutes) TIMED DRY... *The Timed Dry cycle will have different levels of dampness. Damp dry items such as sport shirts, casual business clothes and permanent press blends. Items will default to gently dry items... Each cycle dries certain fabrics at the recommended temperature. A sensor detects the moisture in the dryer too long. Heavy Duty Use this cycle to dry items to a damp level using Low ...

Use and Care Guide
Page 21
... This ends the current cycle. 2. Press STOP once. 2. The drum turns, but the rack does not move. Do not use the automatic cycle with the Manual Cycles. Temperature Temperature settings are used with the Auto Cycles. Air Only Use the Air Only modifier for items that can be able to purchase... of Cycle Signal is on ordering, please refer to the front page of the manual or contact the dealer from whom you do not select the WRINKLE SHIELD™ feature, the dryer stops after opening and closing the dryer door by pushing START. ■ Cancel at any time by hand periodically during ...
... This ends the current cycle. 2. Press STOP once. 2. The drum turns, but the rack does not move. Do not use the automatic cycle with the Manual Cycles. Temperature Temperature settings are used with the Auto Cycles. Air Only Use the Air Only modifier for items that can be able to purchase... of Cycle Signal is on ordering, please refer to the front page of the manual or contact the dealer from whom you do not select the WRINKLE SHIELD™ feature, the dryer stops after opening and closing the dryer door by pushing START. ■ Cancel at any time by hand periodically during ...


