Use and Care Guide
Page 1
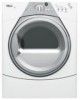
® ® ELECTRONIC ELECTRIC DRYER Use & Care Guide For questions about features, operation/performance, parts, accessories or service, call: 1-800-253-1301 or visit our website at... www.whirlpool.com Table of Contents 2 W10151580A
® ® ELECTRONIC ELECTRIC DRYER Use & Care Guide For questions about features, operation/performance, parts, accessories or service, call: 1-800-253-1301 or visit our website at... www.whirlpool.com Table of Contents 2 W10151580A
Use and Care Guide
Page 2
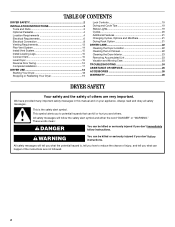
... follow instructions. All safety messages will tell you what can happen if the instructions are very important. TABLE OF CONTENTS DRYER SAFETY 2 INSTALLATION INSTRUCTIONS 3 Tools and Parts 3 Optional Pedestal 4 Location Requirements 4 Electrical Requirements 6 Electrical Connection 8 Venting Requirements 13 Plan Vent System 14 Install Vent System 15 Install Leveling Legs 15 Connect Vent 15 Level...
... follow instructions. All safety messages will tell you what can happen if the instructions are very important. TABLE OF CONTENTS DRYER SAFETY 2 INSTALLATION INSTRUCTIONS 3 Tools and Parts 3 Optional Pedestal 4 Location Requirements 4 Electrical Requirements 6 Electrical Connection 8 Venting Requirements 13 Plan Vent System 14 Install Vent System 15 Install Leveling Legs 15 Connect Vent 15 Level...
Use and Care Guide
Page 3
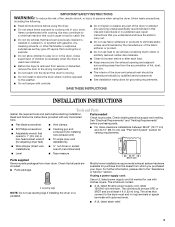
...out. ■ Do not use heat to dry articles containing foam rubber or similarly textured rubber-like materials. ■ Clean lint screen before purchasing parts. ■ For close-clearance installations between 28.65" (72.77 cm) and 34.15" (86.74 cm), see "Plan Vent System" ... ■ Do not use fabric softeners or products to the "Assistance or Service" section. If using the dryer. ■ Do not place items exposed to cooking oils in your dryer. See "Electrical Requirements" and "Venting Requirements" before or after each load. ■ Keep area around the exhaust opening and...
...out. ■ Do not use heat to dry articles containing foam rubber or similarly textured rubber-like materials. ■ Clean lint screen before purchasing parts. ■ For close-clearance installations between 28.65" (72.77 cm) and 34.15" (86.74 cm), see "Plan Vent System" ... ■ Do not use fabric softeners or products to the "Assistance or Service" section. If using the dryer. ■ Do not place items exposed to cooking oils in your dryer. See "Electrical Requirements" and "Venting Requirements" before or after each load. ■ Keep area around the exhaust opening and...

Use and Care Guide
Page 4
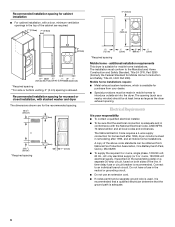
... quarters. For a garage installation, you placing the dryer on a pedestal? Ask for Part Number 8563738. You will need to place the dryer at least 18" (46 cm) above the floor for this dryer. If using a power cord, a grounded electrical outlet located within 2 ft (61 cm) of ...9632; A location that allows for a total height of an automatic cycle. See "Electrical Requirements." ■ A sturdy floor to the bottom of the dryer. Check code requirements. Contact your DUET SPORT™ washer and dryer? You have the option of purchasing pedestals of 127 lbs (57.6 kg). For ...
... quarters. For a garage installation, you placing the dryer on a pedestal? Ask for Part Number 8563738. You will need to place the dryer at least 18" (46 cm) above the floor for this dryer. If using a power cord, a grounded electrical outlet located within 2 ft (61 cm) of ...9632; A location that allows for a total height of an automatic cycle. See "Electrical Requirements." ■ A sturdy floor to the bottom of the dryer. Check code requirements. Contact your DUET SPORT™ washer and dryer? You have the option of purchasing pedestals of 127 lbs (57.6 kg). For ...
Use and Care Guide
Page 6
...For side or bottom venting, 0" (0 cm) spacing is allowed. Connect to the Manufactured Home Construction and Safety Standard, Title 24 CFR, Part 3280 (formerly the Federal Standard for mobile home installations. A copy of the line. Recommended installation spacing for cabinet installation ■ For ...Mobile home - The installation must be sure that the ground path is adequate and in remodeling after 1996, dryer circuits involved in conformance with the National Electrical Code, ANSI/NFPA 70-latest edition and all mobile home installations. The opening (such as a nearby ...
...For side or bottom venting, 0" (0 cm) spacing is allowed. Connect to the Manufactured Home Construction and Safety Standard, Title 24 CFR, Part 3280 (formerly the Federal Standard for mobile home installations. A copy of the line. Recommended installation spacing for cabinet installation ■ For ...Mobile home - The installation must be sure that the ground path is adequate and in remodeling after 1996, dryer circuits involved in conformance with the National Electrical Code, ANSI/NFPA 70-latest edition and all mobile home installations. The opening (such as a nearby ...
Use and Care Guide
Page 13
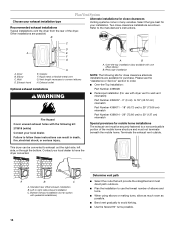
...; venting products are acceptable only if accessible for cleaning. ■ Flexible metal vent must not be fully extended and supported when the dryer is recommended to avoid crushing and kinking. Louvered hood style B. Do not use a plastic vent. Modify existing vent system if necessary to...cap the vent to seal all governing codes and ordinances. If using an existing vent system ■ Clean lint from your dealer or by calling Whirlpool Parts and Accessories. Flexible metal vent ■ Flexible metal vents are recommended. 4" 10.2 cm 4" (10.2 cm) heavy metal exhaust vent DURASAFE...
...; venting products are acceptable only if accessible for cleaning. ■ Flexible metal vent must not be fully extended and supported when the dryer is recommended to avoid crushing and kinking. Louvered hood style B. Do not use a plastic vent. Modify existing vent system if necessary to...cap the vent to seal all governing codes and ordinances. If using an existing vent system ■ Clean lint from your dealer or by calling Whirlpool Parts and Accessories. Flexible metal vent ■ Flexible metal vents are recommended. 4" 10.2 cm 4" (10.2 cm) heavy metal exhaust vent DURASAFE...
Use and Care Guide
Page 14
... side exhaust installation C. B C D A E F G A. Dryer B. This dryer can result in many varieties. Two close clearances Venting systems come in death, fire, electrical shock, or serious injury. Exhaust hood H E. Bottom exhaust installation ...(not an option with pedestal installations) 14 Determine vent path ■ Select the route that will provide the straightest and most direct path outdoors. ■ Plan the installation to use with dryer vent to wall vent mismatch): Part...
... side exhaust installation C. B C D A E F G A. Dryer B. This dryer can result in many varieties. Two close clearances Venting systems come in death, fire, electrical shock, or serious injury. Exhaust hood H E. Bottom exhaust installation ...(not an option with pedestal installations) 14 Determine vent path ■ Select the route that will provide the straightest and most direct path outdoors. ■ Plan the installation to use with dryer vent to wall vent mismatch): Part...
Use and Care Guide
Page 17
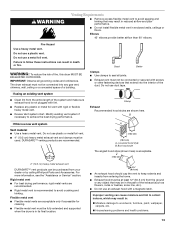
...You may be seen from the dryer door opening. Dryer front panel B. Plug strip (cannot be 2 household fuses or circuit breakers for the dryer. Complete Installation 1. Check the dryer's final location. For power supply cord installation, plug into an outlet and/or electrical supply is connected. ■ ...Household fuse is intact and tight, or circuit breaker has not tripped. ■ Dryer door is an extra part, go away. Read "Dryer Use." 9. Do not select the Air Only modifier. If...
...You may be seen from the dryer door opening. Dryer front panel B. Plug strip (cannot be 2 household fuses or circuit breakers for the dryer. Complete Installation 1. Check the dryer's final location. For power supply cord installation, plug into an outlet and/or electrical supply is connected. ■ ...Household fuse is intact and tight, or circuit breaker has not tripped. ■ Dryer door is an extra part, go away. Read "Dryer Use." 9. Do not select the Air Only modifier. If...
Use and Care Guide
Page 19
...reached the damp dry level. Cycle Complete This light illuminates when a drying cycle is especially important for more than 5 minutes, the dryer will continue from the dryer as soon as tumbling stops to increased shrinkage or wrinkling. NOTE: You cannot choose a Dryness Level with Manual Cycles. ■ ...will also be used only with Manual Cycles. To make changes to ON. Press and hold END OF CYCLE SIGNAL button for your dryer is cooling down part of 90 minutes), when Pause/Cancel is pressed, or when the door is reached in "Additional Features." 6. (OPTIONAL STEP) The...
...reached the damp dry level. Cycle Complete This light illuminates when a drying cycle is especially important for more than 5 minutes, the dryer will continue from the dryer as soon as tumbling stops to increased shrinkage or wrinkling. NOTE: You cannot choose a Dryness Level with Manual Cycles. ■ ...will also be used only with Manual Cycles. To make changes to ON. Press and hold END OF CYCLE SIGNAL button for your dryer is cooling down part of 90 minutes), when Pause/Cancel is pressed, or when the door is reached in "Additional Features." 6. (OPTIONAL STEP) The...
Use and Care Guide
Page 23
... lint screen. Dry unstable dye items inside out to avoid transfer of time, you are secure in dryer. See "Cleaning the Lint Screen." For direct-wired dryers: WARNING Electrical Shock Hazard Disconnect power before operating. Apply paste to the stained area and rub with hot water..... Scrub lint screen with hot water. 5. Rinse screen with the brush to both sides of lint screen with a soft cloth until all parts and panels before servicing. OR Apply a liquid, nonflammable household cleaner to a soft cloth. Vacation and Moving Care Vacation care Operate your fingers...
... lint screen. Dry unstable dye items inside out to avoid transfer of time, you are secure in dryer. See "Cleaning the Lint Screen." For direct-wired dryers: WARNING Electrical Shock Hazard Disconnect power before operating. Apply paste to the stained area and rub with hot water..... Scrub lint screen with hot water. 5. Rinse screen with the brush to both sides of lint screen with a soft cloth until all parts and panels before servicing. OR Apply a liquid, nonflammable household cleaner to a soft cloth. Vacation and Moving Care Vacation care Operate your fingers...

Use and Care Guide
Page 26
... impaired, limited vision, etc.) ■ Referrals to Whirlpool Corporation with any questions or concerns at: Whirlpool Corporation Customer eXperience Center 553 Benson Road Benton Harbor, MI 49022-2692 Please include a daytime phone number in the United States. Accessories U.S.A. Part Number Accessory 20-48KITRC 4" (10.2 cm) gas line dryer connector installation kit PT220L 4" (10.2 cm...
... impaired, limited vision, etc.) ■ Referrals to Whirlpool Corporation with any questions or concerns at: Whirlpool Corporation Customer eXperience Center 553 Benson Road Benton Harbor, MI 49022-2692 Please include a daytime phone number in the United States. Accessories U.S.A. Part Number Accessory 20-48KITRC 4" (10.2 cm) gas line dryer connector installation kit PT220L 4" (10.2 cm...


