User Manual
Page 2
ATTACHING THE BASE STAND TO THE LCD MONITOR 6 2. TURN THE POWER ON ...6 CONTROL PANEL BUTTONS 7 OSD MENU FUNCTIONS...8 QUICK ADJUSTMENTS...9 DISPLAY MODES ...10 TROUBLESHOOTING ...11 NO POWER ...11 NO SCREEN IMAGE ...11 FUZZY IMAGE ...11 "OUT OF ...HOW TO CONNECT A DVI-D INPUT TO THE MONITOR 12 ADDITIONAL QUESTIONS...12 1 CONNECT YOUR COMPUTER AND OTHER DEVICES 6 3. CONNECT POWER CABLE 6 4. CONTENTS IMPORTANT PRODUCT SAFETY INSTRUCTIONS 2 SAFETY GUIDELINES ...3 FCC COMPLIANCE STATEMENT 3 CLEANING THE LCD MONITOR 4 FEATURES...5 POWER SAVER ...5 PLUG & PLAY ...5 INSTALLATION ...6 PACKAGE...
ATTACHING THE BASE STAND TO THE LCD MONITOR 6 2. TURN THE POWER ON ...6 CONTROL PANEL BUTTONS 7 OSD MENU FUNCTIONS...8 QUICK ADJUSTMENTS...9 DISPLAY MODES ...10 TROUBLESHOOTING ...11 NO POWER ...11 NO SCREEN IMAGE ...11 FUZZY IMAGE ...11 "OUT OF ...HOW TO CONNECT A DVI-D INPUT TO THE MONITOR 12 ADDITIONAL QUESTIONS...12 1 CONNECT YOUR COMPUTER AND OTHER DEVICES 6 3. CONNECT POWER CABLE 6 4. CONTENTS IMPORTANT PRODUCT SAFETY INSTRUCTIONS 2 SAFETY GUIDELINES ...3 FCC COMPLIANCE STATEMENT 3 CLEANING THE LCD MONITOR 4 FEATURES...5 POWER SAVER ...5 PLUG & PLAY ...5 INSTALLATION ...6 PACKAGE...
User Manual
Page 7
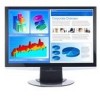
... Your product package includes: • Westinghouse Widescreen LCD Monitor • Detachable Base Stand • AC Power Cord • VGA Cable • User's Manual • Warranty Card • Specification Sheet Optional contents (depends on connectors of the LCD monitor first, and then power on the PC and A/V devices. Press the power button on the side of monitor): • 3.5 mm Mini-Stereo...
... Your product package includes: • Westinghouse Widescreen LCD Monitor • Detachable Base Stand • AC Power Cord • VGA Cable • User's Manual • Warranty Card • Specification Sheet Optional contents (depends on connectors of the LCD monitor first, and then power on the PC and A/V devices. Press the power button on the side of monitor): • 3.5 mm Mini-Stereo...
User Manual
Page 8
... the OSD is displayed. • Move a selection right when the OSD is a list of the LCD Monitor to switch between different video inputs or enter/exit the OSD menu. • Power On and Off button. 7 Control Panel Buttons Use the control buttons in "OSD Functions" on page 8. 1. ▲ 2. ▼ 3. The OSD controls are defined in the...
... the OSD is displayed. • Move a selection right when the OSD is a list of the LCD Monitor to switch between different video inputs or enter/exit the OSD menu. • Power On and Off button. 7 Control Panel Buttons Use the control buttons in "OSD Functions" on page 8. 1. ▲ 2. ▼ 3. The OSD controls are defined in the...

User Manual
Page 9
...power should be made . (Example) Source Image Menu Audio Menu Color Menu Miscellaneous Menu Info Menu Resolution & Frequency Extra functions: • DDC/CI: Allows the monitor to communicate with Color Management Engine. • Optimal aspect ratio: ideal fit your display to the viewable area of the monitor. • Reset: Restore this LCD monitor... approximately 10 seconds, if no action is taken.) This LCD monitor has been adjusted to optimal settings before shipment. Turning off . To display the OSD main menu, press the keypad button on the control panel. (Note: The OSD menu display...
...power should be made . (Example) Source Image Menu Audio Menu Color Menu Miscellaneous Menu Info Menu Resolution & Frequency Extra functions: • DDC/CI: Allows the monitor to communicate with Color Management Engine. • Optimal aspect ratio: ideal fit your display to the viewable area of the monitor. • Reset: Restore this LCD monitor... approximately 10 seconds, if no action is taken.) This LCD monitor has been adjusted to optimal settings before shipment. Turning off . To display the OSD main menu, press the keypad button on the control panel. (Note: The OSD menu display...


