User Manual
Page 3
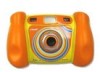
... (2) Dual Viewfinders A/V Port for purchasing the VTech® Kidizoom Camera™! Delete Button Press this A/V port to connect to your TV. A/V Port Plug the included A/V cable into this button to take a photo or start recording a movie. Kidizoom Camera™ also has TV connectability that lets kids... connect to confirm a choice or action. Reset Button Press this button to reset the camera if it includes a USB port and cable to connect the Kidizoom Camera™ to your PC. Kidizoom Camera™ has 16MB of built-in memory and supports up to a 2GB Secure Digital ...
... (2) Dual Viewfinders A/V Port for purchasing the VTech® Kidizoom Camera™! Delete Button Press this A/V port to connect to your TV. A/V Port Plug the included A/V cable into this button to take a photo or start recording a movie. Kidizoom Camera™ also has TV connectability that lets kids... connect to confirm a choice or action. Reset Button Press this button to reset the camera if it includes a USB port and cable to connect the Kidizoom Camera™ to your PC. Kidizoom Camera™ has 16MB of built-in memory and supports up to a 2GB Secure Digital ...
User Manual
Page 4
INCLUDED IN THIS PACKAGE • 1 VTech® Kidizoom Camera™ • 2 interchangeable faceplates • 1 PC installation CD-ROM with additional features in the Photo Editor • 1 A/V cable • 1 USB cable • 1 user's manual • 1 wrist strap WARNING: All packing materials such ...2 Supported File Formats: Photo: JPEG (up to 2 Mega pixels at 1632x1224 resolution) Movie: Kidizoom Camera™ Motion JPEG Supported Hardware: A/V cable for TV connection (included) USB cable for PC connection (included) SD memory cards (not included) up to a 2GB Secure Digital (...
INCLUDED IN THIS PACKAGE • 1 VTech® Kidizoom Camera™ • 2 interchangeable faceplates • 1 PC installation CD-ROM with additional features in the Photo Editor • 1 A/V cable • 1 USB cable • 1 user's manual • 1 wrist strap WARNING: All packing materials such ...2 Supported File Formats: Photo: JPEG (up to 2 Mega pixels at 1632x1224 resolution) Movie: Kidizoom Camera™ Motion JPEG Supported Hardware: A/V cable for TV connection (included) USB cable for PC connection (included) SD memory cards (not included) up to a 2GB Secure Digital (...
User Manual
Page 7
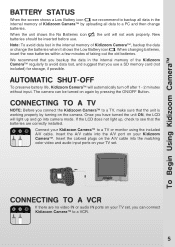
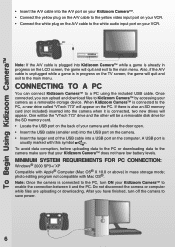
...data in the internal memory of Kidizoom Camera™ by pressing the ON/OFF Button. Insert the A/V cable into camera mode. Once you backup the data in the internal memory of the Kidizoom Camera™ regularly to avoid data lost in the internal memory of Kidizoom Camera™, backup the data or...and go into the A/V port on your Kidizoom Camera™. Connecting to a VCR. 5 To Begin Using Kidizoom Camera™ BATTERY STATUS When the screen shows a Low Battery icon , we recommend to backup all data to a TV or monitor using the included A/V cable. Connect your TV set . When the...
...data in the internal memory of Kidizoom Camera™ by pressing the ON/OFF Button. Insert the A/V cable into camera mode. Once you backup the data in the internal memory of the Kidizoom Camera™ regularly to avoid data lost in the internal memory of Kidizoom Camera™, backup the data or...and go into the A/V port on your Kidizoom Camera™. Connecting to a VCR. 5 To Begin Using Kidizoom Camera™ BATTERY STATUS When the screen shows a Low Battery icon , we recommend to backup all data to a TV or monitor using the included A/V cable. Connect your TV set . When the...
User Manual
Page 8
... port is connected to the PC, a new drive called "VTech 773" will be the "VTech 773" drive and the other will appear on the A/V cable to Kidizoom Camera™ by accessing your VCR. Note: Once the camera is already in mass storage mode; Do not disconnect the camera or computer while files are uploading or downloading. To...
... port is connected to the PC, a new drive called "VTech 773" will be the "VTech 773" drive and the other will appear on the A/V cable to Kidizoom Camera™ by accessing your VCR. Note: Once the camera is already in mass storage mode; Do not disconnect the camera or computer while files are uploading or downloading. To...
User Manual
Page 13
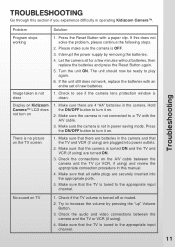
... saving mode. Make sure that all cable plugs are plugged into the appropriate ports. 5. The unit should now be ready to see if the camera lens protection window is tuned to turn it on the TV screen 1. Display on Kidizoom Camera™ LCD does not turn it ... stops working 1. There is not connected to increase the volume by removing the batteries. 4. No sound on the A/V cable between the camera and the TV or VCR (if using ) and review the appropriate connection procedure in operating Kidizoom Camera™. Try to a TV with a paper clip.
... saving mode. Make sure that all cable plugs are plugged into the appropriate ports. 5. The unit should now be ready to see if the camera lens protection window is tuned to turn it on the TV screen 1. Display on Kidizoom Camera™ LCD does not turn it ... stops working 1. There is not connected to increase the volume by removing the batteries. 4. No sound on the A/V cable between the camera and the TV or VCR (if using ) and review the appropriate connection procedure in operating Kidizoom Camera™. Try to a TV with a paper clip.
User Manual
Page 14
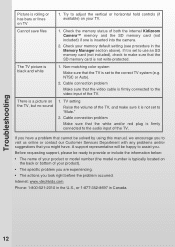
... included), check to make sure it is typically located on the back or bottom of your TV. 1. Cable connection problem Make sure that the white and/or red plug is inserted into the camera. 2. NTSC or Auto). 2. If you have a problem that cannot be solved by using this manual..., we encourage you took right before the problem occurred. Cable connection problem Make sure that the video cable is not write-protected. 1. Check the memory status of both the internal Kidizoom Camera™ memory and the SD memory card (not included) if one is firmly ...
... included), check to make sure it is typically located on the back or bottom of your TV. 1. Cable connection problem Make sure that the white and/or red plug is inserted into the camera. 2. NTSC or Auto). 2. If you have a problem that cannot be solved by using this manual..., we encourage you took right before the problem occurred. Cable connection problem Make sure that the video cable is not write-protected. 1. Check the memory status of both the internal Kidizoom Camera™ memory and the SD memory card (not included) if one is firmly ...
User Manual
Page 20
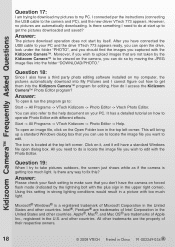
... a standard Windows dialog box that are not taken by moving the JPEG image files into the Kidizoom Camera™ program for editing. Question 18: Since I also have connected the USB cable to : Start -> All Programs -> VTech Kidizoom -> Photo Editor -> Vtech Photo Editor. Question 19: When I try to get the pictures downloaded and saved? Is there any...
... a standard Windows dialog box that are not taken by moving the JPEG image files into the Kidizoom Camera™ program for editing. Question 18: Since I also have connected the USB cable to : Start -> All Programs -> VTech Kidizoom -> Photo Editor -> Vtech Photo Editor. Question 19: When I try to get the pictures downloaded and saved? Is there any...

