Download
Page 7
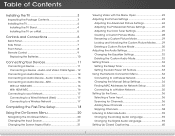
...Wired Network (Best 17 Connecting to a Wireless Network 17 Completing the First-Time Setup 18 Using the On-Screen Menu 20 Navigating the On-Screen Menu 20 Changing the Input Source 21 Changing the Screen Aspect Ratio 21 Viewing Video with the Menu Open 22 Adjusting the Picture Settings 23 Adjusting the Advanced... 3 Installing the TV 4 Installing the TV Stand 4 Installing the TV on a Wall 5 Controls and Connections 6 Back Panel 6 Side Panel 7 Front Panel 8 Remote Control 9 Replacing the Batteries 10 Connecting Your Devices 11 Connecting A Device 11 Connecting a Device -
...Wired Network (Best 17 Connecting to a Wireless Network 17 Completing the First-Time Setup 18 Using the On-Screen Menu 20 Navigating the On-Screen Menu 20 Changing the Input Source 21 Changing the Screen Aspect Ratio 21 Viewing Video with the Menu Open 22 Adjusting the Picture Settings 23 Adjusting the Advanced... 3 Installing the TV 4 Installing the TV Stand 4 Installing the TV on a Wall 5 Controls and Connections 6 Back Panel 6 Side Panel 7 Front Panel 8 Remote Control 9 Replacing the Batteries 10 Connecting Your Devices 11 Connecting A Device 11 Connecting a Device -
Download
Page 38
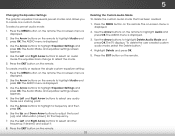
... button on the remote. To select a pre-set modes and allows you to highlight a frequency and then press OK. 6. To create, modify, or replace the single custom equalizer setting: 1. Use the Arrow buttons on the remote. The Audio menu is displayed. 3. Press the MENU button on the remote. ...to select any audio mode as a starting point. 5. Highlight Delete and press OK. 5. The Audio menu is displayed. 3. Press the EXIT button on -screen menu is displayed. 2. Use the Left and Right Arrow buttons to highlight Delete Audio Mode and press OK. The TV displays, "To delete the user...
... button on the remote. To select a pre-set modes and allows you to highlight a frequency and then press OK. 6. To create, modify, or replace the single custom equalizer setting: 1. Use the Arrow buttons on the remote. The Audio menu is displayed. 3. Press the MENU button on the remote. ...to select any audio mode as a starting point. 5. Highlight Delete and press OK. 5. The Audio menu is displayed. 3. Press the EXIT button on -screen menu is displayed. 2. Use the Left and Right Arrow buttons to highlight Delete Audio Mode and press OK. The TV displays, "To delete the user...

Download
Page 67
...strength of the channel may be interfering with HDMI cables. • If you switch from , the difference may be noticeable. • See Changing the Screen Aspect Ratio on page 21. 61 However, sometimes pixels may be low. Move the TV away from electrical appliances, cars, and fluorescent lights. •...the new input source differs from the one button at a time. • Point the remote directly at the TV when pressing a button. • Replace the remote batteries with this model. • Ensure you are always dark or always lit. • Your HDTV is higher or lower than the ...
...strength of the channel may be interfering with HDMI cables. • If you switch from , the difference may be noticeable. • See Changing the Screen Aspect Ratio on page 21. 61 However, sometimes pixels may be low. Move the TV away from electrical appliances, cars, and fluorescent lights. •...the new input source differs from the one button at a time. • Point the remote directly at the TV when pressing a button. • Replace the remote batteries with this model. • Ensure you are always dark or always lit. • Your HDTV is higher or lower than the ...


