User Manual
Page 2
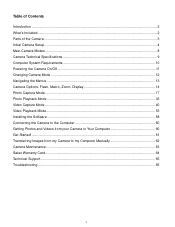
... Camera Options: Flash, Macro, Zoom, Display 14 Photo Capture Mode ...17 Photo Playback Mode ...33 Video Capture Mode ...40 Video Playback Mode...53 Installing the Software ...58 Connecting the Camera to the Computer 60 Getting Photos and Videos from your Camera to Your Computer 60 Get Started! ...61 Transferring Images from...
... Camera Options: Flash, Macro, Zoom, Display 14 Photo Capture Mode ...17 Photo Playback Mode ...33 Video Capture Mode ...40 Video Playback Mode...53 Installing the Software ...58 Connecting the Camera to the Computer 60 Getting Photos and Videos from your Camera to Your Computer 60 Get Started! ...61 Transferring Images from...
User Manual
Page 3
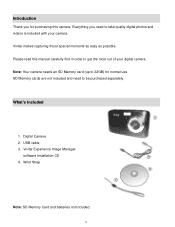
... an SD Memory card (up to 32GB) for purchasing this manual carefully first in order to get the most out of your camera. USB cable 3. Vivitar makes capturing those special moments as easy as possible. Digital Camera 2. Wrist Strap Note: SD Memory Card and batteries not included. 2 SD Memory cards are... is included with your digital camera. What's Included 1. Everything you for normal use. Please read this camera. Introduction Thank you need to be purchased separately. Vivitar Experience Image Manager software Installation CD 4.
... an SD Memory card (up to 32GB) for purchasing this manual carefully first in order to get the most out of your camera. USB cable 3. Vivitar makes capturing those special moments as easy as possible. Digital Camera 2. Wrist Strap Note: SD Memory Card and batteries not included. 2 SD Memory cards are... is included with your digital camera. What's Included 1. Everything you for normal use. Please read this camera. Introduction Thank you need to be purchased separately. Vivitar Experience Image Manager software Installation CD 4.
User Manual
Page 8
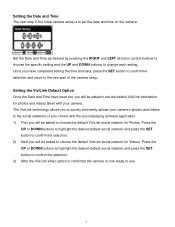
... selection. 3) After the ViviLink Video option is confirmed the camera is to set the default ViviLink destination for photos and videos taken with the accompanying software application. 1) First you will be asked to choose the default ViviLink social network for Photos. Set the Date and Time as desired by pressing the...
... selection. 3) After the ViviLink Video option is confirmed the camera is to set the default ViviLink destination for photos and videos taken with the accompanying software application. 1) First you will be asked to choose the default ViviLink social network for Photos. Set the Date and Time as desired by pressing the...

User Manual
Page 11
Computer System Requirements WINDOWS OS To be able to download photos and videos to your PC using the Vivitar Experience Image Manager Software, you will need the following minimum configuration: Microsoft® Windows XP with Service Pack 3, Windows Vista with Service Pack 1 or... DirectX 9 or higher Internet connection required MACINTOSH OS To be able to download photos and videos to your Macintosh using the Vivitar Experience Image Manager Software, you will need the following minimum configuration: Intel processor running Mac OS X v10.5.x or later 1 GB RAM...
Computer System Requirements WINDOWS OS To be able to download photos and videos to your PC using the Vivitar Experience Image Manager Software, you will need the following minimum configuration: Microsoft® Windows XP with Service Pack 3, Windows Vista with Service Pack 1 or... DirectX 9 or higher Internet connection required MACINTOSH OS To be able to download photos and videos to your Macintosh using the Vivitar Experience Image Manager Software, you will need the following minimum configuration: Intel processor running Mac OS X v10.5.x or later 1 GB RAM...
User Manual
Page 59
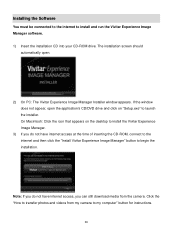
..., connect to the internet and then click the "Install Vivitar Experience Image Manager" button to launch the installer. Note: If you can still download media from my camera to install and run the Vivitar Experience Image Manager software. 1) Insert the installation CD into your CD-ROM drive.... Installing the Software You must be connected to the internet to my computer" button for instructions. 58
..., connect to the internet and then click the "Install Vivitar Experience Image Manager" button to launch the installer. Note: If you can still download media from my camera to install and run the Vivitar Experience Image Manager software. 1) Insert the installation CD into your CD-ROM drive.... Installing the Software You must be connected to the internet to my computer" button for instructions. 58
User Manual
Page 66
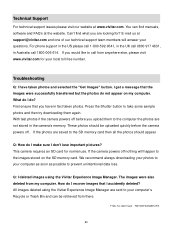
... from there. Technical Support For technical support issues please visit our website at the website. Can‟t find manuals, software and FAQ‟s at www.vivitar.com. With test photos if the camera powers off before the camera powers off nothing will answer your computer as soon... can find what you have taken photos and selected the "Get Images" button. All images deleted using the Vivitar Experience Image Manager. If you upload them again. F128 -TA-122211ver2 FW1900FKGNMD51F01 65 You can be uploaded quickly before you would like to your local toll free number....
... from there. Technical Support For technical support issues please visit our website at the website. Can‟t find manuals, software and FAQ‟s at www.vivitar.com. With test photos if the camera powers off before the camera powers off nothing will answer your computer as soon... can find what you have taken photos and selected the "Get Images" button. All images deleted using the Vivitar Experience Image Manager. If you upload them again. F128 -TA-122211ver2 FW1900FKGNMD51F01 65 You can be uploaded quickly before you would like to your local toll free number....

