
User Guide
Page 1
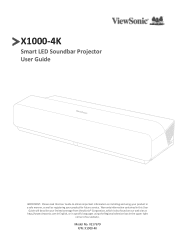
Warranty information contained in this User Guide to obtain important information on our web site at http://www.viewsonic.com in English, or in specific languages using your product for future service. X1000-4K Smart LED Soundbar Projector User Guide IMPORTANT: Please read this User Guide will describe your limited coverage from ViewSonic® Corporation, which is also found on installing and using the Regional selection box in a safe manner, as well as registering your product in the upper right corner of our website. Model No. VS17679 P/N: X1000-4K
Warranty information contained in this User Guide to obtain important information on our web site at http://www.viewsonic.com in English, or in specific languages using your product for future service. X1000-4K Smart LED Soundbar Projector User Guide IMPORTANT: Please read this User Guide will describe your limited coverage from ViewSonic® Corporation, which is also found on installing and using the Regional selection box in a safe manner, as well as registering your product in the upper right corner of our website. Model No. VS17679 P/N: X1000-4K

User Guide
Page 3
... 20" (50 cm) clearance around the projector to disassemble the projector. Doing so may cause death if you start using the projector. • Keep this could cause objects to break on rare occasions. • Never replace the lamp assembly or any heat sources such as this user guide in a well-ventilated area. There are dangerous high voltages inside which may cause the...
... 20" (50 cm) clearance around the projector to disassemble the projector. Doing so may cause death if you start using the projector. • Keep this could cause objects to break on rare occasions. • Never replace the lamp assembly or any heat sources such as this user guide in a well-ventilated area. There are dangerous high voltages inside which may cause the...

User Guide
Page 5
... that you start using the projector. If you use a proper fitting projector ceiling mount kit and that the projector may fall from the place you purchased your projector. 5 Ceiling Mounting Please read the following Safety Precautions before you ensure it is securely and safely installed. Safety Precautions - If you intend to an improper attachment through the use of the wrong gauge or length screws.
... that you start using the projector. If you use a proper fitting projector ceiling mount kit and that the projector may fall from the place you purchased your projector. 5 Ceiling Mounting Please read the following Safety Precautions before you ensure it is securely and safely installed. Safety Precautions - If you intend to an improper attachment through the use of the wrong gauge or length screws.
User Guide
Page 9
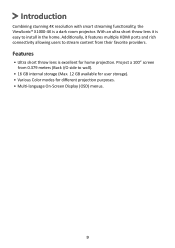
... ViewSonic® X1000-4K is easy to install in the home. Features • Ultra short throw lens is excellent for different projection purposes. • Multi-language On-Screen Display (OSD) menus. 9 Additionally, it is a dark room projector. Project a 100" screen from 0.379 meters (Back I/O side to stream content from their favorite providers. With an ultra short throw lens it features multiple HDMI ports and rich connectivity...
... ViewSonic® X1000-4K is easy to install in the home. Features • Ultra short throw lens is excellent for different projection purposes. • Multi-language On-Screen Display (OSD) menus. 9 Additionally, it is a dark room projector. Project a 100" screen from 0.379 meters (Back I/O side to stream content from their favorite providers. With an ultra short throw lens it features multiple HDMI ports and rich connectivity...

User Guide
Page 18
... ensure the most secure installation, please use the correct screw size. Mounting the Projector NOTE: If you buy a third party mount, please use a ViewSonic® wall or ceiling mount. 2. Ensure the screws used to attach the mount to the projector meet the following specifications: • Screw type: M6 x 10 • Maximum Screw Length: 10 mm CAUTION: • Avoid installing the projector near a heat source or air conditioner. • Keep at least a 10 cm...
... ensure the most secure installation, please use the correct screw size. Mounting the Projector NOTE: If you buy a third party mount, please use a ViewSonic® wall or ceiling mount. 2. Ensure the screws used to attach the mount to the projector meet the following specifications: • Screw type: M6 x 10 • Maximum Screw Length: 10 mm CAUTION: • Avoid installing the projector near a heat source or air conditioner. • Keep at least a 10 cm...

User Guide
Page 19
If a fault should occur during operation of the projector, use the disconnect device to the AC IN jack at the rear of the projector. 2. Connect the power cord to switch off the power supply, or disconnect the power plug. 19 Plug the power cord into a power outlet. 1 2 NOTE: When installing the projector, incorporate a readily accessible disconnect device in the fixed wiring, or connect the power plug to Power 1. Connecting to an easily accessible outlet near the unit. Making Connections This section guides you on how to connect the projector with other equipment.
If a fault should occur during operation of the projector, use the disconnect device to the AC IN jack at the rear of the projector. 2. Connect the power cord to switch off the power supply, or disconnect the power plug. 19 Plug the power cord into a power outlet. 1 2 NOTE: When installing the projector, incorporate a readily accessible disconnect device in the fixed wiring, or connect the power plug to Power 1. Connecting to an easily accessible outlet near the unit. Making Connections This section guides you on how to connect the projector with other equipment.

User Guide
Page 23
.... Access the drop down control menu. 2. For iOS: 1. Choose "ViewSonic PJ-XXXX". For Android: 1. Download and install the "Google Home" application and open it . Wireless Screen Mirroring Screen Mirroring provides a 5GHz Wi-Fi connection for 30 seconds. 3. Pull-to-refresh the app and wait for users to the same network as the projector. Select the "Screen Mirroring" icon. 3. NOTE: Some Android devices support direct "Casting". NOTE...
.... Access the drop down control menu. 2. For iOS: 1. Choose "ViewSonic PJ-XXXX". For Android: 1. Download and install the "Google Home" application and open it . Wireless Screen Mirroring Screen Mirroring provides a 5GHz Wi-Fi connection for 30 seconds. 3. Pull-to-refresh the app and wait for users to the same network as the projector. Select the "Screen Mirroring" icon. 3. NOTE: Some Android devices support direct "Casting". NOTE...

User Guide
Page 45
...-HDR Change to HDR Picture Mode when an HDR input source is required, i.e. Brightest Maximizes the brightness of the projected image. Movie Appropriate for viewing sports in a darker image. User 1/User 2 Recalls the customized user settings. This mode is suitable for environments where extra-high brightness is detected. The higher the value, the brighter the image. well-lit rooms. TV Optimized for colorful movies, video clips from digital cameras...
...-HDR Change to HDR Picture Mode when an HDR input source is required, i.e. Brightest Maximizes the brightness of the projected image. Movie Appropriate for viewing sports in a darker image. User 1/User 2 Recalls the customized user settings. This mode is suitable for environments where extra-high brightness is detected. The higher the value, the brighter the image. well-lit rooms. TV Optimized for colorful movies, video clips from digital cameras...

User Guide
Page 46
... color temperature; The lower the value, the more greenish the picture becomes. Refers to the amount of "0" removes that color from the image entirely. Reflects the relationship between input source and picture brightness. 46 makes the image appear the most bluish-white. • User Color: Adjust red, green, and blue values as desired. in fact, a setting of that color will be overpowering and unrealistic. If the saturation is too high...
... color temperature; The lower the value, the more greenish the picture becomes. Refers to the amount of "0" removes that color from the image entirely. Reflects the relationship between input source and picture brightness. 46 makes the image appear the most bluish-white. • User Color: Adjust red, green, and blue values as desired. in fact, a setting of that color will be overpowering and unrealistic. If the saturation is too high...

User Guide
Page 51
... light conditions. The projector supports HDR imaging. This is especially for correction if the 3D image depth is selected in its original resolution and resizes it to display better picture quality. For Blu Ray 3D. 3D Sync Adjust and choose from the HDMI 1/2/3 ports, and optimize settings to detect the range of the images while wearing 3D glasses. For input signals with lower resolutions, the projected image will be displayed...
... light conditions. The projector supports HDR imaging. This is especially for correction if the 3D image depth is selected in its original resolution and resizes it to display better picture quality. For Blu Ray 3D. 3D Sync Adjust and choose from the HDMI 1/2/3 ports, and optimize settings to detect the range of the images while wearing 3D glasses. For input signals with lower resolutions, the projected image will be displayed...

User Guide
Page 57
Main Menu Settings Screen Mirroring Add App Add App Add App Add App Sub-menu Advanced Settings Information Menu Option High Altitude Mode Disable Enable Reset Settings OK Cancel Reset To Factory Default OK Cancel Light Source Hours System Version Memory Information Network Mac Address Wi-Fi Mac Address Serial Number 57
Main Menu Settings Screen Mirroring Add App Add App Add App Add App Sub-menu Advanced Settings Information Menu Option High Altitude Mode Disable Enable Reset Settings OK Cancel Reset To Factory Default OK Cancel Light Source Hours System Version Memory Information Network Mac Address Wi-Fi Mac Address Serial Number 57

User Guide
Page 60
... recognize the USB. 3. Only use an USB extension cable, the USB device may not be compatible. 2. Larger files will appear on USB storage devices may be opened. If you use USB storage devices formatted with Windows FAT32 or NTFS file system. 4. Data on screen if a video, music, or photo file are selected to load. 5. How to Use Control Bar Buttons The Control Bar buttons will need extra time to...
... recognize the USB. 3. Only use an USB extension cable, the USB device may not be compatible. 2. Larger files will appear on USB storage devices may be opened. If you use USB storage devices formatted with Windows FAT32 or NTFS file system. 4. Data on screen if a video, music, or photo file are selected to load. 5. How to Use Control Bar Buttons The Control Bar buttons will need extra time to...

User Guide
Page 72
Firmware Upgrade Users can update the firmware by internet or USB, and check the version number. Before entering the Firmware Upgrade menu, ensure the projector is connected to : Home > Setting > Firmware Upgrade > Software Update Online. 72 To enter the menu, select: Home > Setting > Firmware Upgrade. Firmware Update Online 1. Go to the Internet. 2. NOTE: Do not unplug the power cord, USB, or disconnect from the Internet during the upgrading process. 1.
Firmware Upgrade Users can update the firmware by internet or USB, and check the version number. Before entering the Firmware Upgrade menu, ensure the projector is connected to : Home > Setting > Firmware Upgrade > Software Update Online. 72 To enter the menu, select: Home > Setting > Firmware Upgrade. Firmware Update Online 1. Go to the Internet. 2. NOTE: Do not unplug the power cord, USB, or disconnect from the Internet during the upgrading process. 1.

User Guide
Page 76
... are turned on the projector. Menu Power On Source Auto Power On Smart Energy Description Allows the user to the HDMI input of the projector, when the projector's power is turned off automatically after turning on . When the power of the connected device will also be turned on /off automatically. If the projector does not automatically power on , the projector's power will work. Sleep Timer Turn off , the power of the connected deice is turned on , please turn off...
... are turned on the projector. Menu Power On Source Auto Power On Smart Energy Description Allows the user to the HDMI input of the projector, when the projector's power is turned off automatically after turning on . When the power of the connected device will also be turned on /off automatically. If the projector does not automatically power on , the projector's power will work. Sleep Timer Turn off , the power of the connected deice is turned on , please turn off...

User Guide
Page 84
Appendix Specifications Item Projector Category Type Specifications 0.47" 4K-UHD, LED Display Size Throw Distance Lens 60"~150" 0.159 m~0.657 m (100"@0.379 m) F=1.91, f=2.51 mm Optical Zoom Fixed Input Signal Resolution Local Storage Input Output Power Adapter¹ Operating Conditions Dimensions Weight Power Consumption Lamp Type Light Source Life (Normal) Display Color Keystone HDMI Native Support Total Available Audio In (3.5 mm) HDMI USB Type-C USB Type-A RJ45 Input Wi-Fi Input Audio Out (3.5 mm) Subwoofer S/PDIF Speaker USB Type-A (Power) Input Voltage Temperature Humidity ...
Appendix Specifications Item Projector Category Type Specifications 0.47" 4K-UHD, LED Display Size Throw Distance Lens 60"~150" 0.159 m~0.657 m (100"@0.379 m) F=1.91, f=2.51 mm Optical Zoom Fixed Input Signal Resolution Local Storage Input Output Power Adapter¹ Operating Conditions Dimensions Weight Power Consumption Lamp Type Light Source Life (Normal) Display Color Keystone HDMI Native Support Total Available Audio In (3.5 mm) HDMI USB Type-C USB Type-A RJ45 Input Wi-Fi Input Audio Out (3.5 mm) Subwoofer S/PDIF Speaker USB Type-A (Power) Input Voltage Temperature Humidity ...
User Guide
Page 91
... screen image C CEC (Consumer Electronics Control) Synchronizes power on/off operation via HDMI connection. That is, if a device that also supports CEC function is connected to the HDMI input of the projector, when the projector's power is turned off, the power of the connected device is required, such as using the projector in well lit rooms. Brightness Adjusts brightness levels of terms used in alphabetical order. Color Temp Allows users to select specific color temperature settings to your projector...
... screen image C CEC (Consumer Electronics Control) Synchronizes power on/off operation via HDMI connection. That is, if a device that also supports CEC function is connected to the HDMI input of the projector, when the projector's power is turned off, the power of the connected device is required, such as using the projector in well lit rooms. Brightness Adjusts brightness levels of terms used in alphabetical order. Color Temp Allows users to select specific color temperature settings to your projector...

User Guide
Page 94
... remote control will help correctly focus the projection lens. • Ensure the projector and screen are aligned properly. Troubleshooting This section describes some common problems that the video source is turned on. • If the input source is not selected automatically, select the correct source with the Source key on either the projector or the remote control. • Adjusting focus with the same power outlet. • Ensure the video source cable is no obstacles between the remote control...
... remote control will help correctly focus the projection lens. • Ensure the projector and screen are aligned properly. Troubleshooting This section describes some common problems that the video source is turned on. • If the input source is not selected automatically, select the correct source with the Source key on either the projector or the remote control. • Adjusting focus with the same power outlet. • Ensure the video source cable is no obstacles between the remote control...

User Guide
Page 95
.... Cleaning the Case • Use a soft, lint-free, dry cloth to damage the lens and/or case of the projector. • ViewSonic® will not be liable for an extended period of time: • Ensure the temperature and humidity of the storage area are within the recommend range. • Retract the adjuster foot completely. • Remove the batteries from use lens-cleaning paper...
.... Cleaning the Case • Use a soft, lint-free, dry cloth to damage the lens and/or case of the projector. • ViewSonic® will not be liable for an extended period of time: • Ensure the temperature and humidity of the storage area are within the recommend range. • Retract the adjuster foot completely. • Remove the batteries from use lens-cleaning paper...

User Guide
Page 104
... an authorized ViewSonic® service center or ViewSonic®. 4. You will be required to the "Customer Support" page). What the warranty does not cover: 1. How to provide your address, (d) a description of the problem, and (e) the serial number of supplies or parts not meeting Viewsonic's specifications. ͫ Normal wear and tear. ͫ Any other cause which the serial number has been defaced, modified, or removed. 2. Take or...
... an authorized ViewSonic® service center or ViewSonic®. 4. You will be required to the "Customer Support" page). What the warranty does not cover: 1. How to provide your address, (d) a description of the problem, and (e) the serial number of supplies or parts not meeting Viewsonic's specifications. ͫ Normal wear and tear. ͫ Any other cause which the serial number has been defaced, modified, or removed. 2. Take or...

User Guide
Page 106
... period of time. 4. Removal, installation, insurance, and set-up service charges. 106 Replacement product or parts may include remanufactured or refurbished parts or components & accessories. Who the warranty protects: This warranty is displayed on which does not relate to a product defect. 3. Any product exhibiting a condition commonly known as electrical power fluctuations or failure. ͫ Use of supplies or parts not meeting ViewSonic®'s specifications. ͫ Normal...
... period of time. 4. Removal, installation, insurance, and set-up service charges. 106 Replacement product or parts may include remanufactured or refurbished parts or components & accessories. Who the warranty protects: This warranty is displayed on which does not relate to a product defect. 3. Any product exhibiting a condition commonly known as electrical power fluctuations or failure. ͫ Use of supplies or parts not meeting ViewSonic®'s specifications. ͫ Normal...


