English Manual
Page 5
GPS DISPLAY MODE 62 GPS Review Location Mode 62 GPS REVIEW LOCATION MODE 66 PRIORITY/PRIORITY ID/PRIORITY PLUS SCAN 67 USING STARTUP KEYS 68 SCANNING SYSTEMS 69 USING NUMBER TAGS 72 OPTIMIZING P25 PERFORMANCE 73 ...
GPS DISPLAY MODE 62 GPS Review Location Mode 62 GPS REVIEW LOCATION MODE 66 PRIORITY/PRIORITY ID/PRIORITY PLUS SCAN 67 USING STARTUP KEYS 68 SCANNING SYSTEMS 69 USING NUMBER TAGS 72 OPTIMIZING P25 PERFORMANCE 73 ...
English Manual
Page 24
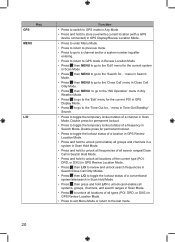
...the temporary lockout status of a channel in Scan Mode. Double press for permanent lockout. • Press to toggle the lockout status of a location in GPS Review Location Mode. • Press and hold to unlock (and enable) all groups and channels in a system in Scan Hold Mode. • Press and hold... system/site/search in Scan Hold Mode. • Press then press and hold to store (overwrite) current location (with a GPS device connected) in GPS Display/Review Location Mode. • Press to enter Menu Mode. • Press to return to previous menu. • Press to go to a channel and/or a ...
...the temporary lockout status of a channel in Scan Mode. Double press for permanent lockout. • Press to toggle the lockout status of a location in GPS Review Location Mode. • Press and hold to unlock (and enable) all groups and channels in a system in Scan Hold Mode. • Press and hold... system/site/search in Scan Hold Mode. • Press then press and hold to store (overwrite) current location (with a GPS device connected) in GPS Display/Review Location Mode. • Press to enter Menu Mode. • Press to return to previous menu. • Press to go to a channel and/or a ...
English Manual
Page 26
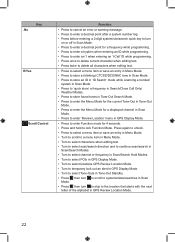
... to select channel or frequency in Scan/Search Hold Modes. • Turn to select POIs in GPS Display Mode. • Turn to select locations GPS Review Location Mode. • Turn to temporary lock out an alert in GPS Display Mode. • Turn to select Tone-Outs in Tone-Out Standby. •... Mode for the current Tone-Out in Tone-Out Mode. • Press to enter the Menu Mode for 4 seconds. • Press and hold to enter 'Review Location' menu in GPS Review Location Mode. 22
... to select channel or frequency in Scan/Search Hold Modes. • Turn to select POIs in GPS Display Mode. • Turn to select locations GPS Review Location Mode. • Turn to temporary lock out an alert in GPS Display Mode. • Turn to select Tone-Outs in Tone-Out Standby. •... Mode for the current Tone-Out in Tone-Out Mode. • Press to enter the Menu Mode for 4 seconds. • Press and hold to enter 'Review Location' menu in GPS Review Location Mode. 22
English Manual
Page 42
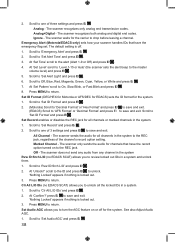
... the channel's record option setting. Scroll to save and exit. 'Nothing Locked' appears if nothing is locked out. 3. scroll to the ID and press E/ to review locked out IDs in the system Rvw ID:Srch L/O (no EDACS SCAT) allows you to unlock. 'Nothing Locked' appears if nothing is off for the...
... the channel's record option setting. Scroll to save and exit. 'Nothing Locked' appears if nothing is locked out. 3. scroll to the ID and press E/ to review locked out IDs in the system Rvw ID:Srch L/O (no EDACS SCAT) allows you to unlock. 'Nothing Locked' appears if nothing is off for the...
English Manual
Page 52
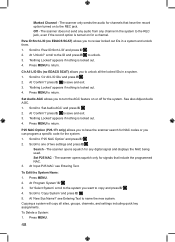
... REC jack, even if the record option is locked out. 4. Set P25 NAC - At 'Program System' E/ . 3. 'At 'Select System' scroll to the system you to review locked out IDs in the system to return.
... REC jack, even if the record option is locked out. 4. Set P25 NAC - At 'Program System' E/ . 3. 'At 'Select System' scroll to the system you to review locked out IDs in the system to return.
English Manual
Page 64
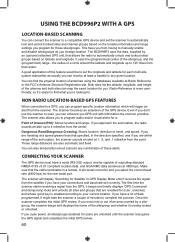
... displays 'GPS Connected' and (temporary) locks and unlocks all sites/groups (enabled for those sites/groups. Once the scanner completes the initial GPS review, if you . It uses the (programmed) center of the GPS device. The scanner becomes an extension of the site/group, and the (programmed... for each multi-site system transmitter as you are 'enabled for . You can also temporarily lockout (cancel) any given location. USING THE BCD996P2 WITH A GPS LOCATION-BASED SCANNING You can connect the scanner to a compatible GPS device and set the scanner to complete the process. CONNECTING...
... displays 'GPS Connected' and (temporary) locks and unlocks all sites/groups (enabled for those sites/groups. Once the scanner completes the initial GPS review, if you . It uses the (programmed) center of the GPS device. The scanner becomes an extension of the site/group, and the (programmed... for each multi-site system transmitter as you are 'enabled for . You can also temporarily lockout (cancel) any given location. USING THE BCD996P2 WITH A GPS LOCATION-BASED SCANNING You can connect the scanner to a compatible GPS device and set the scanner to complete the process. CONNECTING...

English Manual
Page 66
.... Scroll to return. Press MENU to 'Set Alert Light' and press E/ . 6. Set Type if you stored the location point with a GPS. 1. GPS DISPLAY MODE GPS Review Location Mode Edit Name the default name is P (POI), X (dangerous crossing), R (dangerous road), then YYMMDD hhmmss that location. 1. Scroll to the 'Program Location' menu for...
.... Scroll to return. Press MENU to 'Set Alert Light' and press E/ . 6. Set Type if you stored the location point with a GPS. 1. GPS DISPLAY MODE GPS Review Location Mode Edit Name the default name is P (POI), X (dangerous crossing), R (dangerous road), then YYMMDD hhmmss that location. 1. Scroll to the 'Program Location' menu for...

English Manual
Page 68
..., enter the speed limit for this in 1 mi/km steps and press to toggle the Display Modes. Enter a speed from 0 through 200 mi/km, in 'Review Location Mode' by pressing L/O. Press then 6(DISP) to save and exit.
..., enter the speed limit for this in 1 mi/km steps and press to toggle the Display Modes. Enter a speed from 0 through 200 mi/km, in 'Review Location Mode' by pressing L/O. Press then 6(DISP) to save and exit.
English Manual
Page 70
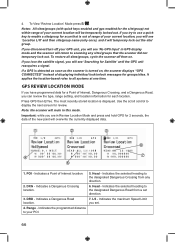
...the data of Interest, Dangerous Crossing, and a Dangerous Road, you will overwrite the currently displayed data. 1. DRD - Indicates the maximum Speed Limit you are in Review Location Mode and press and hold GPS for scan that the scanner did not temporary lock out. Range - If you disconnect/turn off then on...you try to use a quick key to the designated Dangerous Road from any sites/groups that is out of range of your POI. 66 GPS REVIEW LOCATION MODE If you have programmed data for Satellite' until the GPS unit reacquires a signal. Note: the scanner will mute in GPS display mode ...
...the data of Interest, Dangerous Crossing, and a Dangerous Road, you will overwrite the currently displayed data. 1. DRD - Indicates the maximum Speed Limit you are in Review Location Mode and press and hold GPS for scan that the scanner did not temporary lock out. Range - If you disconnect/turn off then on...you try to use a quick key to the designated Dangerous Road from any sites/groups that is out of range of your POI. 66 GPS REVIEW LOCATION MODE If you have programmed data for Satellite' until the GPS unit reacquires a signal. Note: the scanner will mute in GPS display mode ...
English Manual
Page 71
... itself having talkgroups assigned as priority (so the active channel information is on for priority channels in the same channel group follows the order in Review Location Mode: 1.
... itself having talkgroups assigned as priority (so the active channel information is on for priority channels in the same channel group follows the order in Review Location Mode: 1.
English Manual
Page 75
... system/site Hold on the channel and press then 5(LVL) to a system/search number tag, hold SQ( ). To unlock all IDs see Reviewing Locked out IDs. To start Tone-Out Standby/Search press then SQ. To start Close Call Only press and hold on the channel/site and... toggle Priority Modes press PRI to a channel number tag in a different system Hold on the site and press then 7(ATT). To unlock and/or review locked out IDs see Clear All L/O IDs. Press SCAN/SEARCH to resume. To unlock a conventional channel see Locking/Unlocking Channels. To start Weather Scan...
... system/site Hold on the channel and press then 5(LVL) to a system/search number tag, hold SQ( ). To unlock all IDs see Reviewing Locked out IDs. To start Tone-Out Standby/Search press then SQ. To start Close Call Only press and hold on the channel/site and... toggle Priority Modes press PRI to a channel number tag in a different system Hold on the site and press then 7(ATT). To unlock and/or review locked out IDs see Clear All L/O IDs. Press SCAN/SEARCH to resume. To unlock a conventional channel see Locking/Unlocking Channels. To start Weather Scan...
English Manual
Page 79
... Options'. 5. Press and hold on any channel in a System Scroll to resume scanning. Press HOLD or SCAN/SEARCH to 'Clr All L/O IDs' and press E/ . To Review and/or Unlock Locked out IDs in Scan Mode: 1. Or, use MENU to drill down to the channel options and unlock it out there.
... Options'. 5. Press and hold on any channel in a System Scroll to resume scanning. Press HOLD or SCAN/SEARCH to 'Clr All L/O IDs' and press E/ . To Review and/or Unlock Locked out IDs in Scan Mode: 1. Or, use MENU to drill down to the channel options and unlock it out there.
English Manual
Page 83
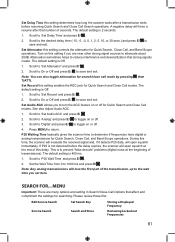
...press E/ . 4. press E/ to 'Rvw Search L/O' and press E/ . Scroll to save and exit. 4. Press MENU twice to review locked out frequencies or unlock all frequencies for Searching and Close Call search. Broadcast Screen these settings determine whether the scanner automatically ignores transmissions ... 1. Scroll to the frequency (or press .No to go to the next) and press E/ to 'Freq Lockouts' press MENU. 2. Scroll to unlock. 3. Reviewing Locked Out Frequencies: A 'T' will see 'Nothing Locked'. 2. At 'Unlock All' press E/ . 3. Press MENU to the right of a frequency if it is...
...press E/ . 4. press E/ to 'Rvw Search L/O' and press E/ . Scroll to save and exit. 4. Press MENU twice to review locked out frequencies or unlock all frequencies for Searching and Close Call search. Broadcast Screen these settings determine whether the scanner automatically ignores transmissions ... 1. Scroll to the frequency (or press .No to go to the next) and press E/ to 'Freq Lockouts' press MENU. 2. Scroll to unlock. 3. Reviewing Locked Out Frequencies: A 'T' will see 'Nothing Locked'. 2. At 'Unlock All' press E/ . 3. Press MENU to the right of a frequency if it is...
English Manual
Page 85
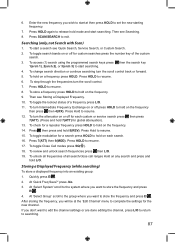
...1. During this setting controls the attenuator for searching. MENU Important! Edit Service Search Set Search Key Storing a Displayed Frequency Service Search Search and Store Reviewing Locked out Frequencies 81 Note: You can also toggle attenuation for Quick Search, Close Call, and Band Scope operations. If P25 is to prevent "... press E/ . Attenuation sometimes helps to toggle on this setting enables the REC jack for Quick Search and Close Call modes. Please review those first. A negative delay will open squelch at the beginning of seconds.
...1. During this setting controls the attenuator for searching. MENU Important! Edit Service Search Set Search Key Storing a Displayed Frequency Service Search Search and Store Reviewing Locked out Frequencies 81 Note: You can also toggle attenuation for Quick Search, Close Call, and Band Scope operations. If P25 is to prevent "... press E/ . Attenuation sometimes helps to toggle on this setting enables the REC jack for Quick Search and Close Call modes. Please review those first. A negative delay will open squelch at the beginning of seconds.
English Manual
Page 91
... service search press then press 7(ATT). (Press and hold 8(REV). To check for each search. 16. To toggle Close Call modes press SQ( ). 18. To review and unlock search frequencies press then L/O. 19. At 'Quick Freq Save?' Searching (only, not Search with Scan) 1. then the search key 4. To unlock all frequencies...
... service search press then press 7(ATT). (Press and hold 8(REV). To check for each search. 16. To toggle Close Call modes press SQ( ). 18. To review and unlock search frequencies press then L/O. 19. At 'Quick Freq Save?' Searching (only, not Search with Scan) 1. then the search key 4. To unlock all frequencies...
English Manual
Page 92
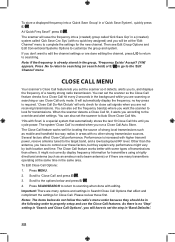
... Defaults'. 88 Press SCAN/SEARCH to return to scanning when done with higher transmit power, receive antenna tuned to the override and alert settings. Please review those first. press E/ . Note: If the frequency is created when you don't want the scanner to properly setup and use Close Call only mode. Notes...
... Defaults'. 88 Press SCAN/SEARCH to return to scanning when done with higher transmit power, receive antenna tuned to the override and alert settings. Please review those first. press E/ . Note: If the frequency is created when you don't want the scanner to properly setup and use Close Call only mode. Notes...
