English Manual
Page 5
GPS DISPLAY MODE 62 GPS Review Location Mode 62 GPS REVIEW LOCATION MODE 66 PRIORITY/PRIORITY ID/PRIORITY PLUS SCAN 67 USING STARTUP KEYS 68 SCANNING SYSTEMS 69 USING NUMBER TAGS 72 OPTIMIZING P25 PERFORMANCE 73 ...
GPS DISPLAY MODE 62 GPS Review Location Mode 62 GPS REVIEW LOCATION MODE 66 PRIORITY/PRIORITY ID/PRIORITY PLUS SCAN 67 USING STARTUP KEYS 68 SCANNING SYSTEMS 69 USING NUMBER TAGS 72 OPTIMIZING P25 PERFORMANCE 73 ...
English Manual
Page 24
... system/site/search in Scan Hold Mode. • Press then press and hold to store (overwrite) current location (with a GPS device connected) in GPS Display/Review Location Mode. • Press to enter Menu Mode. • Press to return to previous menu. • Press to go to a channel and/or a system ...number tag after entering. • Press to return to GPS mode in Review Location Mode. • Press then MENU to go to the last mode 20 Double press for permanent lockout. • Press to toggle the lockout status...
... system/site/search in Scan Hold Mode. • Press then press and hold to store (overwrite) current location (with a GPS device connected) in GPS Display/Review Location Mode. • Press to enter Menu Mode. • Press to return to previous menu. • Press to go to a channel and/or a system ...number tag after entering. • Press to return to GPS mode in Review Location Mode. • Press then MENU to go to the last mode 20 Double press for permanent lockout. • Press to toggle the lockout status...
English Manual
Page 26
... the current Tone-Out in Tone-Out Mode. • Press to enter the Menu Mode for a displayed channel in Scan Mode. • Press to enter 'Review Location' menu in GPS Display Mode. • Press to enter Function mode for a frequency while programming. • Press to enter a hyphen when entering an ID... to select channel or frequency in Scan/Search Hold Modes. • Turn to select POIs in GPS Display Mode. • Turn to select locations GPS Review Location Mode. • Turn to temporary lock out an alert in GPS Display Mode. • Turn to select Tone-Outs in Tone-Out Standby. •...
... the current Tone-Out in Tone-Out Mode. • Press to enter the Menu Mode for a displayed channel in Scan Mode. • Press to enter 'Review Location' menu in GPS Display Mode. • Press to enter Function mode for a frequency while programming. • Press to enter a hyphen when entering an ID... to select channel or frequency in Scan/Search Hold Modes. • Turn to select POIs in GPS Display Mode. • Turn to select locations GPS Review Location Mode. • Turn to temporary lock out an alert in GPS Display Mode. • Turn to select Tone-Outs in Tone-Out Standby. •...
English Manual
Page 42
... send any audio from any channel in the system Rvw ID:Srch L/O (no EDACS SCAT) allows you to unlock all channels in the system to review locked out IDs in the system. 1. Clr All L/O IDs (no EDACS SCAT) allows you to turn the AGC feature on to save and exit. 'Nothing...
... send any audio from any channel in the system Rvw ID:Srch L/O (no EDACS SCAT) allows you to unlock all channels in the system to review locked out IDs in the system. 1. Clr All L/O IDs (no EDACS SCAT) allows you to turn the AGC feature on to save and exit. 'Nothing...
English Manual
Page 52
... return. The scanner does not send any audio from any digital signal and displays the NAC being used. scroll to the ID and press E/ to review locked out IDs in a system. 1. Clr All L/O IDs (no EDACS SCAT) allows you to unlock all sites, groups, channels, and settings including quick key assignments...
... return. The scanner does not send any audio from any digital signal and displays the NAC being used. scroll to the ID and press E/ to review locked out IDs in a system. 1. Clr All L/O IDs (no EDACS SCAT) allows you to unlock all sites, groups, channels, and settings including quick key assignments...
English Manual
Page 64
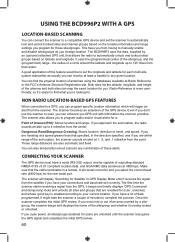
...cycle power, all sites and groups that specified, in GPS Display Mode until the scanner reacquires the GPS signal and completes the initial GPS review. 60 If you approach the set location, the radio sounds an alert up to 125 miles from the scanner. Once the scanner completes ...the location information and range settings you program for you. If you are traveling at 1, .5, and .1 miles/km from the center. USING THE BCD996P2 WITH A GPS LOCATION-BASED SCANNING You can connect the scanner to a compatible GPS device and set the scanner to automatically lock and unlock trunked sites...
...cycle power, all sites and groups that specified, in GPS Display Mode until the scanner reacquires the GPS signal and completes the initial GPS review. 60 If you approach the set location, the radio sounds an alert up to 125 miles from the scanner. Once the scanner completes ...the location information and range settings you program for you. If you are traveling at 1, .5, and .1 miles/km from the center. USING THE BCD996P2 WITH A GPS LOCATION-BASED SCANNING You can connect the scanner to a compatible GPS device and set the scanner to automatically lock and unlock trunked sites...

English Manual
Page 66
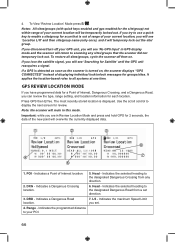
... E/ . 3. Scroll to the 'Program Location' menu for that indicates the year, month, date, and time you are in range of a POI. GPS DISPLAY MODE GPS Review Location Mode Edit Name the default name is P (POI), X (dangerous crossing), R (dangerous road), then YYMMDD hhmmss that location. 1. Set Alert Light (Dangerous Road/Xing only...
... E/ . 3. Scroll to the 'Program Location' menu for that indicates the year, month, date, and time you are in range of a POI. GPS DISPLAY MODE GPS Review Location Mode Edit Name the default name is P (POI), X (dangerous crossing), R (dangerous road), then YYMMDD hhmmss that location. 1. Set Alert Light (Dangerous Road/Xing only...

English Manual
Page 68
...-dependent, enter the speed limit for this in 1 mi/km steps and press to save and exit. Enter a speed from 0 through 200 mi/km, in 'Review Location Mode' by pressing L/O. Set Lockout the default setting is 'Unlocked'. 1. Scroll to 'Unlocked', 'Temporary L/O', or 'Lockout' and press to save and exit. Note: you...
...-dependent, enter the speed limit for this in 1 mi/km steps and press to save and exit. Enter a speed from 0 through 200 mi/km, in 'Review Location Mode' by pressing L/O. Set Lockout the default setting is 'Unlocked'. 1. Scroll to 'Unlocked', 'Temporary L/O', or 'Lockout' and press to save and exit. Note: you...
English Manual
Page 70
..." instead of your GPS unit, you have programmed data for groups/sites. Use the scroll control to scanning any direction. 2. DRD - GPS REVIEW LOCATION MODE If you will see 'Searching for scan that the scanner did not temporary lock out. Press GPS then E/Yes. The most recently stored...a Dangerous Road, you try to use a quick key to the designated Dangerous Road from any sites/groups that is displayed. If you can review the type, range setting, and location information for the site/group) not within range of the new point will temporary lock out the site/ ...
..." instead of your GPS unit, you have programmed data for groups/sites. Use the scroll control to scanning any direction. 2. DRD - GPS REVIEW LOCATION MODE If you will see 'Searching for scan that the scanner did not temporary lock out. Press GPS then E/Yes. The most recently stored...a Dangerous Road, you try to use a quick key to the designated Dangerous Road from any sites/groups that is displayed. If you can review the type, range setting, and location information for the site/group) not within range of the new point will temporary lock out the site/ ...
English Manual
Page 71
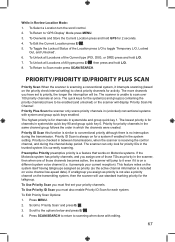
... the Location press L/O to check priority channels for a system if enabled in the system setting. Priority Plus Scan the scanner only scans priority channels in Review Location Mode: 1. Scroll to Scan mode press SCAN/SEARCH. This feature relies on the system itself having talkgroups assigned as priority in system/site and...
... the Location press L/O to check priority channels for a system if enabled in the system setting. Priority Plus Scan the scanner only scans priority channels in Review Location Mode: 1. Scroll to Scan mode press SCAN/SEARCH. This feature relies on the system itself having talkgroups assigned as priority in system/site and...
English Manual
Page 75
.... To toggle Close Call Modes press SQ( ). To go to 'unlock' Function mode and resume. To unlock and/or review locked out IDs see Clear All L/O IDs. To unlock all IDs see Reviewing Locked out IDs. Press twice to a channel number tag in the current system/site Hold on the system. To...
.... To toggle Close Call Modes press SQ( ). To go to 'unlock' Function mode and resume. To unlock and/or review locked out IDs see Clear All L/O IDs. To unlock all IDs see Reviewing Locked out IDs. Press twice to a channel number tag in the current system/site Hold on the system. To...
English Manual
Page 79
... lock it there. Press MENU to save and exit. 75 Press and hold L/O until 'Unlocked' is locked out. 7. Press MENU. See 'Edit Channel Options'. To Review and/or Unlock Locked out IDs in Scan Mode: 1. press E/ to return. Scroll to the channel you want to unlock then quickly (within 3 seconds) scroll...
... lock it there. Press MENU to save and exit. 75 Press and hold L/O until 'Unlocked' is locked out. 7. Press MENU. See 'Edit Channel Options'. To Review and/or Unlock Locked out IDs in Scan Mode: 1. press E/ to return. Scroll to the channel you want to unlock then quickly (within 3 seconds) scroll...
English Manual
Page 83
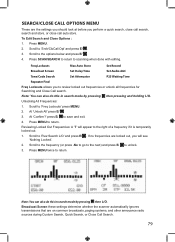
... are locked out, you will appear to the right of a frequency if it is temporarily locked out. 1. Press SCAN/SEARCH to return to return. Reviewing Locked Out Frequencies: A 'T' will see 'Nothing Locked'. 2. Note: You can also do this in search mode by pressing Unlocking All Frequencies: then ...press E/ to the options below and press E/ . 4. SEARCH/CLOSE CALL OPTIONS MENU These are the settings you should look at before you to review locked out frequencies or unlock all frequencies for Searching and Close Call search. Scroll to the frequency (or press .No to go to the next...
... are locked out, you will appear to the right of a frequency if it is temporarily locked out. 1. Press SCAN/SEARCH to return to return. Reviewing Locked Out Frequencies: A 'T' will see 'Nothing Locked'. 2. Note: You can also do this in search mode by pressing Unlocking All Frequencies: then ...press E/ to the options below and press E/ . 4. SEARCH/CLOSE CALL OPTIONS MENU These are the settings you should look at before you to review locked out frequencies or unlock all frequencies for Searching and Close Call search. Scroll to the frequency (or press .No to go to the next...
English Manual
Page 85
...Search, Close Call, and Band Scope operations. MENU Important! Edit Service Search Set Search Key Storing a Displayed Frequency Service Search Search and Store Reviewing Locked out Frequencies 81 Scroll to save and exit. Set Audio AGC allows you to attenuate about 20dB. Turn on or off. 4. Note...: Any analog transmissions will lose the first part of seconds. Please review those first. Scroll to On or Off and press E/ to 'Set Attenuator' and press E/ . 2. Scroll to 'Analog' and press E/ to ...
...Search, Close Call, and Band Scope operations. MENU Important! Edit Service Search Set Search Key Storing a Displayed Frequency Service Search Search and Store Reviewing Locked out Frequencies 81 Scroll to save and exit. Set Audio AGC allows you to attenuate about 20dB. Turn on or off. 4. Note...: Any analog transmissions will lose the first part of seconds. Please review those first. Scroll to On or Off and press E/ to 'Set Attenuator' and press E/ . 2. Scroll to 'Analog' and press E/ to ...
English Manual
Page 91
... or off for the new channel. then the search key 4. Then see Searching. 8. Press then press and hold on a frequency press HOLD. press .No. 3. To review and unlock search frequencies press then L/O. 19. To turn Intermediate Frequency Exchange on or off press HOLD to hold 8(REV). To step through the frequencies...
... or off for the new channel. then the search key 4. Then see Searching. 8. Press then press and hold on a frequency press HOLD. press .No. 3. To review and unlock search frequencies press then L/O. 19. To turn Intermediate Frequency Exchange on or off press HOLD to hold 8(REV). To step through the frequencies...
English Manual
Page 92
... to properly setup and use Close Call only mode. Performance is required. 'Close Call Do-Not-Disturb' will automatically display the frequency; Press MENU. 2. Please review those first. To Edit Close Call Options: 1. Scroll to customize the group and system. To store a displayed frequency into a (created) group called 'Qck Save Cnv...
... to properly setup and use Close Call only mode. Performance is required. 'Close Call Do-Not-Disturb' will automatically display the frequency; Press MENU. 2. Please review those first. To Edit Close Call Options: 1. Scroll to customize the group and system. To store a displayed frequency into a (created) group called 'Qck Save Cnv...
