
User Guide
Page 8
Contents Chapter 1: Getting to Know Your Camcorder 11 Overview 11 Check the components 12 System requirements 13 Front view 14 Rear view 14 Side view 15 Underside view 15 Chapter 2: Getting Started 16 Loading the battery 16 Charge your battery 18 Inserting and removing an SD™ Card 22 Protecting data on an SD™ Card 23 Turning the camcorder on and getting started .......24 Record 3D video 24 Turning off the camcorder 24 Chapter 3: Record Mode 25 Button functions 25 LCD touch screen information 26 8
Contents Chapter 1: Getting to Know Your Camcorder 11 Overview 11 Check the components 12 System requirements 13 Front view 14 Rear view 14 Side view 15 Underside view 15 Chapter 2: Getting Started 16 Loading the battery 16 Charge your battery 18 Inserting and removing an SD™ Card 22 Protecting data on an SD™ Card 23 Turning the camcorder on and getting started .......24 Record 3D video 24 Turning off the camcorder 24 Chapter 3: Record Mode 25 Button functions 25 LCD touch screen information 26 8

User Guide
Page 9
... 44 Touch function icons 45 Playback mode operations 46 Video Playback 47 Photo Playback 47 Delete a file in Playback mode 47 Video Trim 48 Chapter 5: Camcorder Settings 49 Setup Menu 49 Menu Sound 49 TV 49 Language 50 Time Settings 50 Format 50 Default Setting 51 Chapter 6: Viewing Photos and Videos...
... 44 Touch function icons 45 Playback mode operations 46 Video Playback 47 Photo Playback 47 Delete a file in Playback mode 47 Video Trim 48 Chapter 5: Camcorder Settings 49 Setup Menu 49 Menu Sound 49 TV 49 Language 50 Time Settings 50 Format 50 Default Setting 51 Chapter 6: Viewing Photos and Videos...
User Guide
Page 11
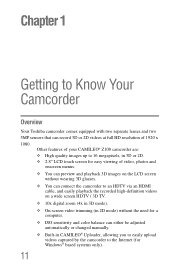
Chapter 1 Getting to Know Your Camcorder Overview Your Toshiba camcorder comes equipped with two separate lenses and two 5MP sensors that can record 3D or 2D videos at full HD resolution of video, photos and onscreen menus. ❖ You can preview and playback 3D images on the LCD screen without... balance can either be adjusted automatically or changed manually. ❖ Built-in 3D or 2D. ❖ 2.8" LCD touch screen for Windows® based systems only). 11 Other features of your CAMILEO® Z100 camcorder are: ❖ High quality images up to 16 megapixels, in CAMILEO®...
Chapter 1 Getting to Know Your Camcorder Overview Your Toshiba camcorder comes equipped with two separate lenses and two 5MP sensors that can record 3D or 2D videos at full HD resolution of video, photos and onscreen menus. ❖ You can preview and playback 3D images on the LCD screen without... balance can either be adjusted automatically or changed manually. ❖ Built-in 3D or 2D. ❖ 2.8" LCD touch screen for Windows® based systems only). 11 Other features of your CAMILEO® Z100 camcorder are: ❖ High quality images up to 16 megapixels, in CAMILEO®...

User Guide
Page 13
... recording. However, some tiny black and/or bright dots (white, red, blue or green) may appear on the LCD touch screen. Getting to Know Your Camcorder 13 Overview System requirements ❖ Microsoft® Windows® XP/Windows Vista®/Windows® 7 ❖ Intel® Core™ 2 Duo or...; 1 GB (2 GB or more recommended) ❖ 1 GB free HDD space ❖ 4x CD-ROM Drive ❖ Available USB 2.0 port ❖ 3D-compatible display screen for 3D video Mac compatibility ❖ Mac OS 10.6 or above ❖ CPU Intel® Core™ 2 Duo or above ❖ 1 GB (2 GB or...
... recording. However, some tiny black and/or bright dots (white, red, blue or green) may appear on the LCD touch screen. Getting to Know Your Camcorder 13 Overview System requirements ❖ Microsoft® Windows® XP/Windows Vista®/Windows® 7 ❖ Intel® Core™ 2 Duo or...; 1 GB (2 GB or more recommended) ❖ 1 GB free HDD space ❖ 4x CD-ROM Drive ❖ Available USB 2.0 port ❖ 3D-compatible display screen for 3D video Mac compatibility ❖ Mac OS 10.6 or above ❖ CPU Intel® Core™ 2 Duo or above ❖ 1 GB (2 GB or...

User Guide
Page 15
Side view LCD touch screen Getting to Know Your Camcorder Overview Power button 15 3D button Microphone jack cover Light button (Sample Illustration) Side view Underside view Tripod socket Battery/SD™ Card cover (Sample Illustration) Underside view
Side view LCD touch screen Getting to Know Your Camcorder Overview Power button 15 3D button Microphone jack cover Light button (Sample Illustration) Side view Underside view Tripod socket Battery/SD™ Card cover (Sample Illustration) Underside view
User Guide
Page 24
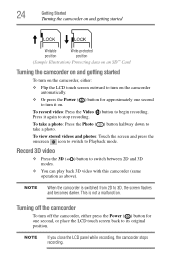
... photos: Touch the screen and press the onscreen icon to switch to switch between 2D and 3D modes. ❖ You can play back 3D video with this camcorder (same operation as above). Record 3D video ❖ Press the 3D ( ) button to Playback mode. Press it on. To take a photo. NOTE If...Sample Illustration) Protecting data on an SD™ Card Turning the camcorder on and getting started To turn on the camcorder, either press the Power ( ) button for approximately one second, or place the LCD touch screen back to 3D, the screen flashes and becomes darker. To record video: Press ...
... photos: Touch the screen and press the onscreen icon to switch to switch between 2D and 3D modes. ❖ You can play back 3D video with this camcorder (same operation as above). Record 3D video ❖ Press the 3D ( ) button to Playback mode. Press it on. To take a photo. NOTE If...Sample Illustration) Protecting data on an SD™ Card Turning the camcorder on and getting started To turn on the camcorder, either press the Power ( ) button for approximately one second, or place the LCD touch screen back to 3D, the screen flashes and becomes darker. To record video: Press ...

User Guide
Page 52
Chapter 6 Viewing Photos and Videos on TV Connecting to a 3D-compatible TV To view images or videos on a 3D-compatible TV: 1 Connect the mini HDMI® cable to your camcorder's mini HDMI® Out port. 2 Connect the other end of the cable to a 3D-compatible TV. 3 Make the necessary settings on the 3D TV. (For further details, please refer to the instructions of your TV.) 4 The steps for viewing stored photos and videos on a TV are the same steps used for viewing them on the LCD screen. 3D TV (Sample Image) Connecting a 3D TV 52
Chapter 6 Viewing Photos and Videos on TV Connecting to a 3D-compatible TV To view images or videos on a 3D-compatible TV: 1 Connect the mini HDMI® cable to your camcorder's mini HDMI® Out port. 2 Connect the other end of the cable to a 3D-compatible TV. 3 Make the necessary settings on the 3D TV. (For further details, please refer to the instructions of your TV.) 4 The steps for viewing stored photos and videos on a TV are the same steps used for viewing them on the LCD screen. 3D TV (Sample Image) Connecting a 3D TV 52

User Guide
Page 53
... LCD screen. (16:9) (Sample Illustration) Connecting a high-definition TV NOTE You can view 3D content on a non-3D display is still in 2D mode. NOTE The LCD touch screen does not display when the camcorder is connected to a TV or an HDTV. NOTE Some functions may not be accessible while... the camcorder is connected to an HDTV. However, the 3D content is a lower resolution than content recorded in full HD. Viewing ...
... LCD screen. (16:9) (Sample Illustration) Connecting a high-definition TV NOTE You can view 3D content on a non-3D display is still in 2D mode. NOTE The LCD touch screen does not display when the camcorder is connected to a TV or an HDTV. NOTE Some functions may not be accessible while... the camcorder is connected to an HDTV. However, the 3D content is a lower resolution than content recorded in full HD. Viewing ...
User Guide
Page 65
... replace the SD card with another one . Then, insert the battery and plug in better lighting. Place the camcorder on . The card has a problem and cannot be used during 3D recording. Power is not natural. The date imprinted on the memory card do some unnecessary videos / photos or insert... is incorrect Please remove the battery and unplug the adapter. Set the date and time in 3D mode, certain functions will be restricted. To solve this, format the SD card using the camcorder instead of my indoor photos look blurry and dark? Delete some of a computer. (Please ...
... replace the SD card with another one . Then, insert the battery and plug in better lighting. Place the camcorder on . The card has a problem and cannot be used during 3D recording. Power is not natural. The date imprinted on the memory card do some unnecessary videos / photos or insert... is incorrect Please remove the battery and unplug the adapter. Set the date and time in 3D mode, certain functions will be restricted. To solve this, format the SD card using the camcorder instead of my indoor photos look blurry and dark? Delete some of a computer. (Please ...


