
User Manual
Page 9
... is subject to the licensed service, this device. To prevent radio interference to the following radio frequency and safety standards. consult Safety Code 6, obtainable from windows to 5.25 GHz frequency range. The term "IC" before the equipment certification number only signifies that may not cause interference, and (2) this device. This device...
... is subject to the licensed service, this device. To prevent radio interference to the following radio frequency and safety standards. consult Safety Code 6, obtainable from windows to 5.25 GHz frequency range. The term "IC" before the equipment certification number only signifies that may not cause interference, and (2) this device. This device...
User Manual
Page 25
... and/or other countries. and any use of such marks by the Bluetooth SIG, Inc. and/or Toshiba Corporation. DirectX, Active Desktop, DirectShow, and Windows Media are trademarks or registered trademarks of their respective owners. 25 Trademarks Tecra is a trademark of Synaptics, Inc. Intel, Intel Core, Celeron, Centrino and Pentium are owned by...
... and/or other countries. and any use of such marks by the Bluetooth SIG, Inc. and/or Toshiba Corporation. DirectX, Active Desktop, DirectShow, and Windows Media are trademarks or registered trademarks of their respective owners. 25 Trademarks Tecra is a trademark of Synaptics, Inc. Intel, Intel Core, Celeron, Centrino and Pentium are owned by...
User Manual
Page 28
... 97 Making your keyboard emulate a full-size keyboard 97 Ctrl, Fn, and Alt keys 98 Function keys 98 Windows special keys 99 Overlay keys 99 Using the overlay to type numeric data...........100 Starting a program 100 Starting a... program from the Start menu.........101 Starting a program from Windows® Explorer..101 Starting a program from the Run dialog box ..102 Saving your work 103 Printing your work 105... a disc with the computer off ..........114 Caring for CD or DVD Discs 115 Toshiba's online resources 115
... 97 Making your keyboard emulate a full-size keyboard 97 Ctrl, Fn, and Alt keys 98 Function keys 98 Windows special keys 99 Overlay keys 99 Using the overlay to type numeric data...........100 Starting a program 100 Starting a... program from the Start menu.........101 Starting a program from Windows® Explorer..101 Starting a program from the Run dialog box ..102 Saving your work 103 Printing your work 105... a disc with the computer off ..........114 Caring for CD or DVD Discs 115 Toshiba's online resources 115
User Manual
Page 32
... Problems that are easy to fix 205 Problems when you turn on the computer............207 The Windows® operating system is not working...209 Using Startup options to fix problems 210 Internet problems 211 The Windows® XP operating system can help you 211 Resolving a hardware conflict 212 A plan of action 212...
... Problems that are easy to fix 205 Problems when you turn on the computer............207 The Windows® operating system is not working...209 Using Startup options to fix problems 210 Internet problems 211 The Windows® XP operating system can help you 211 Resolving a hardware conflict 212 A plan of action 212...
User Manual
Page 33
33 Contents Develop good computing habits 238 Data and system configuration backup in Windows XP 239 If you need further assistance 245 Before you contact Toshiba 245 Contacting Toshiba 246 Other Toshiba Internet Web sites 247 Toshiba's worldwide offices 248 Appendix A: Hot Keys 250 Volume Mute 250 Password security 251 Without a password 251 With a password 251...
33 Contents Develop good computing habits 238 Data and system configuration backup in Windows XP 239 If you need further assistance 245 Before you contact Toshiba 245 Contacting Toshiba 246 Other Toshiba Internet Web sites 247 Toshiba's worldwide offices 248 Appendix A: Hot Keys 250 Volume Mute 250 Password security 251 Without a password 251 With a password 251...
User Manual
Page 45
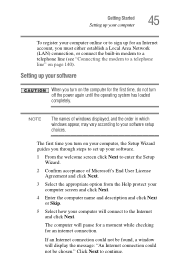
... Wizard guides you through steps to set up your software. 1 From the welcome screen click Next to enter the Setup Wizard. 2 Confirm acceptance of windows displayed, and the order in modem to a telephone line (see "Connecting the modem to a telephone line" on the computer for the first time,...online or to sign up for an Internet account, you must either establish a Local Area Network (LAN) connection, or connect the built-in which windows appear, may vary according to your software setup choices. NOTE The names of Microsoft's End User License Agreement and click Next. 3 Select the ...
... Wizard guides you through steps to set up your software. 1 From the welcome screen click Next to enter the Setup Wizard. 2 Confirm acceptance of windows displayed, and the order in modem to a telephone line (see "Connecting the modem to a telephone line" on the computer for the first time,...online or to sign up for an Internet account, you must either establish a Local Area Network (LAN) connection, or connect the built-in which windows appear, may vary according to your software setup choices. NOTE The names of Microsoft's End User License Agreement and click Next. 3 Select the ...
User Manual
Page 56
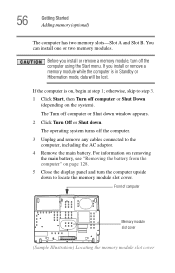
Before you install or remove a memory module while the computer is on page 128. 5 Close the display panel and turn off computer or Shut down window appears. 2 Click Turn Off or Shut down to locate the memory module slot cover. Front of computer Memory module slot cover (Sample Illustration) Locating the ...
Before you install or remove a memory module while the computer is on page 128. 5 Close the display panel and turn off computer or Shut down window appears. 2 Click Turn Off or Shut down to locate the memory module slot cover. Front of computer Memory module slot cover (Sample Illustration) Locating the ...
User Manual
Page 64
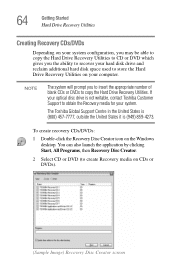
... Support Centre in the United States is (800) 457-7777, outside the United States it is not writable, contact Toshiba Customer Support to copy the Hard Drive Recovery Utilities. You can also launch the application by clicking Start, All Programs, then Recovery Disc Creator. 2 Select... system will prompt you the ability to recover your hard disk drive and reclaim additional hard disk space used to create Recovery media on the Windows desktop. 64 Getting Started Hard Drive Recovery Utilities Creating Recovery CDs/DVDs Depending on your system configuration, you may be able to copy the ...
... Support Centre in the United States is (800) 457-7777, outside the United States it is not writable, contact Toshiba Customer Support to copy the Hard Drive Recovery Utilities. You can also launch the application by clicking Start, All Programs, then Recovery Disc Creator. 2 Select... system will prompt you the ability to recover your hard disk drive and reclaim additional hard disk space used to create Recovery media on the Windows desktop. 64 Getting Started Hard Drive Recovery Utilities Creating Recovery CDs/DVDs Depending on your system configuration, you may be able to copy the ...

User Manual
Page 74
To reinstall drivers and applications: 1 Double-click the Toshiba Application Installer icon on the Windows desktop. 2 Click Next. 3 Click the item(s) you can check its status as follows: 1 Click Start, and then click Control Panel. 2 Double-click the .... 74 Getting Started Hard Drive Recovery Utilities 3 Click Yes to install. 4 Click Install. 5 Follow the on your computer. Installing drivers and applications The Toshiba Application Installer allows you to reinstall the drivers and applications that the HDD has been recovered. 4 Press any key on -screen prompts to restart the...
To reinstall drivers and applications: 1 Double-click the Toshiba Application Installer icon on the Windows desktop. 2 Click Next. 3 Click the item(s) you can check its status as follows: 1 Click Start, and then click Control Panel. 2 Double-click the .... 74 Getting Started Hard Drive Recovery Utilities 3 Click Yes to install. 4 Click Install. 5 Follow the on your computer. Installing drivers and applications The Toshiba Application Installer allows you to reinstall the drivers and applications that the HDD has been recovered. 4 Press any key on -screen prompts to restart the...
User Manual
Page 76
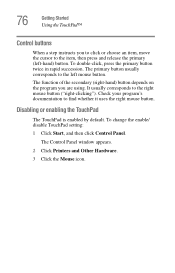
..., press the primary button twice in rapid succession. To change the enable/ disable TouchPad setting: 1 Click Start, and then click Control Panel. The Control Panel window appears. 2 Click Printers and Other Hardware. 3 Click the Mouse icon. Disabling or enabling the TouchPad The TouchPad is enabled by default. The primary button usually...
..., press the primary button twice in rapid succession. To change the enable/ disable TouchPad setting: 1 Click Start, and then click Control Panel. The Control Panel window appears. 2 Click Printers and Other Hardware. 3 Click the Mouse icon. Disabling or enabling the TouchPad The TouchPad is enabled by default. The primary button usually...
User Manual
Page 77
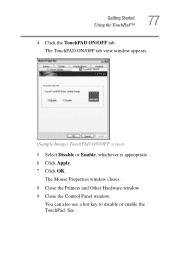
You can also use a hot key to disable or enable the TouchPad. See . The Mouse Properties window closes. 8 Close the Printers and Other Hardware window. 9 Close the Control Panel window. Getting Started Using the TouchPad™ 77 4 Click the TouchPAD ON/OFF tab. The TouchPAD ON/OFF tab view window appears. (Sample Image) TouchPAD ON/OFF screen 5 Select Disable or Enable, whichever is appropriate. 6 Click Apply. 7 Click OK.
You can also use a hot key to disable or enable the TouchPad. See . The Mouse Properties window closes. 8 Close the Printers and Other Hardware window. 9 Close the Control Panel window. Getting Started Using the TouchPad™ 77 4 Click the TouchPAD ON/OFF tab. The TouchPAD ON/OFF tab view window appears. (Sample Image) TouchPAD ON/OFF screen 5 Select Disable or Enable, whichever is appropriate. 6 Click Apply. 7 Click OK.
User Manual
Page 80
... one to your system, the mouse cursor may need to match the resolution of the external display device. If this occurs, press the Esc or Windows key to return it to your computer. TECHNICAL NOTE: To use a mouse instead of the screen. The external display device must support a resolution of the...
... one to your system, the mouse cursor may need to match the resolution of the external display device. If this occurs, press the Esc or Windows key to return it to your computer. TECHNICAL NOTE: To use a mouse instead of the screen. The external display device must support a resolution of the...

User Manual
Page 82
... your printer installation guide for the first time. Refer to set it up a printer NOTE Some printers require a specific installation process. The Printers and Faxes window appears. 2 Click Add a printer. 82 Getting Started Connecting a printer Setting up for instructions before completing the following procedure.
... your printer installation guide for the first time. Refer to set it up a printer NOTE Some printers require a specific installation process. The Printers and Faxes window appears. 2 Click Add a printer. 82 Getting Started Connecting a printer Setting up for instructions before completing the following procedure.

User Manual
Page 84
...to consider when choosing either Turn Off or Shut Down: ❖ Use the Turn Off command if you are using Windows® XP Home, or either Windows® XP Professional or Windows® XP Media Center Edition (MCE) and are not connected to a domain server. ❖ Use the Shut ... Each option has its advantages. 84 Getting Started Turning off the computer Turning off the computer Pressing the power button before shutting down the Microsoft Windows® operating system could cause you to turn off the power while a disk is off) to a domain server. Make sure the system indicator...
...to consider when choosing either Turn Off or Shut Down: ❖ Use the Turn Off command if you are using Windows® XP Home, or either Windows® XP Professional or Windows® XP Media Center Edition (MCE) and are not connected to a domain server. ❖ Use the Shut ... Each option has its advantages. 84 Getting Started Turning off the computer Turning off the computer Pressing the power button before shutting down the Microsoft Windows® operating system could cause you to turn off the power while a disk is off) to a domain server. Make sure the system indicator...

User Manual
Page 85
... when restarting from Standby. ❖ When starting up again, the computer returns to the state in progress and are not connected to a network, use the Windows® Standby or Hibernate commands to the hard disk. TECHNICAL NOTE: Before using .
... when restarting from Standby. ❖ When starting up again, the computer returns to the state in progress and are not connected to a network, use the Windows® Standby or Hibernate commands to the hard disk. TECHNICAL NOTE: Before using .
User Manual
Page 87
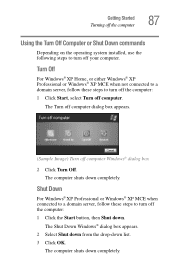
The computer shuts down completely. The computer shuts down completely. Shut Down For Windows® XP Professional or Windows® XP MCE when connected to a domain server, follow these steps to turn off the computer: 1 Click Start, select Turn off the computer: 1 Click... the Start button, then Shut down list. 3 Click OK. The Shut Down Windows® dialog box appears. 2 Select Shut down from the drop-down . Turn Off For Windows® XP Home, or either Windows® XP Professional or Windows® XP MCE when not connected to a domain server, follow these steps to turn...
The computer shuts down completely. The computer shuts down completely. Shut Down For Windows® XP Professional or Windows® XP MCE when connected to a domain server, follow these steps to turn off the computer: 1 Click Start, select Turn off the computer: 1 Click... the Start button, then Shut down list. 3 Click OK. The Shut Down Windows® dialog box appears. 2 Select Shut down from the drop-down . Turn Off For Windows® XP Home, or either Windows® XP Professional or Windows® XP MCE when not connected to a domain server, follow these steps to turn...
User Manual
Page 89
... you can turn off the computer using the Hibernation command, click Start, Turn off computer, and select Hibernate. (Sample Image) Turn off computer Windows® dialog box The computer saves the state of all open programs and files, turns off the display, and then turns off the computer by... opening the display panel. NOTE For more information about the Power Saver utility, see "Toshiba Power Saver" on the options set. Using and configuring Hibernation mode To turn it again by closing the display panel, depending on page 179. ...
... you can turn off the computer using the Hibernation command, click Start, Turn off computer, and select Hibernate. (Sample Image) Turn off computer Windows® dialog box The computer saves the state of all open programs and files, turns off the display, and then turns off the computer by... opening the display panel. NOTE For more information about the Power Saver utility, see "Toshiba Power Saver" on the options set. Using and configuring Hibernation mode To turn it again by closing the display panel, depending on page 179. ...
User Manual
Page 91
... or closing the display panel, you were using the Standby command, click Start, Turn off computer, and select Stand By. (Sample Image) Turn off computer Windows® dialog box The computer saves the status of all open programs and files, turns off the display, and enters into Standby mode. Using and... off the computer 91 Starting again from Hibernation mode, press the power button until the on /off light blinks amber indicating the computer is in Toshiba's Power Saver utility. 1 Click Start, Control Panel, then click Performance and Maintenance.
... or closing the display panel, you were using the Standby command, click Start, Turn off computer, and select Stand By. (Sample Image) Turn off computer Windows® dialog box The computer saves the status of all open programs and files, turns off the display, and enters into Standby mode. Using and... off the computer 91 Starting again from Hibernation mode, press the power button until the on /off light blinks amber indicating the computer is in Toshiba's Power Saver utility. 1 Click Start, Control Panel, then click Performance and Maintenance.
User Manual
Page 96
Turning off the computer while it unless you will lose all new files for files you do not let the Windows® operating system shut down normally, details such as your files to avoid repetitive-motion injuries and eyestrain. ❖ Do not turn off backing ...and configuring Standby mode" on a regular basis. If you receive via diskette, email, or download from or writing to learn more about Standby. NOTE The Windows® operating system records information, such as new icon positions may damage the disk, the drive, or both. ❖ Before turning off the computer, ...
Turning off the computer while it unless you will lose all new files for files you do not let the Windows® operating system shut down normally, details such as your files to avoid repetitive-motion injuries and eyestrain. ❖ Do not turn off backing ...and configuring Standby mode" on a regular basis. If you receive via diskette, email, or download from or writing to learn more about Standby. NOTE The Windows® operating system records information, such as new icon positions may damage the disk, the drive, or both. ❖ Before turning off the computer, ...
User Manual
Page 97
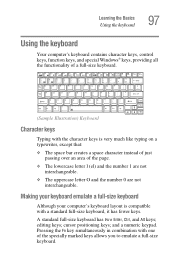
Learning the Basics Using the keyboard 97 Using the keyboard Your computer's keyboard contains character keys, control keys, function keys, and special Windows® keys, providing all the functionality of a full-size keyboard. (Sample Illustration) Keyboard Character keys Typing with the character keys is compatible with one of ...
Learning the Basics Using the keyboard 97 Using the keyboard Your computer's keyboard contains character keys, control keys, function keys, and special Windows® keys, providing all the functionality of a full-size keyboard. (Sample Illustration) Keyboard Character keys Typing with the character keys is compatible with one of ...


