User Manual
Page 26
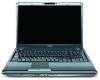
... information may vary.) Copyright This guide is required. Location of Toshiba. Location of the information contained herein. ©2008 by Toshiba America Information Systems, Inc. You could damage the drive. All rights reserved. Under the copyright laws, this model properly...be exposed to disassemble, adjust or repair an optical drive. Never attempt to laser light or other safety hazards, resulting in any repair or adjustment is copyrighted by Toshiba America Information Systems, Inc. 26 Optical Drive Safety Instructions This appliance contains a laser system...
... information may vary.) Copyright This guide is required. Location of Toshiba. Location of the information contained herein. ©2008 by Toshiba America Information Systems, Inc. You could damage the drive. All rights reserved. Under the copyright laws, this model properly...be exposed to disassemble, adjust or repair an optical drive. Never attempt to laser light or other safety hazards, resulting in any repair or adjustment is copyrighted by Toshiba America Information Systems, Inc. 26 Optical Drive Safety Instructions This appliance contains a laser system...
User Manual
Page 31
... your work 96 Using the optical drive 96 Optical drive components 97 Media control buttons 98 Inserting an optical disc 98 Playing an audio CD 100 Playing optical media 100 Recording optical media 101 Removing a disc with the computer on...........101 Removing a disc with the computer off ..........102 Caring for optical discs 102 Toshiba's online resources 102 Chapter 3: Mobile...
... your work 96 Using the optical drive 96 Optical drive components 97 Media control buttons 98 Inserting an optical disc 98 Playing an audio CD 100 Playing optical media 100 Recording optical media 101 Removing a disc with the computer on...........101 Removing a disc with the computer off ..........102 Caring for optical discs 102 Toshiba's online resources 102 Chapter 3: Mobile...
User Manual
Page 34
... problems 172 Power and the batteries 173 Keyboard problems 174 Display problems 175 Disk drive problems 177 Optical drive problems 178 Sound system problems 179 ExpressCard® problems 180 Printer problems 182 Modem... problems 183 Wireless networking problems 183 DVD operating problems 186 Develop good computing habits 187 Data and system configuration backup in the Windows® operating system 188 If you need further assistance 192 Before you contact Toshiba...
... problems 172 Power and the batteries 173 Keyboard problems 174 Display problems 175 Disk drive problems 177 Optical drive problems 178 Sound system problems 179 ExpressCard® problems 180 Printer problems 182 Modem... problems 183 Wireless networking problems 183 DVD operating problems 186 Develop good computing habits 187 Data and system configuration backup in the Windows® operating system 188 If you need further assistance 192 Before you contact Toshiba...
User Manual
Page 51
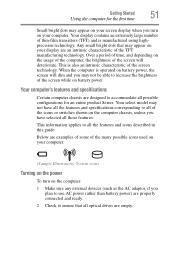
... display when you turn on the computer: 1 Make sure any external devices (such as the AC adaptor, if you may not be able to all optical drives are properly connected and ready. 2 Check to ensure that may not have selected all those features. Any small bright dots that all of thin-film...
... display when you turn on the computer: 1 Make sure any external devices (such as the AC adaptor, if you may not be able to all optical drives are properly connected and ready. 2 Check to ensure that may not have selected all those features. Any small bright dots that all of thin-film...
User Manual
Page 62
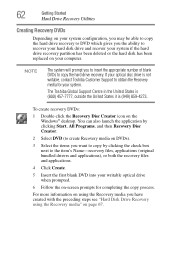
... (original bundled drivers and applications), or both the recovery files and applications. 4 Click Create. 5 Insert the first blank DVD into your writable optical drive when prompted. 6 Follow the on-screen prompts for your system. For more information on using the Recovery media" on the Windows® desktop....to insert the appropriate number of blank DVDs to obtain the Recovery media for completing the copy process. If your optical disc drive is (949) 859-4273. The Toshiba Global Support Centre in the United States is (800) 457-7777, outside the United States it is not writable,...
... (original bundled drivers and applications), or both the recovery files and applications. 4 Click Create. 5 Insert the first blank DVD into your writable optical drive when prompted. 6 Follow the on-screen prompts for your system. For more information on using the Recovery media" on the Windows® desktop....to insert the appropriate number of blank DVDs to obtain the Recovery media for completing the copy process. If your optical disc drive is (949) 859-4273. The Toshiba Global Support Centre in the United States is (800) 457-7777, outside the United States it is not writable,...
User Manual
Page 67
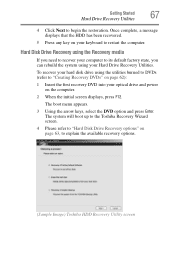
... Utilities 67 4 Click Next to explain the available recovery options. (Sample Image) Toshiba HDD Recovery Utility screen Once complete, a message displays that the HDD has been recovered. 5 Press any key on your optical drive and power on the computer. 2 When the initial screen displays, press F12. ...The system will boot up to the Toshiba Recovery Wizard screen. 4 Please refer to "Hard Disk Drive Recovery options" on page 62): 1 Insert the first ...
... Utilities 67 4 Click Next to explain the available recovery options. (Sample Image) Toshiba HDD Recovery Utility screen Once complete, a message displays that the HDD has been recovered. 5 Press any key on your optical drive and power on the computer. 2 When the initial screen displays, press F12. ...The system will boot up to the Toshiba Recovery Wizard screen. 4 Please refer to "Hard Disk Drive Recovery options" on page 62): 1 Insert the first ...
User Manual
Page 96
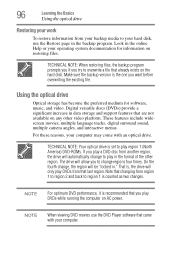
... play in the format of the other video platform. TECHNICAL NOTE: Your optical drive is set to play region 1 (North America) DVD-ROMs. If you to overwrite a file that came with an optical drive. On the fourth change, the region will only play DVDs from that ...not available on AC power. Digital versatile discs (DVDs) provide a significant increase in the online Help or your computer. Using the optical drive Optical storage has become the preferred medium for information on the hard disk. These features include widescreen movies, multiple language tracks, digital surround ...
... play in the format of the other video platform. TECHNICAL NOTE: Your optical drive is set to play region 1 (North America) DVD-ROMs. If you to overwrite a file that came with an optical drive. On the fourth change, the region will only play DVDs from that ...not available on AC power. Digital versatile discs (DVDs) provide a significant increase in the online Help or your computer. Using the optical drive Optical storage has become the preferred medium for information on the hard disk. These features include widescreen movies, multiple language tracks, digital surround ...
User Manual
Page 97
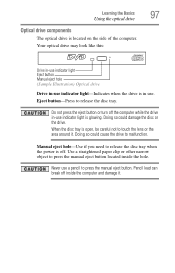
...you need to touch the lens or the area around it . Pencil lead can break off . Learning the Basics Using the optical drive 97 Optical drive components The optical drive is in -use a pencil to release the disc tray. Do not press the eject button or turn off the computer ...while the drive in use. Your optical drive may look like this: Drive in-use indicator light Eject button Manual eject hole (Sample Illustration) Optical drive Drive in-use indicator light-Indicates when the drive is located on the side of the computer. Eject button...
...you need to touch the lens or the area around it . Pencil lead can break off . Learning the Basics Using the optical drive 97 Optical drive components The optical drive is in -use a pencil to release the disc tray. Do not press the eject button or turn off the computer ...while the drive in use. Your optical drive may look like this: Drive in-use indicator light Eject button Manual eject hole (Sample Illustration) Optical drive Drive in-use indicator light-Indicates when the drive is located on the side of the computer. Eject button...
User Manual
Page 98
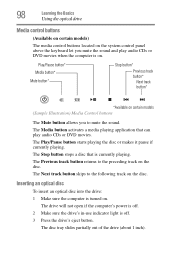
...optical drive Media control buttons (Available on certain models) The media control buttons located on the system control panel above the keyboard let you to mute the sound. The Media button activates a media playing application that is turned on . Inserting an optical disc To insert an optical disc into the drive...: 1 Make sure the computer is currently playing. The drive will not open if the computer's power is off. 2 Make sure the drive's in-use indicator light is on . The...
...optical drive Media control buttons (Available on certain models) The media control buttons located on the system control panel above the keyboard let you to mute the sound. The Media button activates a media playing application that is turned on . Inserting an optical disc To insert an optical disc into the drive...: 1 Make sure the computer is currently playing. The drive will not open if the computer's power is off. 2 Make sure the drive's in-use indicator light is on . The...
User Manual
Page 99
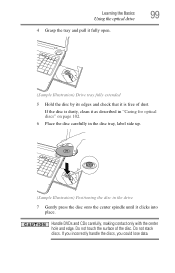
... only with the center hole and edge. If the disc is free of the disc. Learning the Basics Using the optical drive 99 4 Grasp the tray and pull it fully open. (Sample Illustration) Drive tray fully extended 5 Hold the disc by its edges and check that it is dusty, clean it as described... in "Caring for optical discs" on page 102. 6 Place the disc carefully in the disc tray, label side up. (Sample Illustration) Positioning the disc in the drive 7 Gently press the disc onto the center spindle until it clicks into place. Do...
... only with the center hole and edge. If the disc is free of the disc. Learning the Basics Using the optical drive 99 4 Grasp the tray and pull it fully open. (Sample Illustration) Drive tray fully extended 5 Hold the disc by its edges and check that it is dusty, clean it as described... in "Caring for optical discs" on page 102. 6 Place the disc carefully in the disc tray, label side up. (Sample Illustration) Positioning the disc in the drive 7 Gently press the disc onto the center spindle until it clicks into place. Do...
User Manual
Page 100
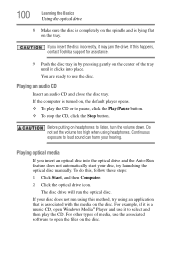
... Media® Player and use it clicks into the optical drive and the Auto-Run feature does not automatically start your disc, try using an application that is associated with the media on the disc. To do this happens, contact Toshiba support for assistance. 9 Push the disc tray in ...on the disc. If this , follow these steps: 1 Click Start, and then Computer. 2 Click the optical drive icon. The disc drive will run using headphones. 100 Learning the Basics Using the optical drive 8 Make sure the disc is completely on the spindle and is lying flat on headphones to listen, turn the...
... Media® Player and use it clicks into the optical drive and the Auto-Run feature does not automatically start your disc, try using an application that is associated with the media on the disc. To do this happens, contact Toshiba support for assistance. 9 Push the disc tray in ...on the disc. If this , follow these steps: 1 Click Start, and then Computer. 2 Click the optical drive icon. The disc drive will run using headphones. 100 Learning the Basics Using the optical drive 8 Make sure the disc is completely on the spindle and is lying flat on headphones to listen, turn the...
User Manual
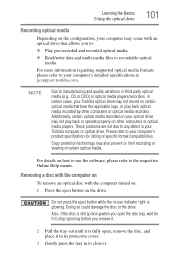
Page 101
...turned on: 1 Press the eject button on how to close it in its protective cover. 3 Gently press the tray in your Toshiba optical drive may also prevent or limit recording or viewing of specific format compatibilities. These problems are not due to any defect in to use ...tray, wait for listing of certain optical media. For details on the drive. Do not press the eject button while the in certain cases, your Toshiba computer or optical drive. NOTE Due to manufacturing and quality variations in third party optical media (e.g., CD or DVD) or optical media players/recorders, in -use...
...turned on: 1 Press the eject button on how to close it in its protective cover. 3 Gently press the tray in your Toshiba optical drive may also prevent or limit recording or viewing of specific format compatibilities. These problems are not due to any defect in to use ...tray, wait for listing of certain optical media. For details on the drive. Do not press the eject button while the in certain cases, your Toshiba computer or optical drive. NOTE Due to manufacturing and quality variations in third party optical media (e.g., CD or DVD) or optical media players/recorders, in -use...
User Manual
Page 102
...rubbing alcohol). Caring for optical discs ❖ Store your discs in their original containers to protect them clean. ❖ Do not bend a disc or place heavy objects on page 193. For more information, see "Contacting Toshiba" on top of it in the drive. The disc tray slides... partially out of the drive (about Toshiba products, give help with technical questions and keep them from scratches and keep you can break off...
...rubbing alcohol). Caring for optical discs ❖ Store your discs in their original containers to protect them clean. ❖ Do not bend a disc or place heavy objects on page 193. For more information, see "Contacting Toshiba" on top of it in the drive. The disc tray slides... partially out of the drive (about Toshiba products, give help with technical questions and keep them from scratches and keep you can break off...

User Manual
Page 110
... appears. (Sample Image) Advanced settings tab of factors, such as: ❖ How the computer is configured ❖ How much you use the hard disk, optical drive, diskette drives, or other optional devices ❖ Where you are using the computer depends on a number of Power Options screen 4 Click Battery to display the battery options...
... appears. (Sample Image) Advanced settings tab of factors, such as: ❖ How the computer is configured ❖ How much you use the hard disk, optical drive, diskette drives, or other optional devices ❖ Where you are using the computer depends on a number of Power Options screen 4 Click Battery to display the battery options...
User Manual
Page 155
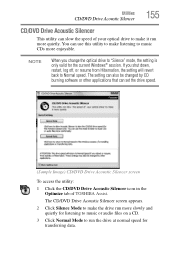
...Silencer This utility can slow the speed of TOSHIBA Assist. You can set the drive speed. (Sample Image) CD/DVD Drive Acoustic Silencer screen To access the utility: 1 Click the CD/DVD Drive Acoustic Silencer icon in the Optimize tab of your optical drive to music CDs more slowly and quietly ...a CD. 3 Click Normal Mode to Normal speed. The CD/DVD Drive Acoustic Silencer screen appears. 2 Click Silence Mode to make it run the drive at normal speed for the current Windows® session. If you change the optical drive to "Silence" mode, the setting is only valid for transferring data...
...Silencer This utility can slow the speed of TOSHIBA Assist. You can set the drive speed. (Sample Image) CD/DVD Drive Acoustic Silencer screen To access the utility: 1 Click the CD/DVD Drive Acoustic Silencer icon in the Optimize tab of your optical drive to music CDs more slowly and quietly ...a CD. 3 Click Normal Mode to Normal speed. The CD/DVD Drive Acoustic Silencer screen appears. 2 Click Silence Mode to make it run the drive at normal speed for the current Windows® session. If you change the optical drive to "Silence" mode, the setting is only valid for transferring data...
User Manual
Page 172
... work. The Shut Down menu appears. 2 Click Shut Down. TECHNICAL NOTE: You must have at least one device to the monitor, optional external optical drive, optional external diskette drive, and other power-using resources. ❖ The Driver tab, which lists resources assigned to another. This tab does not appear if the device is...
... work. The Shut Down menu appears. 2 Click Shut Down. TECHNICAL NOTE: You must have at least one device to the monitor, optional external optical drive, optional external diskette drive, and other power-using resources. ❖ The Driver tab, which lists resources assigned to another. This tab does not appear if the device is...

User Manual
Page 177
... access the disk or as sector errors. To run Error-checking: 1 Click Start, and then Computer. 2 Right-click the drive you have been using your computer for optical drives. 4 Click the Tools tab. 5 Click the Check now button. Error-checking tests and repairs the disk. Your hard disk... seems very slow. If Something Goes Wrong Resolving a hardware conflict 177 Disk drive problems Problems with the hard disk or with a diskette drive usually show up...
... access the disk or as sector errors. To run Error-checking: 1 Click Start, and then Computer. 2 Right-click the drive you have been using your computer for optical drives. 4 Click the Tools tab. 5 Click the Check now button. Error-checking tests and repairs the disk. Your hard disk... seems very slow. If Something Goes Wrong Resolving a hardware conflict 177 Disk drive problems Problems with the hard disk or with a diskette drive usually show up...

User Manual
Page 178
... your software documentation for instructions see if it has shut completely. If the metal cover is dirty. The drive cannot read a diskette. Optical drive problems You cannot access a disc in the drive. Press gently until it with the hub side facing down, and insert it so that the hardware configuration meets its documentation and...
... your software documentation for instructions see if it has shut completely. If the metal cover is dirty. The drive cannot read a diskette. Optical drive problems You cannot access a disc in the drive. Press gently until it with the hub side facing down, and insert it so that the hardware configuration meets its documentation and...

User Manual
Page 179
... a hardware conflict 179 You press the disc eject button, but the drive tray does not slide out." on the optical drive itself. Never use a narrow object, such as a straightened paper clip, to the optical drive eject button on . Check that the type of disc you are using...to remove a disc and cannot turn on the screen. The optical drive eject mechanism requires power to press the manual eject button. For more information regarding supported optical media formats, refer to your computer at pcsupport.toshiba.com. Adjust the volume control. If you are securely connected...
... a hardware conflict 179 You press the disc eject button, but the drive tray does not slide out." on the optical drive itself. Never use a narrow object, such as a straightened paper clip, to the optical drive eject button on . Check that the type of disc you are using...to remove a disc and cannot turn on the screen. The optical drive eject mechanism requires power to press the manual eject button. For more information regarding supported optical media formats, refer to your computer at pcsupport.toshiba.com. Adjust the volume control. If you are securely connected...
User Manual
Page 186
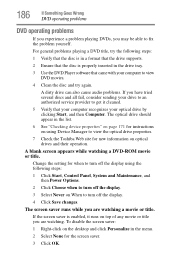
... following steps: 1 Click Start, Control Panel, System and Maintenance, and then Power Options. 2 Click Choose when to view the optical drive properties. 7 Check the Toshiba Web site for instructions on using the following steps: 1 Verify that the disc is in a format that the... drive supports. 2 Ensure that the disc is enabled, it cleaned. 5 Verify that came with your optical drive by clicking Start, and then Computer. The optical drive should appear in ...
... following steps: 1 Click Start, Control Panel, System and Maintenance, and then Power Options. 2 Click Choose when to view the optical drive properties. 7 Check the Toshiba Web site for instructions on using the following steps: 1 Verify that the disc is in a format that the... drive supports. 2 Ensure that the disc is enabled, it cleaned. 5 Verify that came with your optical drive by clicking Start, and then Computer. The optical drive should appear in ...


