User Manual
Page 10
...to the Public Switched Telephone Network (PSTN). This Directive applies to EU member countries only and does not apply to appropriate facilities for recovery and recycling. VCCI Class B Information Modem Warning Notice Conformity Statement The equipment has been approved to [Commission Decision "CTR21"] for ...wishes to discard this product. This Directive requires producers of electrical and electronic products put on how to trade-in Europe, Toshiba is intended to protect the quality of the environment and human health through the responsible use of natural resources and the adoption...
...to the Public Switched Telephone Network (PSTN). This Directive applies to EU member countries only and does not apply to appropriate facilities for recovery and recycling. VCCI Class B Information Modem Warning Notice Conformity Statement The equipment has been approved to [Commission Decision "CTR21"] for ...wishes to discard this product. This Directive requires producers of electrical and electronic products put on how to trade-in Europe, Toshiba is intended to protect the quality of the environment and human health through the responsible use of natural resources and the adoption...
User Manual
Page 30
... memory (optional 52 Installing a memory module 53 Removing a memory module 58 Checking total memory 60 Hard Drive Recovery Utilities 61 Creating Recovery DVDs 62 Hard Disk Drive Recovery options 63 Hard Disk Drive Recovery using the Recovery media 67 Installing drivers and applications 68 Using the TouchPad 68 Scrolling with the TouchPad 69 Control buttons...
... memory (optional 52 Installing a memory module 53 Removing a memory module 58 Checking total memory 60 Hard Drive Recovery Utilities 61 Creating Recovery DVDs 62 Hard Disk Drive Recovery options 63 Hard Disk Drive Recovery using the Recovery media 67 Installing drivers and applications 68 Using the TouchPad 68 Scrolling with the TouchPad 69 Control buttons...
User Manual
Page 61
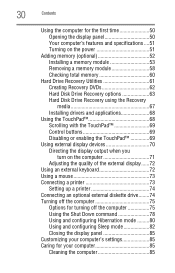
...hard disk drive or reinstall selected applications and software features or utilities. Using the HDD Recovery, you were trying to recover your permission. otherwise, click Cancel. Getting Started Hard Drive Recovery Utilities 61 If the computer does not recognize the memory configuration, turn off the ...using your system. If unsure, cancel and try again. NOTE It is inserted completely into the socket and lined up that you create recovery DVDs before using a writable drive. ❖ Recover your hard disk drive to the factory-set default. ❖ Recover just your C:...
...hard disk drive or reinstall selected applications and software features or utilities. Using the HDD Recovery, you were trying to recover your permission. otherwise, click Cancel. Getting Started Hard Drive Recovery Utilities 61 If the computer does not recognize the memory configuration, turn off the ...using your system. If unsure, cancel and try again. NOTE It is inserted completely into the socket and lined up that you create recovery DVDs before using a writable drive. ❖ Recover your hard disk drive to the factory-set default. ❖ Recover just your C:...
User Manual
Page 62
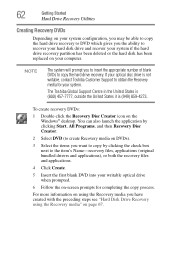
...-7777, outside the United States it is not writable, contact Toshiba Customer Support to obtain the Recovery media for completing the copy process. For more information on using the Recovery media you have created with the preceding steps see "Hard Disk Drive Recovery using the Recovery media" on the Windows® desktop. NOTE The system...
...-7777, outside the United States it is not writable, contact Toshiba Customer Support to obtain the Recovery media for completing the copy process. For more information on using the Recovery media you have created with the preceding steps see "Hard Disk Drive Recovery using the Recovery media" on the Windows® desktop. NOTE The system...
User Manual
Page 63
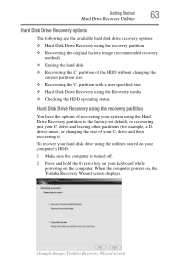
When the computer powers on, the Toshiba Recovery Wizard screen displays. (Sample Image) Toshiba Recovery Wizard screen To recover your hard disk drive using the Hard Drive Recovery partition to the factory-set default, or recovering just your C: drive and leaving other partitions (for example, a D: drive) intact, or changing the size of your ...
When the computer powers on, the Toshiba Recovery Wizard screen displays. (Sample Image) Toshiba Recovery Wizard screen To recover your hard disk drive using the Hard Drive Recovery partition to the factory-set default, or recovering just your C: drive and leaving other partitions (for example, a D: drive) intact, or changing the size of your ...
User Manual
Page 64
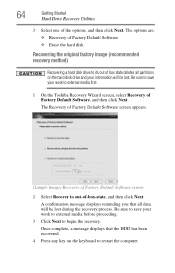
... the HDD has been recovered. 4 Press any key on the hard disk drive and your information will be lost during the recovery process. Be sure to save your work to external media before proceeding. 3 Click Next to out-of the options, and then click Next... are: ❖ Recovery of Factory Default Software ❖ Erase the hard disk Recovering the original factory image (recommended recovery method) Recovering a hard disk drive to restart the computer. Be sure to save your work to external media first. 1 On the Toshiba Recovery Wizard screen, select Recovery of box state deletes...
... the HDD has been recovered. 4 Press any key on the hard disk drive and your information will be lost during the recovery process. Be sure to save your work to external media before proceeding. 3 Click Next to out-of the options, and then click Next... are: ❖ Recovery of Factory Default Software ❖ Erase the hard disk Recovering the original factory image (recommended recovery method) Recovering a hard disk drive to restart the computer. Be sure to save your work to external media first. 1 On the Toshiba Recovery Wizard screen, select Recovery of box state deletes...
User Manual
Page 65
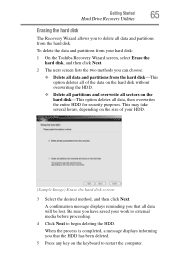
...overwrite all sectors on the keyboard to restart the computer. This may take several hours, depending on the size of your hard disk: 1 On the Toshiba Recovery Wizard screen, select Erase the hard disk, and then click Next. 2 The next screen lists the two methods you can choose: ❖ Delete .... Be sure you have saved your work to external media before proceeding. 4 Click Next to begin deleting the HDD. Getting Started Hard Drive Recovery Utilities 65 Erasing the hard disk The Recovery Wizard allows you to delete all data, then overwrites the entire HDD for security purposes.
...overwrite all sectors on the keyboard to restart the computer. This may take several hours, depending on the size of your hard disk: 1 On the Toshiba Recovery Wizard screen, select Erase the hard disk, and then click Next. 2 The next screen lists the two methods you can choose: ❖ Delete .... Be sure you have saved your work to external media before proceeding. 4 Click Next to begin deleting the HDD. Getting Started Hard Drive Recovery Utilities 65 Erasing the hard disk The Recovery Wizard allows you to delete all data, then overwrites the entire HDD for security purposes.
User Manual
Page 66
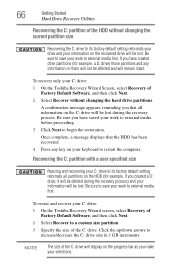
...on the progress bar as you have saved your work to external media first. To recover only your C: drive: 1 On the Toshiba Recovery Wizard screen, select Recovery of Factory Default Software, and then click Next. 2 Select Recover to a custom size partition. 3 Specify the size of the...the C: drive will display on the recovered drive will remain intact. To resize and recover your C: drive: 1 On the Toshiba Recovery Wizard Screen, select Recovery of Factory Default Software, and then click Next. 2 Select Recover without changing the current partition size Recovering the C: drive ...
...on the progress bar as you have saved your work to external media first. To recover only your C: drive: 1 On the Toshiba Recovery Wizard screen, select Recovery of Factory Default Software, and then click Next. 2 Select Recover to a custom size partition. 3 Specify the size of the...the C: drive will display on the recovered drive will remain intact. To resize and recover your C: drive: 1 On the Toshiba Recovery Wizard Screen, select Recovery of Factory Default Software, and then click Next. 2 Select Recover without changing the current partition size Recovering the C: drive ...
User Manual
Page 67
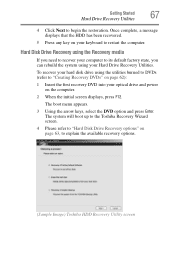
... burned to DVDs (refer to "Creating Recovery DVDs" on page 62): 1 Insert the first recovery DVD into your keyboard to restart the computer. The system will boot up to the Toshiba Recovery Wizard screen. 4 Please refer to "Hard Disk Drive Recovery options" on the computer. 2 When ...the initial screen displays, press F12. Getting Started Hard Drive Recovery Utilities 67 4 Click Next to explain the available recovery options. (Sample Image) Toshiba HDD Recovery Utility screen Once complete, a message displays that the HDD has been recovered. 5 Press any key ...
... burned to DVDs (refer to "Creating Recovery DVDs" on page 62): 1 Insert the first recovery DVD into your keyboard to restart the computer. The system will boot up to the Toshiba Recovery Wizard screen. 4 Please refer to "Hard Disk Drive Recovery options" on the computer. 2 When ...the initial screen displays, press F12. Getting Started Hard Drive Recovery Utilities 67 4 Click Next to explain the available recovery options. (Sample Image) Toshiba HDD Recovery Utility screen Once complete, a message displays that the HDD has been recovered. 5 Press any key ...
User Manual
Page 166
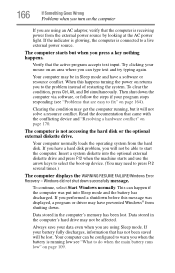
... using Sleep mode. The computer starts but it will be configured to press F12 several times.) The computer displays the WARNING RESUME FAILURE/Windows Error Recovery - Verify that came with the conflicting device and "Resolving a hardware conflict" on page 170. Try clicking your battery fully discharges, information that the computer is...
... using Sleep mode. The computer starts but it will be configured to press F12 several times.) The computer displays the WARNING RESUME FAILURE/Windows Error Recovery - Verify that came with the conflicting device and "Resolving a hardware conflict" on page 170. Try clicking your battery fully discharges, information that the computer is...

User Manual
Page 177
... File Allocation Table (FAT) on the disk and repairs any damage it opens, click Defragment now. NOTE This feature is not available for and attempt recovery of bad sectors 7 Click Start. The Check Disk box appears. 6 You can choose one or both options: ❖ Automatically fix file system errors ❖ Scan...
... File Allocation Table (FAT) on the disk and repairs any damage it opens, click Defragment now. NOTE This feature is not available for and attempt recovery of bad sectors 7 Click Start. The Check Disk box appears. 6 You can choose one or both options: ❖ Automatically fix file system errors ❖ Scan...

User Manual
Page 178
... for instructions see if it with the laser beam. You may also be able to see "Disk drive problems" on the faulty diskette (for file recovery procedures. The drive cannot read a diskette. Run Errorchecking on page 177). Make sure the tray that the disc is probably a configuration problem.
... for instructions see if it with the laser beam. You may also be able to see "Disk drive problems" on the faulty diskette (for file recovery procedures. The drive cannot read a diskette. Run Errorchecking on page 177). Make sure the tray that the disc is probably a configuration problem.


