User Manual
Page 27
... enabling the TouchPad 64 Using the Dual Mode Pad 65 Using Dual Mode 65 Using external display devices 67 Directing the display output when you turn on the computer 68 Adjusting the quality of the external display......69 Using an external keyboard 69 Using a mouse 69 Connecting a printer 70 Setting up a... the computer 72 Using the Shut Down command 75 Using and configuring Hibernation mode .........77 Using and configuring Sleep mode 79 Closing the display panel 82 Customizing your computer's settings 82 Caring for your computer 82 Cleaning the computer 82 Moving the computer 82
... enabling the TouchPad 64 Using the Dual Mode Pad 65 Using Dual Mode 65 Using external display devices 67 Directing the display output when you turn on the computer 68 Adjusting the quality of the external display......69 Using an external keyboard 69 Using a mouse 69 Connecting a printer 70 Setting up a... the computer 72 Using the Shut Down command 75 Using and configuring Hibernation mode .........77 Using and configuring Sleep mode 79 Closing the display panel 82 Customizing your computer's settings 82 Caring for your computer 82 Cleaning the computer 82 Moving the computer 82
User Manual
Page 31
... Resolving a hardware conflict 175 A plan of action 175 Fixing a problem with Device Manager ...........176 Memory problems 177 Power and the batteries 178 Keyboard problems 179 Display problems 180 Disk drive problems 182 Optical drive problems 183 Sound system problems 184 PC Card problems 185 Printer problems 187 Modem problems 187 Wireless...
... Resolving a hardware conflict 175 A plan of action 175 Fixing a problem with Device Manager ...........176 Memory problems 177 Power and the batteries 178 Keyboard problems 179 Display problems 180 Disk drive problems 182 Optical drive problems 183 Sound system problems 184 PC Card problems 185 Printer problems 187 Modem problems 187 Wireless...
User Manual
Page 32
32 Contents If you need further assistance 197 Before you contact Toshiba 197 Contacting Toshiba 198 Other Toshiba Internet Web sites 199 Toshiba's worldwide offices 199 Appendix A: Hot Keys 201 Hot Key Cards 201 Using the Hot Key Cards 202 Application Cards 203 Using... the Application Cards 203 Card Case 204 Hot Key Functions 205 Volume Mute 205 Password security 206 Power plan 208 Sleep mode 209 Hibernation mode 210 Display modes 211 Display...
32 Contents If you need further assistance 197 Before you contact Toshiba 197 Contacting Toshiba 198 Other Toshiba Internet Web sites 199 Toshiba's worldwide offices 199 Appendix A: Hot Keys 201 Hot Key Cards 201 Using the Hot Key Cards 202 Application Cards 203 Using... the Application Cards 203 Card Case 204 Hot Key Functions 205 Volume Mute 205 Password security 206 Power plan 208 Sleep mode 209 Hibernation mode 210 Display modes 211 Display...
User Manual
Page 40
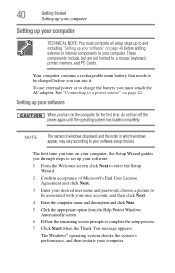
... first time you through steps to set up your software. 1 From the Welcome screen click Next to enter the Setup Wizard. 2 Confirm acceptance of windows displayed, and the order in which windows appear, may vary according to a power source" on page 42. Setting up your software When you turn on the...
... first time you through steps to set up your software. 1 From the Welcome screen click Next to enter the Setup Wizard. 2 Confirm acceptance of windows displayed, and the order in which windows appear, may vary according to a power source" on page 42. Setting up your software When you turn on the...
User Manual
Page 41
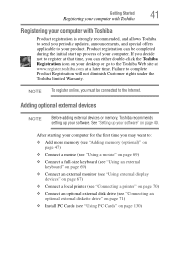
..." on page 69) ❖ Connect a full-size keyboard (see "Using an external keyboard" on page 69) ❖ Connect an external monitor (see "Using external display devices" on page 67) ❖ Connect a local printer (see "Connecting a printer" on page 70) ❖ Connect an optional external disk drive (see "Connecting...drive" on page 71) ❖ Install PC Cards (see "Using PC Cards" on your desktop or go to the Toshiba Web site at www.register.toshiba.com at that time, you can be connected to the Internet. Failure to complete Product Registration will not diminish Customer rights under...
..." on page 69) ❖ Connect a full-size keyboard (see "Using an external keyboard" on page 69) ❖ Connect an external monitor (see "Using external display devices" on page 67) ❖ Connect a local printer (see "Connecting a printer" on page 70) ❖ Connect an optional external disk drive (see "Connecting...drive" on page 71) ❖ Install PC Cards (see "Using PC Cards" on your desktop or go to the Toshiba Web site at www.register.toshiba.com at that time, you can be connected to the Internet. Failure to complete Product Registration will not diminish Customer rights under...
User Manual
Page 45
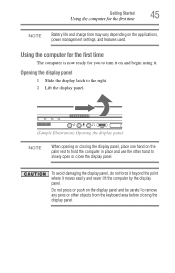
... time NOTE Battery life and charge time may vary depending on and begin using it moves easily and never lift the computer by the display panel. Do not press or push on the display panel and be careful to remove any pens or other objects from the keyboard area before closing the... to hold the computer in place and use the other hand to slowly open or close the display panel. To avoid damaging the display panel, do not force it beyond the point where it . Opening the display panel 1 Slide the display latch to turn it on the applications, power management settings, and features used.
... time NOTE Battery life and charge time may vary depending on and begin using it moves easily and never lift the computer by the display panel. Do not press or push on the display panel and be careful to remove any pens or other objects from the keyboard area before closing the... to hold the computer in place and use the other hand to slowly open or close the display panel. To avoid damaging the display panel, do not force it beyond the point where it . Opening the display panel 1 Slide the display latch to turn it on the applications, power management settings, and features used.
User Manual
Page 46
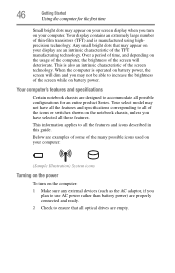
...and ready. 2 Check to increase the brightness of thin-film transistors (TFT) and is manufactured using highprecision technology. This is operated on your display are designed to all of the TFT manufacturing technology. Your select model may not have selected all the features and icons described in this guide... of the icons or switches shown on the notebook chassis, unless you may not be able to ensure that may appear on your screen display when you turn on your computer: (Sample Illustration) System icons Turning on the power To turn on the usage of the computer, the...
...and ready. 2 Check to increase the brightness of thin-film transistors (TFT) and is manufactured using highprecision technology. This is operated on your display are designed to all of the TFT manufacturing technology. Your select model may not have selected all the features and icons described in this guide... of the icons or switches shown on the notebook chassis, unless you may not be able to ensure that may appear on your screen display when you turn on your computer: (Sample Illustration) System icons Turning on the power To turn on the usage of the computer, the...

User Manual
Page 49
... locate the memory module slot cover. For information on removing the main battery, see "Removing the battery from the computer" on page 111. 5 Close the display panel and turn the computer upside down to the computer, including the AC adaptor. 4 Remove the main battery. Getting Started 49 Adding memory (optional) 2 Click...
... locate the memory module slot cover. For information on removing the main battery, see "Removing the battery from the computer" on page 111. 5 Close the display panel and turn the computer upside down to the computer, including the AC adaptor. 4 Remove the main battery. Getting Started 49 Adding memory (optional) 2 Click...
User Manual
Page 54
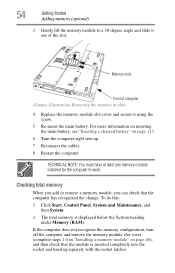
... (optional) 3 Gently lift the memory module to work. Checking total memory When you add or remove a memory module, you can check that the module is displayed below the System heading under Memory (RAM).
... (optional) 3 Gently lift the memory module to work. Checking total memory When you add or remove a memory module, you can check that the module is displayed below the System heading under Memory (RAM).
User Manual
Page 55
... "Creating Recovery CDs/DVDs" on your computer without your permission. Getting Started 55 Hard Drive Recovery Utilities NOTE From time to time, Windows® will display a pop-up that you create recovery CDs/DVDs before using a writable drive ❖ Recover your hard disk drive to the factory-set default ❖ Recover...
... "Creating Recovery CDs/DVDs" on your computer without your permission. Getting Started 55 Hard Drive Recovery Utilities NOTE From time to time, Windows® will display a pop-up that you create recovery CDs/DVDs before using a writable drive ❖ Recover your hard disk drive to the factory-set default ❖ Recover...
User Manual
Page 58
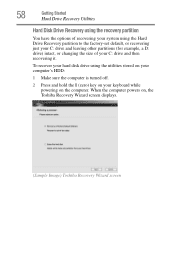
... is turned off. 2 Press and hold the 0 (zero) key on your C: drive and then recovering it. When the computer powers on, the Toshiba Recovery Wizard screen displays. (Sample Image) Toshiba Recovery Wizard screen 58 Getting Started Hard Drive Recovery Utilities Hard Disk Drive Recovery using the recovery partition You have the options of...
... is turned off. 2 Press and hold the 0 (zero) key on your C: drive and then recovering it. When the computer powers on, the Toshiba Recovery Wizard screen displays. (Sample Image) Toshiba Recovery Wizard screen 58 Getting Started Hard Drive Recovery Utilities Hard Disk Drive Recovery using the recovery partition You have the options of...
User Manual
Page 59
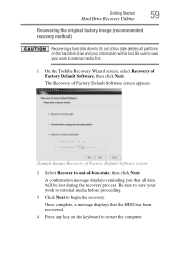
...(Sample Image) Recovery of Factory Default Software screen 2 Select Recover to out-of-box-state, then click Next. Once complete, a message displays that all partitions on the keyboard to restart the computer. Be sure to save your work to external media before proceeding. 3 Click Next ...and your information will be lost during the recovery process. Be sure to save your work to external media first. 1 On the Toshiba Recovery Wizard screen, select Recovery of Factory Default Software, then click Next. Getting Started 59 Hard Drive Recovery Utilities Recovering the original ...
...(Sample Image) Recovery of Factory Default Software screen 2 Select Recover to out-of-box-state, then click Next. Once complete, a message displays that all partitions on the keyboard to restart the computer. Be sure to save your work to external media before proceeding. 3 Click Next ...and your information will be lost during the recovery process. Be sure to save your work to external media first. 1 On the Toshiba Recovery Wizard screen, select Recovery of Factory Default Software, then click Next. Getting Started 59 Hard Drive Recovery Utilities Recovering the original ...
User Manual
Page 60
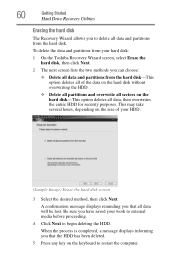
...has been deleted. 5 Press any key on the hard disk-This option deletes all data will be lost. When the process is completed, a message displays informing you that all data, then overwrites the entire HDD for security purposes. 60 Getting Started Hard Drive Recovery Utilities Erasing the hard disk The... sure you can choose: ❖ Delete all data and partitions from the hard disk-This option deletes all of your hard disk: 1 On the Toshiba Recovery Wizard screen, select Erase the hard disk, then click Next. 2 The next screen lists the two methods you have saved your work to external...
...has been deleted. 5 Press any key on the hard disk-This option deletes all data will be lost. When the process is completed, a message displays informing you that all data, then overwrites the entire HDD for security purposes. 60 Getting Started Hard Drive Recovery Utilities Erasing the hard disk The... sure you can choose: ❖ Delete all data and partitions from the hard disk-This option deletes all of your hard disk: 1 On the Toshiba Recovery Wizard screen, select Erase the hard disk, then click Next. 2 The next screen lists the two methods you have saved your work to external...
User Manual
Page 61
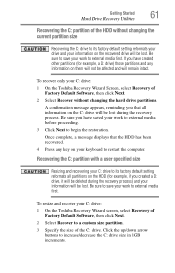
... setting reformats your drive and your work to external media before proceeding. 3 Click Next to restart the computer. Once complete, a message displays that all partitions on the HDD (for example, a D: drive) those partitions and any key on the C: drive will remain intact....a user specified size Resizing and recovering your C: drive to its factory default setting reformats all information on your C: drive: 1 On the Toshiba Recovery Wizard screen, select Recovery of Factory Default Software, then click Next. 2 Select Recover to external media first. Getting Started 61 Hard ...
... setting reformats your drive and your work to external media before proceeding. 3 Click Next to restart the computer. Once complete, a message displays that all partitions on the HDD (for example, a D: drive) those partitions and any key on the C: drive will remain intact....a user specified size Resizing and recovering your C: drive to its factory default setting reformats all information on your C: drive: 1 On the Toshiba Recovery Wizard screen, select Recovery of Factory Default Software, then click Next. 2 Select Recover to external media first. Getting Started 61 Hard ...
User Manual
Page 62
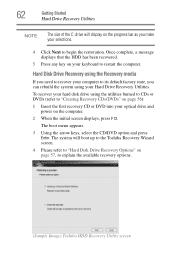
... media If you need to recover your computer to its default factory state, you make your keyboard to restart the computer. Once complete, a message displays that the HDD has been recovered. 5 Press any key on your selections. 4 Click Next to begin the restoration. To recover your hard disk ...your Hard Drive Recovery Utilities. 62 Getting Started Hard Drive Recovery Utilities NOTE The size of the C: drive will boot up to the Toshiba Recovery Wizard screen. 4 Please refer to "Hard Disk Drive Recovery Options" on page 57, to explain the available recovery options. (Sample Image...
... media If you need to recover your computer to its default factory state, you make your keyboard to restart the computer. Once complete, a message displays that the HDD has been recovered. 5 Press any key on your selections. 4 Click Next to begin the restoration. To recover your hard disk ...your Hard Drive Recovery Utilities. 62 Getting Started Hard Drive Recovery Utilities NOTE The size of the C: drive will boot up to the Toshiba Recovery Wizard screen. 4 Please refer to "Hard Disk Drive Recovery Options" on page 57, to explain the available recovery options. (Sample Image...
User Manual
Page 63
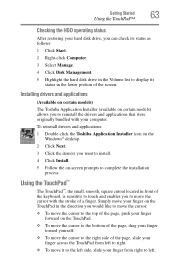
...left to right. ❖ To move the cursor with the stroke of a finger. Installing drivers and applications (Available on certain models) The Toshiba Application Installer (available on -screen prompts to complete the installation process. Getting Started 63 Using the TouchPad™ Checking the HDD operating status ...: 1 Click Start. 2 Right-click Computer. 3 Select Manage. 4 Click Disk Management. 5 Highlight the hard disk drive in the Volume list to display its status in front of the keyboard, is sensitive to touch and enables you to move it to the left side, slide your computer.
...left to right. ❖ To move the cursor with the stroke of a finger. Installing drivers and applications (Available on certain models) The Toshiba Application Installer (available on -screen prompts to complete the installation process. Getting Started 63 Using the TouchPad™ Checking the HDD operating status ...: 1 Click Start. 2 Right-click Computer. 3 Select Manage. 4 Click Disk Management. 5 Highlight the hard disk drive in the Volume list to display its status in front of the keyboard, is sensitive to touch and enables you to move it to the left side, slide your computer.
User Manual
Page 64
... TouchPad. The primary button usually corresponds to the left -hand) button. Disabling or enabling the TouchPad™ The TouchPad™ is much smaller than the display screen, moving your cursor across the TouchPad in the preferred direction. To change the enable/disable TouchPad setting, press Fn + F9. Scrolling with any wheel...
... TouchPad. The primary button usually corresponds to the left -hand) button. Disabling or enabling the TouchPad™ The TouchPad™ is much smaller than the display screen, moving your cursor across the TouchPad in the preferred direction. To change the enable/disable TouchPad setting, press Fn + F9. Scrolling with any wheel...
User Manual
Page 67
...cable installation requirements that are unassigned by the cable installer at the top of the Dual Mode Pad (buttons 4, 5, and 6 in display, but you can assign different functions to the point of these buttons if you must only be used if the cable's outer conductive ...shielding has been grounded by default. Getting Started 67 Using external display devices Configuring virtual buttons The virtual buttons at the building premises as close the Mouse Properties window. Before connecting an external monitor or...
...cable installation requirements that are unassigned by the cable installer at the top of the Dual Mode Pad (buttons 4, 5, and 6 in display, but you can assign different functions to the point of these buttons if you must only be used if the cable's outer conductive ...shielding has been grounded by default. Getting Started 67 Using external display devices Configuring virtual buttons The virtual buttons at the building premises as close the Mouse Properties window. Before connecting an external monitor or...
User Manual
Page 68
...desire and click Apply. 5 Then click OK. Briefly pause each time you can easily attach an external monitor or projector to use the internal display only, the external device only, or both simultaneously. To do this: 1 Connect the monitor's video cable to the RGB (monitor) port... on the external device. Your computer will automatically detect the external display device and activate a screen with display options. 4 Select the settings you need a larger screen. The quickest way to change . This hot key cycles through the ...
...desire and click Apply. 5 Then click OK. Briefly pause each time you can easily attach an external monitor or projector to use the internal display only, the external device only, or both simultaneously. To do this: 1 Connect the monitor's video cable to the RGB (monitor) port... on the external device. Your computer will automatically detect the external display device and activate a screen with display options. 4 Select the settings you need a larger screen. The quickest way to change . This hot key cycles through the ...
User Manual
Page 69
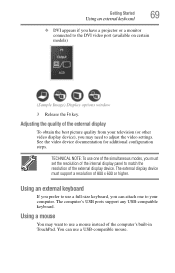
.... TECHNICAL NOTE: To use a full-size keyboard, you can use a mouse instead of the external display device. The external display device must set the resolution of the internal display panel to match the resolution of the computer's built-in TouchPad. The computer's USB ports support any ...USB-compatible keyboard. You can attach one of the simultaneous modes, you must support a resolution of the external display To obtain the best picture quality from your computer. Getting Started 69 Using an external keyboard ❖ DVI appears if you may want...
.... TECHNICAL NOTE: To use a full-size keyboard, you can use a mouse instead of the external display device. The external display device must set the resolution of the internal display panel to match the resolution of the computer's built-in TouchPad. The computer's USB ports support any ...USB-compatible keyboard. You can attach one of the simultaneous modes, you must support a resolution of the external display To obtain the best picture quality from your computer. Getting Started 69 Using an external keyboard ❖ DVI appears if you may want...


