User Guide
Page 2
... your important data, please make periodic back-up copies of all set-up and usage instructions in the applicable user guides and/or manuals enclosed. TOSHIBA DISCLAIMS ANY LIABILITY FOR THE FAILURE TO COPY OR TRANSFER THE DATA CORRECTLY. 2 Models: Satellite® M35 Series ReWritable CD/DVD Drives The computer system you purchased may lose data or suffer other storage devices as a precaution against...
... your important data, please make periodic back-up copies of all set-up and usage instructions in the applicable user guides and/or manuals enclosed. TOSHIBA DISCLAIMS ANY LIABILITY FOR THE FAILURE TO COPY OR TRANSFER THE DATA CORRECTLY. 2 Models: Satellite® M35 Series ReWritable CD/DVD Drives The computer system you purchased may lose data or suffer other storage devices as a precaution against...
User Guide
Page 28
... Power management 105 Using additional batteries 106 Charging the batteries 106 Maximizing battery life 107 Charging the main battery 108 Charging the RTC battery 109 Monitoring battery power 110 Determining remaining battery power 111 Conserving battery power 113 Power profiles in Windows XP 114 Using a hot key to set the power profile..........114 Additional options for power 115 What to do when the battery runs low 115 What to do when the battery alarm sounds ....116 Changing the main battery 116 Removing the battery...
... Power management 105 Using additional batteries 106 Charging the batteries 106 Maximizing battery life 107 Charging the main battery 108 Charging the RTC battery 109 Monitoring battery power 110 Determining remaining battery power 111 Conserving battery power 113 Power profiles in Windows XP 114 Using a hot key to set the power profile..........114 Additional options for power 115 What to do when the battery runs low 115 What to do when the battery alarm sounds ....116 Changing the main battery 116 Removing the battery...

User Guide
Page 30
... Changing or removing existing key assignments 157 TOSHIBA Console 158 Customizing Your Computer 159 Network 159 Security 159 Power Management 159 Mouse utility 161 Hotkey utility 161 Toshiba Hardware Settings 162 Toshiba Picture Enhancement Utility 164 CD/DVD Drive Acoustic Silencer 164 Enabling Hibernation 165 Setting user passwords 165 Using an instant password 166 Setting a user password 167 Disabling a user password 167 Using a supervisor password 168 Setting a supervisor password 168 Deleting a supervisor password 169 Chapter 7: If Something Goes Wrong 170 Problems...
... Changing or removing existing key assignments 157 TOSHIBA Console 158 Customizing Your Computer 159 Network 159 Security 159 Power Management 159 Mouse utility 161 Hotkey utility 161 Toshiba Hardware Settings 162 Toshiba Picture Enhancement Utility 164 CD/DVD Drive Acoustic Silencer 164 Enabling Hibernation 165 Setting user passwords 165 Using an instant password 166 Setting a user password 167 Disabling a user password 167 Using a supervisor password 168 Setting a supervisor password 168 Deleting a supervisor password 169 Chapter 7: If Something Goes Wrong 170 Problems...
User Guide
Page 31
... DVD-ROM or multi-function drive problems...187 Sound system problems 187 PC Card problems 188 Printer problems 191 Modem problems 192 Develop good computing habits 192 If you need further assistance 194 Before you call 194 Contacting Toshiba 195 Other Toshiba Internet Web sites 196 Toshiba's worldwide offices 196 Appendix A: Hot Keys 200 Volume Mute 200 Instant password security 201 Power usage profile 201 Stand By mode 202 Hibernation mode 203 Display modes 204 Display brightness...
... DVD-ROM or multi-function drive problems...187 Sound system problems 187 PC Card problems 188 Printer problems 191 Modem problems 192 Develop good computing habits 192 If you need further assistance 194 Before you call 194 Contacting Toshiba 195 Other Toshiba Internet Web sites 196 Toshiba's worldwide offices 196 Appendix A: Hot Keys 200 Volume Mute 200 Instant password security 201 Power usage profile 201 Stand By mode 202 Hibernation mode 203 Display modes 204 Display brightness...
User Guide
Page 55
... at accessories.toshiba.com). If this procedure. Getting Started Installing additional memory (optional) 55 NOTE The Fn + F9 shortcut can be used to disable or enable the TouchPad (see "Disabling or enabling the TouchPad" on the most of data. Additional memory comes in Stand by or Hibernation mode, data will need a standard Phillips no.1 screwdriver for a long time, the memory modules become hot. You may have both slots occupied...
... at accessories.toshiba.com). If this procedure. Getting Started Installing additional memory (optional) 55 NOTE The Fn + F9 shortcut can be used to disable or enable the TouchPad (see "Disabling or enabling the TouchPad" on the most of data. Additional memory comes in Stand by or Hibernation mode, data will need a standard Phillips no.1 screwdriver for a long time, the memory modules become hot. You may have both slots occupied...

User Guide
Page 57
Getting Started Installing additional memory (optional) 57 6 Using a standard Phillips no. 1 screwdriver, unscrew the captive screws that the gold connector bar faces the slot, fit the memory module into the socket. 10 Gently press down on the memory module connector until the clips snap into place. Sample removing the memory module slot cover 7 Place the memory module slot cover in a safe place so that you may have built up. Before you...
Getting Started Installing additional memory (optional) 57 6 Using a standard Phillips no. 1 screwdriver, unscrew the captive screws that the gold connector bar faces the slot, fit the memory module into the socket. 10 Gently press down on the memory module connector until the clips snap into place. Sample removing the memory module slot cover 7 Place the memory module slot cover in a safe place so that you may have built up. Before you...
User Guide
Page 60
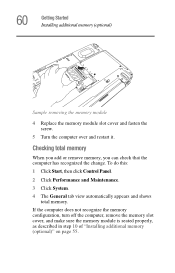
... this: 1 Click Start, then click Control Panel. 2 Click Performance and Maintenance. 3 Click System. 4 The General tab view automatically appears and shows total memory. 60 Getting Started Installing additional memory (optional) Sample removing the memory module 4 Replace the memory module slot cover and fasten the screw. 5 Turn the computer over and restart it. If the computer does not recognize the memory configuration, turn off the computer, remove the memory slot cover, and make sure the memory module is seated...
... this: 1 Click Start, then click Control Panel. 2 Click Performance and Maintenance. 3 Click System. 4 The General tab view automatically appears and shows total memory. 60 Getting Started Installing additional memory (optional) Sample removing the memory module 4 Replace the memory module slot cover and fasten the screw. 5 Turn the computer over and restart it. If the computer does not recognize the memory configuration, turn off the computer, remove the memory slot cover, and make sure the memory module is seated...
User Guide
Page 66
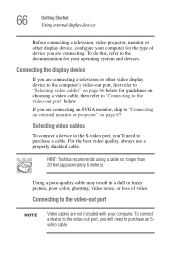
... your operating system and devices. To connect a device to the video-out port, you 'll need to purchase an Svideo cable. HINT: Toshiba recommends using a cable no longer than 20 feet (approximately 6 meters). Connecting to the video-out port NOTE Video cables are connecting. Selecting video cables To connect a device to the S-video port, you will need to purchase a cable. For the best video quality, always use a properly shielded cable. 66 Getting Started Using external display devices Before connecting a television, video projector, monitor or other video display device to...
... your operating system and devices. To connect a device to the video-out port, you 'll need to purchase an Svideo cable. HINT: Toshiba recommends using a cable no longer than 20 feet (approximately 6 meters). Connecting to the video-out port NOTE Video cables are connecting. Selecting video cables To connect a device to the S-video port, you will need to purchase a cable. For the best video quality, always use a properly shielded cable. 66 Getting Started Using external display devices Before connecting a television, video projector, monitor or other video display device to...
User Guide
Page 140
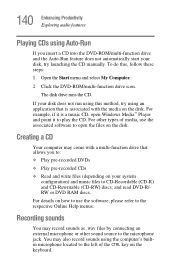
...: 1 Open the Start menu and select My Computer. 2 Click the DVD-ROM/multi-function drive icon. For details on how to use the associated software to open Windows Media™ Player and point it is associated with the media on the disk. You may record sounds as .wav files by connecting an external microphone or other types of the CTRL key on the disk. and read DVD-R/RW or DVD RAM discs. For other sound source...
...: 1 Open the Start menu and select My Computer. 2 Click the DVD-ROM/multi-function drive icon. For details on how to use the associated software to open Windows Media™ Player and point it is associated with the media on the disk. You may record sounds as .wav files by connecting an external microphone or other types of the CTRL key on the disk. and read DVD-R/RW or DVD RAM discs. For other sound source...

User Guide
Page 143
... i.LINK® port Using external speakers or headphones Your computer is equipped with a full stereo sound system with internal speakers. To adjust the volume: ❖ For external speakers, use the computer's volume control dial. Other types of data in real-time, such as video devices. This makes it ideal for devices that require an external power source. In addition to high speed, the i.LINK® port also supports isochronous data...
... i.LINK® port Using external speakers or headphones Your computer is equipped with a full stereo sound system with internal speakers. To adjust the volume: ❖ For external speakers, use the computer's volume control dial. Other types of data in real-time, such as video devices. This makes it ideal for devices that require an external power source. In addition to high speed, the i.LINK® port also supports isochronous data...
User Guide
Page 173
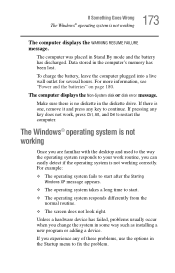
... any key does not work routine, you change the system in Stand By mode and the battery has discharged. The Windows® operating system is not working Once you experience any of these problems, use the options in the computer's memory has been lost. The computer was placed in some way such as installing a new program or adding a device. For more information, see "Power and the batteries...
... any key does not work routine, you change the system in Stand By mode and the battery has discharged. The Windows® operating system is not working Once you experience any of these problems, use the options in the computer's memory has been lost. The computer was placed in some way such as installing a new program or adding a device. For more information, see "Power and the batteries...

User Guide
Page 175
... to locate the site. The World Wide Web is very slow, try later. The Windows® XP operating system can help you If the operating system has started properly, but you in . A single incorrect letter or missed character, comma instead of the address carefully. If accessing a particular site is constantly changing. The Help and Support window appears. Internet problems My Internet connection is...
... to locate the site. The World Wide Web is very slow, try later. The Windows® XP operating system can help you If the operating system has started properly, but you in . A single incorrect letter or missed character, comma instead of the address carefully. If accessing a particular site is constantly changing. The Help and Support window appears. Internet problems My Internet connection is...
User Guide
Page 182
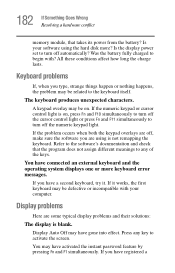
... the keys. If you have connected an external keyboard and the operating system displays one or more ? If it . If the problem occurs when both the keypad overlays are off, make sure the software you type, strange things happen or nothing happens, the problem may have registered a Is the display power set to turn off the numeric keypad light. 182 If Something Goes Wrong Resolving a hardware conflict memory module...
... the keys. If you have connected an external keyboard and the operating system displays one or more ? If it . If the problem occurs when both the keypad overlays are off, make sure the software you type, strange things happen or nothing happens, the problem may have registered a Is the display power set to turn off the numeric keypad light. 182 If Something Goes Wrong Resolving a hardware conflict memory module...

User Guide
Page 183
.... Some flickering is registered, press Enter. The screen reactivates and allows you are using an external monitor: ❖ Check that the monitor is turned on. ❖ Check that the monitor's power cable is firmly plugged into a working power outlet. ❖ Check that the cable connecting the external monitor to the computer is firmly attached. ❖ Try adjusting the contrast and brightness controls on the external monitor. ❖ Press Fn and F5...
.... Some flickering is registered, press Enter. The screen reactivates and allows you are using an external monitor: ❖ Check that the monitor is turned on. ❖ Check that the monitor's power cable is firmly plugged into a working power outlet. ❖ Check that the cable connecting the external monitor to the computer is firmly attached. ❖ Try adjusting the contrast and brightness controls on the external monitor. ❖ Press Fn and F5...
User Guide
Page 205
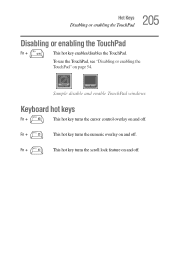
205 Hot Keys Disabling or enabling the TouchPad Disabling or enabling the TouchPad Fn + This hot key enables/disables the TouchPad. Fn + This hot key turns the scroll lock feature on and off . Fn + This hot key turns the numeric overlay on and off . To use the TouchPad, see "Disabling or enabling the TouchPad" on and off. Sample disable and enable TouchPad windows Keyboard hot keys Fn + This hot key turns the cursor control overlay on page 54.
205 Hot Keys Disabling or enabling the TouchPad Disabling or enabling the TouchPad Fn + This hot key enables/disables the TouchPad. Fn + This hot key turns the scroll lock feature on and off . Fn + This hot key turns the numeric overlay on and off . To use the TouchPad, see "Disabling or enabling the TouchPad" on and off. Sample disable and enable TouchPad windows Keyboard hot keys Fn + This hot key turns the cursor control overlay on page 54.

User Guide
Page 211
211 Using ConfigFree™ with infrared) devices that are also displayed. Device Settings The Device Settings screen displays a list of all wired, wireless, and infrared (for systems with your Toshiba Computer ConfigFree Utilities Sample Connectivity Doctor screen The Connectivity Doctor screen automatically refreshes. Detailed information about each device, such as the driver version number and the status, are connected to refresh the screen. However, you can also use the Refresh button to the network.
211 Using ConfigFree™ with infrared) devices that are also displayed. Device Settings The Device Settings screen displays a list of all wired, wireless, and infrared (for systems with your Toshiba Computer ConfigFree Utilities Sample Connectivity Doctor screen The Connectivity Doctor screen automatically refreshes. Detailed information about each device, such as the driver version number and the status, are connected to refresh the screen. However, you can also use the Refresh button to the network.

User Guide
Page 226
... crystal display (LCD)-A type of pixels is refreshed. A filter over a relatively limited area and connected by a communications link that provides electronic mail, the World Wide Web, and other line of display that represents a function, file, or program. I icon-A small image displayed on the network. Internet-The decentralized, world-wide network of using a pointing device such as a hard disk) into the processor to add or remove devices...
... crystal display (LCD)-A type of pixels is refreshed. A filter over a relatively limited area and connected by a communications link that provides electronic mail, the World Wide Web, and other line of display that represents a function, file, or program. I icon-A small image displayed on the network. Internet-The decentralized, world-wide network of using a pointing device such as a hard disk) into the processor to add or remove devices...
User Guide
Page 233
... 92 to a network 92 connecting to a power source 47 connection set up 133 conserving battery power 113 Contents CDs 88 DVDs 88 control buttons 53 critical applications 2 Ctrl keys 73 D desktop creating new icon 128 major features 128 desktop exploration 127 desktop icons 128 Device Manager 178 checking properties 179 disabling a device 178, 179 devices keyboard 61 mouse 61 dial-up connection 92 Dial-Up Networking Wizard 92 Disk Defragmenter 185 disk drive corrupted/damaged...
... 92 to a network 92 connecting to a power source 47 connection set up 133 conserving battery power 113 Contents CDs 88 DVDs 88 control buttons 53 critical applications 2 Ctrl keys 73 D desktop creating new icon 128 major features 128 desktop exploration 127 desktop icons 128 Device Manager 178 checking properties 179 disabling a device 178, 179 devices keyboard 61 mouse 61 dial-up connection 92 Dial-Up Networking Wizard 92 Disk Defragmenter 185 disk drive corrupted/damaged...
User Guide
Page 234
... normal/flickers 183 external monitor not working 184 latch 51 screen is blank 182 display device connecting 66 external 65 video 65 display modes hot key 204 display output settings 68 display panel closing 65 opening 51 display, external adjusting 69 disposal information 24 disposing of used batteries 119 DMA (Direct Memory Access) 177 double-click 53 DVD-ROM drive problems 187 removing a disc 88 troubleshooting 179 DVD-ROM or multi-function drive can't access disc 187 inserting discs 87 removing 88 DVD-ROM/multi-function drive drive tray will not open 187 problems 187 troubleshooting 179...
... normal/flickers 183 external monitor not working 184 latch 51 screen is blank 182 display device connecting 66 external 65 video 65 display modes hot key 204 display output settings 68 display panel closing 65 opening 51 display, external adjusting 69 disposal information 24 disposing of used batteries 119 DMA (Direct Memory Access) 177 double-click 53 DVD-ROM drive problems 187 removing a disc 88 troubleshooting 179 DVD-ROM or multi-function drive can't access disc 187 inserting discs 87 removing 88 DVD-ROM/multi-function drive drive tray will not open 187 problems 187 troubleshooting 179...
User Guide
Page 236
... 192 resetting port to default settings 131 upgrading 131 using 92 module memory 57 Wi-Fi Mini PC 152 monitor 65 connecting 66, 67 external connecting 122 not working 183 mouse installing 61 serial 61 using 122 N network 159 accessing 132 connecting to 92 dial-up connection 92 Dial-Up Networking Wizard 132 networking wireless 132 O office computing 121 optional devices 121 other documentation 36 overlay keys 74 P password deleting a supervisor 169 disabling a user 167 supervisor set up 168 passwords instant, using 166 setting user...
... 192 resetting port to default settings 131 upgrading 131 using 92 module memory 57 Wi-Fi Mini PC 152 monitor 65 connecting 66, 67 external connecting 122 not working 183 mouse installing 61 serial 61 using 122 N network 159 accessing 132 connecting to 92 dial-up connection 92 Dial-Up Networking Wizard 132 networking wireless 132 O office computing 121 optional devices 121 other documentation 36 overlay keys 74 P password deleting a supervisor 169 disabling a user 167 supervisor set up 168 passwords instant, using 166 setting user...


