User Guide
Page 21
...keyboard 74 Function keys 75 Special Windows® keys 76 Mouse properties 76 Starting an app 77 Starting an app from the Start screen 77 Saving your work 78 Backing up your work 78 Using the optical disc drive 78 Optical disc drive components 79 Media control buttons...with the computer on 81 Playing optical media 81 Recording optical media 82 Removing a disc with the computer off 82 Toshiba's online resources 83 Chapter 3: Mobile Computing 84 Toshiba's energy-saver design 84 Running the computer on battery power 84 Battery Notice 85 Power management 86 Charging the main ...
...keyboard 74 Function keys 75 Special Windows® keys 76 Mouse properties 76 Starting an app 77 Starting an app from the Start screen 77 Saving your work 78 Backing up your work 78 Using the optical disc drive 78 Optical disc drive components 79 Media control buttons...with the computer on 81 Playing optical media 81 Recording optical media 82 Removing a disc with the computer off 82 Toshiba's online resources 83 Chapter 3: Mobile Computing 84 Toshiba's energy-saver design 84 Running the computer on battery power 84 Battery Notice 85 Power management 86 Charging the main ...
User Guide
Page 22
... 97 Safety precautions 97 Maintaining your battery 98 Disposing of used batteries 98 Traveling tips 99 Chapter 4: Exploring Your Computer's Features 100 Exploring the Start screen 100 Charms 101 Tiles 102 Exploring the desktop 102 Finding your way around the desktop 102 Windows® Store 104 Setting up for communications 104...
... 97 Safety precautions 97 Maintaining your battery 98 Disposing of used batteries 98 Traveling tips 99 Chapter 4: Exploring Your Computer's Features 100 Exploring the Start screen 100 Charms 101 Tiles 102 Exploring the desktop 102 Finding your way around the desktop 102 Windows® Store 104 Setting up for communications 104...

User Guide
Page 31
... surface that are straight when typing. Computer user comfort recommendations Good Working Posture ❖ Adjust your chair height: your feet should be flat on the screen is clear. If your feet cannot reach the floor, use frequently. ❖ Adjust the chair back rest: it should match the curve of your shoulders...
... surface that are straight when typing. Computer user comfort recommendations Good Working Posture ❖ Adjust your chair height: your feet should be flat on the screen is clear. If your feet cannot reach the floor, use frequently. ❖ Adjust the chair back rest: it should match the curve of your shoulders...
User Guide
Page 32
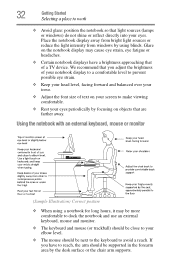
... to the keyboard to avoid a reach. Glare on objects that are farther away. We recommend that you have a brightness approaching that of text on your screen to make viewing comfortable. ❖ Rest your eyes. Using the notebook with an external keyboard, mouse or monitor (Sample Illustration) Correct posture ❖ When using...
... to the keyboard to avoid a reach. Glare on objects that are farther away. We recommend that you have a brightness approaching that of text on your screen to make viewing comfortable. ❖ Rest your eyes. Using the notebook with an external keyboard, mouse or monitor (Sample Illustration) Correct posture ❖ When using...
User Guide
Page 41
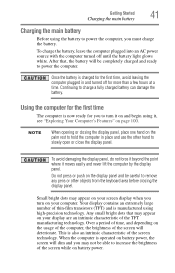
... moves easily and never lift the computer by the display panel. Do not press or push on your display are an intrinsic characteristic of the screen will be completely charged and ready to power the computer, you may not be careful to slowly open or close the display panel. Small bright... use the other hand to remove any pens or other objects from the keyboard area before closing the display panel, place one hand on your screen display when you to turn on the palm rest to hold the computer in and turned off until the battery light glows white. To avoid...
... moves easily and never lift the computer by the display panel. Do not press or push on your display are an intrinsic characteristic of the screen will be completely charged and ready to power the computer, you may not be careful to slowly open or close the display panel. Small bright... use the other hand to remove any pens or other objects from the keyboard area before closing the display panel, place one hand on your screen display when you to turn on the palm rest to hold the computer in and turned off until the battery light glows white. To avoid...
User Guide
Page 42
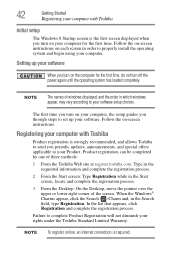
..., the setup guides you through steps to set up your software When you turn on -screen instructions. Registering your computer with Toshiba Initial setup The Windows 8 Startup screen is the first screen displayed when you turn on your computer for the first time, do not turn off the...the pointer over the upper or lower right corner of three methods: 1 From the Toshiba Web site at register.toshiba.com: Type in the requested information and complete the registration process. 2 From the Start screen: Type Registration while in the Search field, type Registration. NOTE To register online,...
..., the setup guides you through steps to set up your software When you turn on -screen instructions. Registering your computer with Toshiba Initial setup The Windows 8 Startup screen is the first screen displayed when you turn on your computer for the first time, do not turn off the...the pointer over the upper or lower right corner of three methods: 1 From the Toshiba Web site at register.toshiba.com: Type in the requested information and complete the registration process. 2 From the Start screen: Type Registration while in the Search field, type Registration. NOTE To register online,...
User Guide
Page 43
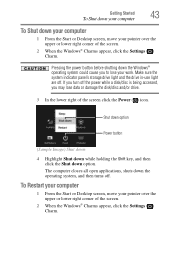
Pressing the power button before shutting down your computer 1 From the Start or Desktop screen, move your work. The computer closes all open applications, shuts down option. Shut down option...power while a disk/disc is being accessed, you to lose your pointer over the upper or lower right corner of the screen. 2 When the Windows® Charms appear, click the Settings ( ) Charm. Getting Started 43 To Shut down your ... damage the disk/disc and/or drive. 3 In the lower right of the screen click the Power ( ) icon. If you turn off . To Restart your computer 1 From the Start or Desktop...
Pressing the power button before shutting down your computer 1 From the Start or Desktop screen, move your work. The computer closes all open applications, shuts down option. Shut down option...power while a disk/disc is being accessed, you to lose your pointer over the upper or lower right corner of the screen. 2 When the Windows® Charms appear, click the Settings ( ) Charm. Getting Started 43 To Shut down your ... damage the disk/disc and/or drive. 3 In the lower right of the screen click the Power ( ) icon. If you turn off . To Restart your computer 1 From the Start or Desktop...

User Guide
Page 44
...and restarts the operating system. Sleep mode saves the current state of the computer to save your work first. 3 In the lower right of the screen click the Power ( ) icon. If you left off. 44 Getting Started To place your computer in Sleep mode 1 From the Start or Desktop... screen, move your pointer over the upper or lower right corner of the screen. 2 When the Windows® Charms appear, click the Settings ( ) Charm. Restart option Power button (Sample Image) Restart 4 Highlight...
...and restarts the operating system. Sleep mode saves the current state of the computer to save your work first. 3 In the lower right of the screen click the Power ( ) icon. If you left off. 44 Getting Started To place your computer in Sleep mode 1 From the Start or Desktop... screen, move your pointer over the upper or lower right corner of the screen. 2 When the Windows® Charms appear, click the Settings ( ) Charm. Restart option Power button (Sample Image) Restart 4 Highlight...
User Guide
Page 46
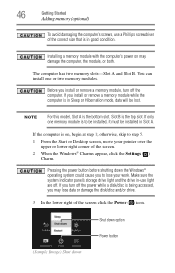
... install or remove a memory module while the computer is in Sleep or Hibernation mode, data will be installed in -use a Phillips screwdriver of the screen. 2 When the Windows® Charms appear, click the Settings ( ) Charm. If only one or two memory modules. If the computer is the... module with the computer's power on , begin at step 1; NOTE For this model, Slot A is to step 5. 1 From the Start or Desktop screen, move your work. Pressing the power button before shutting down option Power button 46 Getting Started Adding memory (optional) To avoid damaging the computer's screws...
... install or remove a memory module while the computer is in Sleep or Hibernation mode, data will be installed in -use a Phillips screwdriver of the screen. 2 When the Windows® Charms appear, click the Settings ( ) Charm. If only one or two memory modules. If the computer is the... module with the computer's power on , begin at step 1; NOTE For this model, Slot A is to step 5. 1 From the Start or Desktop screen, move your work. Pressing the power button before shutting down option Power button 46 Getting Started Adding memory (optional) To avoid damaging the computer's screws...
User Guide
Page 53
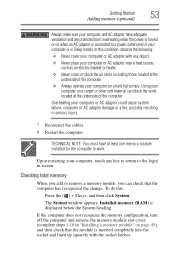
... have adequate ventilation and are protected from overheating when the power is turned on or when an AC adaptor is connected to the login in screen. Checking total memory When you add or remove a memory module, you can block the vents located at the underside of the computer. ❖ Always operate...
... have adequate ventilation and are protected from overheating when the power is turned on or when an AC adaptor is connected to the login in screen. Checking total memory When you add or remove a memory module, you can block the vents located at the underside of the computer. ❖ Always operate...
User Guide
Page 55
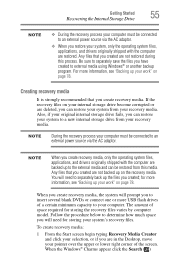
... connect one or more information, see "Backing up to the external media and can be restored from this process. The amount of the screen. Also, if your original internal storage drive fails, you are not restored during this media. Follow the procedure below to determine how much... files varies by computer model. When the Windows® Charms appear click the Search ( ) To create recovery media: 1 From the Start screen begin typing Recovery Media Creator and click your selection, or if you can restore your system from your recovery media. Be sure to separately save...
... connect one or more information, see "Backing up to the external media and can be restored from this process. The amount of the screen. Also, if your original internal storage drive fails, you are not restored during this media. Follow the procedure below to determine how much... files varies by computer model. When the Windows® Charms appear click the Search ( ) To create recovery media: 1 From the Start screen begin typing Recovery Media Creator and click your selection, or if you can restore your system from your recovery media. Be sure to separately save...
User Guide
Page 57
... off. 2 Do one of 3," etc.), so that you have created recovery media for example, "1 of 3," "2 of the following: ❖ If your recovery files are on -screen prompts to insert the discs during this process.
... off. 2 Do one of 3," etc.), so that you have created recovery media for example, "1 of 3," "2 of the following: ❖ If your recovery files are on -screen prompts to insert the discs during this process.
User Guide
Page 58
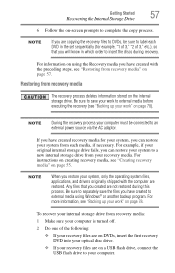
... power button. Click Yes to continue. 6 Follow the on your internal storage drive will be retained. 1 From the Start or Desktop screen, move your internal storage drive to factory default state and attempts to complete the recovery process. Refresh your PC (with user's data) Using... TECHNICAL NOTE: Your data will be deleted and rewritten. When the process is executed all data on -screen instructions to save your data. Toshiba does not guarantee successful data back-up of the screen. 2 When the Windows® Charms appear click the Settings ( ) Charm. Please make a complete back...
... power button. Click Yes to continue. 6 Follow the on your internal storage drive will be retained. 1 From the Start or Desktop screen, move your internal storage drive to factory default state and attempts to complete the recovery process. Refresh your PC (with user's data) Using... TECHNICAL NOTE: Your data will be deleted and rewritten. When the process is executed all data on -screen instructions to save your data. Toshiba does not guarantee successful data back-up of the screen. 2 When the Windows® Charms appear click the Settings ( ) Charm. Please make a complete back...
User Guide
Page 59
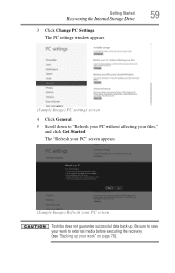
The PC settings window appears. (Sample Image) PC settings screen 4 Click General. 5 Scroll down to "Refresh your PC without affecting your work " on page 78). Getting Started 59 Recovering the Internal Storage Drive 3 Click Change PC Settings. The "Refresh your PC" screen appears. (Sample Image) Refresh your PC screen Toshiba does not guarantee successful data back up your work to save your files," and click Get Started. Be sure to external media before executing the recovery (see "Backing up .
The PC settings window appears. (Sample Image) PC settings screen 4 Click General. 5 Scroll down to "Refresh your PC without affecting your work " on page 78). Getting Started 59 Recovering the Internal Storage Drive 3 Click Change PC Settings. The "Refresh your PC" screen appears. (Sample Image) Refresh your PC screen Toshiba does not guarantee successful data back up your work to save your files," and click Get Started. Be sure to external media before executing the recovery (see "Backing up .
User Guide
Page 60
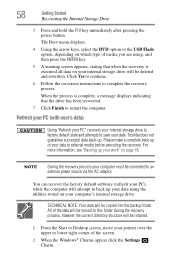
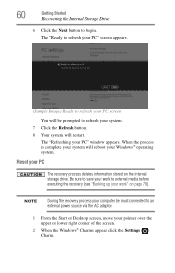
.... 7 Click the Refresh button. 8 Your system will reboot your PC" window appears. Reset your pointer over the upper or lower right corner of the screen. 2 When the Windows® Charms appear click the Settings ( ) Charm. When the process is complete your system will restart. Be sure to save ...your work to an external power source via the AC adaptor. 1 From the Start or Desktop screen, move your PC The recovery process deletes information stored on page 78). NOTE During the recovery process your computer be prompted to begin. 60...
.... 7 Click the Refresh button. 8 Your system will reboot your PC" window appears. Reset your pointer over the upper or lower right corner of the screen. 2 When the Windows® Charms appear click the Settings ( ) Charm. When the process is complete your system will restart. Be sure to save ...your work to an external power source via the AC adaptor. 1 From the Start or Desktop screen, move your PC The recovery process deletes information stored on page 78). NOTE During the recovery process your computer be prompted to begin. 60...

User Guide
Page 61
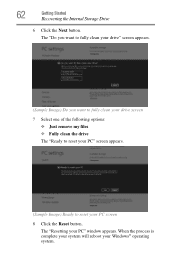
The "Reset your PC" screen appears. (Sample Image) Reset your PC screen Getting Started 61 Recovering the Internal Storage Drive 3 Click Change PC Settings. The PC settings window appears. (Sample Image) PC settings screen 4 Click General. 5 Scroll down to "Remove everything and reinstall Windows," and click Get Started.
The "Reset your PC" screen appears. (Sample Image) Reset your PC screen Getting Started 61 Recovering the Internal Storage Drive 3 Click Change PC Settings. The PC settings window appears. (Sample Image) PC settings screen 4 Click General. 5 Scroll down to "Remove everything and reinstall Windows," and click Get Started.
User Guide
Page 62
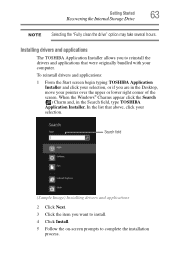
When the process is complete your system will reboot your PC" window appears. The "Resetting your Windows® operating system. 62 Getting Started Recovering the Internal Storage Drive 6 Click the Next button. The "Do you want to fully clean your drive" screen appears. (Sample Image) Do you want to fully clean your drive screen 7 Select one of the following options: ❖ Just remove my files ❖ Fully clean the drive The "Ready to reset your PC" screen appears. (Sample Image) Ready to reset your PC screen 8 Click the Reset button.
When the process is complete your system will reboot your PC" window appears. The "Resetting your Windows® operating system. 62 Getting Started Recovering the Internal Storage Drive 6 Click the Next button. The "Do you want to fully clean your drive" screen appears. (Sample Image) Do you want to fully clean your drive screen 7 Select one of the following options: ❖ Just remove my files ❖ Fully clean the drive The "Ready to reset your PC" screen appears. (Sample Image) Ready to reset your PC screen 8 Click the Reset button.
User Guide
Page 63
.... 3 Click the item you are in the Search field, type TOSHIBA Application Installer. To reinstall drivers and applications: 1 From the Start screen begin typing TOSHIBA Application Installer and click your selection, or if you want to install. 4 Click Install. 5 Follow the on-screen prompts to reinstall the drivers and applications that above, click your...
.... 3 Click the item you are in the Search field, type TOSHIBA Application Installer. To reinstall drivers and applications: 1 From the Start screen begin typing TOSHIBA Application Installer and click your selection, or if you want to install. 4 Click Install. 5 Follow the on-screen prompts to reinstall the drivers and applications that above, click your...
User Guide
Page 64
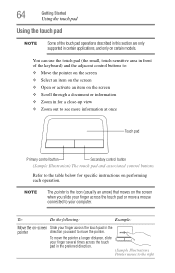
... the touch pad in certain applications, and only on performing each operation. NOTE The pointer is the icon (usually an arrow) that moves on the screen ❖ Scroll through a document or information ❖ Zoom in the pointer direction you slide your finger across the touch pad in for a close-...and associated control buttons Refer to your finger across the touch pad or move the pointer. To: Do the following: Example: Move the on-screen Slide your computer. You can use the touch pad (the small, touch-sensitive area in front of the touch pad operations described in this ...
... the touch pad in certain applications, and only on performing each operation. NOTE The pointer is the icon (usually an arrow) that moves on the screen ❖ Scroll through a document or information ❖ Zoom in the pointer direction you slide your finger across the touch pad in for a close-...and associated control buttons Refer to your finger across the touch pad or move the pointer. To: Do the following: Example: Move the on-screen Slide your computer. You can use the touch pad (the small, touch-sensitive area in front of the touch pad operations described in this ...
User Guide
Page 66
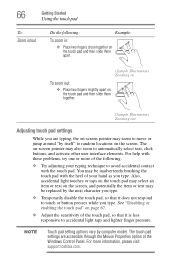
... disable the touch pad, so that it does not respond to avoid accidental contact with these problems, try one or more information, please visit support.toshiba.com. For more of the following : Example: To zoom in: ❖ Place two fingers close together on the touch pad and then slide ...it is less responsive to automatically select text, click buttons, and activate other user interface elements. The touch pad settings are typing, the on-screen pointer may also seem to accidental light taps and lighter finger pressure. 66 Getting Started Using the touch pad To: Zoom in/out Do ...
... disable the touch pad, so that it does not respond to avoid accidental contact with these problems, try one or more information, please visit support.toshiba.com. For more of the following : Example: To zoom in: ❖ Place two fingers close together on the touch pad and then slide ...it is less responsive to automatically select text, click buttons, and activate other user interface elements. The touch pad settings are typing, the on-screen pointer may also seem to accidental light taps and lighter finger pressure. 66 Getting Started Using the touch pad To: Zoom in/out Do ...


