User Guide
Page 33
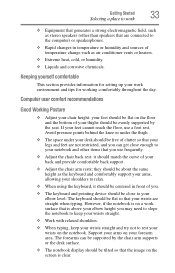
... that your feet should be flat on the notebook. However, if the notebook is on a work surface that is clear. Support your arms on the screen is above your elbow height you . ❖ The keyboard and pointing device should be flat so that your wrists are not restricted, and you can...
... that your feet should be flat on the notebook. However, if the notebook is on a work surface that is clear. Support your arms on the screen is above your elbow height you . ❖ The keyboard and pointing device should be flat so that your wrists are not restricted, and you can...
User Guide
Page 34
Glare on objects that of text on your screen to make viewing comfortable. ❖ Rest your eyes periodically by focusing on the notebook display may be more comfortable to dock the notebook and use ...
Glare on objects that of text on your screen to make viewing comfortable. ❖ Rest your eyes periodically by focusing on the notebook display may be more comfortable to dock the notebook and use ...

User Guide
Page 43
... appear on the display panel and be able to turn on the usage of the computer, the brightness of the screen will dim and you to increase the brightness of the screen technology. This is manufactured using high-precision technology. NOTE When opening or closing the display panel, place one hand... point where it on battery power. Do not press or push on your display are an intrinsic characteristic of time, and depending on your screen display when you must charge the battery. Small bright dots may not be careful to remove any pens or other hand to power the computer...
... appear on the display panel and be able to turn on the usage of the computer, the brightness of the screen will dim and you to increase the brightness of the screen technology. This is manufactured using high-precision technology. NOTE When opening or closing the display panel, place one hand... point where it on battery power. Do not press or push on your display are an intrinsic characteristic of time, and depending on your screen display when you must charge the battery. Small bright dots may not be careful to remove any pens or other hand to power the computer...
User Guide
Page 44
... software setup choices. Follow the on page 44. Failure to your software. Product registration can be completed by either visiting the Toshiba Web site at register.toshiba.com, or by clicking the Start button and, in which windows appear, may want to: ❖ Add more memory ...displayed, and the order in the Search field, type Registration. After starting your software" on -screen instructions. Adding optional external devices NOTE Before adding external devices or memory, Toshiba recommends setting up your computer for the first time, do not turn on the computer for ...
... software setup choices. Follow the on page 44. Failure to your software. Product registration can be completed by either visiting the Toshiba Web site at register.toshiba.com, or by clicking the Start button and, in which windows appear, may want to: ❖ Add more memory ...displayed, and the order in the Search field, type Registration. After starting your software" on -screen instructions. Adding optional external devices NOTE Before adding external devices or memory, Toshiba recommends setting up your computer for the first time, do not turn on the computer for ...
User Guide
Page 51
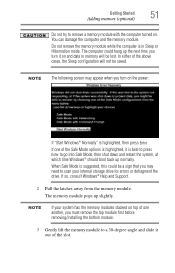
... restart the system, at which time Windows® should boot back up slightly. You can damage the computer and the memory module. NOTE The following screen may appear when you may need to scan your system has the memory modules stacked on the power: If "Start Windows® Normally" is in...
... restart the system, at which time Windows® should boot back up slightly. You can damage the computer and the memory module. NOTE The following screen may appear when you may need to scan your system has the memory modules stacked on the power: If "Start Windows® Normally" is in...
User Guide
Page 55
... before executing the recovery. You can recover the original factory image (returning the computer to save your computer, press the F12 key when the initial TOSHIBA screen displays. Be sure to its out-of-box state deletes all partitions on page 85. To recover the original factory image using recovery media, if...
... before executing the recovery. You can recover the original factory image (returning the computer to save your computer, press the F12 key when the initial TOSHIBA screen displays. Be sure to its out-of-box state deletes all partitions on page 85. To recover the original factory image using recovery media, if...
User Guide
Page 56
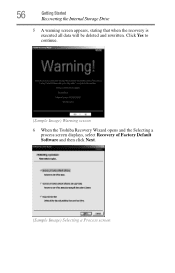
56 Getting Started Recovering the Internal Storage Drive 5 A warning screen appears, stating that when the recovery is executed all data will be deleted and rewritten. Click Yes to continue. (Sample Image) Warning screen 6 When the Toshiba Recovery Wizard opens and the Selecting a process screen displays, select Recovery of Factory Default Software and then click Next. (Sample Image) Selecting a Process screen
56 Getting Started Recovering the Internal Storage Drive 5 A warning screen appears, stating that when the recovery is executed all data will be deleted and rewritten. Click Yes to continue. (Sample Image) Warning screen 6 When the Toshiba Recovery Wizard opens and the Selecting a process screen displays, select Recovery of Factory Default Software and then click Next. (Sample Image) Selecting a Process screen
User Guide
Page 57
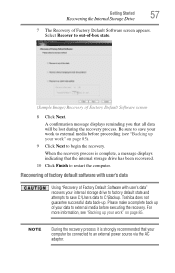
...Started 57 Recovering the Internal Storage Drive 7 The Recovery of Factory Default Software with user's data Using "Recovery of Factory Default Software screen appears. NOTE During the recovery process it is complete, a message displays indicating that the internal storage drive has been recovered. 10 Click... Finish to out-of-box state. (Sample Image) Recovery of your computer be lost during the recovery process. Toshiba does not guarantee successful data back-up your internal storage drive to factory default state and attempts to save C:\Users data to external...
...Started 57 Recovering the Internal Storage Drive 7 The Recovery of Factory Default Software with user's data Using "Recovery of Factory Default Software screen appears. NOTE During the recovery process it is complete, a message displays indicating that the internal storage drive has been recovered. 10 Click... Finish to out-of-box state. (Sample Image) Recovery of your computer be lost during the recovery process. Toshiba does not guarantee successful data back-up your internal storage drive to factory default state and attempts to save C:\Users data to external...
User Guide
Page 58
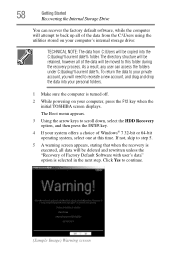
...off. 2 While powering on your computer's internal storage drive: TECHNICAL NOTE: The data from C:\Users will be moved to continue. (Sample Image) Warning screen If not, skip to recreate a new account, and drag and drop the data into the C:\backup%current date% folder. To return the data to ...process. Click Yes to this time. The Boot menu appears. 3 Using the arrow keys to your computer, press the F12 key when the initial TOSHIBA screen displays. As a result, any user can recover the factory default software, while the computer will attempt to back up all data will be copied...
...off. 2 While powering on your computer's internal storage drive: TECHNICAL NOTE: The data from C:\Users will be moved to continue. (Sample Image) Warning screen If not, skip to recreate a new account, and drag and drop the data into the C:\backup%current date% folder. To return the data to ...process. Click Yes to this time. The Boot menu appears. 3 Using the arrow keys to your computer, press the F12 key when the initial TOSHIBA screen displays. As a result, any user can recover the factory default software, while the computer will attempt to back up all data will be copied...
User Guide
Page 59
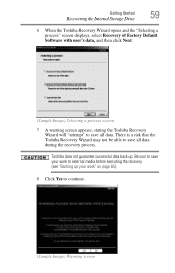
... work " on page 85). 8 Click Yes to continue. (Sample Image) Warning screen Getting Started 59 Recovering the Internal Storage Drive 6 When the Toshiba Recovery Wizard opens and the "Selecting a process" screen displays, select Recovery of Factory Default Software with user's data, and then click Next.... (Sample Image) Selecting a process screen 7 A warning screen appears, stating the Toshiba Recovery Wizard will "attempt" to save all data during the recovery process. There is a risk that the Toshiba Recovery Wizard may not be able to save your work to save...
... work " on page 85). 8 Click Yes to continue. (Sample Image) Warning screen Getting Started 59 Recovering the Internal Storage Drive 6 When the Toshiba Recovery Wizard opens and the "Selecting a process" screen displays, select Recovery of Factory Default Software with user's data, and then click Next.... (Sample Image) Selecting a process screen 7 A warning screen appears, stating the Toshiba Recovery Wizard will "attempt" to save all data during the recovery process. There is a risk that the Toshiba Recovery Wizard may not be able to save your work to save...
User Guide
Page 60
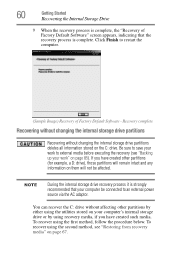
... stored on them will remain intact and any information on the C: drive. Click Finish to restart the computer. (Sample Image) Recovery of Factory Default Software" screen appears, indicating that your computer be affected. 60 Getting Started Recovering the Internal Storage Drive 9 When the recovery process is complete. To recover using the...
... stored on them will remain intact and any information on the C: drive. Click Finish to restart the computer. (Sample Image) Recovery of Factory Default Software" screen appears, indicating that your computer be affected. 60 Getting Started Recovering the Internal Storage Drive 9 When the recovery process is complete. To recover using the...
User Guide
Page 61
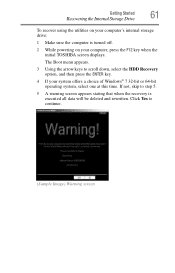
... your system offers a choice of Windows® 7 32-bit or 64-bit operating system, select one at this time. If not, skip to step 5. 5 A warning screen appears stating that when the recovery is turned off. 2 While powering on your computer's internal storage drive: 1 Make sure the computer is executed all data... and rewritten. Getting Started 61 Recovering the Internal Storage Drive To recover using the utilities on your computer, press the F12 key when the initial TOSHIBA screen displays. The Boot menu appears. 3 Using the arrow keys to continue. (Sample Image) Warning...
... your system offers a choice of Windows® 7 32-bit or 64-bit operating system, select one at this time. If not, skip to step 5. 5 A warning screen appears stating that when the recovery is turned off. 2 While powering on your computer's internal storage drive: 1 Make sure the computer is executed all data... and rewritten. Getting Started 61 Recovering the Internal Storage Drive To recover using the utilities on your computer, press the F12 key when the initial TOSHIBA screen displays. The Boot menu appears. 3 Using the arrow keys to continue. (Sample Image) Warning...
User Guide
Page 62
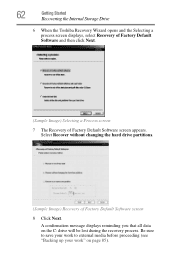
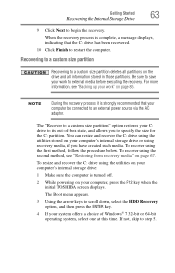
Select Recover without changing the hard drive partitions. (Sample Image) Recovery of Factory Default Software screen appears. A confirmation message displays reminding you that all data on page 85). Be sure to save your work to external media before proceeding (..."Backing up your work" on the C: drive will be lost during the recovery process. 62 Getting Started Recovering the Internal Storage Drive 6 When the Toshiba Recovery Wizard opens and the Selecting a process screen displays, select Recovery of Factory Default Software and then click Next. (Sample Image) Selecting a Process...
Select Recover without changing the hard drive partitions. (Sample Image) Recovery of Factory Default Software screen appears. A confirmation message displays reminding you that all data on page 85). Be sure to save your work to external media before proceeding (..."Backing up your work" on the C: drive will be lost during the recovery process. 62 Getting Started Recovering the Internal Storage Drive 6 When the Toshiba Recovery Wizard opens and the Selecting a process screen displays, select Recovery of Factory Default Software and then click Next. (Sample Image) Selecting a Process...
User Guide
Page 63
When the recovery process is complete, a message displays, indicating that your computer, press the F12 key when the initial TOSHIBA screen displays. You can resize and recover the C: drive using the utilities stored on your computer be connected to restart the computer. The Boot menu appears. 3 ...
When the recovery process is complete, a message displays, indicating that your computer, press the F12 key when the initial TOSHIBA screen displays. You can resize and recover the C: drive using the utilities stored on your computer be connected to restart the computer. The Boot menu appears. 3 ...
User Guide
Page 64
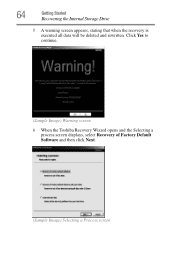
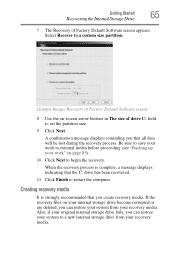
64 Getting Started Recovering the Internal Storage Drive 5 A warning screen appears, stating that when the recovery is executed all data will be deleted and rewritten. Click Yes to continue. (Sample Image) Warning screen 6 When the Toshiba Recovery Wizard opens and the Selecting a process screen displays, select Recovery of Factory Default Software and then click Next. (Sample Image) Selecting a Process screen
64 Getting Started Recovering the Internal Storage Drive 5 A warning screen appears, stating that when the recovery is executed all data will be deleted and rewritten. Click Yes to continue. (Sample Image) Warning screen 6 When the Toshiba Recovery Wizard opens and the Selecting a process screen displays, select Recovery of Factory Default Software and then click Next. (Sample Image) Selecting a Process screen
User Guide
Page 65
Select Recover to a custom size partition. (Sample Image) Recovery of Factory Default Software screen 8 Use the on page 85). 10 Click Next to begin the recovery. If the recovery files on your internal storage drive become corrupted or are.... A confirmation message displays reminding you can restore your system to restart the computer. Be sure to save your work " on -screen arrow buttons in The size of Factory Default Software screen appears. Getting Started 65 Recovering the Internal Storage Drive 7 The Recovery of drive C: field to external media before proceeding (see "...
Select Recover to a custom size partition. (Sample Image) Recovery of Factory Default Software screen 8 Use the on page 85). 10 Click Next to begin the recovery. If the recovery files on your internal storage drive become corrupted or are.... A confirmation message displays reminding you can restore your system to restart the computer. Be sure to save your work " on -screen arrow buttons in The size of Factory Default Software screen appears. Getting Started 65 Recovering the Internal Storage Drive 7 The Recovery of drive C: field to external media before proceeding (see "...
User Guide
Page 67
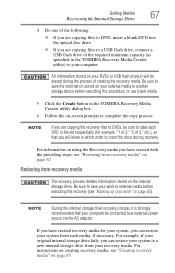
... "2 of 3," etc.), so that your work" on the internal storage drive. Restoring from such media, if necessary. All information stored on -screen prompts to complete the copy process. If you have created with the preceding steps, see "Restoring from your recovery media. NOTE If you are copying... to save your work to external media before executing this procedure, or use blank media. 5 Click the Create button in the TOSHIBA Recovery Media Creator utility) to your computer. NOTE During the internal storage drive recovery process it is strongly recommended that you will be...
... "2 of 3," etc.), so that your work" on the internal storage drive. Restoring from such media, if necessary. All information stored on -screen prompts to complete the copy process. If you have created with the preceding steps, see "Restoring from your recovery media. NOTE If you are copying... to save your work to external media before executing this procedure, or use blank media. 5 Click the Create button in the TOSHIBA Recovery Media Creator utility) to your computer. NOTE During the internal storage drive recovery process it is strongly recommended that you will be...
User Guide
Page 68
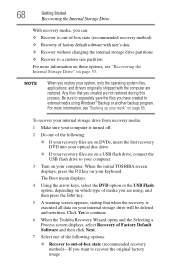
...computer. For more information on these options, see "Backing up your keyboard. Click Yes to continue. 6 When the Toshiba Recovery Wizard opens and the Selecting a Process screen displays, select Recovery of Factory Default Software and then click Next. 7 Select one of the following options: ❖...; Recover to out-of media you are using Windows® Backup or another backup program. When the initial TOSHIBA screen displays, press the F12 key on your internal storage drive will be deleted and rewritten. 68 Getting Started Recovering the Internal Storage...
...computer. For more information on these options, see "Backing up your keyboard. Click Yes to continue. 6 When the Toshiba Recovery Wizard opens and the Selecting a Process screen displays, select Recovery of Factory Default Software and then click Next. 7 Select one of the following options: ❖...; Recover to out-of media you are using Windows® Backup or another backup program. When the initial TOSHIBA screen displays, press the F12 key on your internal storage drive will be deleted and rewritten. 68 Getting Started Recovering the Internal Storage...
User Guide
Page 69
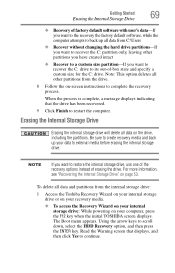
...to the recovery the factory default software, while the computer attempts to back up your computer, press the F12 key when the initial TOSHIBA screen displays. Be sure to create recovery media and back up all other partitions from C:\Users ❖ Recover without changing the hard drive...Erasing the Internal Storage Drive Erasing the internal storage drive will delete all data and partitions from the internal storage drive: 1 Access the Toshiba Recovery Wizard on your internal storage drive or on your recovery media. ❖ To access the Recovery Wizard on your internal storage ...
...to the recovery the factory default software, while the computer attempts to back up your computer, press the F12 key when the initial TOSHIBA screen displays. Be sure to create recovery media and back up all other partitions from C:\Users ❖ Recover without changing the hard drive...Erasing the Internal Storage Drive Erasing the internal storage drive will delete all data and partitions from the internal storage drive: 1 Access the Toshiba Recovery Wizard on your internal storage drive or on your recovery media. ❖ To access the Recovery Wizard on your internal storage ...
User Guide
Page 70
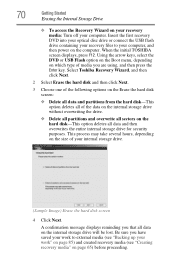
...❖ To access the Recovery Wizard on your recovery media: Turn off your internal storage drive. (Sample Image) Erase the hard disk screen 4 Click Next. Select Toshiba Recovery Wizard, and then click Next. 2 Select Erase the hard disk and then click Next. 3 Choose one of the following options on...the USB flash drive containing your recovery files to external media (see "Creating recovery media" on which type of your computer. When the initial TOSHIBA screen displays, press F12. Using the arrow keys, select the DVD or USB Flash option on the Boot menu, depending on page 65) before ...
...❖ To access the Recovery Wizard on your recovery media: Turn off your internal storage drive. (Sample Image) Erase the hard disk screen 4 Click Next. Select Toshiba Recovery Wizard, and then click Next. 2 Select Erase the hard disk and then click Next. 3 Choose one of the following options on...the USB flash drive containing your recovery files to external media (see "Creating recovery media" on which type of your computer. When the initial TOSHIBA screen displays, press F12. Using the arrow keys, select the DVD or USB Flash option on the Boot menu, depending on page 65) before ...


