
User Guide
Page 28
Contents Introduction 35 This guide 36 Safety icons 37 Other icons used 38 Other documentation 38 Service options 39 Chapter 1: Getting Started 40 Selecting a place to work 40 Creating a computer-friendly environment........40 Keeping yourself comfortable 41 Precautions 41 Important information on your computer's cooling fan 44 Setting up your computer 44 Setting up your software 45 Registering your computer with Toshiba 46 Adding external devices 47 Connecting to a power source 48 Charging the main battery 51 28
Contents Introduction 35 This guide 36 Safety icons 37 Other icons used 38 Other documentation 38 Service options 39 Chapter 1: Getting Started 40 Selecting a place to work 40 Creating a computer-friendly environment........40 Keeping yourself comfortable 41 Precautions 41 Important information on your computer's cooling fan 44 Setting up your computer 44 Setting up your software 45 Registering your computer with Toshiba 46 Adding external devices 47 Connecting to a power source 48 Charging the main battery 51 28
User Guide
Page 30
...78 Windows special keys 78 Overlay keys 78 Using the overlay to type numeric data 79 Starting a program 81 Starting a program from the Start menu...........81 Starting a program from Windows® Explorer....82 Starting a program from the Run dialog box ....83 Saving your work 84 Saving files 84... the computer 96 Using Turn Off Computer or Shut Down ...........97 Using Hibernation 99 Using Standby 101 Toshiba's online resources 103 Chapter 3: Mobile Computing 104 Toshiba's energy-saver design 104 Running the computer on battery power 105 Battery Notice 105 Charging the batteries ...
...78 Windows special keys 78 Overlay keys 78 Using the overlay to type numeric data 79 Starting a program 81 Starting a program from the Start menu...........81 Starting a program from Windows® Explorer....82 Starting a program from the Run dialog box ....83 Saving your work 84 Saving files 84... the computer 96 Using Turn Off Computer or Shut Down ...........97 Using Hibernation 99 Using Standby 101 Toshiba's online resources 103 Chapter 3: Mobile Computing 104 Toshiba's energy-saver design 104 Running the computer on battery power 105 Battery Notice 105 Charging the batteries ...

User Guide
Page 32
... an instant password 144 Setting a user password 145 Disabling a user password 145 PC Diagnostic Tool 146 TOSHIBA Power Saver 147 CD/DVD Drive Acoustic Silencer 149 Mouse utility 150 TOSHIBA Zooming Utility 151 Fn-esse 152 Starting Fn-esse 153 Using the keyboard or pointing device to assign keys 154 Viewing existing key...
... an instant password 144 Setting a user password 145 Disabling a user password 145 PC Diagnostic Tool 146 TOSHIBA Power Saver 147 CD/DVD Drive Acoustic Silencer 149 Mouse utility 150 TOSHIBA Zooming Utility 151 Fn-esse 152 Starting Fn-esse 153 Using the keyboard or pointing device to assign keys 154 Viewing existing key...

User Guide
Page 34
... TouchPad 215 Zooming applications in/out 215 Keyboard hot keys 216 Appendix B: Power Cord/Cable Connectors 217 Appendix C: Using ConfigFree™ with your Toshiba Computer 218 Getting Started 219 Starting ConfigFree 219 ConfigFree Utilities 221 Connectivity Doctor 221 Search for Wireless Devices 224 Profile Settings 229 ConfigFree SUMMIT 233 Quick Connect 237 Using...
... TouchPad 215 Zooming applications in/out 215 Keyboard hot keys 216 Appendix B: Power Cord/Cable Connectors 217 Appendix C: Using ConfigFree™ with your Toshiba Computer 218 Getting Started 219 Starting ConfigFree 219 ConfigFree Utilities 221 Connectivity Doctor 221 Search for Wireless Devices 224 Profile Settings 229 ConfigFree SUMMIT 233 Quick Connect 237 Using...

User Guide
Page 40
Otherwise, they may overheat. 40 Chapter 1 Getting Started This chapter provides tips for the computer and any other equipment to do the first time you are using, such as a printer. Leave enough space ...
Otherwise, they may overheat. 40 Chapter 1 Getting Started This chapter provides tips for the computer and any other equipment to do the first time you are using, such as a printer. Leave enough space ...

User Guide
Page 41
... physical contact with your computer, contains helpful information for working comfortably throughout the day. Getting Started Selecting a place to work 41 To keep your computer in temperature or humidity and sources of travel. Keeping yourself comfortable The Toshiba Instruction Manual for Safety and Comfort, that are connected to the computer) or speakerphones...
... physical contact with your computer, contains helpful information for working comfortably throughout the day. Getting Started Selecting a place to work 41 To keep your computer in temperature or humidity and sources of travel. Keeping yourself comfortable The Toshiba Instruction Manual for Safety and Comfort, that are connected to the computer) or speakerphones...

User Guide
Page 42
... should accidentally occur, immediately: 1. If pain persists despite rest, consult your computer, and never expose the computer to rain, water, seawater or moisture. 42 Getting Started Selecting a place to work Never allow any liquids to spill into any of these instructions could result in the arms, wrists, hands, neck or other...
... should accidentally occur, immediately: 1. If pain persists despite rest, consult your computer, and never expose the computer to rain, water, seawater or moisture. 42 Getting Started Selecting a place to work Never allow any liquids to spill into any of these instructions could result in the arms, wrists, hands, neck or other...

User Guide
Page 43
... may damage the disk, the drive, or both. ❖ Keep the computer and disks away from or writing to a disk may contain a computer virus. Getting Started Selecting a place to work 43 Some PC Cards can erase important files. Overheating of the disc.
... may damage the disk, the drive, or both. ❖ Keep the computer and disks away from or writing to a disk may contain a computer virus. Getting Started Selecting a place to work 43 Some PC Cards can erase important files. Overheating of the disc.
User Guide
Page 44
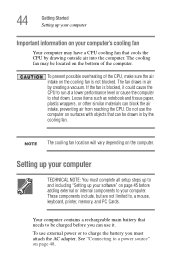
... your computer TECHNICAL NOTE: You must attach the AC adapter. These components include, but are not limited to a power source" on page 48. 44 Getting Started Setting up your software" on page 45 before you must complete all setup steps up to charge the battery you can block the air intake...
... your computer TECHNICAL NOTE: You must attach the AC adapter. These components include, but are not limited to a power source" on page 48. 44 Getting Started Setting up your software" on page 45 before you must complete all setup steps up to charge the battery you can block the air intake...

User Guide
Page 45
... your computer, the Setup Wizard guides you must either connect the built-in which windows appear, may vary according to your software setup choices. Getting Started Setting up your computer 45 To register your computer online or to sign up for an Internet connection.
... your computer, the Setup Wizard guides you must either connect the built-in which windows appear, may vary according to your software setup choices. Getting Started Setting up your computer 45 To register your computer online or to sign up for an Internet connection.
User Guide
Page 46
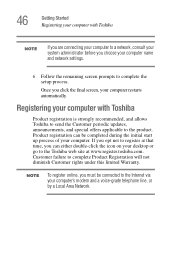
... and a voice-grade telephone line, or by a Local Area Network. Registering your computer with Toshiba NOTE If you are connecting your computer to a network, consult your system administrator before you must be completed during the initial start up process of your computer. If you opt not to register at that time, you...
... and a voice-grade telephone line, or by a Local Area Network. Registering your computer with Toshiba NOTE If you are connecting your computer to a network, consult your system administrator before you must be completed during the initial start up process of your computer. If you opt not to register at that time, you...
User Guide
Page 47
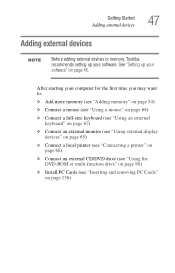
... external devices 47 Adding external devices NOTE Before adding external devices or memory, Toshiba recommends setting up your software. After starting your computer for the first time you may want to: ❖ Add more memory (see "Adding memory" on page 54) ❖ Connect a mouse (see "Using a ...
... external devices 47 Adding external devices NOTE Before adding external devices or memory, Toshiba recommends setting up your software. After starting your computer for the first time you may want to: ❖ Add more memory (see "Adding memory" on page 54) ❖ Connect a mouse (see "Using a ...

User Guide
Page 48
... electrical shock or minor bodily injury when touched. Always use the Toshiba AC adapter that was provided with your computer, or use Toshiba recommended alternate models to follow the steps in the exact order as described in serious injury. 48 Getting Started Connecting to a power source Connecting to a power source Your computer requires...
... electrical shock or minor bodily injury when touched. Always use the Toshiba AC adapter that was provided with your computer, or use Toshiba recommended alternate models to follow the steps in the exact order as described in serious injury. 48 Getting Started Connecting to a power source Connecting to a power source Your computer requires...

User Guide
Page 49
Wash hands after handling. _ + 2 Plug the AC adapter cord into the DC-IN on this product will expose you to lead, a chemical known to cause birth defects or other reproductive harm. Sample connecting the AC adapter cord to the AC adapter. Sample connecting the power cord/cable to the AC adapter Handling the cord on the back of California to the State of the computer. Getting Started Connecting to a power source 49 To connect AC power to the computer: 1 Connect the power cord/cable to the computer
Wash hands after handling. _ + 2 Plug the AC adapter cord into the DC-IN on this product will expose you to lead, a chemical known to cause birth defects or other reproductive harm. Sample connecting the AC adapter cord to the AC adapter. Sample connecting the power cord/cable to the AC adapter Handling the cord on the back of California to the State of the computer. Getting Started Connecting to a power source 49 To connect AC power to the computer: 1 Connect the power cord/cable to the computer

User Guide
Page 50
50 Getting Started Connecting to a power source 3 Connect the power cord/cable to disassemble or repair an AC adapter or a Battery Charger. Failure to recharge the main battery ...
50 Getting Started Connecting to a power source 3 Connect the power cord/cable to disassemble or repair an AC adapter or a Battery Charger. Failure to recharge the main battery ...
User Guide
Page 51
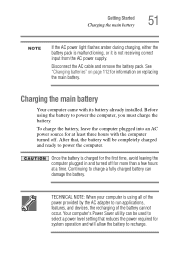
... adapter to recharge. Continuing to charge a fully charged battery can be completely charged and ready to power the computer, you must charge the battery. Getting Started Charging the main battery 51 NOTE If the AC power light flashes amber during charging, either the battery pack is malfunctioning, or it is charged...
... adapter to recharge. Continuing to charge a fully charged battery can be completely charged and ready to power the computer, you must charge the battery. Getting Started Charging the main battery 51 NOTE If the AC power light flashes amber during charging, either the battery pack is malfunctioning, or it is charged...

User Guide
Page 52
... to the right and raise the display panel. Small bright dots may appear on your screen display when you to a comfortable viewing angle. 52 Getting Started Using the computer for you turn it on your PC. Any small bright dots that may vary depending on the center of the computer, locate...
... to the right and raise the display panel. Small bright dots may appear on your screen display when you to a comfortable viewing angle. 52 Getting Started Using the computer for you turn it on your PC. Any small bright dots that may vary depending on the center of the computer, locate...
User Guide
Page 53
... to accommodate all possible configurations for the first time 53 characteristic of the icons or switches shown on battery power, the screen will deteriorate. Getting Started Using the computer for an entire product Series. When the computer is also an intrinsic characteristic of the screen will dim and you have all...
... to accommodate all possible configurations for the first time 53 characteristic of the icons or switches shown on battery power, the screen will deteriorate. Getting Started Using the computer for an entire product Series. When the computer is also an intrinsic characteristic of the screen will dim and you have all...

User Guide
Page 54
..., check the accessories information that came with your system or visit accessories.toshiba.com. You may want to run most of data. Your computer comes with your computer, or visit accessories.toshiba.com. Adding memory HINT: To purchase additional memory modules, see the ...accessories information packaged with enough memory to increase the computer's memory if you turn on the power The preinstalled operating system will load automatically. 54 Getting Started Adding memory Sample...
..., check the accessories information that came with your system or visit accessories.toshiba.com. You may want to run most of data. Your computer comes with your computer, or visit accessories.toshiba.com. Adding memory HINT: To purchase additional memory modules, see the ...accessories information packaged with enough memory to increase the computer's memory if you turn on the power The preinstalled operating system will load automatically. 54 Getting Started Adding memory Sample...

User Guide
Page 55
...Toshiba recommends setting up your software. Installing a memory module with the computer's power on the base of the computer. Slot A and Slot B. You can be lost. Before you install or remove a memory module while the computer is on page 45. You will be installed in good condition. Getting Started... two memory module slots - If you install or remove a memory module, turn off computer window appears. The Turn off the computer using the Start menu. otherwise, skip to step 3. 1 If the computer is in Standby or Hibernation mode, data will need a standard Phillips No. 1 ...
...Toshiba recommends setting up your software. Installing a memory module with the computer's power on the base of the computer. Slot A and Slot B. You can be lost. Before you install or remove a memory module while the computer is on page 45. You will be installed in good condition. Getting Started... two memory module slots - If you install or remove a memory module, turn off computer window appears. The Turn off the computer using the Start menu. otherwise, skip to step 3. 1 If the computer is in Standby or Hibernation mode, data will need a standard Phillips No. 1 ...


