User Manual
Page 40
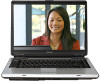
... Next. 4 Enter the computer name and description and click Next. 5 Click the appropriate option from the Help Protect Windows Automatically screen. 6 Follow the remaining screen prompts to your computer. To use it. NOTE The names of Microsoft's End User License Agreement and click Next. 3 Enter your... limited to your software When you must complete all setup steps up to and including "Setting up your software. 1 From the Welcome screen click Next to enter the Setup Wizard. 2 Confirm acceptance of windows displayed, and the order in which windows appear, may vary according...
... Next. 4 Enter the computer name and description and click Next. 5 Click the appropriate option from the Help Protect Windows Automatically screen. 6 Follow the remaining screen prompts to your computer. To use it. NOTE The names of Microsoft's End User License Agreement and click Next. 3 Enter your... limited to your software When you must complete all setup steps up to and including "Setting up your software. 1 From the Welcome screen click Next to enter the Setup Wizard. 2 Confirm acceptance of windows displayed, and the order in which windows appear, may vary according...
User Manual
Page 46
... Certain notebook chassis are properly connected and ready. 2 Check to ensure that may appear on the usage of the computer, the brightness of the screen will dim and you may not be able to increase the brightness of the icons or switches shown on the computer: 1 Make sure any external... power To turn on battery power. This information applies to all possible configurations for the first time Small bright dots may appear on your screen display when you turn on the notebook chassis, unless you have all the features and specifications corresponding to all those features.
... Certain notebook chassis are properly connected and ready. 2 Check to ensure that may appear on the usage of the computer, the brightness of the screen will dim and you may not be able to increase the brightness of the icons or switches shown on the computer: 1 Make sure any external... power To turn on battery power. This information applies to all possible configurations for the first time Small bright dots may appear on your screen display when you turn on the notebook chassis, unless you have all the features and specifications corresponding to all those features.
User Manual
Page 53
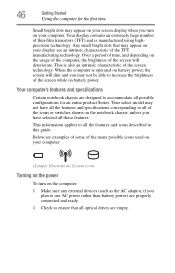
... time Windows® should boot back up slightly. You can damage the computer and the memory module. The memory module pops up normally. The following screen appears when you must remove the top module first before removing/installing the bottom module. In either of the above cases, the Sleep configuration will...
... time Windows® should boot back up slightly. You can damage the computer and the memory module. The memory module pops up normally. The following screen appears when you must remove the top module first before removing/installing the bottom module. In either of the above cases, the Sleep configuration will...
User Manual
Page 55
... or people from doing things on your computer without your cursor, you can check that says, "Windows® needs your finger several times across the screen often means having to move your permission to left side, slide your finger on the TouchPad in "Installing a memory module" on the TouchPad. ❖ To... page, drag your finger toward yourself. ❖ To move the cursor with the socket latches. NOTE Because the TouchPad is much smaller than the display screen, moving your cursor across the TouchPad in front of the keyboard, is displayed under Memory (RAM).
... or people from doing things on your computer without your cursor, you can check that says, "Windows® needs your finger several times across the screen often means having to move your permission to left side, slide your finger on the TouchPad in "Installing a memory module" on the TouchPad. ❖ To... page, drag your finger toward yourself. ❖ To move the cursor with the socket latches. NOTE Because the TouchPad is much smaller than the display screen, moving your cursor across the TouchPad in front of the keyboard, is displayed under Memory (RAM).
User Manual
Page 59
.... 2 While holding down Fn, press F5 repeatedly until the setting you want takes effect. Your computer will automatically detect the external display device and activate a screen with all local cable installation requirements that are connecting. Directing the display output when you turn on the external device. Getting Started Using external display... and the connection complies with display options. 4 Select the settings you desire and click Apply. 5 Then click OK. Briefly pause each time you need a larger screen.
.... 2 While holding down Fn, press F5 repeatedly until the setting you want takes effect. Your computer will automatically detect the external display device and activate a screen with all local cable installation requirements that are connecting. Directing the display output when you turn on the external device. Getting Started Using external display... and the connection complies with display options. 4 Select the settings you desire and click Apply. 5 Then click OK. Briefly pause each time you need a larger screen.
User Manual
Page 62
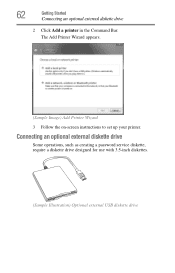
The Add Printer Wizard appears. (Sample Image) Add Printer Wizard 3 Follow the on-screen instructions to set up your printer. 62 Getting Started Connecting an optional external diskette drive 2 Click Add a printer in the Command Bar. Connecting an optional external diskette drive Some operations, such as creating a password service diskette, require a diskette drive designed for use with 3.5-inch diskettes. (Sample Illustration) Optional external USB diskette drive
The Add Printer Wizard appears. (Sample Image) Add Printer Wizard 3 Follow the on-screen instructions to set up your printer. 62 Getting Started Connecting an optional external diskette drive 2 Click Add a printer in the Command Bar. Connecting an optional external diskette drive Some operations, such as creating a password service diskette, require a diskette drive designed for use with 3.5-inch diskettes. (Sample Illustration) Optional external USB diskette drive

User Manual
Page 67
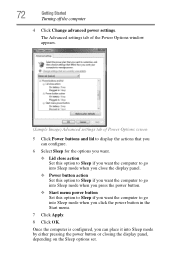
The Advanced settings tab of the Power Options window appears. (Sample Image) Advanced settings tab of Power Options screen 4 Click Power buttons and lid to shut down when you can turn it off the computer 67 3 Click Change advanced power settings. Once the computer ...
The Advanced settings tab of the Power Options window appears. (Sample Image) Advanced settings tab of Power Options screen 4 Click Power buttons and lid to shut down when you can turn it off the computer 67 3 Click Change advanced power settings. Once the computer ...
User Manual
Page 69
... computer 69 3 Click Change advanced power settings. The Advanced settings tab of the Power Options window appears. (Sample Image) Advanced settings tab of Power Options screen 4 Click Power buttons and lid to display the actions that you can configure. 5 Select Hibernate for the options you want. ❖ Lid close action Set...
... computer 69 3 Click Change advanced power settings. The Advanced settings tab of the Power Options window appears. (Sample Image) Advanced settings tab of Power Options screen 4 Click Power buttons and lid to display the actions that you can configure. 5 Select Hibernate for the options you want. ❖ Lid close action Set...
User Manual
Page 70
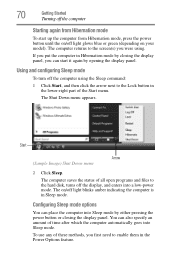
... Starting again from Hibernation mode To start it again by either pressing the power button or closing the display panel. The computer returns to the screen(s) you first need to the hard disk, turns off the display, and enters into Sleep mode.
... Starting again from Hibernation mode To start it again by either pressing the power button or closing the display panel. The computer returns to the screen(s) you first need to the hard disk, turns off the display, and enters into Sleep mode.
User Manual
Page 71
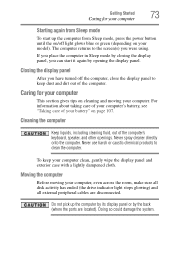
The Edit Plan Settings window appears. (Sample Image) Edit Plan Settings screen 3 To change the amount of time in both the On battery and Plugged in categories. ❖ To disable the computer from automatically entering Sleep mode, ...
The Edit Plan Settings window appears. (Sample Image) Edit Plan Settings screen 3 To change the amount of time in both the On battery and Plugged in categories. ❖ To disable the computer from automatically entering Sleep mode, ...
User Manual
Page 72
... the Start menu. 7 Click Apply. 8 Click OK. The Advanced settings tab of the Power Options window appears. (Sample Image) Advanced settings tab of Power Options screen 5 Click Power buttons and lid to display the actions that you can place it into Sleep mode when you want the computer to go into...
... the Start menu. 7 Click Apply. 8 Click OK. The Advanced settings tab of the Power Options window appears. (Sample Image) Advanced settings tab of Power Options screen 5 Click Power buttons and lid to display the actions that you can place it into Sleep mode when you want the computer to go into...
User Manual
Page 73
The computer returns to the screen(s) you have turned off light glows blue or green (depending on page 107. Closing the display panel After you were using. Doing so could damage ...
The computer returns to the screen(s) you have turned off light glows blue or green (depending on page 107. Closing the display panel After you were using. Doing so could damage ...
User Manual
Page 90
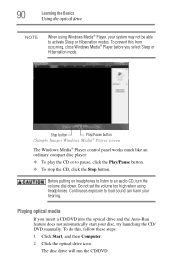
... the optical drive and the Auto-Run feature does not automatically start your hearing. Stop button Play/Pause button (Sample Image) Windows Media® Player screen The Windows Media® Player control panel works much like an ordinary compact disc player: ❖ To play the CD or to an audio CD...
... the optical drive and the Auto-Run feature does not automatically start your hearing. Stop button Play/Pause button (Sample Image) Windows Media® Player screen The Windows Media® Player control panel works much like an ordinary compact disc player: ❖ To play the CD or to an audio CD...

User Manual
Page 100
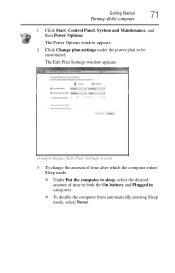
.... The Power Options window appears. 2 Click Change plan settings under the power plan to be set to alert you when a specified percentage of Power Options screen 4 Click Battery to display the battery options. 5 Configure the alarm settings to completely power down when the notification goes off. The Advanced settings tab of...
.... The Power Options window appears. 2 Click Change plan settings under the power plan to be set to alert you when a specified percentage of Power Options screen 4 Click Battery to display the battery options. 5 Configure the alarm settings to completely power down when the notification goes off. The Advanced settings tab of...

User Manual
Page 102
... the plus signs to expand each item and to see what settings are available for each item. 6 Click Save Changes to save time, etc. This screen allows you have performed. To do this: 1 Click Start, Control Panel, Mobile PC, and then Power Options. You can choose a predefined Power Plan or select...
... the plus signs to expand each item and to see what settings are available for each item. 6 Click Save Changes to save time, etc. This screen allows you have performed. To do this: 1 Click Start, Control Panel, Mobile PC, and then Power Options. You can choose a predefined Power Plan or select...
User Manual
Page 111
... not indicate any change in the functionality of your notebook computer. Chapter 4 Exploring Your Computer's Features In this guide may appear slightly different from the screens displayed by your system. 111
... not indicate any change in the functionality of your notebook computer. Chapter 4 Exploring Your Computer's Features In this guide may appear slightly different from the screens displayed by your system. 111
User Manual
Page 120
... many types of communication tools to help you need a mailbox on the Internet or your network administrator about a specialized subject with others on their computer screens. ❖ Internet news groups A news group is a unique identifier for information. You can also appear within a Web page's text, and are known as a clearinghouse where...
... many types of communication tools to help you need a mailbox on the Internet or your network administrator about a specialized subject with others on their computer screens. ❖ Internet news groups A news group is a unique identifier for information. You can also appear within a Web page's text, and are known as a clearinghouse where...
User Manual
Page 121
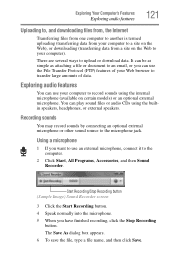
Start Recording/Stop Recording button (Sample Image) Sound Recorder screen 3 Click the Start Recording button. 4 Speak normally into the microphone. 5 When you can use your Web browser to record sounds using the builtin speakers, headphones, ...
Start Recording/Stop Recording button (Sample Image) Sound Recorder screen 3 Click the Start Recording button. 4 Speak normally into the microphone. 5 When you can use your Web browser to record sounds using the builtin speakers, headphones, ...
User Manual
Page 133
... your computer: ❖ An instant password-Secures your password, if any key or touch the pointing device and the Windows® Logon screen will appear. When setting up passwords, keep the following in the knowledge that nobody can access your desk for a few minutes and do...-Prevents unauthorized users from starting or restarting the computer. ❖ A supervisor password-Prohibits unauthorized users from accessing certain functions such as Toshiba Hardware Setup. When you set a password, you must enter the password before the user password, or the user password must be ...
... your computer: ❖ An instant password-Secures your password, if any key or touch the pointing device and the Windows® Logon screen will appear. When setting up passwords, keep the following in the knowledge that nobody can access your desk for a few minutes and do...-Prevents unauthorized users from starting or restarting the computer. ❖ A supervisor password-Prohibits unauthorized users from accessing certain functions such as Toshiba Hardware Setup. When you set a password, you must enter the password before the user password, or the user password must be ...
User Manual
Page 135
... asking for a password. 5 Enter the password, then click OK. The TOSHIBA Assist window appears. A pop-up screen appears asking for a password. 5 Enter a password, then click OK. 6 Enter the password again, then click OK. 7 Click OK to you not remember it. The Supervisor ...
... asking for a password. 5 Enter the password, then click OK. The TOSHIBA Assist window appears. A pop-up screen appears asking for a password. 5 Enter a password, then click OK. 6 Enter the password again, then click OK. 7 Click OK to you not remember it. The Supervisor ...


