Qosmio G15 Users Guide (PDF)
Page 29
... 59 Scrolling with the TouchPad 59 Using the Scroll button 60 Using the Control buttons 60 Disabling or enabling the TouchPad 60 Installing additional memory (optional 62 Removing a memory module 66 Using an external keyboard 68 Using a mouse 68 Connecting a local printer 68 Setting up your printer 69 Connecting an optional external...
... 59 Scrolling with the TouchPad 59 Using the Scroll button 60 Using the Control buttons 60 Disabling or enabling the TouchPad 60 Installing additional memory (optional 62 Removing a memory module 66 Using an external keyboard 68 Using a mouse 68 Connecting a local printer 68 Setting up your printer 69 Connecting an optional external...
Qosmio G15 Users Guide (PDF)
Page 32
... 151 Removing a PC Card 152 Setting up a PC Card for your computer .........153 Using the Bridge Media slot 153 Inserting Memory Stick or Memory Stick PRO media 153 Removing Memory Stick or Memory Stick PRO media 154 Inserting an SD™ Card 154 Removing an SD™ Card 155 Inserting an xD-Picture Card...
... 151 Removing a PC Card 152 Setting up a PC Card for your computer .........153 Using the Bridge Media slot 153 Inserting Memory Stick or Memory Stick PRO media 153 Removing Memory Stick or Memory Stick PRO media 154 Inserting an SD™ Card 154 Removing an SD™ Card 155 Inserting an xD-Picture Card...
Qosmio G15 Users Guide (PDF)
Page 35
... can help you 252 Resolving a hardware conflict 253 A plan of action 253 Resolving hardware conflicts on your own .....254 Fixing a problem with Device Manager ...........255 Memory problems 257 Power and the batteries 257 Keyboard problems 259 Display problems 259 Disk drive problems 262 DVD-ROM or multi-function drive problems...264... Card problems 265 Printer problems 268 Modem problems 269 Develop good computing habits 270 If you need further assistance 271 Before you call 271 Contacting Toshiba 272 Other Toshiba Internet Web sites 273 Toshiba's worldwide offices 273
... can help you 252 Resolving a hardware conflict 253 A plan of action 253 Resolving hardware conflicts on your own .....254 Fixing a problem with Device Manager ...........255 Memory problems 257 Power and the batteries 257 Keyboard problems 259 Display problems 259 Disk drive problems 262 DVD-ROM or multi-function drive problems...264... Card problems 265 Printer problems 268 Modem problems 269 Develop good computing habits 270 If you need further assistance 271 Before you call 271 Contacting Toshiba 272 Other Toshiba Internet Web sites 273 Toshiba's worldwide offices 273
Qosmio G15 Users Guide (PDF)
Page 49
... must be charged before adding external or internal components to your computer. Your computer comes with Windows Automatic Updates. See "Connecting to , a mouse, keyboard, printer, memory, and PC Cards. Windows can include security updates, critical updates, and service packs. Getting Started Setting up your computer 49 Setting up your computer TECHNICAL...
... must be charged before adding external or internal components to your computer. Your computer comes with Windows Automatic Updates. See "Connecting to , a mouse, keyboard, printer, memory, and PC Cards. Windows can include security updates, critical updates, and service packs. Getting Started Setting up your computer 49 Setting up your computer TECHNICAL...

Qosmio G15 Users Guide (PDF)
Page 51
... registration is strongly recommended, and allows Toshiba to send Customer periodic updates, announcements, and special offers applicable to : ❖ Add more memory (see "Installing additional memory (optional)" on page 62) ❖ Connect a mouse (see "Using a mouse" on page 68) ❖ Connect a local printer ... or headphones (see "Using external speakers or headphones" on page 150) Adding external devices NOTE Before adding external devices, Toshiba recommends setting up your software" on your desktop or go to continue. Before starting to use this computer?" 8 Enter your...
... registration is strongly recommended, and allows Toshiba to send Customer periodic updates, announcements, and special offers applicable to : ❖ Add more memory (see "Installing additional memory (optional)" on page 62) ❖ Connect a mouse (see "Using a mouse" on page 68) ❖ Connect a local printer ... or headphones (see "Using external speakers or headphones" on page 150) Adding external devices NOTE Before adding external devices, Toshiba recommends setting up your software" on your desktop or go to continue. Before starting to use this computer?" 8 Enter your...
Qosmio G15 Users Guide (PDF)
Page 62
...'s screws, use the computer for this happens, let the memory modules cool to stay current on , begin at accessories.toshiba.com). 62 Getting Started Installing additional memory (optional) Installing additional memory (optional) Before you replace them. You can install one or two memory modules. Additional memory comes in various capacities (to room temperature before you install...
...'s screws, use the computer for this happens, let the memory modules cool to stay current on , begin at accessories.toshiba.com). 62 Getting Started Installing additional memory (optional) Installing additional memory (optional) Before you replace them. You can install one or two memory modules. Additional memory comes in various capacities (to room temperature before you install...
Qosmio G15 Users Guide (PDF)
Page 63
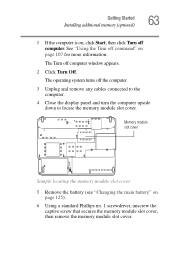
... the main battery" on page 125). 6 Using a standard Phillips no. 1 screwdriver, unscrew the captive screw that secures the memory module slot cover, then remove the memory module slot cover. The Turn off command" on page 107 for more information. See "Using the Turn off computer window appears.... 2 Click Turn Off. Getting Started Installing additional memory (optional) 63 1 If the computer is on, click Start, then click Turn off the computer. 3 Unplug and remove any cables connected to ...
... the main battery" on page 125). 6 Using a standard Phillips no. 1 screwdriver, unscrew the captive screw that secures the memory module slot cover, then remove the memory module slot cover. The Turn off command" on page 107 for more information. See "Using the Turn off computer window appears.... 2 Click Turn Off. Getting Started Installing additional memory (optional) 63 1 If the computer is on, click Start, then click Turn off the computer. 3 Unplug and remove any cables connected to ...

Qosmio G15 Users Guide (PDF)
Page 64
... into the socket. 10 Gently press down on the side you insert into the computer). 8 Remove the new memory module from its antistatic packaging. 9 Holding the memory module by its edges so that you may have built up. Before you handle the module, touch a grounded metal surface to touch its gold ...connector bar (on the memory module connector until the clips snap into place. The memory module should be careful not to discharge any static electricity you can damage the...
... into the socket. 10 Gently press down on the side you insert into the computer). 8 Remove the new memory module from its antistatic packaging. 9 Holding the memory module by its edges so that you may have built up. Before you handle the module, touch a grounded metal surface to touch its gold ...connector bar (on the memory module connector until the clips snap into place. The memory module should be careful not to discharge any static electricity you can damage the...
Qosmio G15 Users Guide (PDF)
Page 65
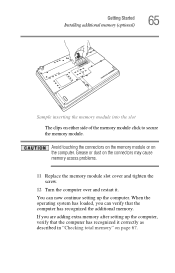
...the computer, verify that the computer has recognized the additional memory. When the operating system has loaded, you are adding extra memory after setting up the computer. Getting Started Installing additional memory (optional) 65 Sample inserting the memory module into the slot The clips on the computer. ...Grease or dust on the connectors may cause memory access problems. 11 Replace the memory module slot cover and tighten the screw. 12 Turn the computer over and restart it correctly as described in "Checking total memory" on page 67. You can verify that the ...
...the computer, verify that the computer has recognized the additional memory. When the operating system has loaded, you are adding extra memory after setting up the computer. Getting Started Installing additional memory (optional) 65 Sample inserting the memory module into the slot The clips on the computer. ...Grease or dust on the connectors may cause memory access problems. 11 Replace the memory module slot cover and tighten the screw. 12 Turn the computer over and restart it correctly as described in "Checking total memory" on page 67. You can verify that the ...

Qosmio G15 Users Guide (PDF)
Page 66
...configuration will be saved. You can damage the computer and the device. In either of the slot. 3 Carefully remove the memory module from the memory module. Do not try to shut down for five seconds, then turn it on, perform the following: Press the power... hang up when you turn it down the computer and open the memory module cover. 66 Getting Started Installing additional memory (optional) Removing a memory module 1 Complete steps 1-7 in "'Installing additional memory (optional)'" to remove a memory module with the computer turned on. The following message appears when you...
...configuration will be saved. You can damage the computer and the device. In either of the slot. 3 Carefully remove the memory module from the memory module. Do not try to shut down for five seconds, then turn it on, perform the following: Press the power... hang up when you turn it down the computer and open the memory module cover. 66 Getting Started Installing additional memory (optional) Removing a memory module 1 Complete steps 1-7 in "'Installing additional memory (optional)'" to remove a memory module with the computer turned on. The following message appears when you...

Qosmio G15 Users Guide (PDF)
Page 67
... can check that the computer has recognized the change. Getting Started Installing additional memory (optional) 67 Sample removing the memory module 4 Replace the memory module slot cover and fasten the screw. 5 Turn the computer over and restart it. To do this: 1 Click Start, ... Maintenance. 3 Click System. 4 The General tab view automatically appears and shows total memory. If the computer does not recognize the memory configuration, turn off the computer, remove the memory slot cover, and make sure the memory module is seated properly, as described in step 10 of "Installing additional...
... can check that the computer has recognized the change. Getting Started Installing additional memory (optional) 67 Sample removing the memory module 4 Replace the memory module slot cover and fasten the screw. 5 Turn the computer over and restart it. To do this: 1 Click Start, ... Maintenance. 3 Click System. 4 The General tab view automatically appears and shows total memory. If the computer does not recognize the memory configuration, turn off the computer, remove the memory slot cover, and make sure the memory module is seated properly, as described in step 10 of "Installing additional...
Qosmio G15 Users Guide (PDF)
Page 81
.... Cleaning the computer Keep liquids, including cleaning fluid, out of data. To keep your Toshiba dealer for suggestions for appropriate cleaning products. Getting Started Caring for your computer 81 commands to save your system settings to memory so that, when you turn off . For information about taking care of your computer's battery...
.... Cleaning the computer Keep liquids, including cleaning fluid, out of data. To keep your Toshiba dealer for suggestions for appropriate cleaning products. Getting Started Caring for your computer 81 commands to save your system settings to memory so that, when you turn off . For information about taking care of your computer's battery...

Qosmio G15 Users Guide (PDF)
Page 84
See "Saving your work stays in the computer's temporary memory until you last saved. This feature saves your battery runs out of charge while you are working, you will lose all work frequently. Chapter 2 Learning ...
See "Saving your work stays in the computer's temporary memory until you last saved. This feature saves your battery runs out of charge while you are working, you will lose all work frequently. Chapter 2 Learning ...

Qosmio G15 Users Guide (PDF)
Page 109
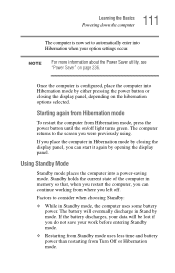
... NOTE For more information about the Power Saver utility, see "Power Saver" on /off the computer by closing the display panel, you start it from memory. Restoring information from the hard disk takes longer than restoring it again by opening the display panel. When you can start up again, press the...
... NOTE For more information about the Power Saver utility, see "Power Saver" on /off the computer by closing the display panel, you start it from memory. Restoring information from the hard disk takes longer than restoring it again by opening the display panel. When you can start up again, press the...
Qosmio G15 Users Guide (PDF)
Page 110
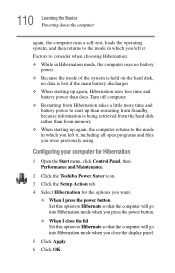
... and files you were previously using Configuring your computer for Hibernation 1 Open the Start menu, click Control Panel, then Performance and Maintenance. 2 Click the Toshiba Power Saver icon. 3 Click the Setup Action tab. 4 Select Hibernation for the options you want. ❖ When I press the power button Set ... more time and battery power to start up than restarting from Standby, because information is being retrieved from the hard disk rather than from memory ❖ When starting up again, the computer returns to the mode in which you close the lid Set this option to Hibernate so ...
... and files you were previously using Configuring your computer for Hibernation 1 Open the Start menu, click Control Panel, then Performance and Maintenance. 2 Click the Toshiba Power Saver icon. 3 Click the Setup Action tab. 4 Select Hibernation for the options you want. ❖ When I press the power button Set ... more time and battery power to start up than restarting from Standby, because information is being retrieved from the hard disk rather than from memory ❖ When starting up again, the computer returns to the mode in which you close the lid Set this option to Hibernate so ...
Qosmio G15 Users Guide (PDF)
Page 111
... holds the current state of the computer in Hibernation mode by closing the display panel, depending on page 236. If you place the computer in memory so that, when you restart the computer, you do not save your option settings occur. The computer returns to consider when choosing Standby: ❖ While...
... holds the current state of the computer in Hibernation mode by closing the display panel, depending on page 236. If you place the computer in memory so that, when you restart the computer, you do not save your option settings occur. The computer returns to consider when choosing Standby: ❖ While...
Qosmio G15 Users Guide (PDF)
Page 119
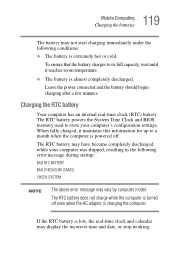
... NOTE The above error message may have become completely discharged while your computer's configuration settings. The RTC battery powers the System Time Clock and BIOS memory used to a month when the computer is powered off even when the AC adapter is almost completely discharged. The RTC battery does not charge while...
... NOTE The above error message may have become completely discharged while your computer's configuration settings. The RTC battery powers the System Time Clock and BIOS memory used to a month when the computer is powered off even when the AC adapter is almost completely discharged. The RTC battery does not charge while...

Qosmio G15 Users Guide (PDF)
Page 125
... : Full Power, High Power, Normal, DVD Playback, Presentation, and Long Life. 3 Release the Fn key. Changing the main battery When your battery power is in memory will be careful not to an AC power source or install a charged battery. The power profile options are now in the selected mode. Also, do...
... : Full Power, High Power, Normal, DVD Playback, Presentation, and Long Life. 3 Release the Fn key. Changing the main battery When your battery power is in memory will be careful not to an AC power source or install a charged battery. The power profile options are now in the selected mode. Also, do...
Qosmio G15 Users Guide (PDF)
Page 153
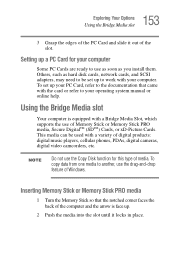
... a Bridge Media Slot, which supports the use the Copy Disk function for your computer. Others, such as you install them. Inserting Memory Stick or Memory Stick PRO media 1 Turn the Memory Stick so that came with the card or refer to your PC Card, refer to another, use as soon as hard disk... Options Using the Bridge Media slot 3 Grasp the edges of the PC Card and slide it locks in place. NOTE Do not use of Memory Stick or Memory Stick PRO media, Secure DigitalTM (SDTM) Cards, or xD-Picture Cards. To copy data from one media to the documentation that the notched corner...
... a Bridge Media Slot, which supports the use the Copy Disk function for your computer. Others, such as you install them. Inserting Memory Stick or Memory Stick PRO media 1 Turn the Memory Stick so that came with the card or refer to your PC Card, refer to another, use as soon as hard disk... Options Using the Bridge Media slot 3 Grasp the edges of the PC Card and slide it locks in place. NOTE Do not use of Memory Stick or Memory Stick PRO media, Secure DigitalTM (SDTM) Cards, or xD-Picture Cards. To copy data from one media to the documentation that the notched corner...

Qosmio G15 Users Guide (PDF)
Page 154
... media while data is safe to remove. 2 Grasp the card and pull it straight out. Even when the message "copying..." Removing Memory Stick or Memory Stick PRO media 1 Right-click the Safely Remove Hardware icon on the System tray. Wait for the indicator light to the media might still be ...
... media while data is safe to remove. 2 Grasp the card and pull it straight out. Even when the message "copying..." Removing Memory Stick or Memory Stick PRO media 1 Right-click the Safely Remove Hardware icon on the System tray. Wait for the indicator light to the media might still be ...


